Last updated on
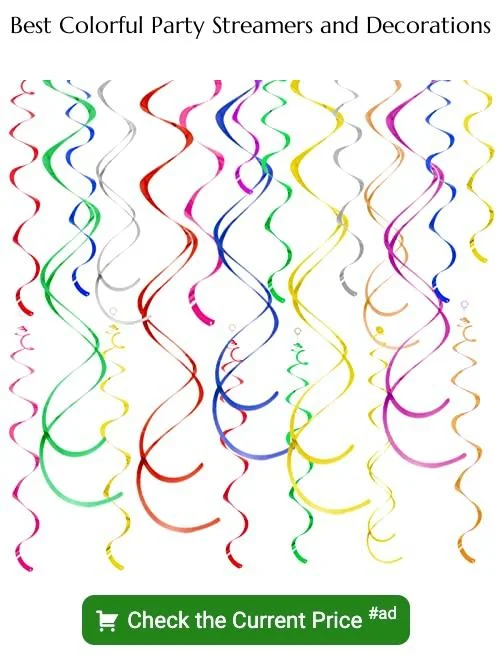
What’s a party without paper streamer decorations? I’ve been exploring and coming up with some ideas on how to creatively use them. Here are 30 of my best ideas with streamers.
Streamer-Adorned Birthday Chair
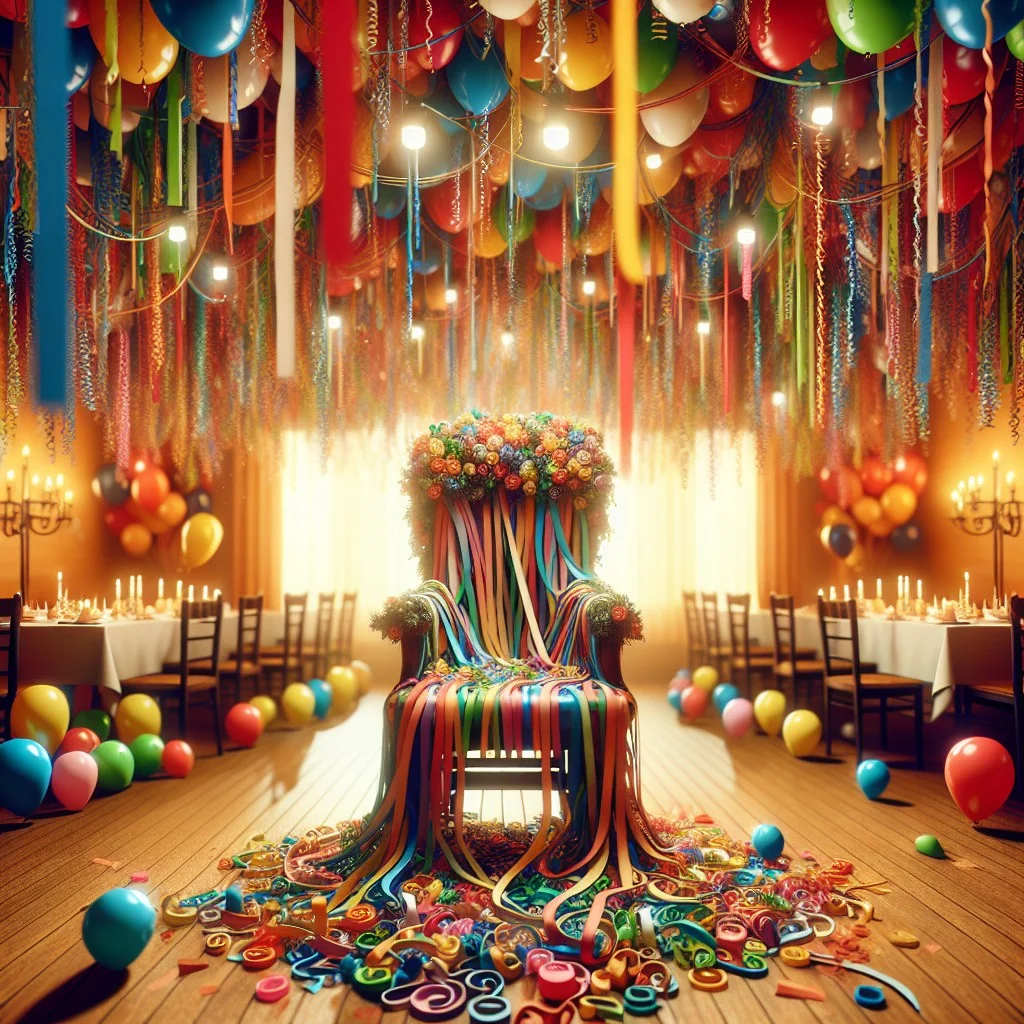
Starting off with the birthday person’s chair could set the celebratory mood for any party. To make the birthday girl or boy feel extra special, consider adorning their chair with colorful streamers. Select colors that match the theme of the party or the favorite hues of the birthday star to add a personalized touch.
1. Measure: First, measure the chair thoroughly – from the top edge down to the seat, across the back, and round the sides. This will help you gauge how much streamer you will need.
2. Choose Colors: If a color theme exists, continue it in the chair decor as well.
3. Attach: Start from the top of the chair back. Attach the streamer securely and wind it around the back and arms. Proceed down to the legs if desired.
4. Layers and Volume: Experiment with layers and volume to create a fuller effect. Allow some streamers to flow down loosely for an added dramatic flair.
5. Final Touches: Knot some balloon strings, attach small party favor toys, or incorporate LED lights for a unique touch.
Keep in mind, while streamers are indeed festive and fun, it’s essential to ensure they don’t interfere with the comfort and safety of the chair occupant.
Streamer-Wrapped Banister

A streamer-wrapped banister can spruce up any stairway, providing an immediate splash of color and cheer. Here’s a quick guide to accomplishing this delightful design:
1. Choose Streamer Colors: Coordinate with the theme of your occasion or, for everyday decor, opt for hues that complement your home’s color palette.
2. Length Measurement: Make sure to measure the banister accurately from top to bottom to ascertain the length of streamers needed.
3. Wrapping Technique: Begin wrapping from the bottom, securing the streamer with a knot or discreet tape. Twist or spiral the streamer around the banister in your preferred pattern, ensuring it is sufficiently tight.
4. Secure and Repeat: Once you reach the top of the banister, cut the streamer, and secure it the same way you did at the bottom. If you want layered, multi-colored effects, repeat the process with different color streamers.
5. Final Touches: For an added flair, accessories like small baubles, bows, or fairy lights can be affixed to the streamer-covered banister.
Just remember, safety first! Ensure your dazzling banister doesn’t become a trip hazard by taking the necessary precautions.
Table Edge Adorned With Streamers
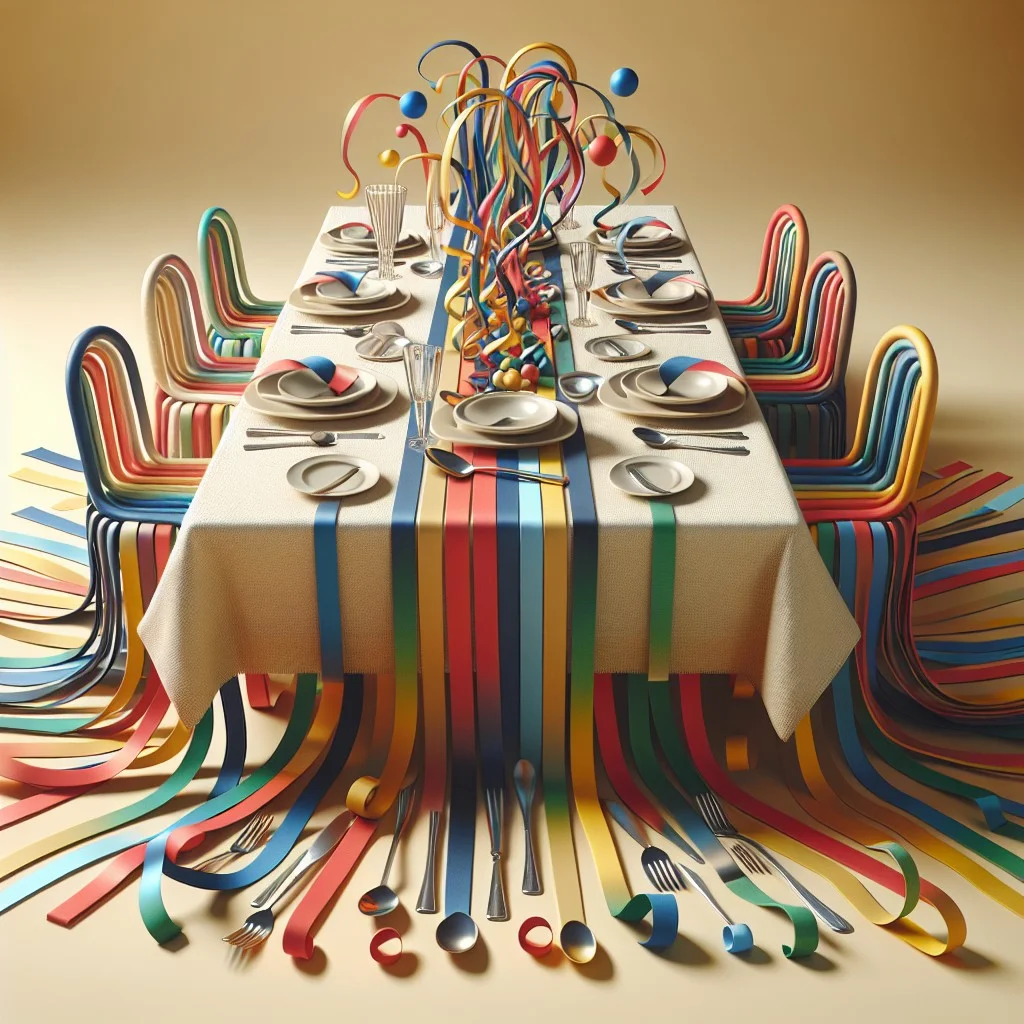
Begin by choosing streamers that match your overall color scheme – this could be complementary or contrasting, depending on your preference. Measure and cut streamer lengths that go from the top edge of the table, down to the floor.
Next, attach one end of each streamer piece to the edge of the table using removable adhesive, like double-sided tape or a small amount of adhesive putty. The key here is to space them out evenly for a uniform appearance. If your tablecloth is plain, you can go bold with a densely packed array of streamers. In contrast, if your tablecloth is patterned, less might be more.
Ensure to neatly trim any excess length at the bottom once attached. For an exquisite final touch, intertwine two contrasting colored streamers for a striking effect.
Remember to ensure your guests have comfortable legroom under the table – décor should not impede comfort. Also, keep in mind that streamers, although playful and vibrant, are part of the larger decorations. Thus, they should harmonize with all other elements of your theme.
Create a Grand Entrance With Streamer Curtain
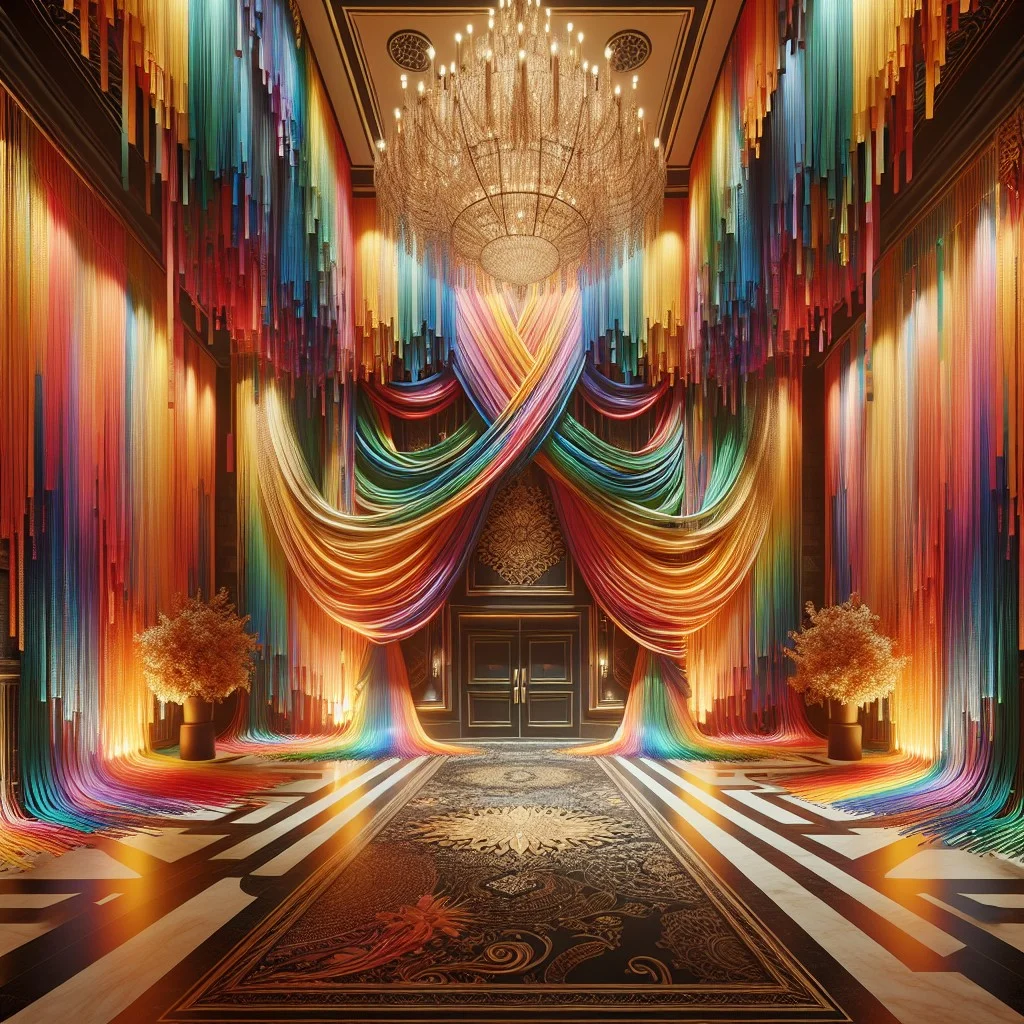
As an impactful first impression, suspending streamers vertically allows for a dramatic entry point. This curtain of color, when attached to doorframes, transforms your everyday hallway into a remarkable walkway.
To manifest this idea, you’ll need several packages of streamers in your chosen color palette. The more colors used, the more vibrant your curtain will be. Begin by measuring the width of the door frame to determine the number of streamers needed. It’s recommended to place them approximately an inch apart to secure a full curtain-like appearance.
Now, cut streamer lengths that are twice as long as the door height. A practical way to secure these to the top of the frame is by using painter’s tape. This will not damage the paintwork. Attach one end of the streamer, allow it to fall, loop it up and secure the other end next to it. This gives a neat finish and makes the curtain reversible.
For added flair, consider rotating varieties of colors, creating patterns or braiding multiple streamers together. Remember that for an elevated effect, consider pairing your curtain with matching party décor. This streamer curtain not only ushers guests into the party zone but also provides a fun, gorgeous backdrop for photographs.
Fancy DIY Streamer Wreath
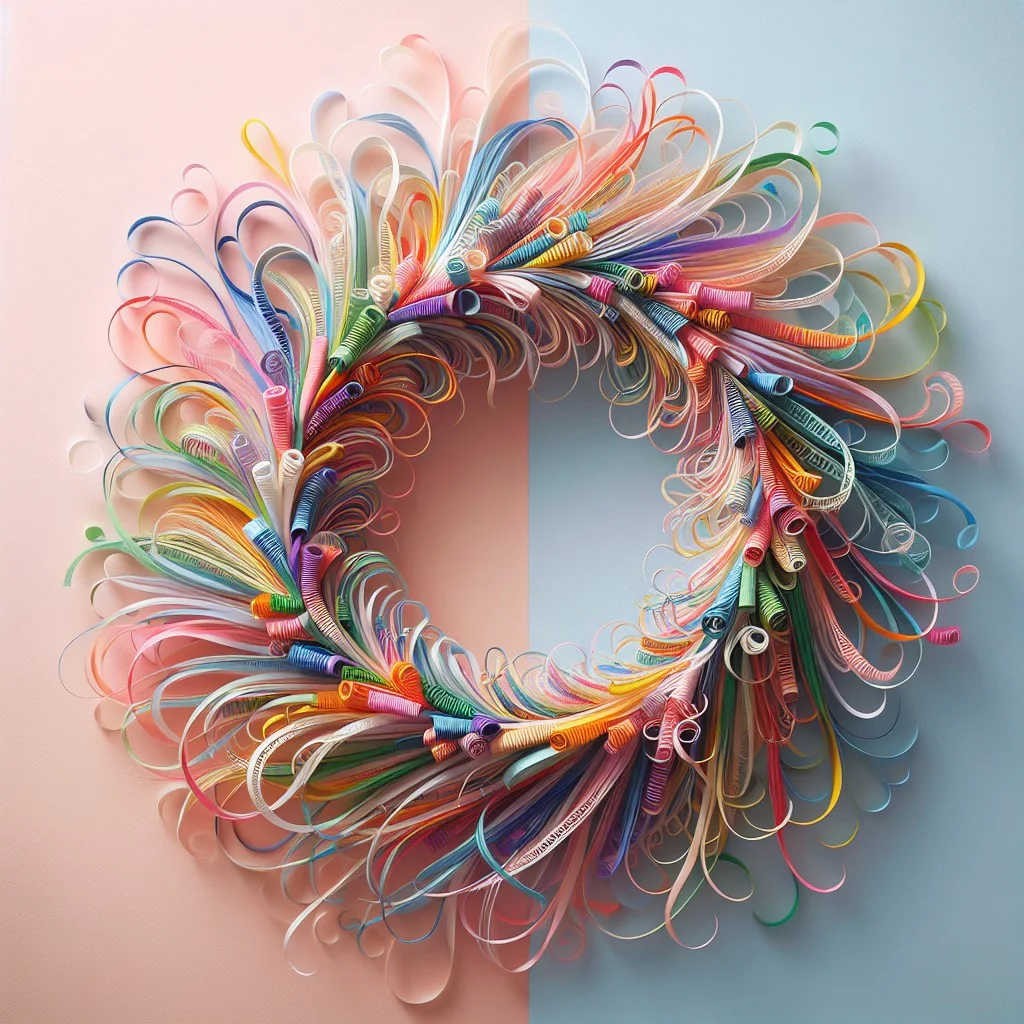
Starting your DIY streamer wreath, remember this idea is about introducing a pop of color and texture to your space. Here’s how you embark on it:
1. Gather materials, chiefly wire wreath frame, streamers of choice and glue.
2. Begin wrapping the streamer around the frame vigorously. Ensure it’s tightly wound and secure with adhesive.
3. Layer different streamers for depth or maintain a singular hue for consistency.
4. For an enhanced look, incorporate extras like faux flowers or baubles.
5. Mount your wreath – a robust, colorful wreath makes a statement on a front door or internal wall.
Remember, the beauty lies in details; shift streamer layers, play with colors, introduce unique features, be innovative and inspired.
Outdoor Tree Decor With Rainbow Streamers
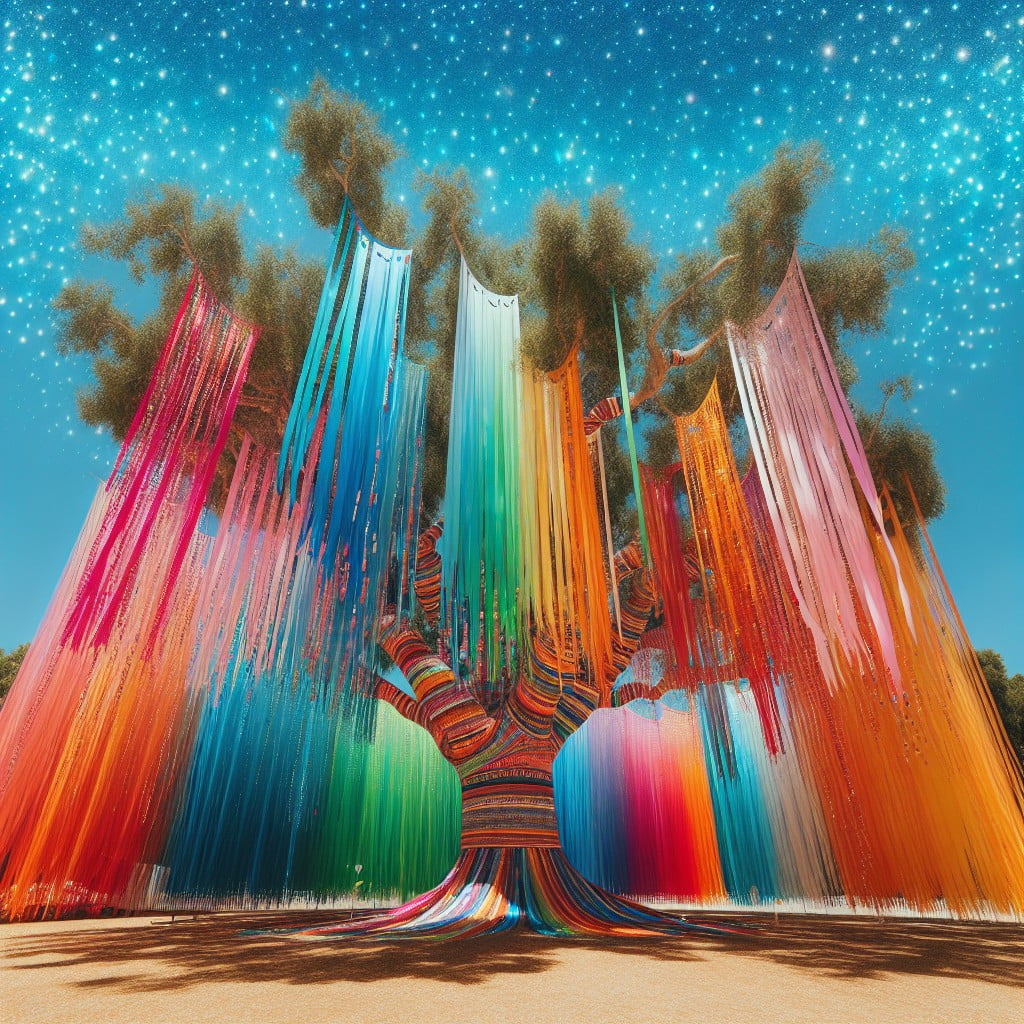
For this tasteful outdoor decoration, color selection matters most. Start by choosing streamers of various hues to mimic the natural brilliance of a rainbow. No need to stick strictly to the usual VIBGYOR (violet, indigo, blue, green, yellow, orange, and red); even an array of pastels or a slew of vibrant neon can work wonders.
Select a large, healthy tree in your backyard for this striking decor feature. Ascertain that the tree’s limbs are sturdy enough to withstand the weight of the hanging streamers. Enlist help for reaching the higher branches if necessary.
Cut strips of streamers into lengths that vary from two feet to six feet. The sizes will allow the streamers to flutter freely in the wind, adding dynamics to your decor. Attach the streamers to the tree branches using clear fishing line or string, which is unnoticeable from a distance.
Distribute colors evenly around the tree to emulate the cascading effect of a rainbow. A useful tip is to place the darker shades higher and lighter shades lower to create a visual ombre effect.
Remember, the beauty of this decor lies in the streamers’ movement. An outdoor setting allows the wind to subtly interact with the streamers, creating a mesmerizing cascade of colors. So, opt for a day with mild to moderate wind to bring your rainbow tree to life.
Keep safety in mind while setting up and taking down the decor. Always ensure the tree’s health is not compromised in any manner. After the party, recycle or reuse the streamers for future arts and crafts projects. With thoughtful execution, your outdoor tree adorned with rainbow streamers will be an enchanting highlight for any gathering.
Party Favors Tied With Tiny Streamers
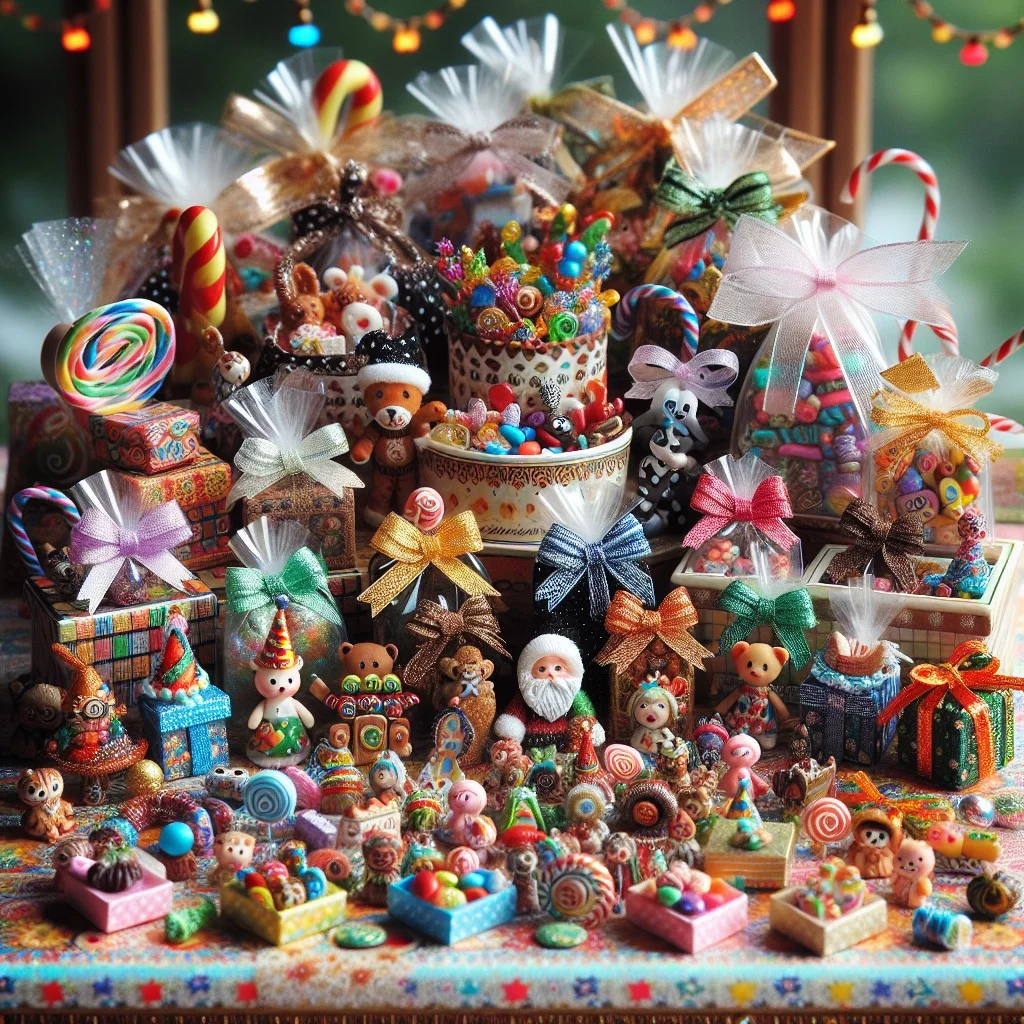
Tiny streamers are an excellent material to use when dressing up your party favors. Not only do they add a festive touch, but they can also be coordinated to match your overall theme by choosing corresponding colors.
To get started, select your streamers and party favors. You may choose to use small boxes, bags, or even miniature buckets for the guests’ takeaways.
Next, prepare the streamers by cutting them into desired lengths. They can be long and dangling, or short and sweet, depending on your preference. Be creative with how you attach the streamers. You may choose to tie them around the favors, like a ribbon bow. Alternatively, you might stick them on the favor bag or box, letting them hang free.
Remember, your aim is to make your guests feel special, and what better way to do so than by adding a personal touch with these beautifully streamer-tied party favors. Whether you’re planning a kids’ party or a sophisticated gathering, everyone will appreciate the thoughtful detail. But, don’t stress about perfection. The end goal here is not intricacy, but rather, fun bundled joy.
DIY Streamer Photo Booth
Kick-starting the unique venture with a few simple resources; brightly colored streamers, a curtain rod, and some adhesive tape, you’ll soon have the perfect photo booth backdrop. Follow the steps below to execute this creative idea:
1. Choose an assortment of streamers based on the theme of your event or personal preference. Don’t hesitate to mix and match.
2. Cut streamers a bit longer than the height of your chosen wall area.
3. Adhere one end of each streamer to a curtain rod using adhesive tape, ensuring an even distribution of various colors. Make it dense for the best effect.
4. Once your curtain rod is full of hanging streamers, it’s time to mount it. Secure it to the top of your wall or between two structures, ensuring it hangs straight and high enough for photos.
5. You’ll ideally want this setup in a location with good lighting or consider integrating an additional light source.
The entire setup requires only a minimal effort; it’s cost-effective and adjustable to suit a wide range of events aside from just a photo booth, such as the backdrop for the gift table, a DIY dessert station, or even to liven up a simple gathering. Remember, creativity is key in personalizing your streamer photo booth, so have fun with it!
Streamer Wall Mural for Artistic Touch
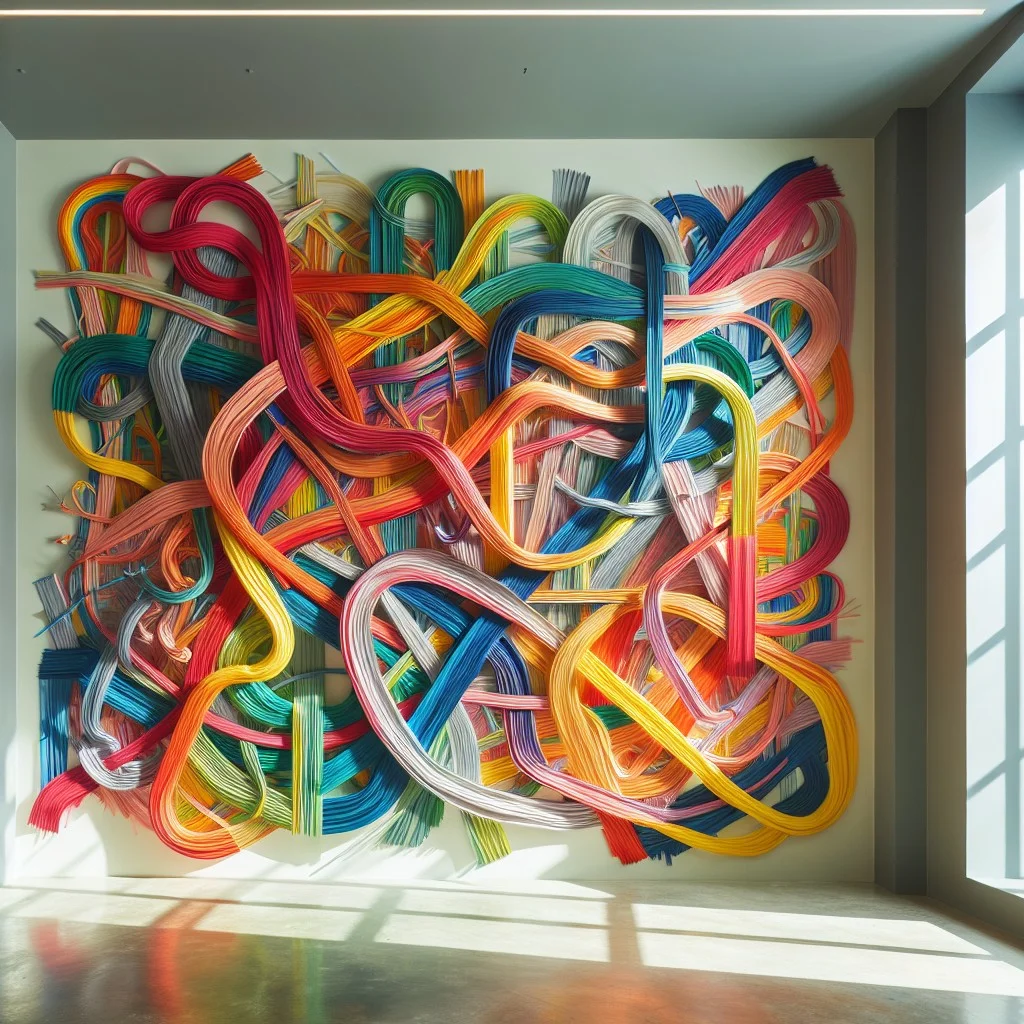
Crafting a wall mural with streamers can be an impactful way to infuse creativity and color into any room. Here’s how to bring this artistic concept to life:
1. Choice of Streamers: Decide on a color scheme. Consider multi-colored streamers for a vibrant, cheerful vibe or monochromatic for a more sophisticated look.
2. Mural Design: Simple geometric shapes or abstract patterns work well. Maps, landscapes, or even a giant chevron pattern can be innovative options.
3. Preparatory Sketch: Plan your design on paper first, then transfer the idea onto the wall using light pencil marks as guidelines.
4. Adhesion: Apply streamers one by one using damage-free wall adhesive. For larger patterns, start from the bottom and work your way up.
5. Layering: Overlap streamers slightly to create depth and avoid gaps.
6. Precision: Use a craft knife to trim any excess streamer lengths for a neat finish.
Remember, the key to an engaging mural is in the details. Take time to smooth out any wrinkles and align each strip precisely to bring the artwork to stunning fruition.
Streamer Mobiles for Nursery Decor
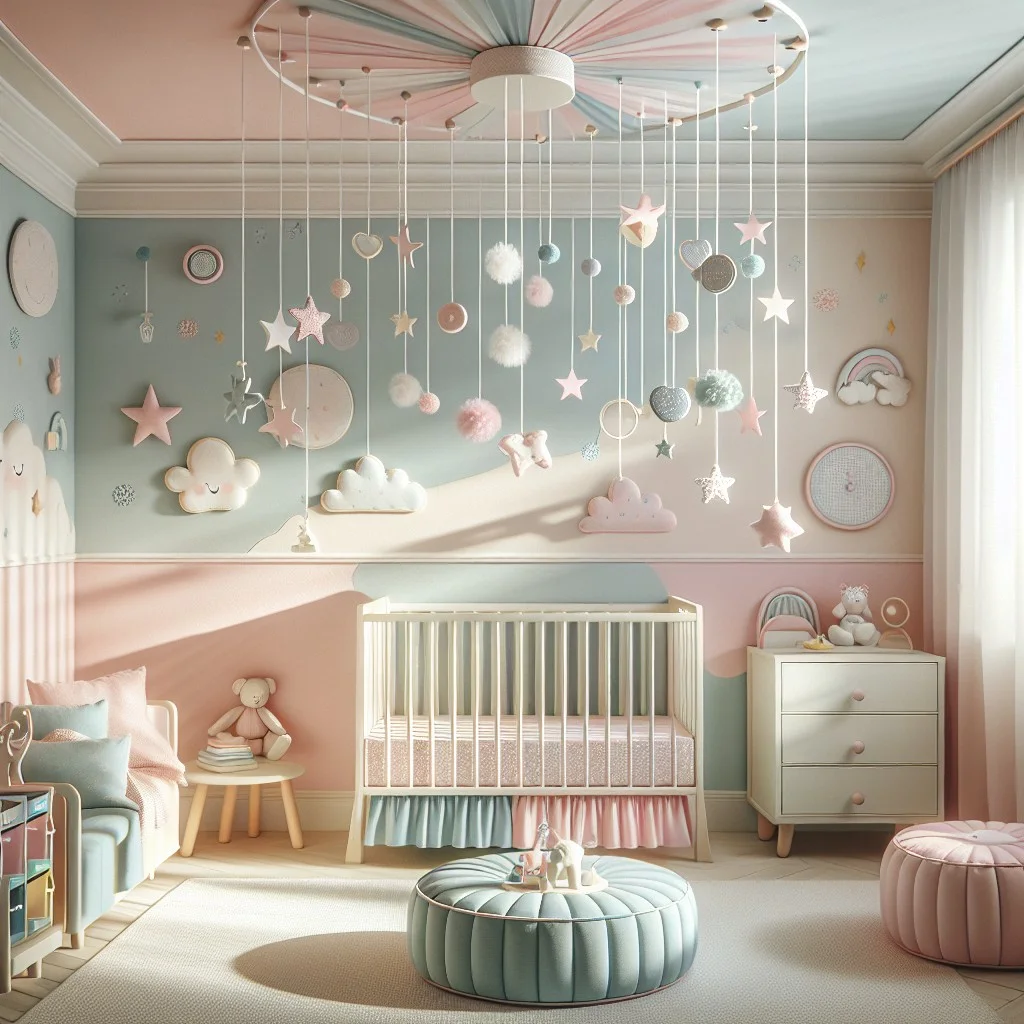
Creating this decor is surprisingly simple, even for those unfamiliar with DIY projects. Begin by choosing streamers correlating with the room’s color palette. Next, find a sturdy circular object, such as a wooden embroidery hoop, to act as the mobile’s frame.
Attach streamers of varied lengths to the hoop, mixing colors and patterns for a whimsical look. For extra flair, consider intertwining fairy lights with the streamers.
Once you’ve finished, suspend the mobile from the ceiling using string or clear fishing line. It’s crucial to ensure that this item is securely fastened to avoid any safety issues. This eye-catching piece will provide a playful, dreamy touch to your nursery decor, and can even serve as a visual stimulator for the infant.
Streamers As Fireplace Mantel Decor
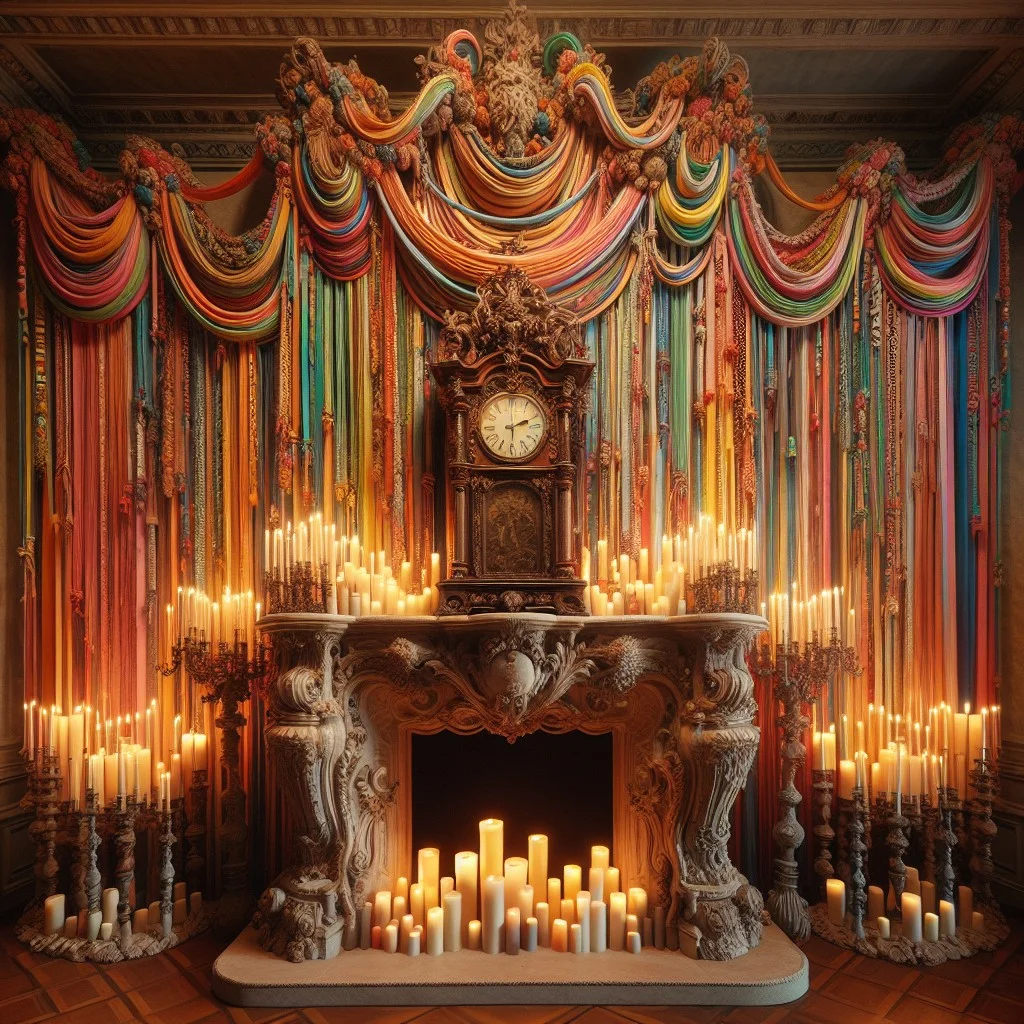
Adding streamers to your fireplace mantel brings a vibrant pop of color and a festive feel to any room. Here are some quick and easy ideas:
1. Color Coordination: Choose streamer colors that complement your existing room decor. A monochromatic color scheme can offer a sophisticated look, while a rainbow of colors screams party time!
2. Layering: Don’t shy away from layering multiple streamers to add depth. Mixing textures and patterns can also add visual interest.
3. Incorporate Other Decor: Streamers don’t need to stand alone – mix them with items like photos, candles, and holiday decorations to create a festive centerpiece.
4. Streamers Styles: Horizontal, Vertical or Swag: Try arranging your streamers in a swag pattern for a classic feel, or hang them vertically for a more modern look.
5. Seasonal Decor: Switch out streamer colors to match holidays or seasons. Use pastel colors for spring, or warm tones for the fall.
Remember, with creativity and an open mind, decorating your fireplace mantel with streamers can be an ever-changing art project!
Streamer Garland Archway

To create a bewitching garland archway, consider these steps:
1. Measure and cut: Determine the length and height of your archway. Cut out strips of streamers that correspond to these dimensions.
2. Fold and attach: Start by folding the cut-out streamer strips in half. Secure these at the top of the arch with strong, durable tape, maintaining a uniform distance between each strip for a balanced look.
3. Shape and polish: Then, gently curve the loose ends of streamers over to the other side of the arch, creating a garland effect. Secure these ends as well. You may vary, mix, and blend the colors for a vibrant impact.
4. Verify and adjust: Step back and view your work. Make any necessary adjustments to ensure pleasing aesthetics.
This technique brings with it an air of charm and festivity, perfect for occasions like birthdays, anniversaries, and weddings. Repeat this process for multiple archways for a more aesthetically pleasing environment. When well executed, it gives your event a professional decorator’s touch.
Streamer Draped Mirrors
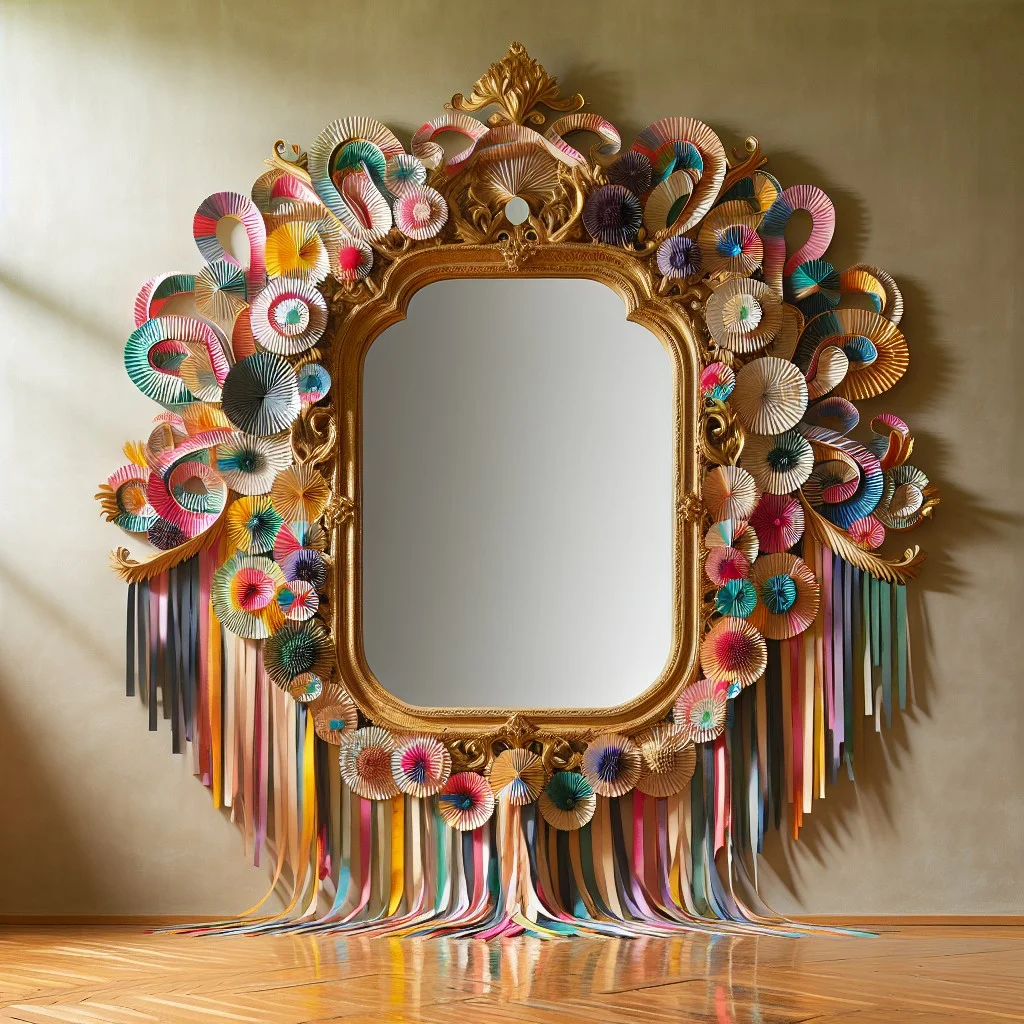
For this striking decor idea, start by choosing thick or thin streamers – the thickness depends on the visual impact you’re aiming for. Thicker streamers create a bold, dramatic image, while thinner ones lend a delicate touch.
There are three simple steps to follow:
- Measure the length of your mirror and cut streamers slightly longer. This extra length helps in accurate placement and adjustment.
- Apply double-sided tape to the back of your mirror along the border. Ensure the tape doesn’t show through the streamers.
- Align the streamers on the tape, pressing them gently yet firmly. Make sure they drape naturally for an effortless look.
Bear in mind that monochrome streamers impart a chic, modern feel. Rainbow-hued or different colored streamers depict a playful scene. Tap into your creativity and create a motif that matches your overall decor theme. Mix and match patterns and colors until you find the perfect combination for your space. Remember, decorating is a process of experimentation – there are no wrong choices!
DIY Streamer ‘Curtain’ for Bookshelves
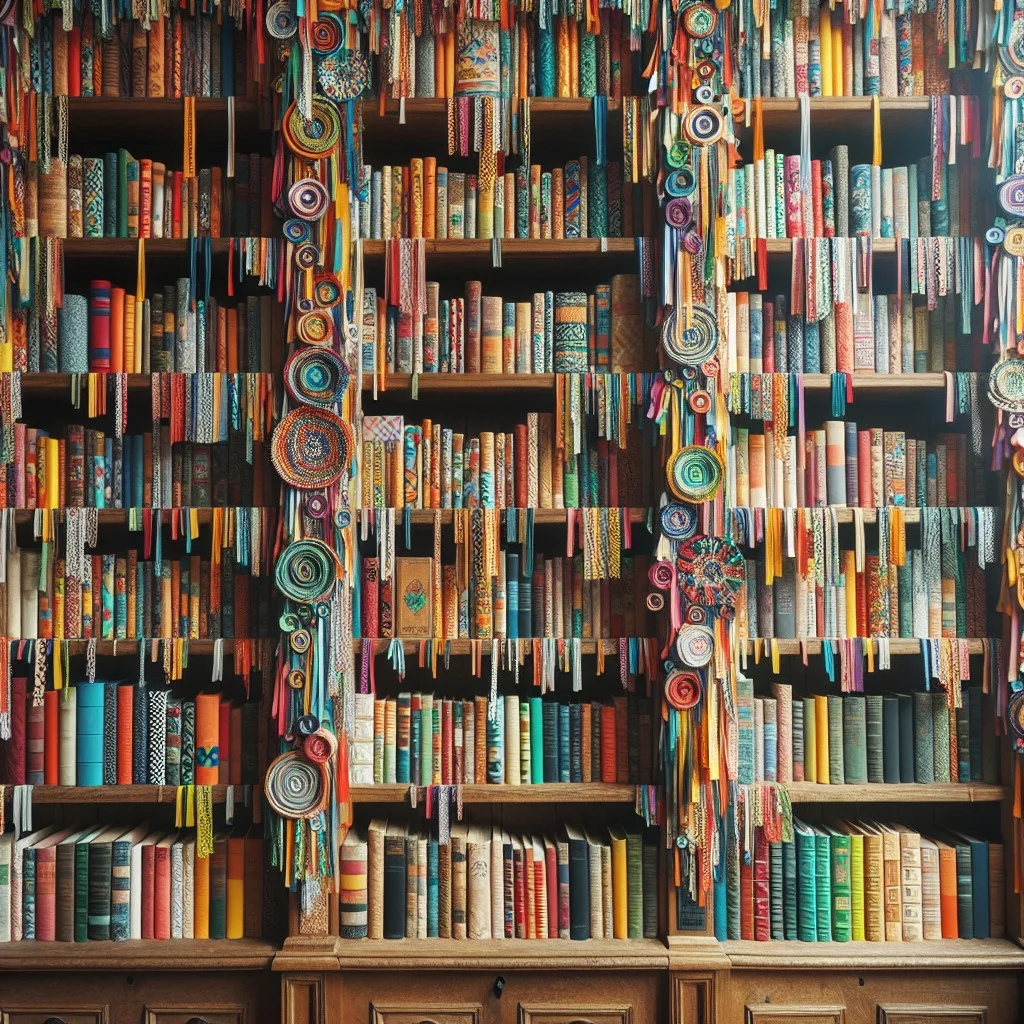
For a sprightly touch to your home library or living room, a streamer ‘curtain’ on your bookshelves can be a great idea. Start by measuring the height and width of your bookshelf so you know how much streamers you’ll need. Pick out streamers in colors that match or contrast the room’s decor.
Now, cut lengths of streamer just a bit longer than the height of your shelf. Position double-sided tape along the top edge of the bookshelf. Firmly press the cut streamers onto the tape, in a row, leaving a small space between each strip. Ensure that the streamers hang down over your books, creating a whimsical ‘curtain’ effect.
One of the key things to adhere to is caution: avoid covering up books you frequently use, as continual adjustment of the streamers may damage them. Your DIY Streamer ‘Curtain’ is complete. Add some novelty to your cherished collection and let there be a burst of colors every time you seek wisdom from your bookshelf!
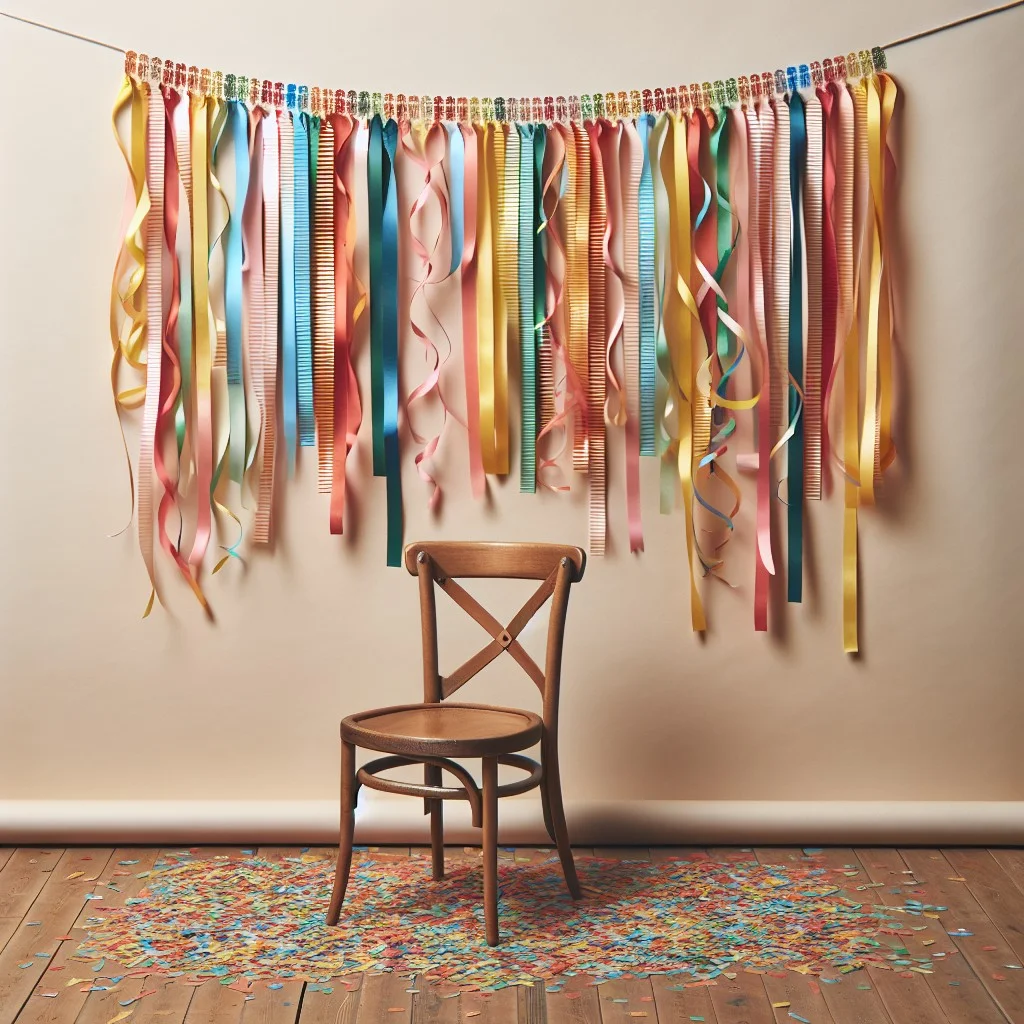
Add Drama With Bunched Streamer Drops

Begin by selecting varying lengths of streamers, keeping in mind the desired final look. Mix and match colours that blend well together or stick to a theme for greater impact.
Next, thoroughly bundle up the lengths of selected streamers. Securely fix the top of the gathered streamers with wire or a thick string, making sure it’s held tight.
It’s important to ensure the bunches are dense for an exaggerated effect. If the bunch is thin, it will lose its drama and could appear underwhelming.
Then, fix these bunches to the ceiling at different points using sturdy adhesive or hooks. Be careful to space them out well, and append them at varying heights to create a multi-dimensional effect.
Also, mix in some streamers that reach almost down to the floor to create a waterfall-like effect. This approach creates a dramatic visual feast that can easily transform any space.
Lastly, remember that this decor idea can be tweaked to suit any occasion. Whether planning a fancy party or just spicing up a room, the bunched streamer drops can be shaped and arranged to harmonize with the overall decor concept.
With these steps, you have created a dramatic presentation with minimal fuss. The process is indeed simple, but the impact is nothing less than stunning.
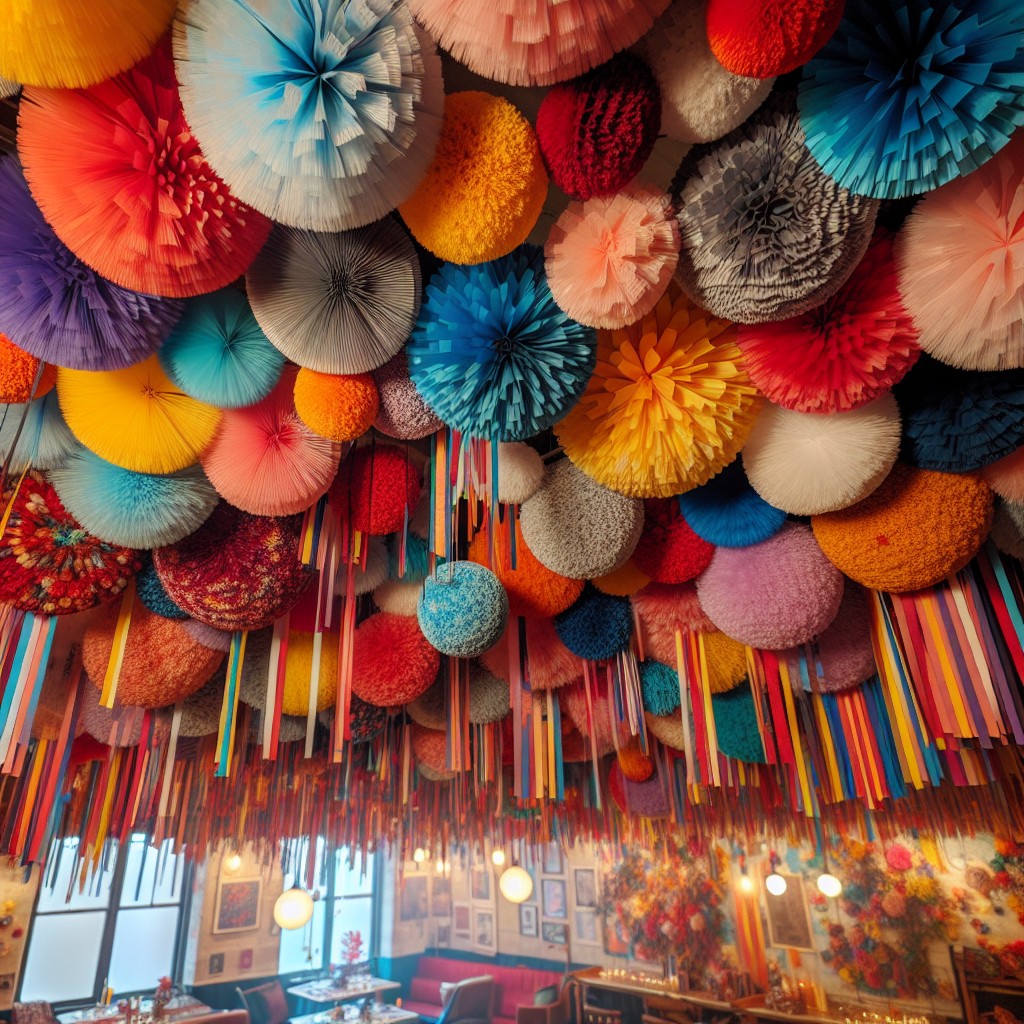
Floating Streamer Clouds for Ceiling

Making use of your home’s upward space, this aesthetically pleasing decor idea brings the illusion of floating streamer clouds to your celebration. Here’s how to achieve this look:
1. Gather supplies: You will need white or pastel-colored streamers, a pair of scissors, and clear adhesive tape. Optionally, you might also consider string lights, balloons, or fluffy cotton for added texture.
2. Measure and Cut: Depending on your ceiling height, measure and cut the streamers to the appropriate length. Longer strips will create a more dramatic effect.
3. Create Cloud Shapes: Begin with a central point and attach the ends of several strips of streamer, letting them fall openly. Loop, twist and turn the streamers for extra volume and visual interest, securing them with tape at different points. Repeat this process, layering and spreading the strips irregularly to replicate cloud fluffiness.
4. Play with Light: If you’ve opted for string lights or glow-in-the-dark items, entwine them within the streamer clusters creating a charming glow. It will mimic the effect of catching sunlight during the day or moonlight for evening events.
5. Inflate And Attach Balloons: If adding balloons, inflate them to various sizes and attach to the ‘cloud’, this gives it extra depth and texture just like real clouds.
With these simple steps, you can create a marvelously whimsical effect and transform an otherwise overlooked part of your room.
Streamer Bows for Chair Decors
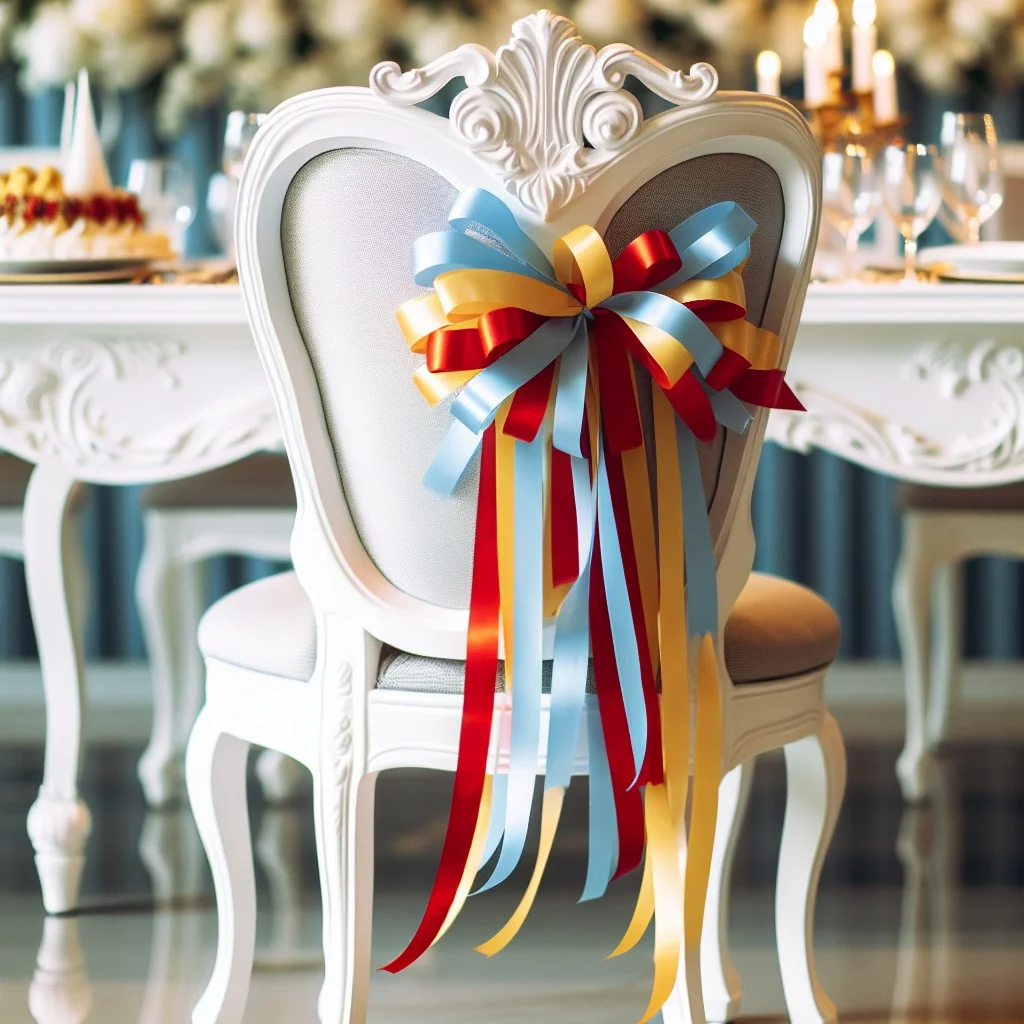
To create captivating chair embellishments, follow these simplified steps. Start by cutting out extensive lengths of streamers, using colors that match your chosen color scheme.
Loop the streamer strip to develop a bow shape. Repeat this step, ensuring each subsequent loop is slightly smaller than the previous one.
Once sufficient loops are in place, secure the center with a piece of clear tape or a small binding wire, leaving enough room to fluff out the bow loops for a fuller feel.
With extra streamer pieces, form the ‘tails’ of the bow. Attach these to the bow’s bottom, using adhesive or discreetly-positioned tape for a seamless look.
Now gently fasten the bow onto the back of the chair. The beauty of streamer bows is their adaptability – you can create different sizes, choose single or multi-colors and place them as you please, be it on the chair backrest or draped down the sides.
Remember, proper placement and proportion are the secrets to achieving a classy and polished look with streamer bows.
DIY Streamer Flowers for Wall Decor
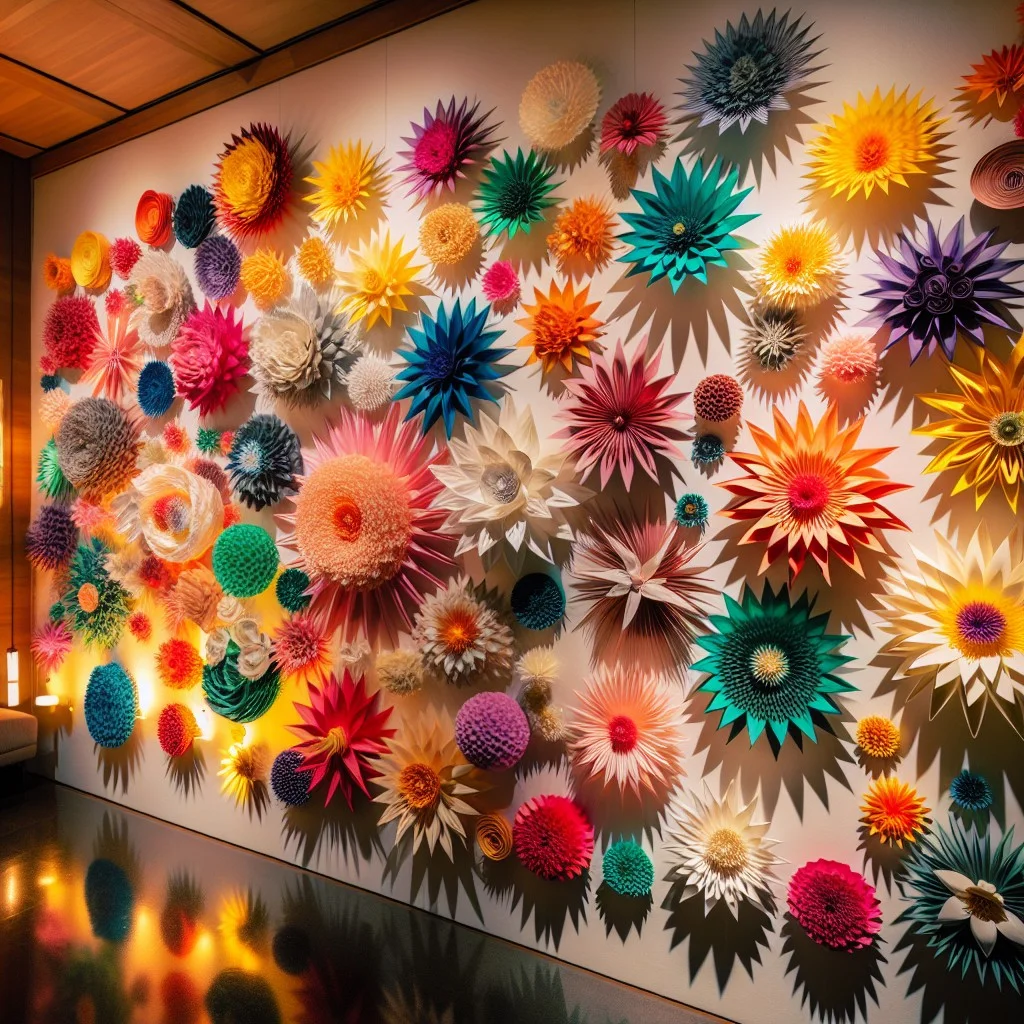
Creating these floral-inspired decorations can add a touch of elegance to your space. Start by selecting paper streamers in colors that match your chosen palette. You’ll also need a pair of scissors and a piece of string or thread for each flower.
Begin by cutting approximately 20 to 30 strips of streamer, each measuring about 12 inches long. Stack the strips and fold them accordion-style, back and forth along the length, ensuring no strip is left unfolded.
Next, tightly tie the string around the middle of the folded strips, creating a cinched effect. Fluff out each half of the streamers, pulling them towards the center to create the impression of flower petals. Repeat this step on the other side.
Affix your completed streamer flowers to the wall using adhesive. Arrange them in a pattern or scattering that suits your style. The result is a chic, nature-inspired decor element that brings life and vibrancy to any wall.
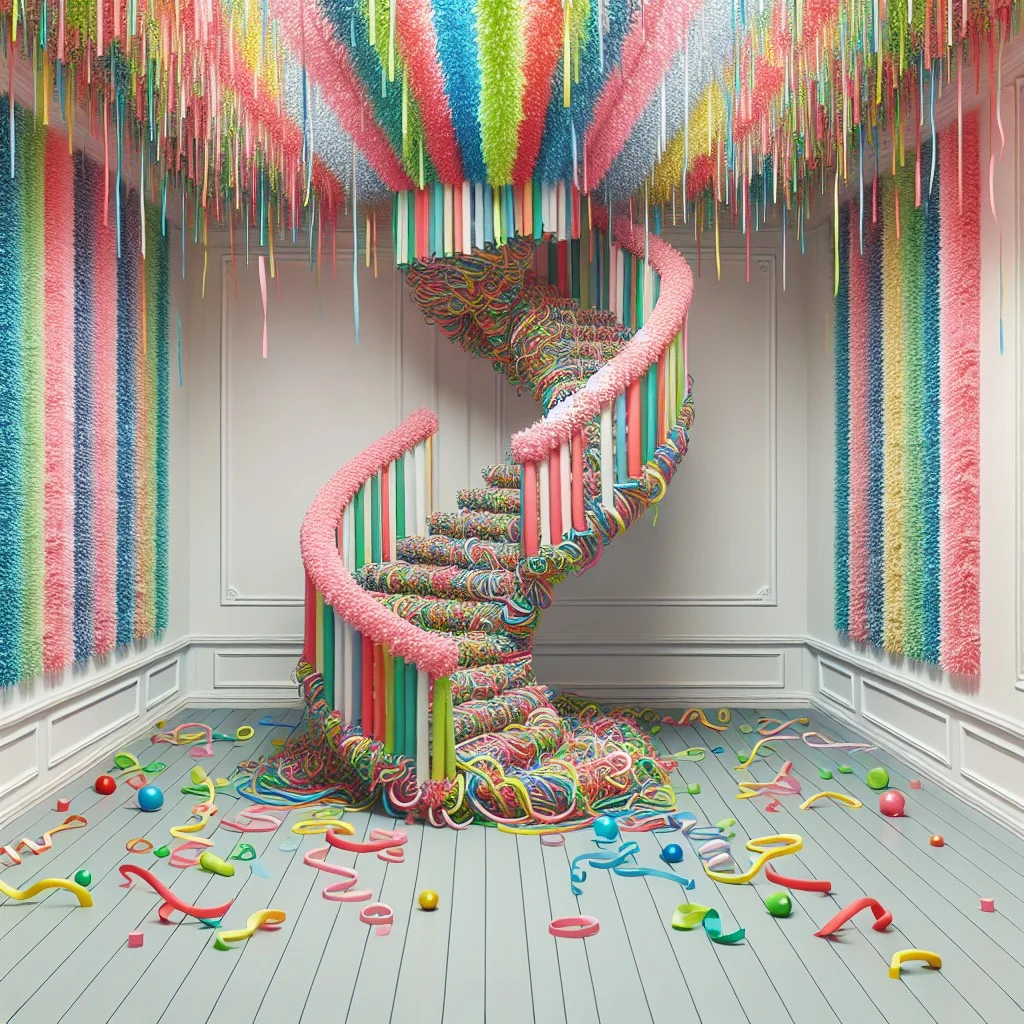
Twisted Streamers for Spiral Effects
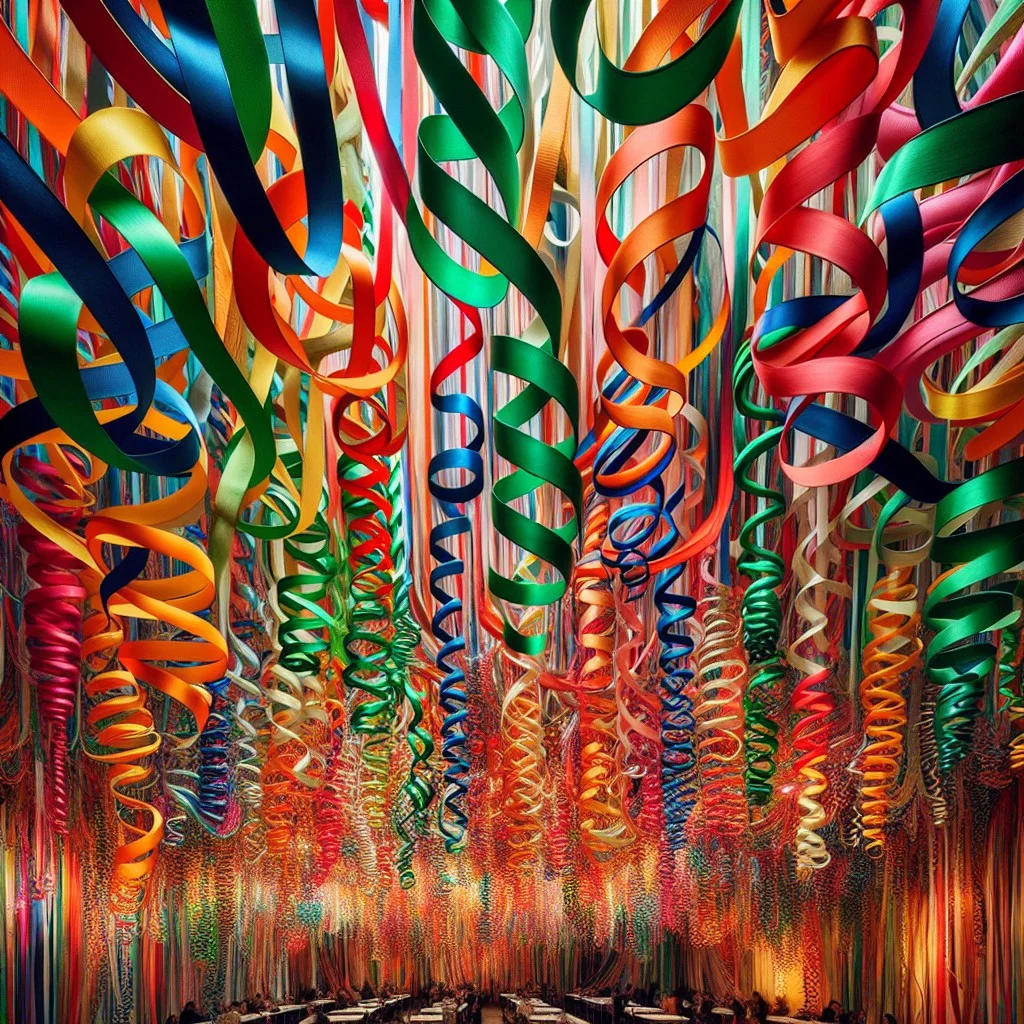
To begin, select streamers in two contrasting or complementary colors. Hold the ends together and fix them at a point using tape or thumbtack. Now, grab the other ends and start twisting them around each other until a tightly coiled effect is achieved. Once this is done, tape or tack the other end to secure the twist.
Repeat these steps with multiple sets of streamers and hang them from the ceiling, doorway, or wall. The result? A mesmerizing spiral effect that brings depth and movement to your decor.
Key considerations to make the best out of this concept include:
- 1. The choice of colors greatly influences the overall look. Opt for colors which fit your theme or mood.
- 2. The tighter the twist, the more distinct the spiral; a looser twist gives a softer effect.
- 3. Consider varying lengths to create a cascading visual.
- 4. Twist multiple streamer sets together for a more robust and striking feature.
Streamer Gift Wrap Ideas
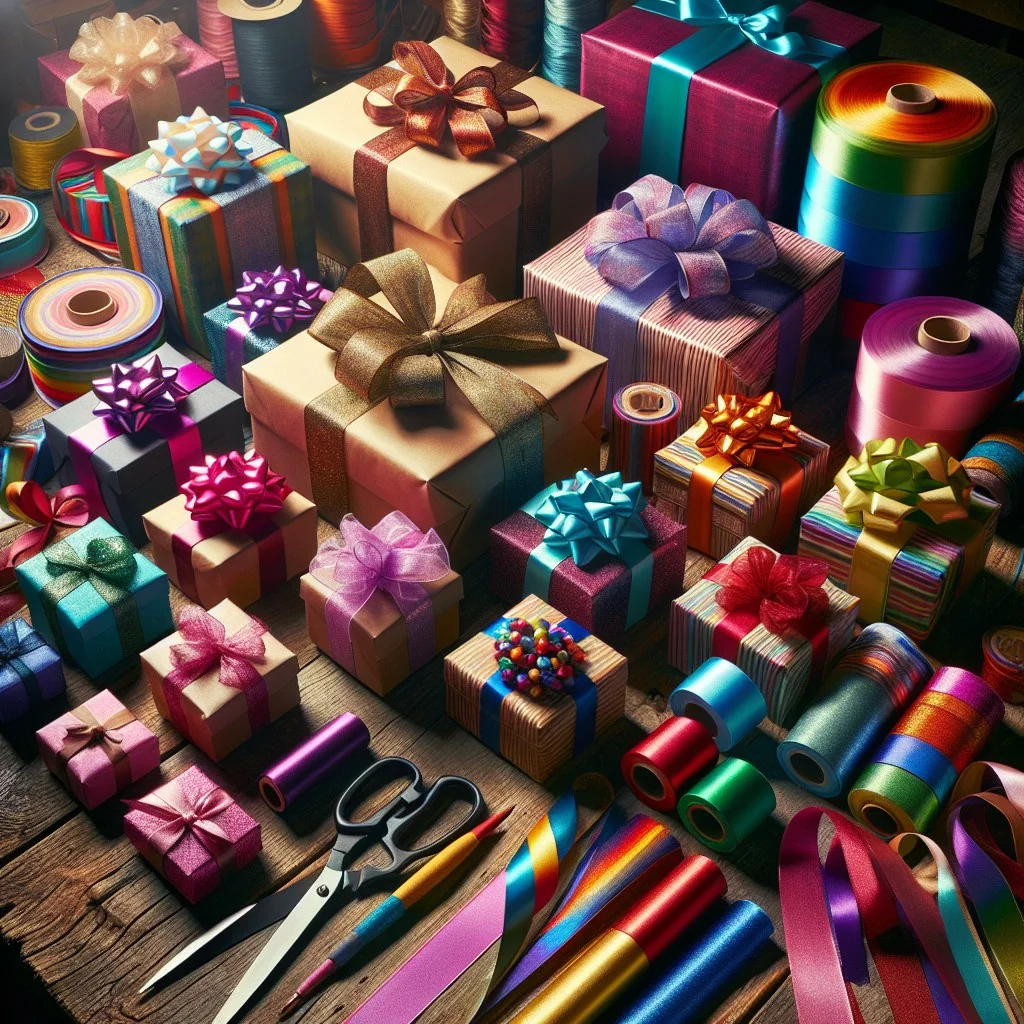
Inject an unexpected twist of charm into your gift-wrapping with streamers. Start by covering your gift box with simple wrapping paper. Then, take a streamer of your chosen color and begin to wrap it around the present, securing it with clear tape, much like a colorful ribbon.
For a different approach, cut small pieces of streamers and glue them on the wrapped box to create patterns or designs. It could be a simple alternating stripe pattern, zig zags, criss-cross or even festive shapes! For an added touch, cut fringes into the length of the streamer before wrapping or gluing.
Remember to blend and contrast colors tastefully. For instance, a baby blue gift paper might work well with white or silver streamers, while a beige paper can be brought to life with red or gold streamers. The options are infinite!
You may also tie a bow with a piece of streamer, or fringe the ends for a tassel-like finish. Combining different techniques and hues can result in unique, eye-catching packages sure to delight any gift recipient.
Add Sparkle With Glittered Streamers
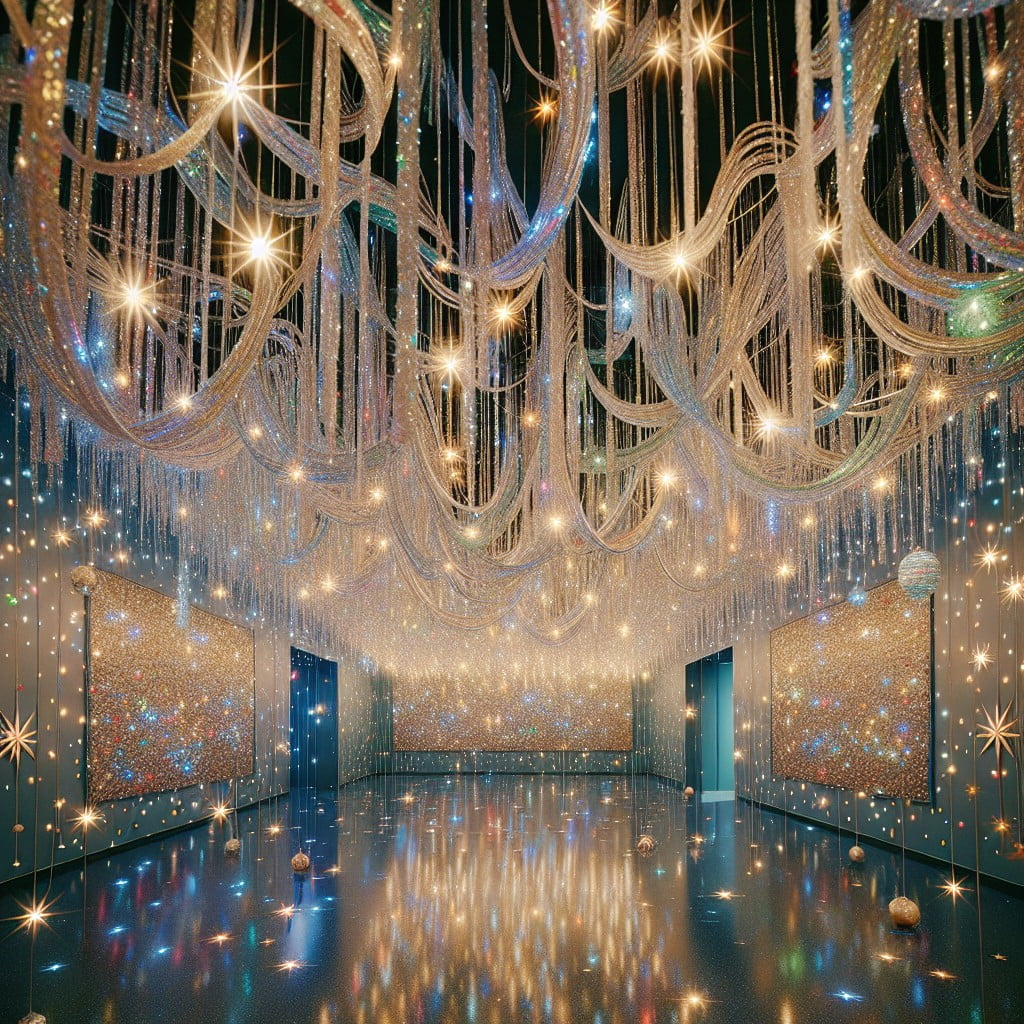
Glittered streamers can instantly heighten the elegance of your decor. Here’s how you can effortlessly integrate them into your decorations:
1. Choose streamers in colors that complement your event’s overall color scheme. In addition, opt for finely milled biodegradable glitter for an eco-friendly alternative.
2. To add the sparkle, simply spread craft glue on your streamer sections, sprinkle your selected glitter over the adhesive, and allow them to dry entirely.
3. Make sure to tap off any excess glitter before displaying your streamers to prevent undesired mess.
4. Drape the glittered streamers from chandeliers, ceilings, door frames, or any high point. The elevated position allows the light to catch and reflect off the glitter to create a mesmerizing sparkle effect.
5. Twist or braid glittered and non-glittered streamers together for a more textured look.
6. For large events, outsource the task to a professional party decorator or enlist help from friends to expedite the process.
7. Glittered streamers can also be used to accentuate centerpieces, gift tables, or photo backdrops for a burst of extra sparkle.
Remember, the key to successfully using glittered streamers lies in their strategic placement and moderation. Too much glitter might take away from the other elements of your decor.
Create Streamer Chandeliers
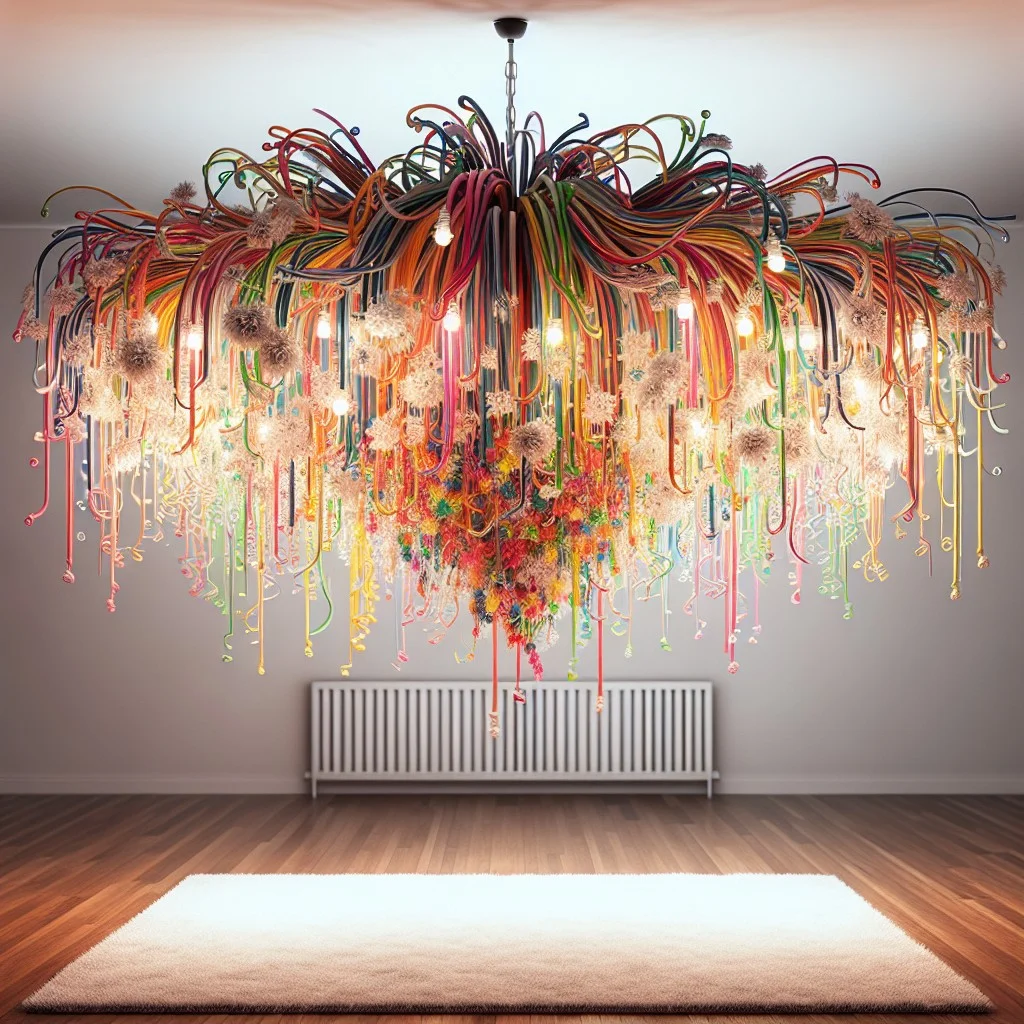
Creating a stunning sparkle impact in any space is achievable by crafting chandeliers from streamers. Select streamer shades that complement the room’s color palette to ensure aesthetic cohesion.
Begin with an embroidery hoop as the base, and determine its size based on the desired chandelier width. Attach lengths of streamers, ensuring variation for a lively effect. Incorporate string lights for a luminary touch. Secure the hoop to the preferable spot on the ceiling and enjoy your vibrant masterpiece.
For a sophisticated twist, consider layering streamers with different sheen levels, like mixing mattes and metallics. Furthermore, add structural finesse by draping some streamers inwards, creating a ‘skirt’ effect. This DIY project allows customization, making each chandelier unique.
Streamer Words for Celebratory Messages
Crafting messages with streamers can add a personal touch to any celebration. Choose robust, wide streamers for better visibility and ease of handling.
Here’s how you can go about it:
1. Draft the Message: Decide on what you want to communicate. It could be a simple “Happy Birthday” or a holiday greeting.
2. Choose the Colors: Keep in mind the theme of your event while picking streamers. Use contrasting colors for the message and the background to make it stand out.
3. Sketch Out: Pencil on paper, sketch out your letters. This becomes your guide to shaping the streamers.
4. Lay Your Streamers: With a bit of adhesive, arrange your streamers over your sketched message. Cut to fit and secure in place.
5. For 3D Effect: Layering the streamers can offer a bold, 3D outcome. Start at the bottom and work your way upwards.
6. Smooth Edges: Use scissors to trim any rough or excess portions around the edges.
Remember, it’s not about perfection, but the heart behind the endeavor that counts!
Streamer ‘Popcorn’ String for Christmas

Embrace holiday spirit with a classic twist on your Christmas tree decoration. All you need are white and yellow tissue paper streamers. Cut them into small, 1-inch pieces, twist them lightly to create a ‘popcorn kernel’ shape.
1. Find a long thread matching your Christmas tree color. Thread it through a needle to start crafting your popcorn string.
2. Thread ends should be tied firmly, making sure it doesn’t unravel while adding ‘kernels’.
3. Use the needle to pierce through the middle of each piece of twisted streamer to look like popcorn.
4. Space them out evenly to resemble a genuine popcorn string.
5. Continue this process until you’ve achieved desired popcorn string length.
This design brims with nostalgia and brings the charm of traditional Christmas aesthetics into your home decor. It also serves as a perfect family-friendly DIY project during the holiday season. Don’t limit yourself to just your Christmas tree; adorn your mantles and windows with your handmade streamer ‘popcorn’ strings.
DIY Streamer Pom Poms
Beginning with your selected streamer color, gather a roll and start folding it accordion style until the entire length is neatly folded. Once complete, secure the middle using a piece of wire or twist tie. Then, cut the ends of the folded streamer into a rounded shape which contributes to the pom pom’s fluffy appearance.
Following this, carefully separate each layer, pulling them towards the center, being cautious to prevent it from tearing. It’s important to ensure the layers are evenly spread to create a full aesthetic. Make several of these, in different sizes or colors, and group them together for a stunning visual arrangement.
One may suspend them from the ceiling or even line them up along a wall to inject a fun celebration vibe into any space. They can also be crafted in advance, as they are lightweight and easy to store until required.
Streamer Pillar Wrappings for Indoor Columns
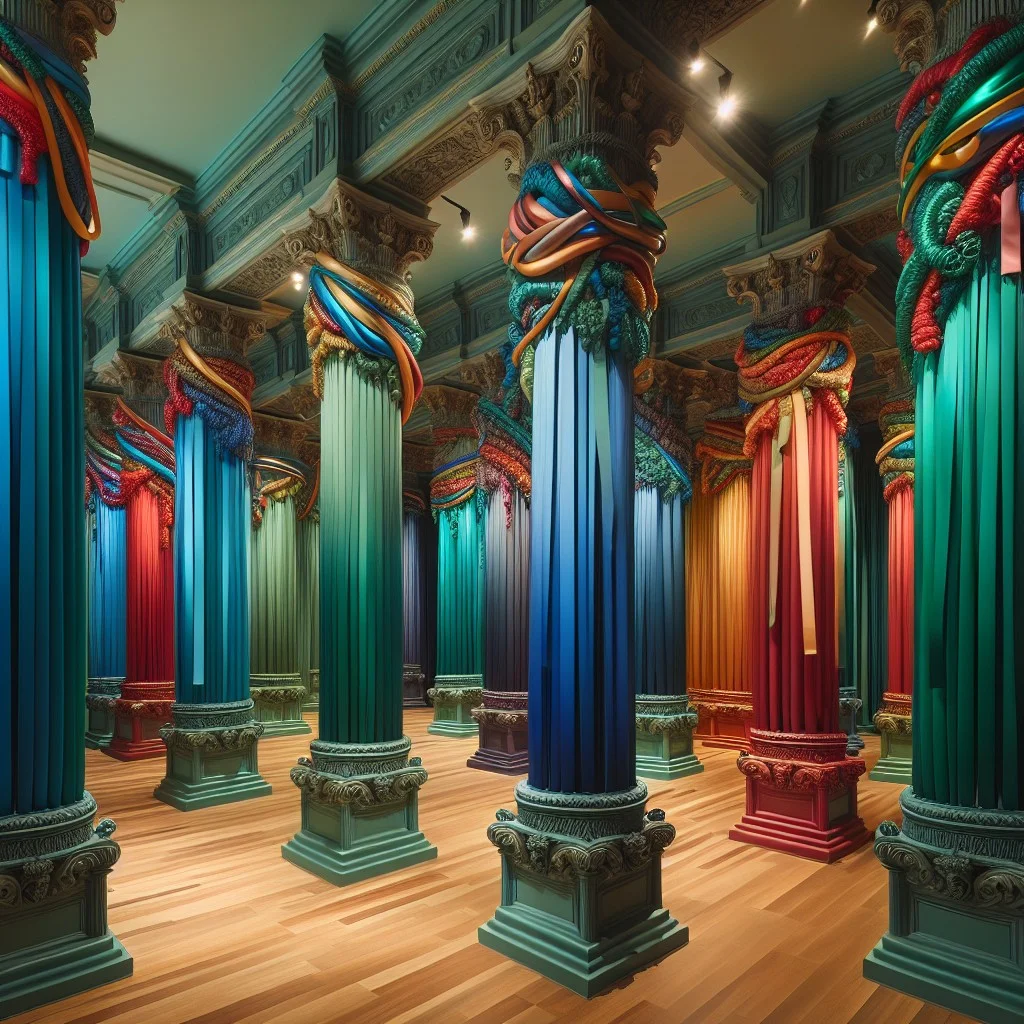
Select streamers that blend well with your room’s color scheme to achieve an optimal aesthetic. Start at the bottom of the column, securing the end of the streamer to the base with either double-sided tape or a dab of hot glue. Gently twist the streamer as you wrap it upward, attaching it every once in a while to maintain twirly shape and secure placement.
Experiment with multicolored wrappings for a vibrant effect. Blend complementary colors or stick with monochrome shades for a textural impact that doesn’t overpower the space. Stagger your wraps so that the streamers overlap in an orderly fashion, allowing the colors underneath to peek through.
Consider adding some additional decorative touches. Attach mini fairy lights or artificial flowers amidst your streamers, or secure mounted photos or small frame artworks to the columns. Use your artistic judgment to add a uniquely personal touch that complements your home’s decor.
Remember, the pillar wrappings are easy to remove and replace, offering an opportunity for fresh updates to your home decor anytime you fancy a change.
Create a DIY Streamer Rainbow
Start with cellophane or crepe streamers in seven different colors. Consider using the classic order: red on top, then orange, yellow, green, blue, indigo, and violet forming the end of the rainbow.
1. Measure and Cut: Depending on the width of your intended rainbow, measure and cut each streamer. Have each color the same length to maintain balance.
2. Position: Arrange the streamers in the correct order on your work surface.
3. Attach: Use adhesive tape or a stapler to join the tops of all the streamers together, ensuring the alignment remains correct.
4. Secure: Attach the rainbow’s top end at your desired height on the wall, making sure that it’s fastened securely.
5. Curve and Drape: Gently curve and drape the streamers down to the floor, creating the arch of the rainbow.
6. Anchor: Use weights, or sticky tack to anchor the bottom ends on the floor, thereby maintaining the complete rainbow shape.
7. Repeat: Repeat this process, if needed, to create a wider rainbow.
Remember, this decoration works great for themed birthday parties, baby showers, or even as a fun addition to a child’s playroom. Fancy it up a bit by adding a pot of gold (use a basket filled with chocolate coins) at the rainbow’s end.
Streamer Bird Nest for Easter
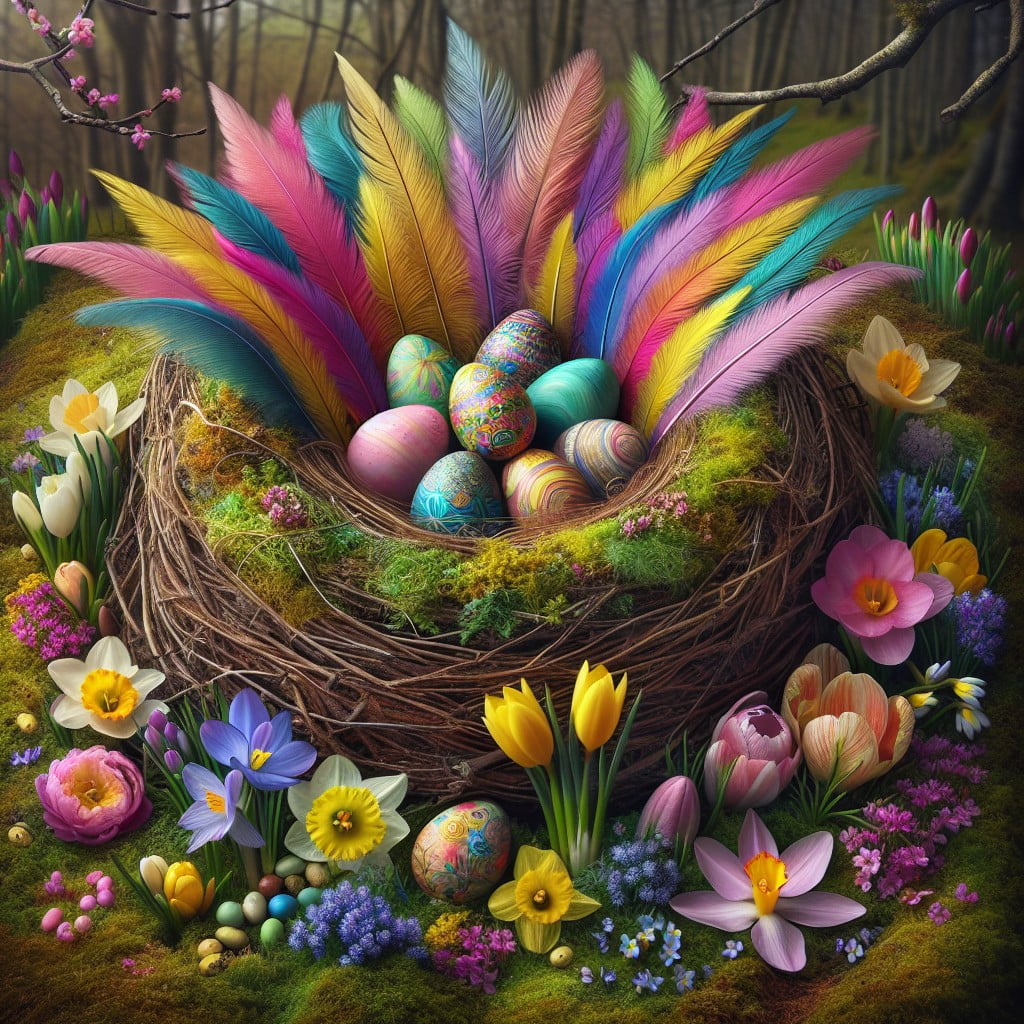
Beginning this project requires simple materials such as construction paper streamers, preferably in pastel shades for the Easter theme, glue, scissors, and a medium-sized bowl.
First, cut the streamers into various lengths – shorter pieces will help to construct a more realistic texture for the nest. Layer your bowl with a plastic wrap to prevent your nest from sticking. Start by gluing the ends of the streamer pieces and sticking them to the plastic-covered bowl, make sure they overlap for a basketweave effect. Continue this process until the inside of the entire bowl is covered.
Let the glue dry overnight. Once it’s fully dry, carefully peel off the plastic wrap. What you’re left with is an attractive, perfectly-sized streamer bird nest! You can fill your new nest with delightful Easter candies, miniature eggs, or even a cute chirpy decorative bird! This eye-catching centerpiece effortlessly adds a festive touch to your Easter table.
Use Streamers to Create a Mock Staircase
To craft this unique décor, you need a large room with expansive wall space. Choose streamers in different shades, ideally contrasting for a more dramatic effect.
Starting from the top of the wall, secure your streamers using a strong adhesive. Ensure you create a clear ‘staircase’ pattern by positioning each step one below the other.
When attaching the streamers, try to create the illusion of depth by adding an extra layer of darker streamers towards the sides. This gives the illusion of shadows much like on a real staircase. In the center, use lighter shades to emulate the staircase’s walkway.
Position other décor items like wall art or frames strategically to compliment this faux staircase.
Lastly, add sturdy chairs or furniture at the ‘base’ of the staircase to reinforce the illusion. Note that it’s crucial to complement the rest of your room decor with your color choice for the best visual outcome.
You’ll find this unexpected use of streamers a conversation starter at your next party or gathering!
Craft DIY Windsocks With Streamers
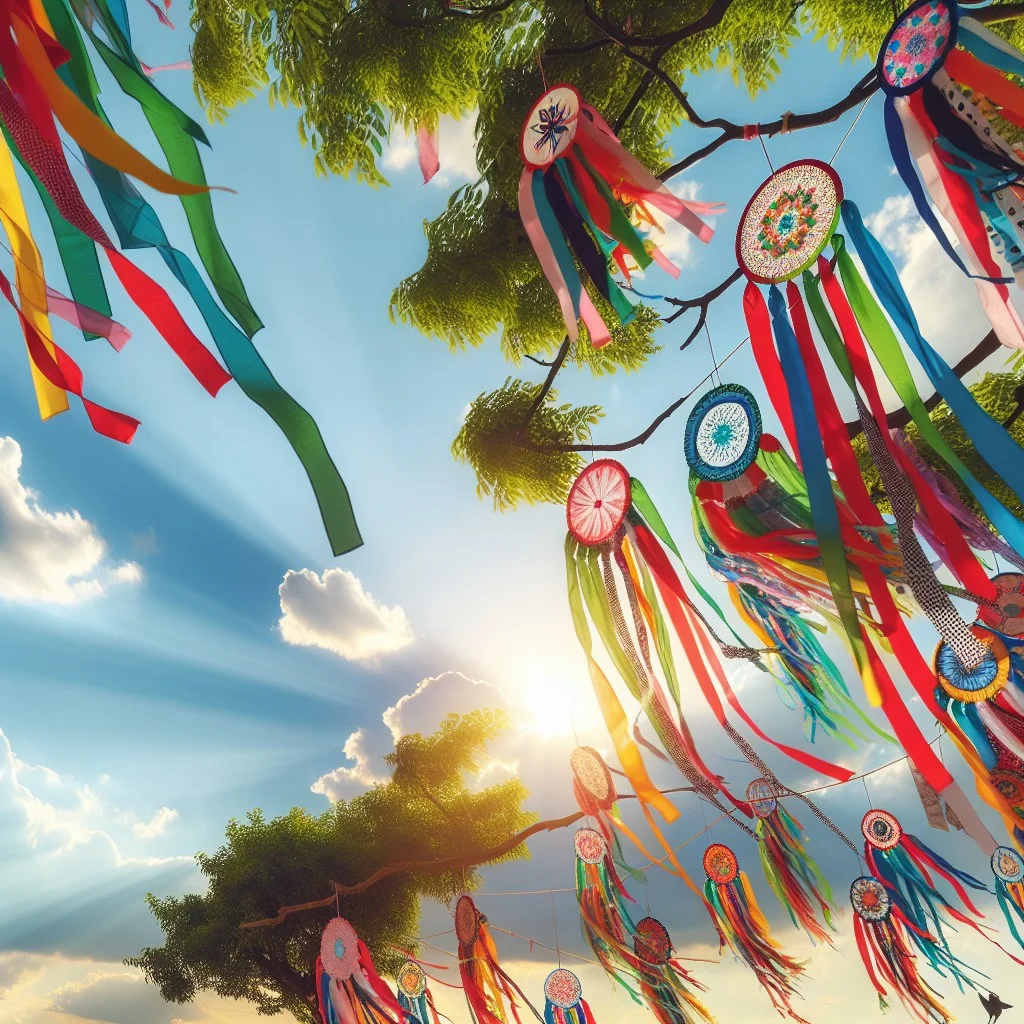
Creating your own windsock using streamers is a delightful way to upgrade your outdoor decor. Versatile and vibrantly colorful, they can add life to porch or patio spaces. Even better, crafting windsocks is a straightforward process that doesn’t require specialized material or skill.
Here’s the step-by-step instructions:
- Start with a sturdy cylindrical base—either a large paper cup, a tin can, or a craft tube.
- Cut out streamers of varied length and colors to achieve an array of visual effects.
- Attach the streamers around the bottom edge of your chosen cylinder. Use a hot glue gun for secure adhesion.
- Punch holes on either side of your cylinder’s top side. Thread through a string or a thin metal wire, creating a loop to hang your windsock.
- Be sure to space your streamers evenly for symmetry and balance, a small trick often employed in home decor to enhance visual appeal.
And there you have it. Don’t be afraid to experiment with different materials, colors, and textures to achieve your desired windsock look. Whether for a garden party or just to spruce up your backyard, these craft DIY windsocks with streamers are sure to catch the eye.
Ideas Elsewhere
- https://mydreampartyshop.com/blogs/news/8-amazing-ways-to-use-crepe-paper-streamers-to-decorate-at-parties
- https://prettylittlepartyshop.co.uk/blogs/pretty-little-party-ideas/17451308-how-to-decorate-with-crepe-paper-streamers
- https://www.lovetoknow.com/celebrations/parties/ways-decorate-streamers
- https://www.wikihow.com/Decorate-With-Streamers
- https://partypieces.co.uk/blogs/inspire/top-6-party-streamer-decoration-ideas
Read More Like This
 15 Homecoming Decoration Ideas to Elevate Your Celebration
 15 Christmas Cake Decorating Ideas to Sweeten Your Holidays
 15 Outdoor Party Tent Decorating Ideas for a Magical Celebration
 15 Ideas for Welcome Home Decorations
 15 Cheap Table Decoration Ideas to Elevate Any Gathering
Recap: