Last updated on
Yes, you can paint over chalk paint using the correct preparation and technique.
Key takeaways:
- You can paint over chalk paint with proper preparation
- Clean the surface thoroughly and assess the condition of the chalk paint
- Apply a primer if necessary and choose the right supplies
- Follow the steps of cleaning, sanding, priming, painting, and sealing
- Adding a tile stencil can enhance the decorative appearance
Before Repainting Chalk-Painted Furniture
Preparing your furniture for a new paint job is crucial for achieving a flawless finish. Begin by cleaning the surface thoroughly with a mild detergent to remove any dirt, dust, or greasy residues. Rinse with water and allow it to dry completely.
Next, assess the current chalk paint’s condition. If it’s smooth and intact, a light sanding is often sufficient to provide a key for new paint. Otherwise, for a peeling or chipped surface, a more thorough sanding is necessary to create a smooth base.
After sanding, wipe the surface with a tack cloth to remove all the dust. This step ensures that no particles interfere with the adhesion of the new paint.
In some cases, applying a primer may be beneficial, especially if transitioning from a dark to a light color, or if the surface is particularly slick or porous. A primer lays the groundwork for an even application of the new paint and can enhance durability.
Finally, ensure proper ventilation in your workspace to safeguard your health and aid the drying process during and after painting.
SUPPLY LIST
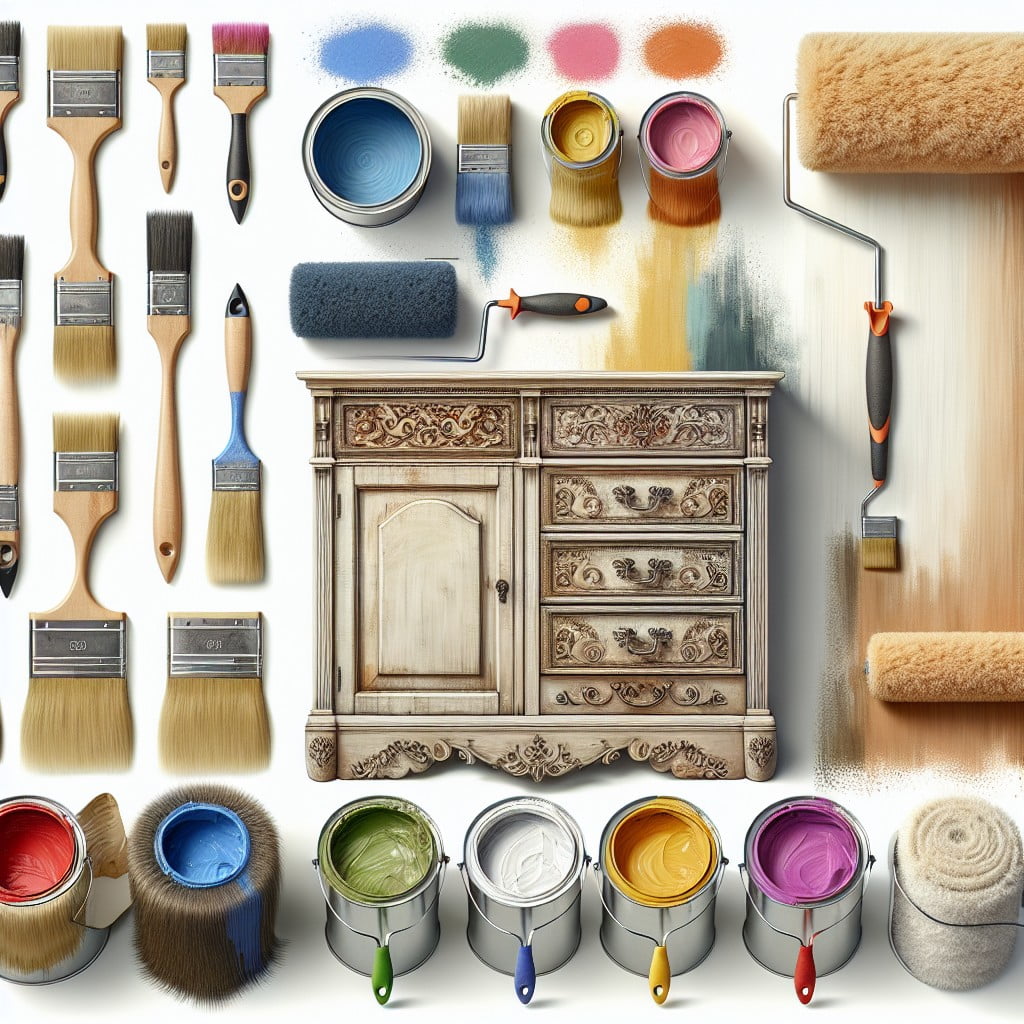
To ensure a smooth painting process and professional-looking results, gather the following items before you start painting over chalk paint:
- 1. Sandpaper (fine-grit for light sanding, if necessary)
- 2. Clean, lint-free cloths for wiping down surfaces
- 3. High-quality primer designed to adhere to chalk paint
- 4. Paintbrushes or rollers suitable for the type of paint you’ll use
- 5. Latex or acrylic paint in the desired color and finish
- 6. Painter’s tape for protecting edges and creating clean lines
- 7. Drop cloths or plastic sheeting to protect your work area
- 8. Optional: Clear coat sealer for added durability
Having these supplies on hand will streamline your project and help you achieve a flawless finish on your repainted piece.
Can You Paint Over Chalk Paint Without Sanding?
Yes, one of the advantages of chalk paint is that it typically does not require sanding before painting over it. Chalk paint adheres well to most surfaces, and its matte finish provides a good base for new paint.
However, consider a few key points to ensure a successful repaint:
- Clean the surface thoroughly before applying new paint to remove any wax or oils that could prevent good adhesion.
- If the existing finish is glossy or has a protective topcoat, a light scuff sanding is recommended to help the new paint adhere.
- Ensure the chalk paint is fully cured, which usually takes about 24 hours, to avoid mixing wet layers and potentially compromising the finish.
- Use a high-quality primer if you’re making a dramatic color change, or if the original color is likely to bleed through the new paint.
- Test a small, inconspicuous area first to ensure the new paint adheres to the chalk paint as expected.
By following these points, you can repaint chalk painted surfaces confidently, knowing that sanding can be an optional step based on the particular piece and desired outcome.
Paint Over Chalk Paint: Instructions
To ensure a successful repaint over a chalk-painted surface, follow these straightforward steps:
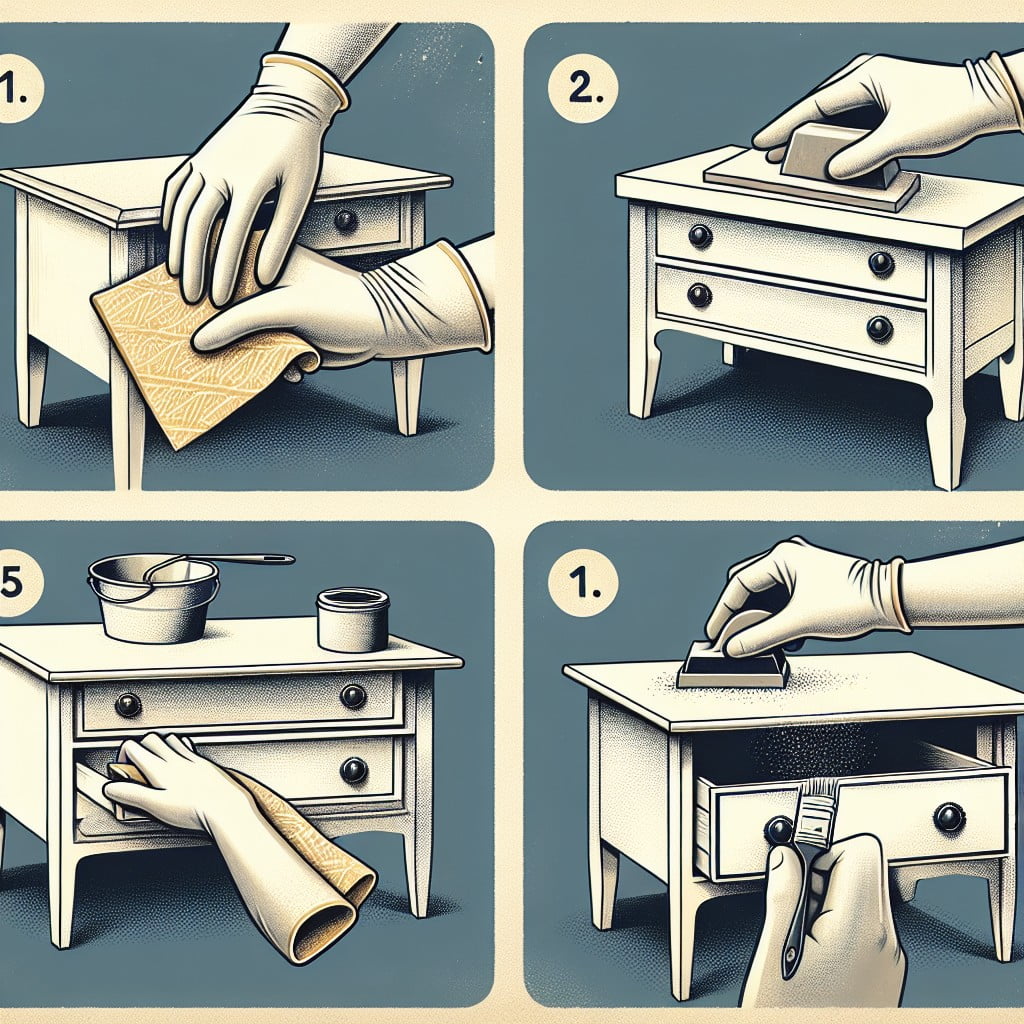
1. Clean the Surface: Begin by wiping down the furniture with a damp cloth to remove any dust or dirt. If greasy spots prevail, use a mild detergent to ensure a clean surface for paint adherence.
2. Light Sanding: Though not always necessary, a quick, light sanding with fine-grit sandpaper can help create a better bond for the new paint. Aim for a smooth, matte finish.
3. Prime if Required: Consider using a water-based primer if the original chalk paint is dark and you’re transitioning to a lighter color. This will help to block stains and prevent the old color from bleeding through.
4. Apply New Paint: Choose a paint suitable for furniture and apply it using a synthetic-bristle brush or foam roller for a smooth finish. Allow the first coat to dry as suggested by the manufacturer’s guidelines before assessing if a second coat is necessary.
5. Seal as Desired: Once the final coat is fully dry, you can seal the piece with a clear topcoat to protect the paint and add durability. Water-based polyurethane or furniture wax works well for this purpose.
Remember to allow adequate drying time between coats and before using the furniture to avoid any smudges or imperfections.
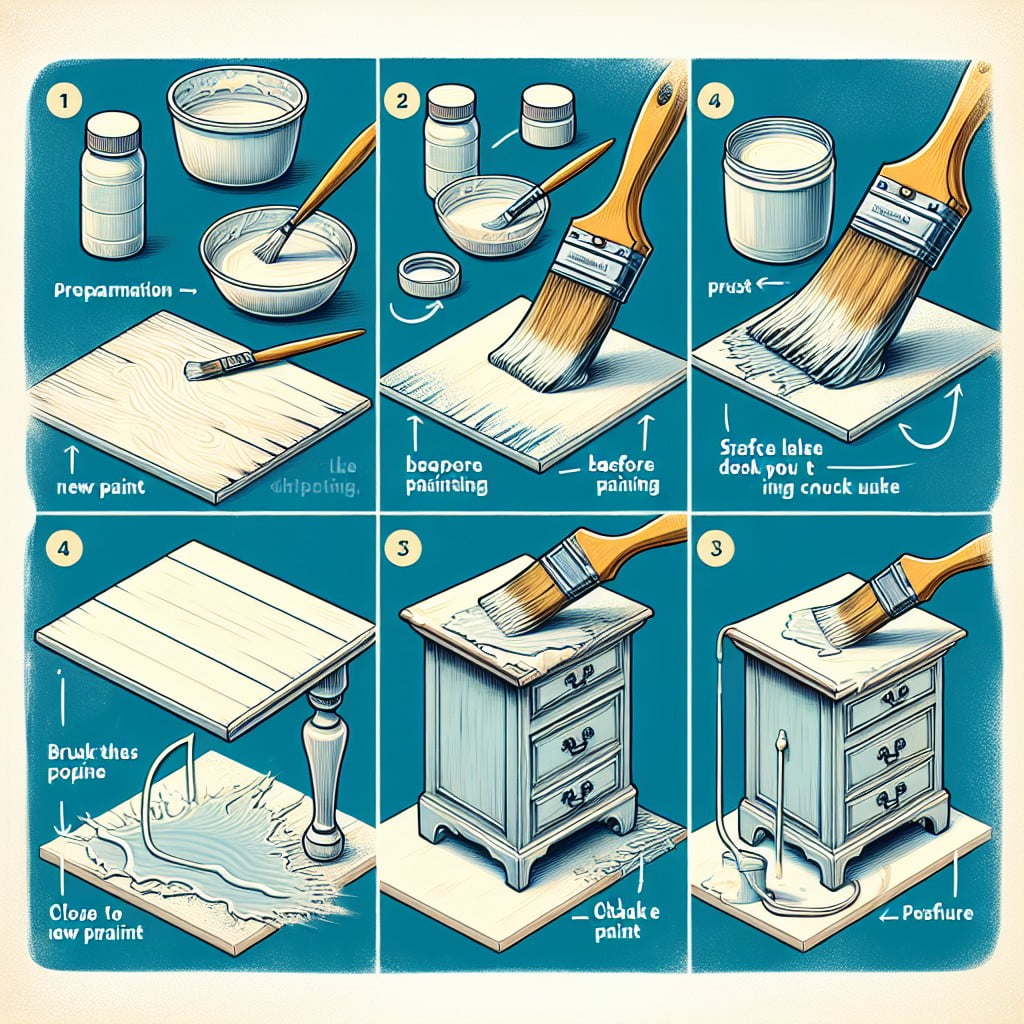
Step 1
Begin by cleaning the surface thoroughly. Use a mild detergent and water to wipe down the piece, ensuring that it’s free of dust, grime, and any oily residues. For stubborn spots, a mixture of water and white vinegar can be quite effective.
Be sure the surface is completely dry before proceeding to the next step. This lays the groundwork for a smooth and successful application of the new paint. Remember, a clean surface ensures better paint adhesion and longevity of your finish.
Step 2
After ensuring your surface is clean, move on to selecting the right primer. This step is crucial for creating a receptive layer that will bond with the new paint. Opt for a water-based primer if you’re planning to use a water-based paint for the topcoat. This helps prevent potential peeling or chipping as the layers adhere properly.
When applying primer, use a high-quality brush or foam roller to achieve even coverage, and be mindful to avoid leaving brush strokes. Allow the primer to dry thoroughly according to the manufacturer’s recommendations before proceeding to the next step. Remember that skimping on drying time can lead to poor paint adhesion.
Step 3
Once the surface is primed and ready, it’s time to choose the right paint. Acrylic or latex paints work well over chalk paint, as they adhere to the primer and create a durable finish. For a smooth application, use a high-quality brush or roller designed for the type of paint you’ve selected.
When painting over a light-colored chalk paint with a darker hue, one coat may suffice. However, if you’re transitioning from dark to light, anticipate applying at least two coats. Allow ample drying time between coats as recommended by the paint manufacturer, usually a couple of hours. This step is crucial for avoiding tackiness and achieving an even, streak-free finish.
Remember to maintain a wet edge while you work to prevent visible lap marks. If you’re using a roller, roll in one direction for the first coat and perpendicular for the second to ensure uniform coverage. Taking these measures will ensure a professional-looking result that honors the work put into the preparation steps.
Step 4
Once your primer has had ample time to dry, it’s time to apply your chosen paint. Select a paint that is compatible with primer and the surface you’re working on. Acrylic, latex, or oil-based paints are all suitable for going over chalk paint, especially if you’ve prepped with a bonding primer.
Using a high-quality brush or roller, begin with a thin coat, going with the grain when working on wood. Ensure even coverage, avoiding heavy application to steer clear of drips and brush marks. Allow this first layer to dry completely, as rushed layers can lead to peeling or an uneven finish.
After the initial coat has dried, assess if a second coat is necessary. In some cases, a single coat with a high-quality paint can suffice. However, more vibrant or full coverage may require additional coats. If you’re applying more than one coat, lightly sanding between layers with fine-grit sandpaper can promote better adhesion and a smoother final surface. Always remove any dust after sanding before laying down the next coat.
Remember, patience is key in achieving a professional-looking finish that will endure the test of time.
Step 5
After you’ve allowed sufficient drying time for your chosen paint, it’s important to protect the new finish. Applying a sealant, often in the form of wax or a water-based polyurethane, safeguards the surface from scratches, stains, and potential water damage.
For a matte finish, a clear wax is an excellent choice. It should be applied with a soft cloth or brush, working it into the paint in a circular motion, then wiping off any excess.
If a more durable or glossier finish is desired, consider a clear polyurethane coating. Apply it with a fine brush or foam roller, using even strokes to prevent visible brush marks.
Regardless of the sealant selected, ensure proper ventilation during the application and allow it to fully cure as instructed by the product’s guidelines. This step is crucial as it not only enhances durability but also contributes to the aesthetic longevity of your newly refreshed piece.
Adding A Tile Stencil After Repainting Chalk-Painted Furniture
Once your repainted surface has dried and cured, adding a tile stencil can bring in a decorative flair. When applying a stencil design, consider the following points to ensure a professional finish:
- Ensure the stenciled area is flat and smooth; this avoids paint bleed under the stencil’s edges.
- Use a small foam roller or stencil brush for the application, tapping off any excess paint to avoid drips.
- Secure the stencil with painter’s tape to prevent it from shifting as you paint.
- Apply paint in light coats, building up to the desired opacity to maintain crisp lines.
- For a lasting effect, seal the stenciled design with a compatible topcoat after the paint has dried.
Adhering to these tips will help achieve a beautifully patterned look that compliments your newly painted piece.
How To Apply A Stencil On Chalk Painted Furniture
Choose your stencil design carefully, considering the size and shape relative to the furniture piece to ensure a cohesive look.
Clean the surface where the stencil will be applied to eliminate any dust or residues that could affect paint adhesion.
Secure the stencil in place using painter’s tape or adhesive spray to prevent it from shifting while you’re painting.
Dab a small amount of paint onto a stencil brush or sponge. Excess paint can cause bleeding under the stencil, so it’s crucial to offload some onto a paper towel first.
Apply the paint using a vertical dabbing or swirling motion to prevent seeping edges instead of brushing or rolling, which can force paint beneath the stencil.
Lift the stencil carefully after you’ve finished applying the paint to avoid smudging the design.
If you’re creating a repeating pattern, make sure to align the stencil correctly as you move across the surface, using marks on the stencil as a guide for proper placement.
Allow the paint to dry completely before adding additional layers or colors to the stencil, ensuring crisp lines and preventing colors from blending unintentionally.
Seal the design with an appropriate topcoat to protect the pattern from wear and tear, using a product that is compatible with both the paint and the chalk paint base.
Lessons I Learned
Embarking on a furniture revamping project comes with a learning curve. One of the key insights gained is the imperative of thorough surface preparation. Skipping the sanding or cleaning step, tempting as it may be for time savings, can lead to paint peeling or chipping prematurely.
Another lesson is the importance of patience, especially when it comes to drying time between coats. Rushing the process tends to result in a less durable finish. It’s also essential to invest in quality brushes or rollers that will leave a smooth finish without stray bristles or lint embedded in your new paint job.
Finally, testing your new paint on a small, inconspicuous area of the furniture can save you from committing to a color or finish that doesn’t meet your expectations once applied over the entire piece. This small step can make a significant impact on the overall satisfaction with the completed project.
FAQ
What happens if you paint over chalk paint?
If you paint over chalk paint without removing the wax first, it will act as a resist leading to poor adherence of the new paint.
Do you have to sand before painting over chalk paint?
Typically, there’s no need to sand before painting over chalk paint as it usually adheres well to furniture without primer or sanding; a quick cleaning should be sufficient.
Can you paint chalk paint over latex paint?
Yes, you can paint chalk paint over latex paint, but for the best results it is advisable to either prime with Slick Stick or sand the surface first to generate a rough texture for better adhesion of the chalk paint.
What do you put over chalk paint?
Over chalk paint, either wax or lacquer is typically applied to protect the finish and enhance color longevity.
Is it possible to apply oil-based paint over chalk paint?
Yes, it is possible to apply oil-based paint over chalk paint.
What type of finish should be used after painting over chalk paint?
After painting over chalk paint, it’s advisable to use a wax or polyurethane finish to seal and protect the paintwork.
Can chalk paint be effectively covered with high-gloss paint?
Yes, chalk paint can be effectively covered with high-gloss paint once it’s properly prepared and primed.
Read More Like This
 15 Unique DIY Christmas Decorations Ideas for a Festive Home
 15 Creative Science Fair Board Ideas to Amaze Your Audience
 15 Handmade Envelope Decoration Ideas for Creative Gifting
 10 DIY Gifts for the Whiskey Lover in Your Life
 15 Creative Ideas for DIY Outdoor Birthday Party Decorations
Recap: