Last updated on
Discover the easy and efficient way to move a pendant light with our step-by-step guide that ensures a seamless process.
Are you tired of staring at the same old pendant light in your home? Perhaps it’s time for a change, but the thought of moving it seems daunting. Fear not, as moving a pendant light is easier than you may think.
As a seasoned home decorator, I’ve moved my fair share of pendant lights and have learned some tips and tricks along the way. In this article, I’ll guide you through the process step-by-step so that you can enjoy a fresh new look in your home without any stress or hassle.
So grab your tools and let’s get started!
Key takeaways:
- Turn off power before moving pendant light.
- Use proper tools and equipment for safety.
- Disconnect power and test for electricity.
- Remove old fixture and disconnect wiring.
- Assemble and install new pendant light.
Safety Precautions
Before we dive into the process of moving a pendant light, it’s essential to take some safety precautions. First and foremost, ensure that you turn off the power supply to the fixture before starting any work.
This will prevent any electrical accidents from occurring while you’re working on it.
It’s also important to use proper tools and equipment when handling electrical fixtures. Make sure that your ladder is sturdy and secure before climbing up to reach the pendant light.
Tools and Materials
Wear protective gear such as gloves or goggles if necessary.
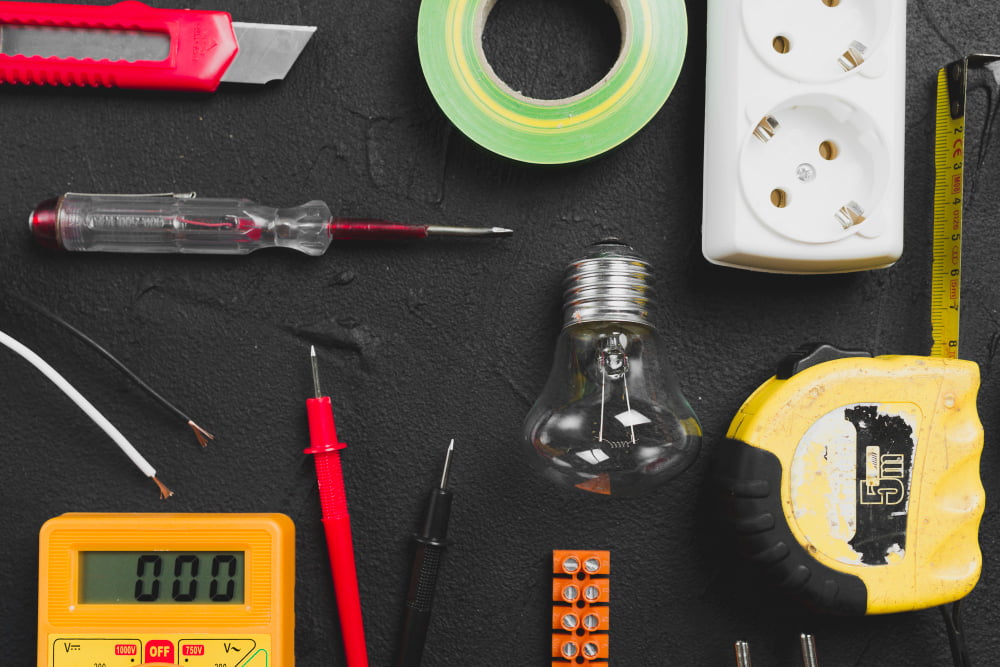
Here are some of the items you’ll need:.
1. Screwdriver – A screwdriver is essential for removing screws that hold the fixture in place.
2. Wire stripper – You’ll need a wire stripper to remove insulation from wires before connecting them.
3. Pliers – Pliers can be used for bending wires or holding small parts while working on your fixture.
4. Voltage tester- This tool will help ensure that there is no electrical current flowing through any of the wires before starting work.
5. Wire nuts- These connectors are necessary when joining two or more wires together securely.
6. New Pendant Light Fixture- Choose a new pendant light fixture that suits your style and fits well with existing decor.
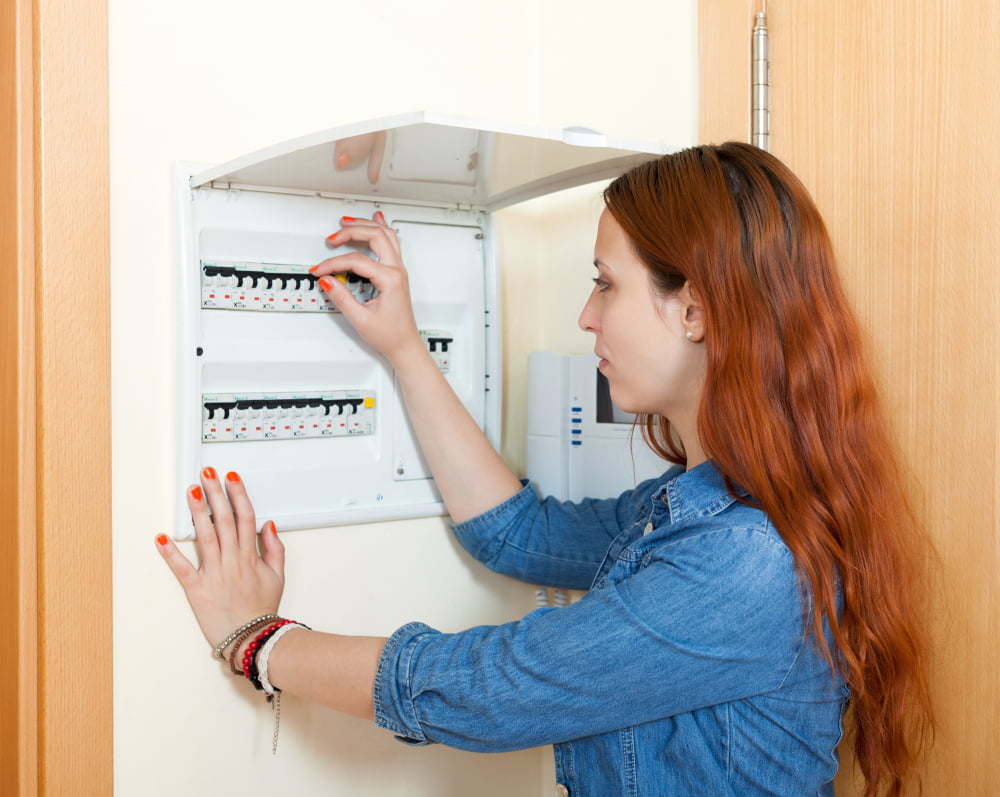
Disconnecting Power
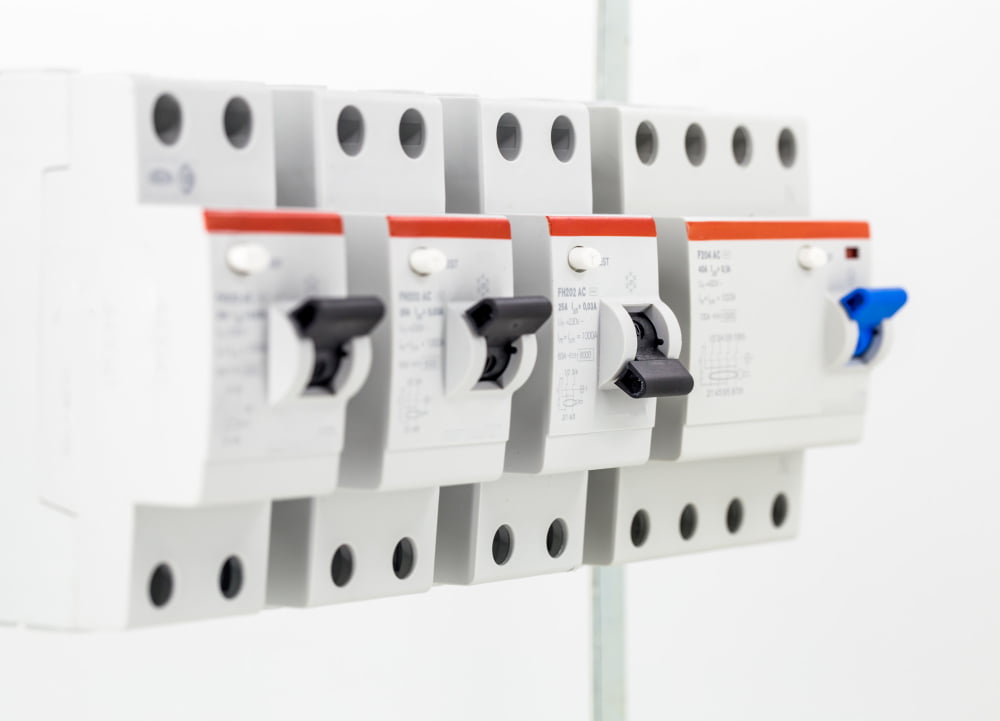
This step is crucial for your safety and prevents any electrical accidents from occurring. To do this, locate the circuit breaker that controls the power supply to your pendant light and turn it off.
If you’re unsure which circuit breaker controls the fixture, turn off all of them until you find the right one.
Once you’ve turned off the power source, use a voltage tester to ensure that there’s no electricity running through any wires connected to your pendant light. You can purchase a voltage tester at most hardware stores or online retailers.
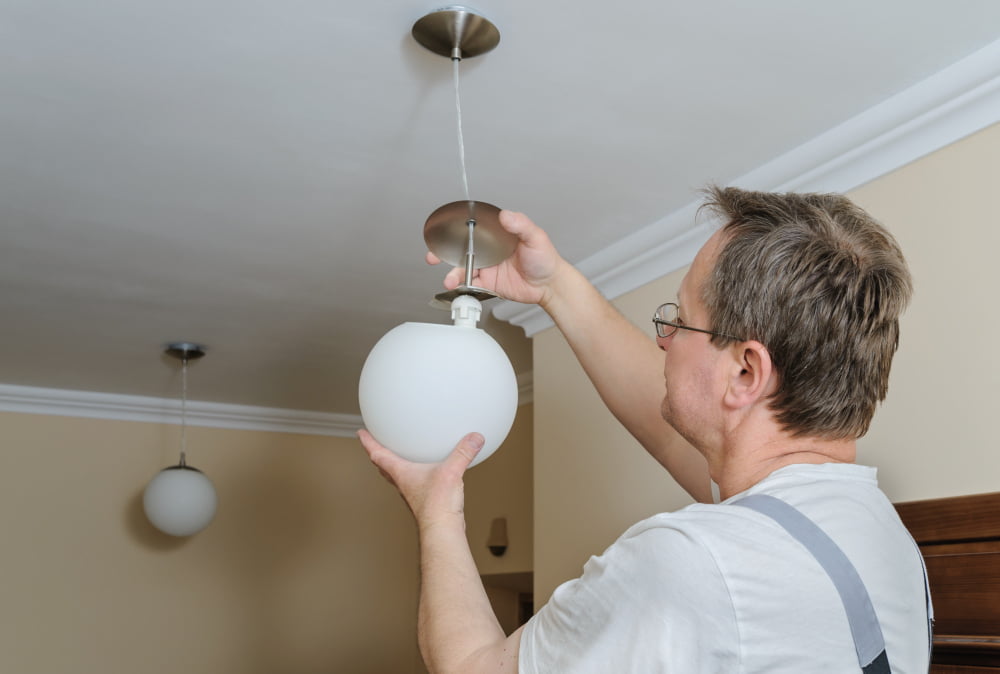
Removing Old Pendant Light
Before starting, make sure that you have turned off the power supply to avoid any electrical hazards.
Firstly, remove any decorative elements such as shades or bulbs from your existing fixture. Then unscrew and carefully lower down the canopy cover of your current pendant light fixture using a screwdriver.
Once removed, disconnect all wiring connections by untwisting wire caps or removing screws holding wires in place.
After disconnecting all wiring connections safely tuck them away so they don’t get tangled up with other fixtures while working on installing new ones later on.
Assembling New Pendant Light
Before starting, make sure that you have all the necessary tools and materials at hand. Most pendant lights come with an instruction manual that outlines how to assemble them step-by-step.
Start by laying out all of the pieces on a flat surface and identifying each part according to its label in the manual. Then follow these steps:
- Attach any mounting brackets or hardware included with your new fixture.
- Connect any wires or cables as instructed in your manual.
- Install bulbs into sockets if they are not already installed.
- Attach shades or covers as directed.
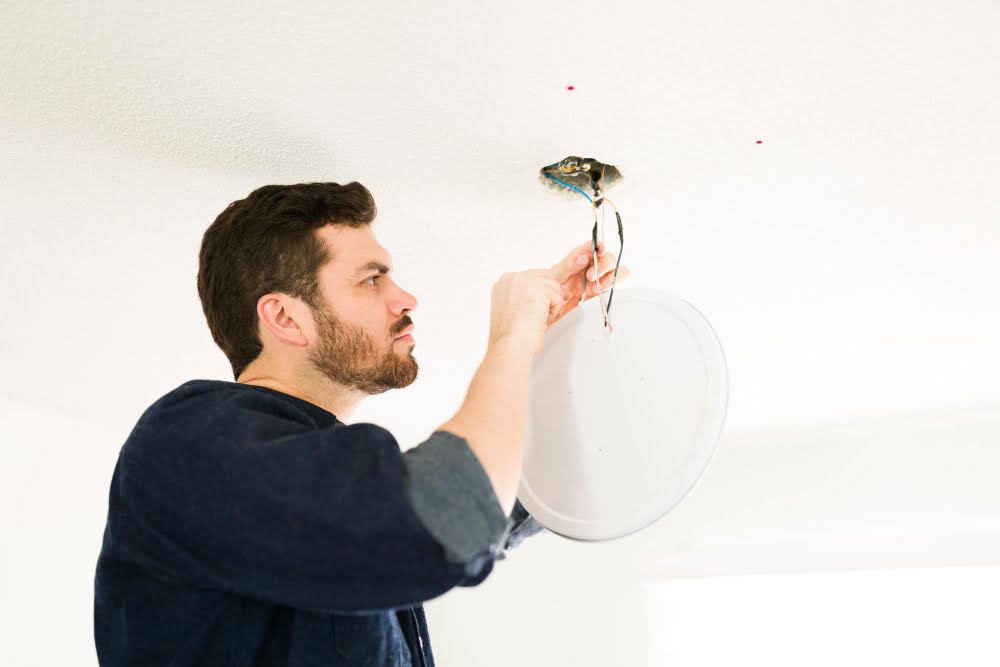
Installing New Fixture

Start by attaching any mounting hardware that came with your new pendant light to the electrical box in your ceiling. Make sure that it is securely fastened and level.
Next, carefully thread the wires from your new fixture through its canopy and attach them to their corresponding wires in the electrical box using wire nuts. Typically, black or red wires are connected together while white or gray ones are paired up as well.
If there is a ground wire present (usually green), connect this too either directly onto a screw on top of an exposed metal part of your junction box or use a grounding clip if one was provided with your fixture.
Tuck all wiring neatly into place inside of its canopy before securing it onto any mounting screws attached earlier on during installation process.
Wiring Connections
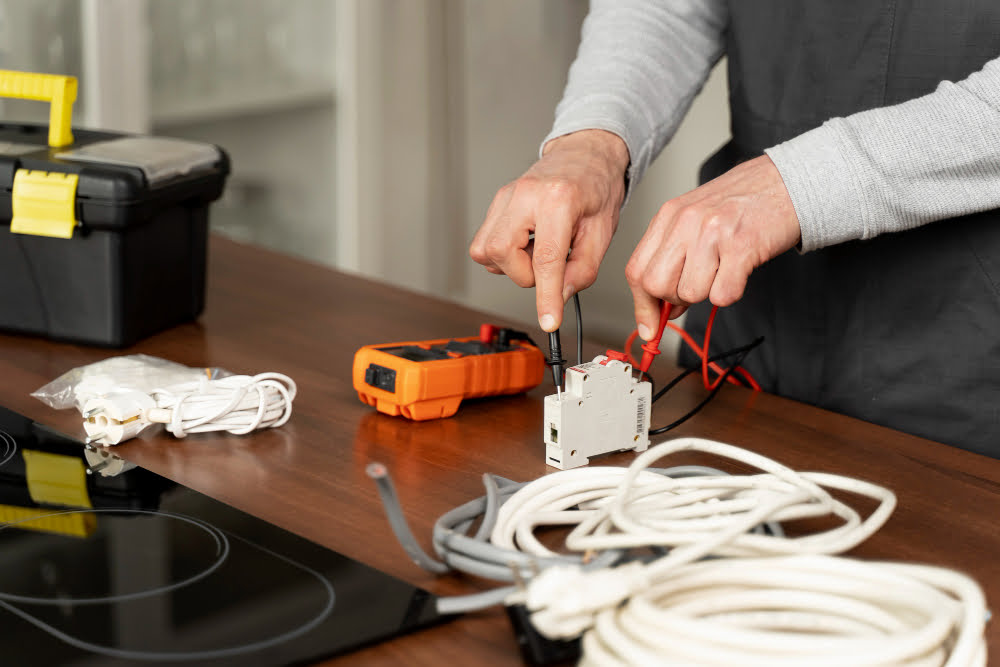
Before starting, make sure that the power is turned off at the circuit breaker or fuse box. This will ensure your safety while working with electrical connections.
Next, remove any wire connectors from both sets of wires (the ones coming out of the ceiling and those on your new fixture). Strip about ¾ inch of insulation from each wire end using a wire stripper tool.
Now it’s time to connect them together. Twist together one black (or red) fixture wire with one black (or red) ceiling wire and secure them tightly with a twist-on connector cap until no bare copper is visible.
Repeat this process for white wires and green or bare copper ground wires if present in both sets.
Tuck all connected wires into the electrical box carefully without damaging any connections before attaching backplate/ceiling canopy securely over top.
Attaching the Shade

This is the final step in giving your room a fresh new look. Before attaching the shade, make sure that all screws are tightened and secure.
To attach the shade, carefully place it over the bulb socket and align any screw holes with those on your fixture. Once aligned, insert screws through both sets of holes until they are tight enough to hold everything securely in place.
If you’re using a glass or delicate material for your pendant light’s shade, be extra careful when handling it during this process as dropping or mishandling could cause damage.
Restoring Power

Before doing so, double-check that all connections are secure and there are no exposed wires. Once you’re confident everything is in order, turn the power back on at the circuit breaker.
Test your new fixture by turning it on and off a few times to ensure that it works correctly. If everything looks good, then congratulations! You’ve successfully moved a pendant light without any issues.
Remember always to prioritize safety when working with electrical fixtures in your home. If you feel unsure about any step of this process or encounter an issue during installation or restoration of power, don’t hesitate to call a professional electrician for assistance.
Now sit back and enjoy the fresh look of your newly installed pendant light!.
Read More Like This
 15 Funny Graduation Cap Ideas to Make Your Big Day Unforgettable
 15 Unique DIY Christmas Decorations Ideas for a Festive Home
 15 Creative Science Fair Board Ideas to Amaze Your Audience
 15 Handmade Envelope Decoration Ideas for Creative Gifting
 10 DIY Gifts for the Whiskey Lover in Your Life
Recap: