Last updated on
You’ll want to explore the world of pottery tray ideas because they offer a unique way to add personal style and functionality to any space.
I’ve designed unique illustrations for these ideas. I hope you get inspired!
Dipping into the boundless beauty of pottery trays, you might stumble upon countless exquisite designs. While there are numerous popular ideas on the internet, we will add resources to the best existing ones towards the end of this piece. However, the crux of this article is to take the road less traveled and highlight some of the most novel and alluring pottery tray ideas. With a fresh perspective and unique angles, we aim to unleash a list of remarkable concepts that will take your love for pottery to the next level.
Embark on this exploration and let your creative instinct engage with these exclusive ideas.
Mosaic Clay Tray
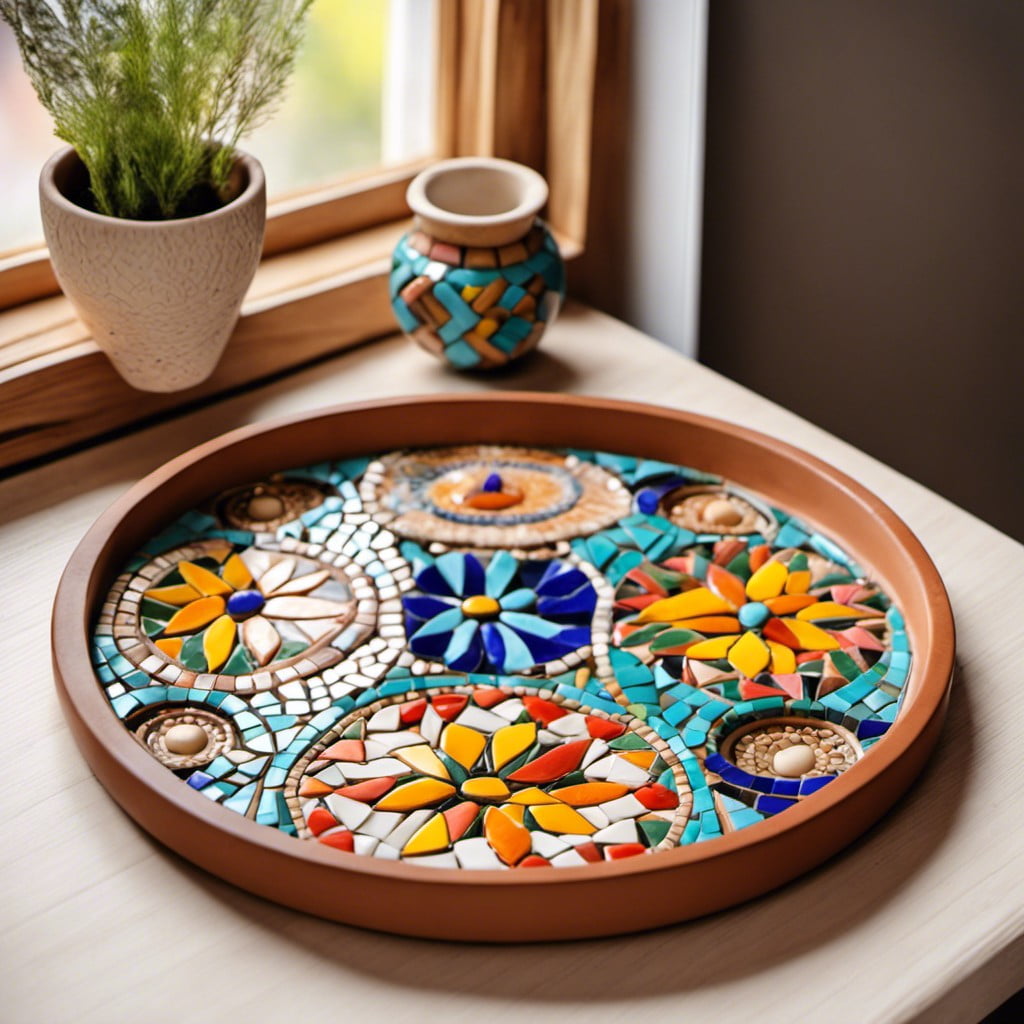
First on our exploration is the enchanting world of mosaics. This trend marries tiny pieces of clay, and sometimes glass or ceramic, to form a harmonious larger design. Key to its success is pre-planning. Sketch the design onto the clay surface before starting the mosaic application.
Keep in mind, both symmetry and random patterns can create striking results. Use differently colored or textured pieces for an aesthetically appealing result. After the composition is laid out, a sealant is applied to keep the pieces in place. It’s this union of smaller fragments into a visually alluring bigger picture that sets mosaic clay trays apart from the crowd.
Get creative and experiment with colors and patterns.
Abstract Sculpture Dish
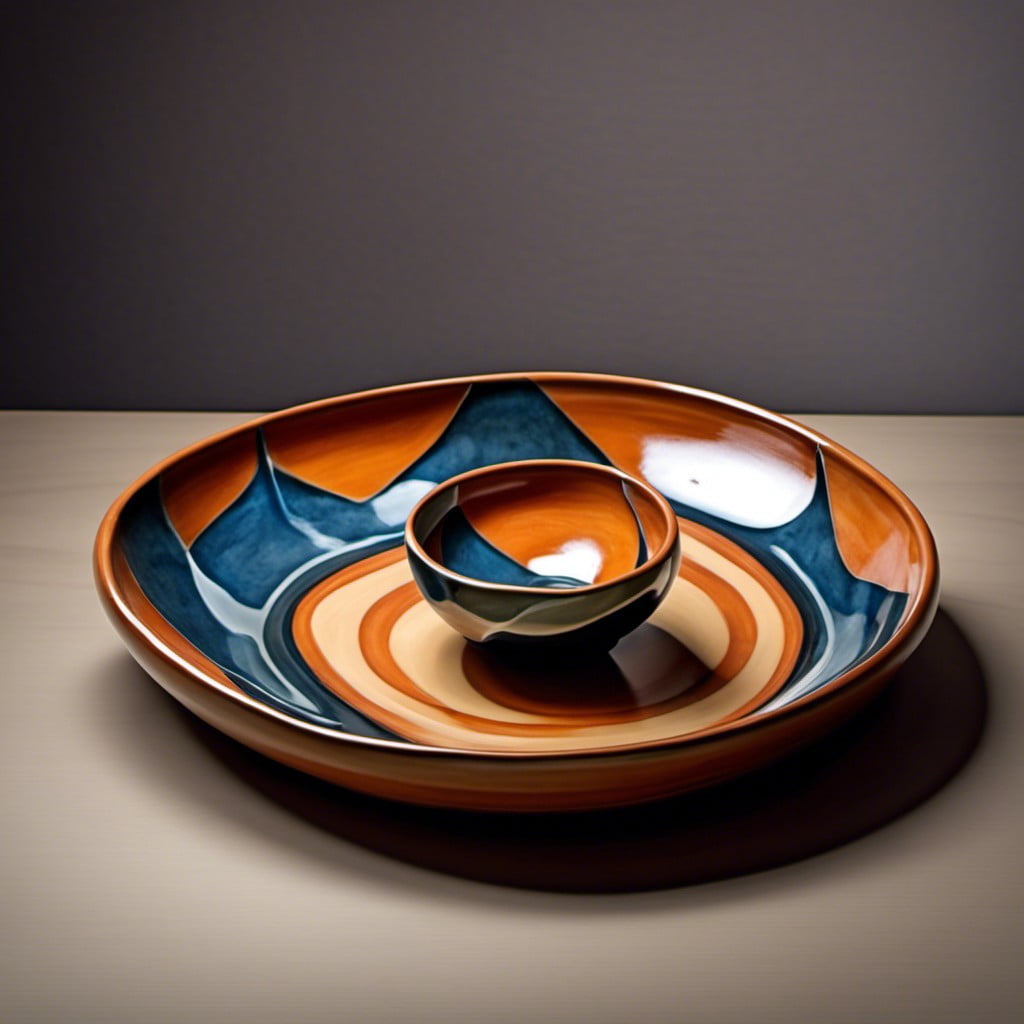
This creative dish option encourages a break from traditional patterns and symmetry, embracing the unpredictable instead. The intricate shapes formed by simply manipulating clay, combined with an array of coloring options, result in an eye-catching centerpiece for your home.
Creating it involves the following steps:
- Begin by weaving raw, earthy clay into shapes of your choice. An indescribable charm lies in unique, organic forms.
- Opt for a combination of matte and glossy finishes. This interplay of textures enhances the abstract theme.
- Consider utilizing contrasting shades or a monochrome palette. Here, the role colors play is to complement the shape, not overshadow it.
- Finally, leave some parts unfinished or less refined. Part of the appeal with abstract art lies in the juxtaposition of polished and raw areas, providing dimension and depth.
The Abstract Sculpture Dish serves as an artistic reflection of your originality and individuality, paving the way for a captivating conversation piece in your home.
Zen-Inspired Tray
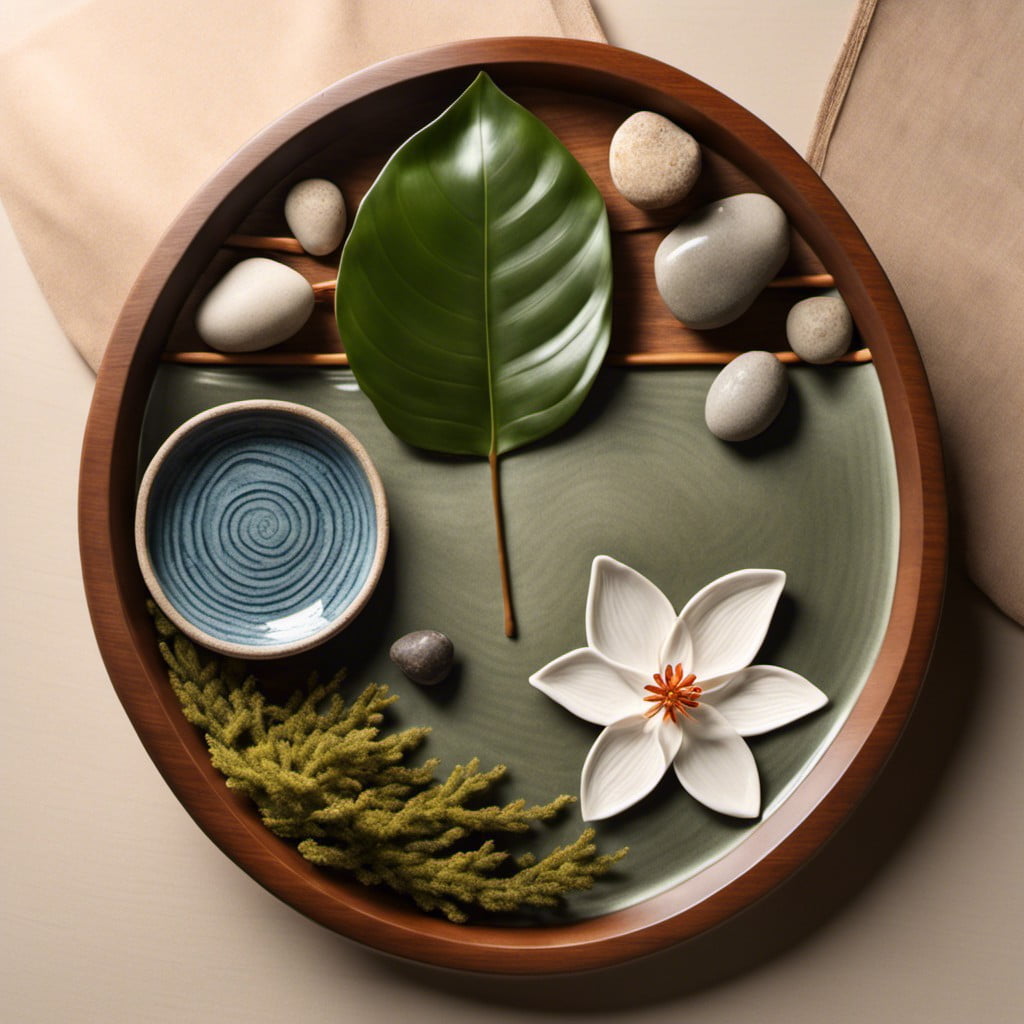
Drawing from serene aesthetics and simplicity, this type of tray radiates tranquility. Here’s how to create one:
1. Select a soft clay, molding it into a round or square shape depending on personal preference.
2. Incorporate Zen elements such as natural imprints; leaves or thin twigs can create a minimalist, organic touch.
3. Keep the palette neutral. Consider whites, beige, soft greys or pastel blues, embodying the calm of Zen environment.
4. Simplification is key. Avoid adding too many elements or vibrant colors.
5. After crafting, ensure to bake the tray as per the clay-type instructions.
6. Once cooled, add a clear sealant to enhance durability and preserve the surface imprints.
With each use, this tray should serve as a humble reminder to embrace simplicity and peace in daily life.
Nature Walk Tray
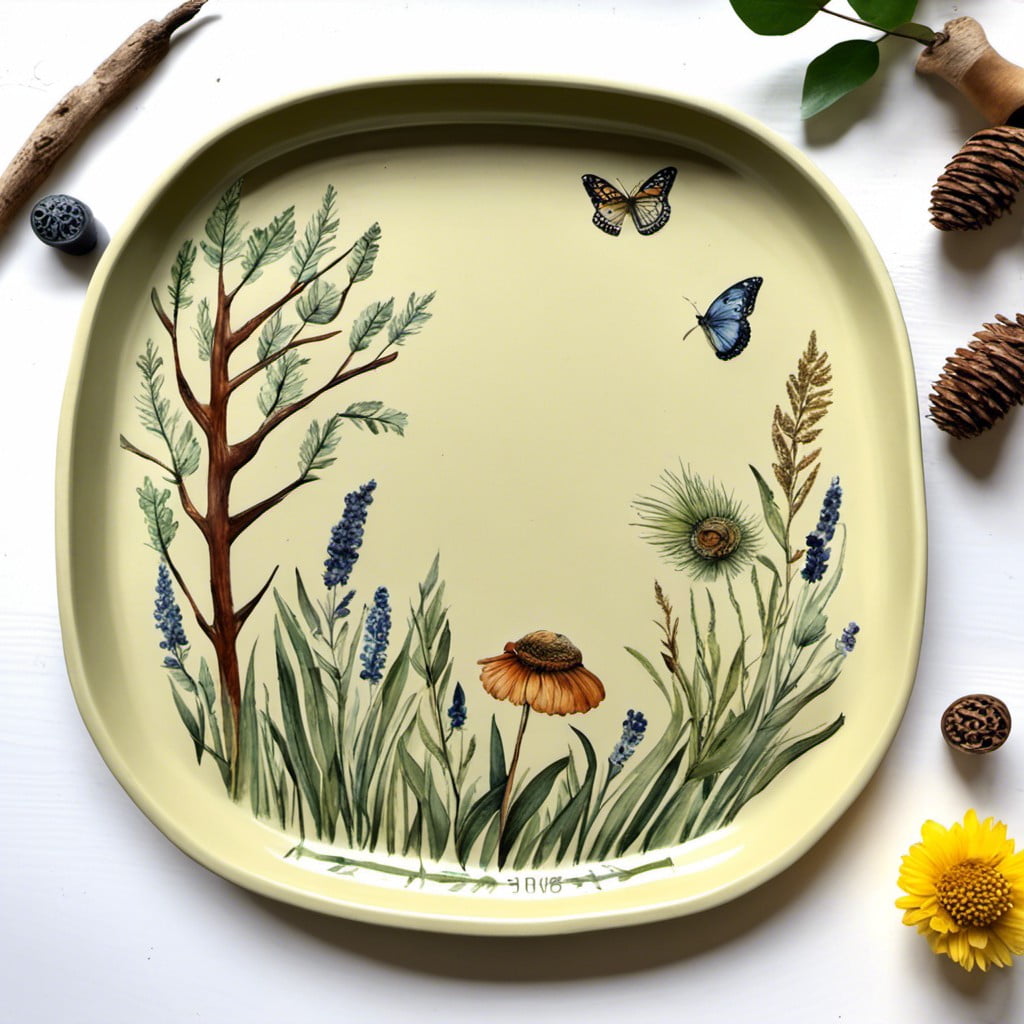
Creating this tray begins with a simple walk outdoors to gather materials. Find items such as leaves, pinecones, seashells, pebbles, or other natural objects that have appealing textures or contours.
Once the clay is rolled out to your desired tray size, these objects can be pressed into the surface to leave an imprint. Be creative with the arrangement of your natural elements — mimic the randomness of nature or arrange them in an intentional pattern.
After baking, a simple glaze can enhance these impressions, adding depth and shine. The result is a tray that’s not only practical but also a unique piece of natural art for your home.
Footprint Keepsake Tray
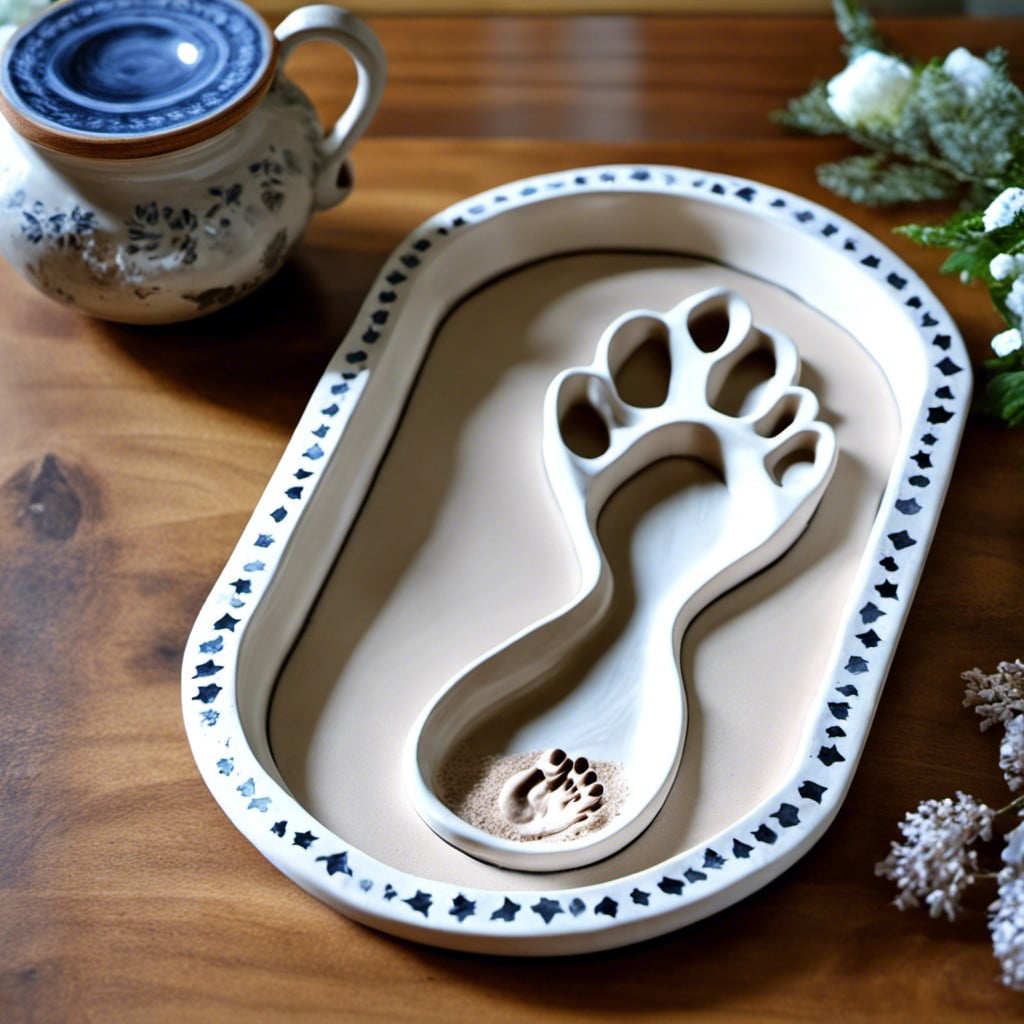
This DIY endeavor requires minimal tools: a chunk of clay and willing family members (preferably small ones, as their footprints create the most adorable results). By creating impressions of feet into the pottery, you instantly transform a basic tray into a piece filled with sweet nostalgia.
Step 1: Flatten a piece of clay that’s large enough to accommodate the footprints.
Step 2: Guide your little one to make a footprint impression into the clay.
Step 3: Trim off excess clay, clean up the edges, and let it dry.
Step 4: Once dry, you can paint it and seal it with a clear coat for a shiny finish.
The end result will be a keepsake tray that you can use to hold keys, coins, or other small items. It’s a heartfelt masterpiece that combines practical use and cherished memories into one.
Clay Fruit Basket

Creating a Clay Fruit Basket starts by shaping a flat clay slab into the form of a basket. For a touch of authenticity, consider adding details such as woven patterns using clay carving tools.
Fruits can be sculpted separately, using different clay colors for realism. Once the individual fruit pieces and basket are dry, they should be carefully joined using clay slip, a liquid mixture of clay and water that acts as a “glue.”
Finally, the entire creation is baked in a pottery kiln to solidify. This project can be customized to include your favorite fruits or arranged in a still life of your design. With patience, the end product is a beautifully crafted clay fruit basket that brings a bit of nature into your home.
Asymmetrical Edge Tray
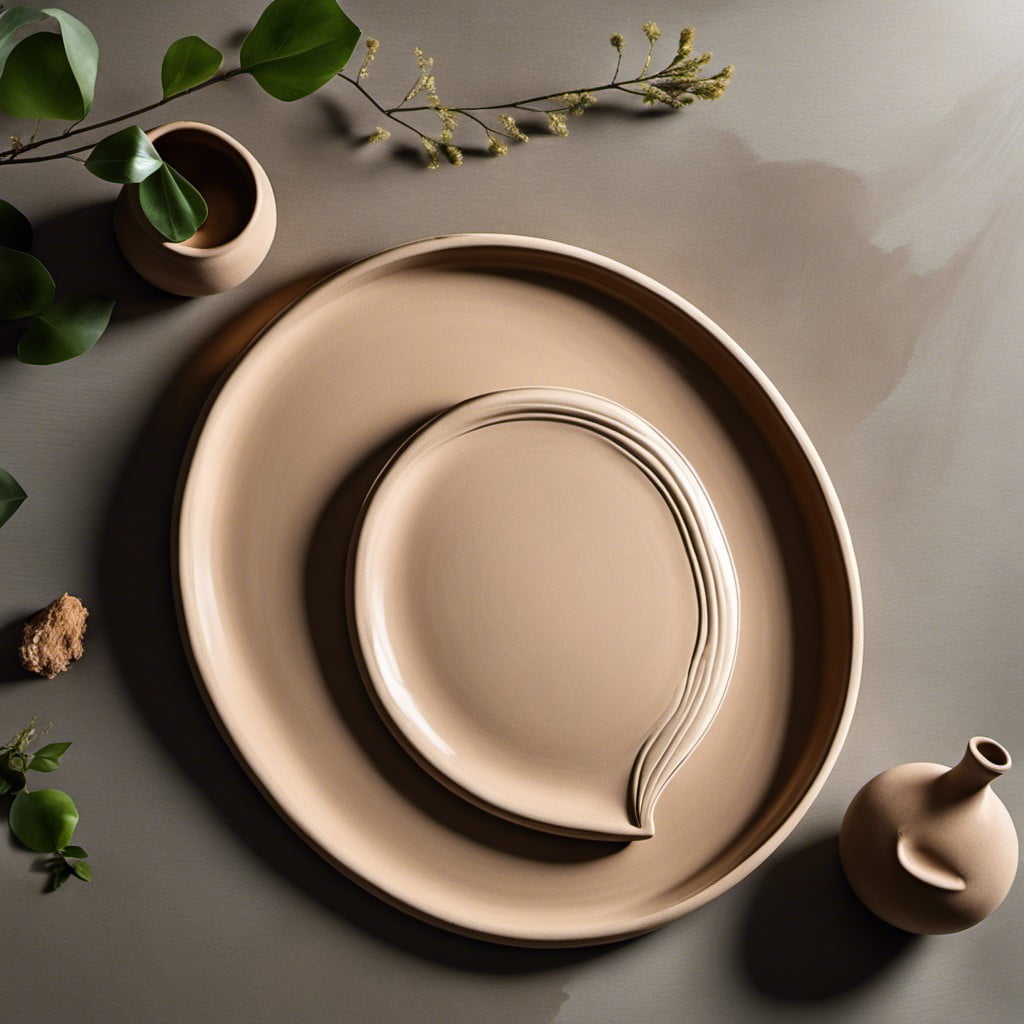
This unique style showcases the beauty of irregularity. Drawing inspiration from the Japanese concept of wabi-sabi, it embraces the imperfections in handmade creations.
Here’s how you can create this distinct asymmetrical tray:
- Create a basic flat tray shape with clay.
- For an imperfect edge, use your hands to distort the evenness intentionally.
- As these trays are meant to be functional, make sure to keep the edges high enough to hold objects.
- When it comes to glazing, opt for earthy, muted tones to maintain the rustic appeal.
- Kiln fire the tray as per clay package instructions.
- Remember, there’s no ‘wrong’ in asymmetry, so have fun with your design.
Creating an asymmetrical edge tray isn’t just about crafting a piece of home decor, it’s a celebration of individuality and uniqueness!
Terrazzo Style Tray
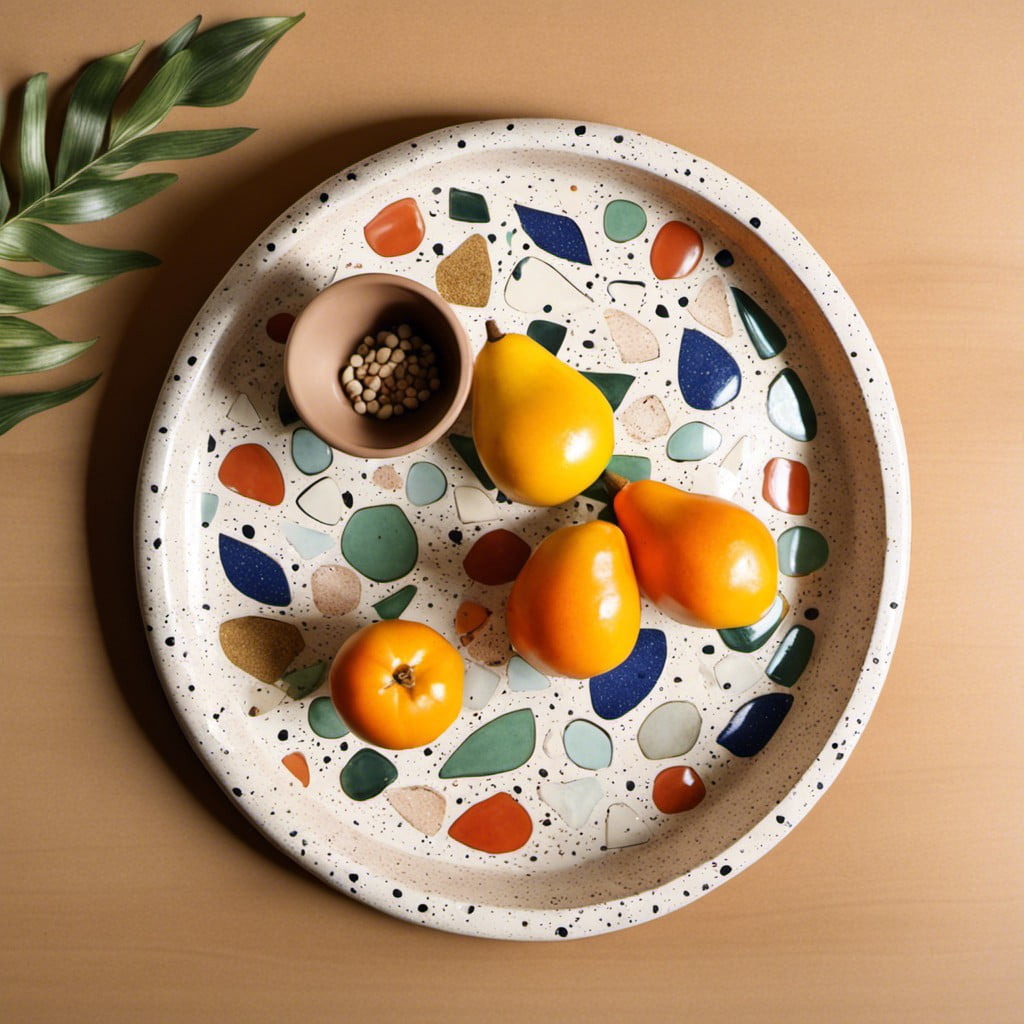
Drawing inspiration from Italian aesthetics, Terrazzo style trays offer a combination of elegance and playfulness. The unique selling point? Tiny, irregular, and multi-colored inclusions embedded into base material – often clay or ceramic. This simulates the look of traditional terrazzo, a composite material widely used for flooring and wall treatments.
1. Use a variety of colored clays: The colorful tiny specks are the heart of this theme. Go for clays in a range of colors, often in contrast with the base color, to create a vivid display.
2. Embrace irregularity: Unlike other themes where uniformity is key, Terrazzo style embraces irregular shapes and sizes. Break the colored clay into tiny irregular pieces to simulate the traditional terrazzo effect.
3. Create a smooth finish: Despite the randomness, the tray surface should be smooth. Flatten the pieces to the same level after embedding them in the base clay.
4. Opt for indirect lightning: To accentuate the colors, place the tray under indirect light. This gives it a subtle glow and brings the colors to life.
5. Pair with minimalist decor: Given its vibrant nature, the Terrazzo tray works best with minimalist, monochrome decor. This allows the tray to be the focal point.
Perfect for adding a spontaneous burst of color to your household, the Terrazzo style tray is a bold statement of creativity and tasteful chaos.
Textured Play-dough Tray
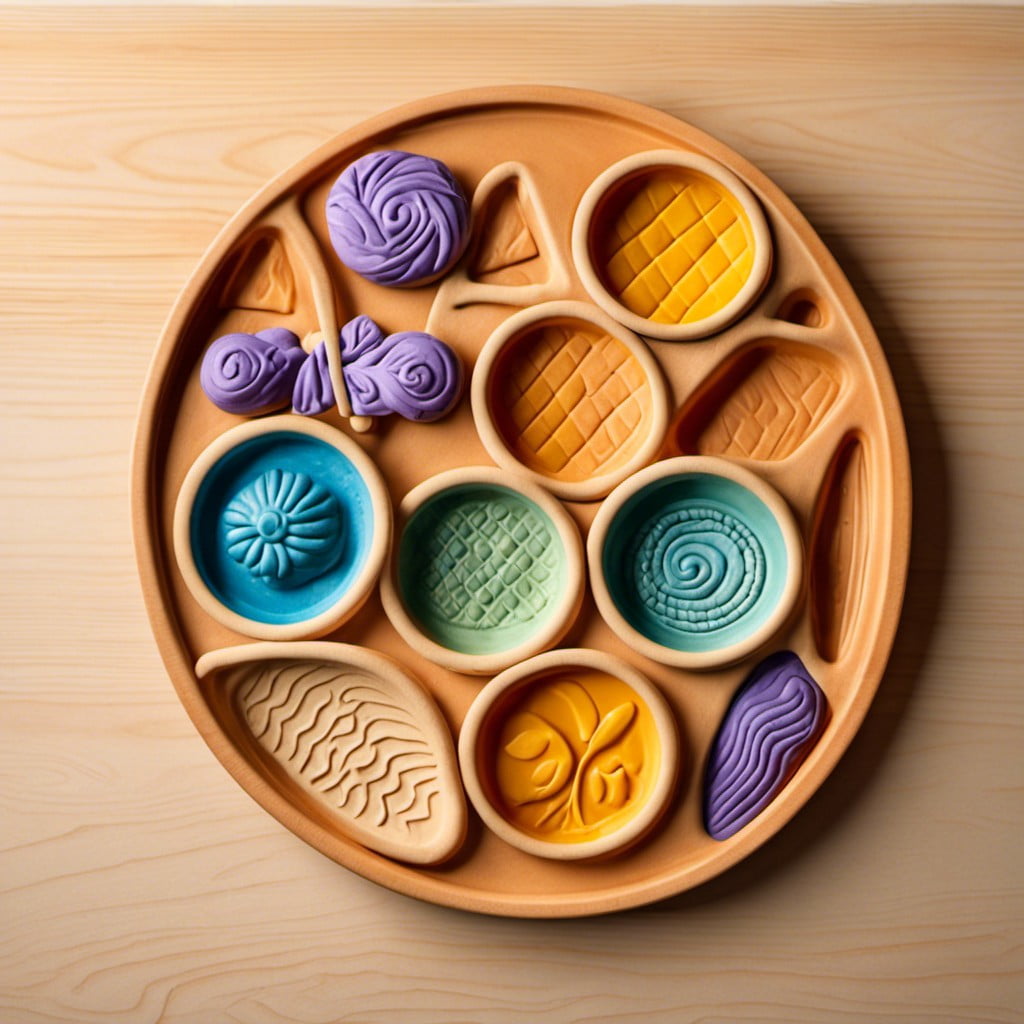
Crafting a textured play-dough tray unveils a world of creative possibilities. By simply using various objects around your home, such as forks, coins, or lace, you can create unique and striking patterns on the surface of your clay.
Start by rolling out a clay sheet for your base. Choose your desired objects and press them firmly but gently into the clay to leave an imprint. Remember to keep sufficient space between each pressing for an elegant, uncluttered look. The choice is ultimately yours–random patterns can be just as beautiful.
After your desired texture has been achieved, shape the tray by placing the clay in your chosen mold. Gentle, even pressure should be applied to avoid altering your patterns. Bake it in the oven as per the clay’s instructions, and voila! Your very own texturized play-dough tray.
This hands-on project can be exciting for both kids and adults. Experimenting with patterns and textures, you can artistically mould a piece that perfectly reflects your unique style. It’s a versatile craft that adds a personal touch to your home decor and makes thoughtful, personalized gifts for loved ones.
Cultural Heritage Tray
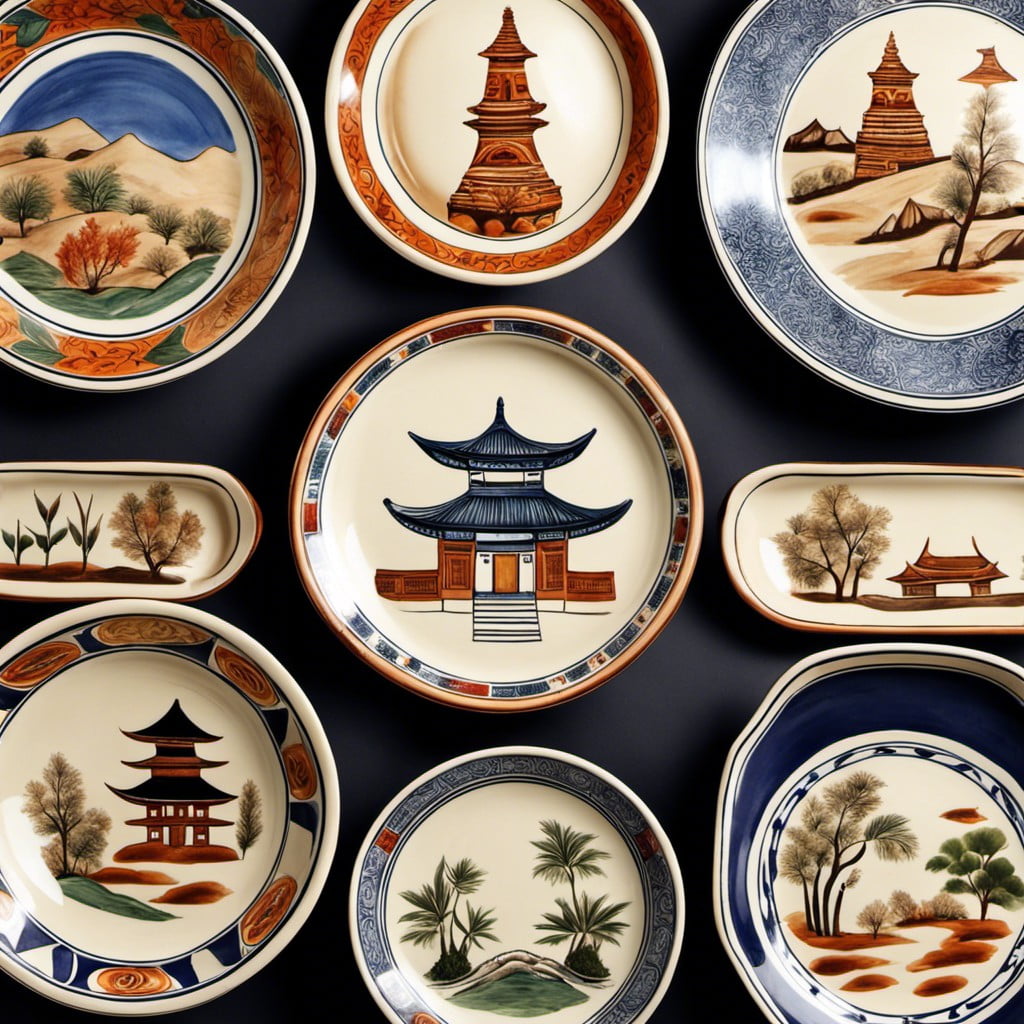
Celebrating your roots through art can be a fulfilling venture. A Cultural Heritage Tray offers the perfect canvas to depict tradition. You can utilize clay to recreate distinct motifs, indigenous patterns, or ancestral symbols, infusing a personal touch. The end result is not only a functionally aesthetic home décor item but also a work of art promoting cultural heritage.
Materials needed include clay, a tray-shaping tool, a fine brush for intricate detailing, and kiln for firing.
It’s important to stay authentic to the chosen culture’s artistic language. Research is key to understand color schemes, shapes, and details prevalent in the society’s art.
Each piece of clay must be diligently carved and arranged to bring life to the envisioned symbols and patterns.
Post sculpture, the tray needs to be left to dry, before a session in the kiln. After cooling, it’s ready for painting. You can use bold hues to make the designs stand out, or softer tones for a vintage appeal.
Remember, every cultural design holds significance. This tray can spark conversations, enlighten guests about your heritage, and stand as a testament to the beauty of your lineage.
Ombre Glazed Dish

Starting with a light base color, one can achieve the gradient, or ombre effect, through successive layers of different hues, each darker than the previous.
This technique can add depth and character to the dish, setting it apart from the typical single-color pottery.
As pottery involves firing, be mindful about the glaze’s heat tolerance.
The technique demands precision, not in the strict sense though – a little imperfection may even add to the charm.
Ombre Glazed dishes can serve decorative or practical purposes, from holding keys and coins to being a centerpiece on a dining room table.
Clay Lace Tray
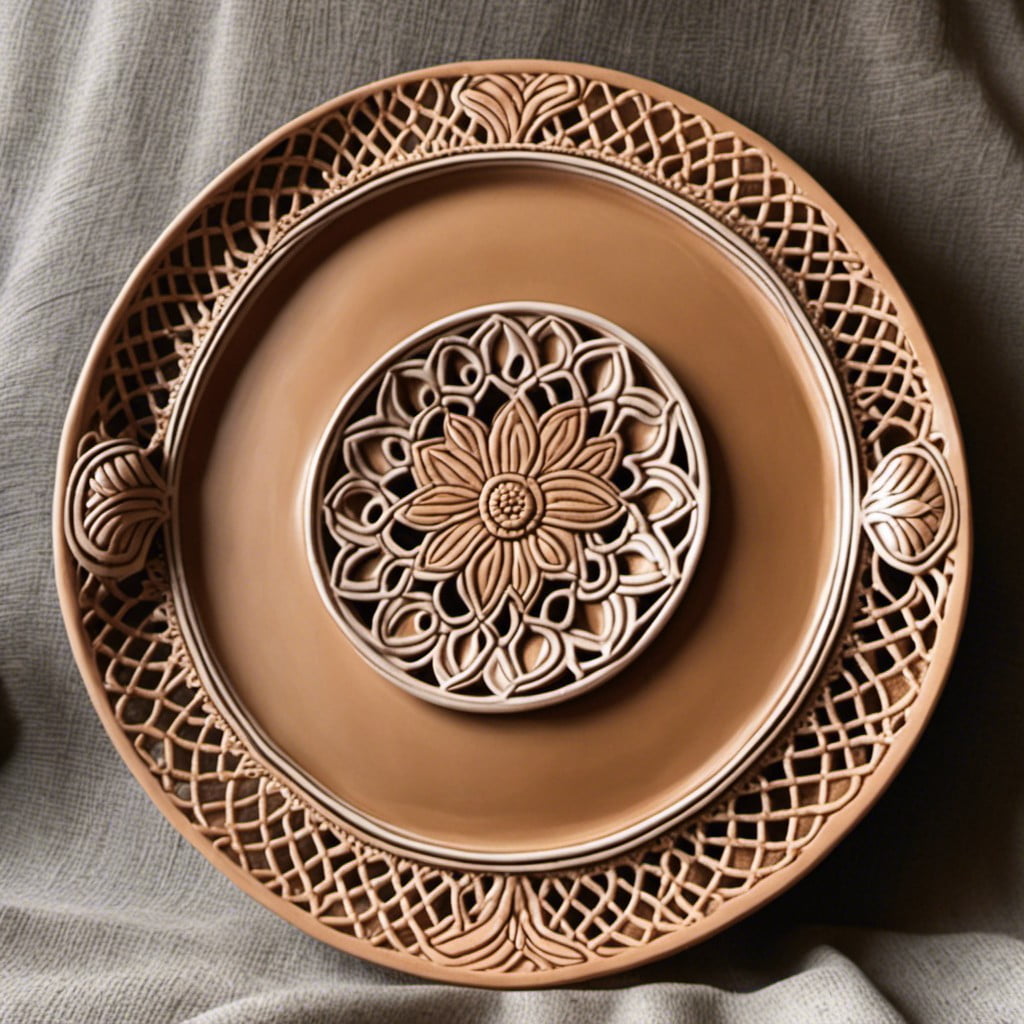
Delicate in appearance, yet durable in function, this unique piece beautifully marries the elegant look of lace with the sturdy nature of pottery.
Creation begins by rolling out the clay to a uniform thickness, laying a piece of lace over the clay and using a rolling pin to create an imprint of the lace pattern directly on the tray.
Once the pattern is firmly etched into the clay, the edges are trimmed to a preferred shape, usually either circular or rectangular.
After drying, the tray is carefully glazed – often, a white or light-colored glaze is used to enhance the lace pattern – then fired in a kiln to make it resistant to chipping or breakage.
This type of tray serves as a charming holder for jewelry, keys, or other small items, or simply as a decorative piece on a table or shelf.
Lotus Blossom Dish
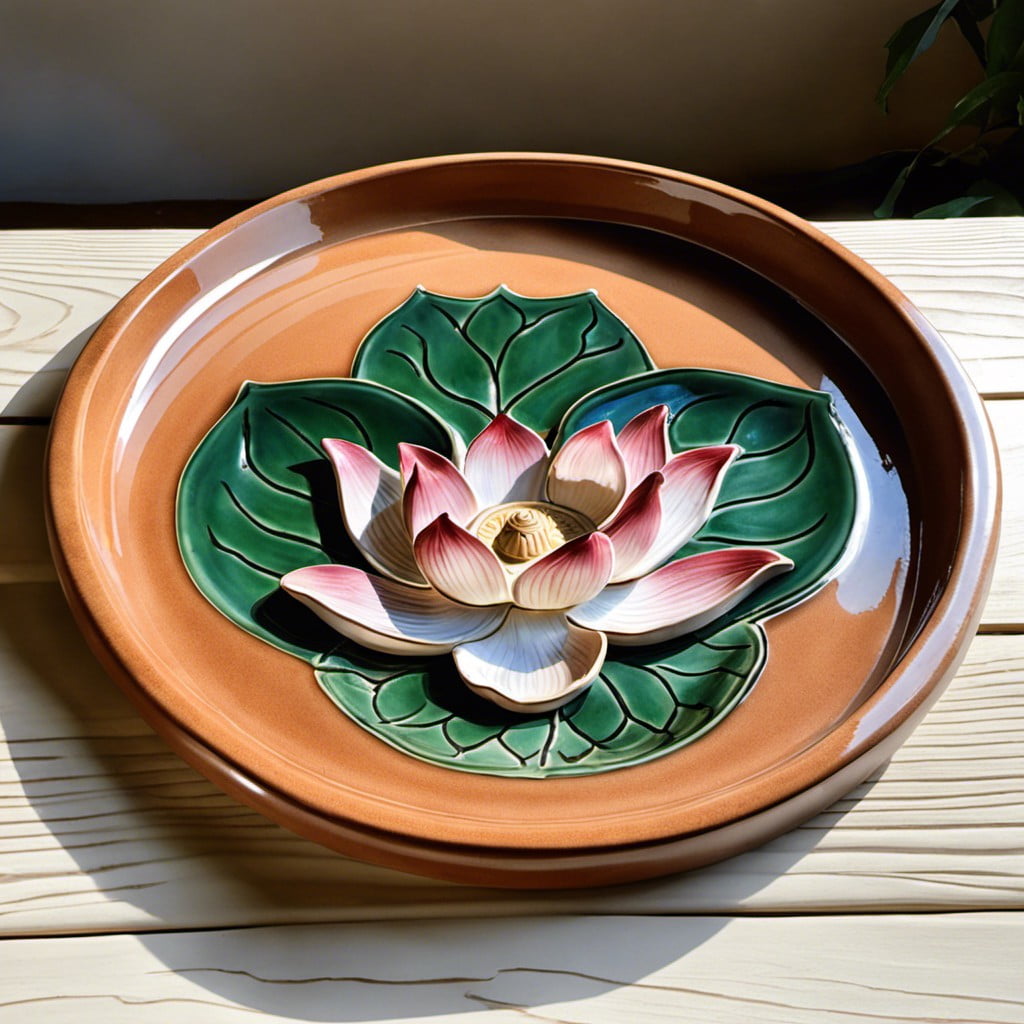
Guided by the allure of Asian aesthetics, this dish design captures the enchanting beauty of the lotus blossom. Crafting your own variation involves meticulous technique and flair.
1. Molding: Shape your clay in the form of a lotus flower. Individual petals, when layered correctly, lend a lifelike effect.
2. Detailing: Texturize the clay petals, to mimic the unique characteristics present on a lotus leaf.
3. Glazing: Consider a dual tone glaze, often pink and cream, to reflect the natural hues of a lotus.
4. Firing: Clay thickness is important. Ensure it’s neither too thick nor thin for cracks during firing.
Remember to exercise patience and precision when creating this intricate pattern. The final product, a beautifully crafted homage to nature, is worth the effort.
Pop Art Tray
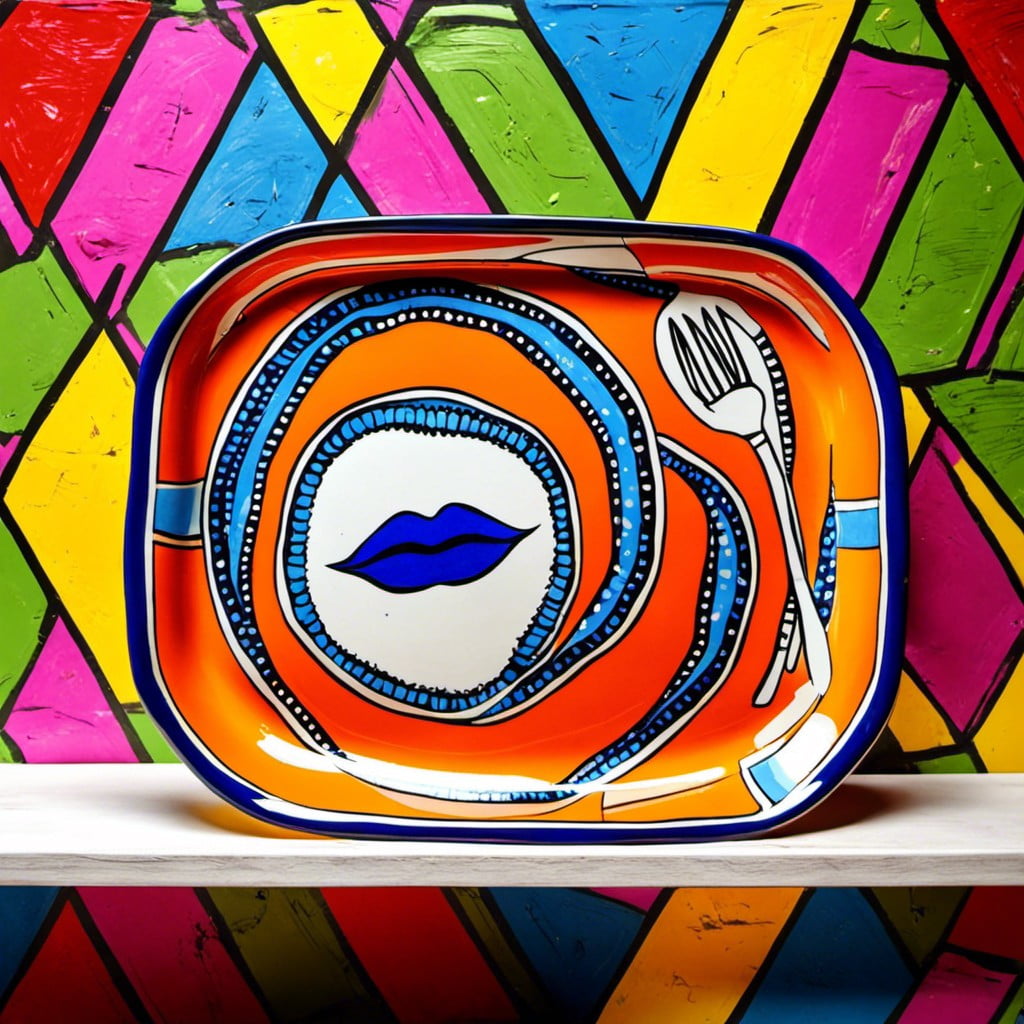
In creating a pop art tray, inspiration descends from bold, vibrant imagery typical of 1950s popular culture. Opt for eye-catching colors and strong geometric shapes, excellently translated into pottery; it’s all about the dramatic visual statement.
Key Points:
- Use Bright Colors: Vibrant hues are core to pop art’s aesthetic appeal. Red, yellow, and blue exhibit a distinct dynamic punch.
- Incorporate Pop-Culture Symbols: Symbols or logos that capture mass culture at its ironic best – such as comic strips, advertising imagery, or even celebrity images – can be incorporated into the tray design.
- Try Bold Patterns: Simple, strong geometric patterns mimic pop art’s affinity for commercial printing techniques. Polka dots, stripes, and checkerboard patterns lend themselves well.
- Experiment with Typography: Songs, catchphrases, or slogans could be used alongside visuals for a more thought-provoking tray.
- Utilize Decoupage Techniques: Transferring printed images onto clay before firing could add an extra layer of interest.
Remember, in pop art, creativity needs no bounds!
Pottery Night Sky Tray
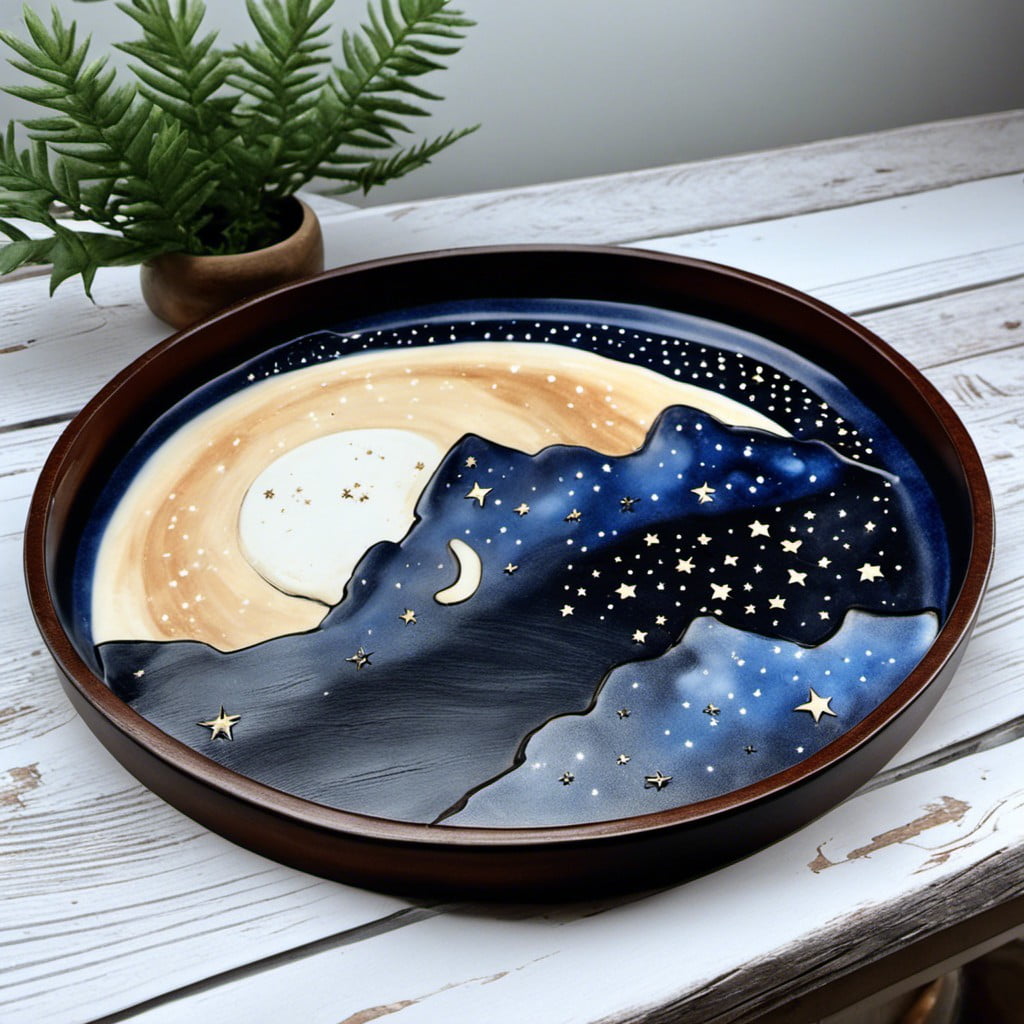
Creating this masterpiece involves a meticulous process of incorporating different shades of blue clay to represent the night sky, with tiny specks of white for stars. The darker colors should be rolled thin and laid first on the tray. Lighter hues then follow, creating a gradient effect.
Next, countless tiny white dots are delicately etched onto the darkened sky representing stars. A clever technique is to use a toothpick or thin, pointed sculpting tool to achieve the desired effect.
For added charm, sculpt miniature clay planets or a crescent moon. Finally, bake the clay as per product instructions, applying a clear glaze to bring out the colors and give the pottery its shiny, finished look.
Always remember, patience is key – your night sky won’t materialize in an instant. It’s a slow process, but each careful step brings you closer to creating a beautifully celestial pottery tray.
Heart-Shaped Jewelry Dish
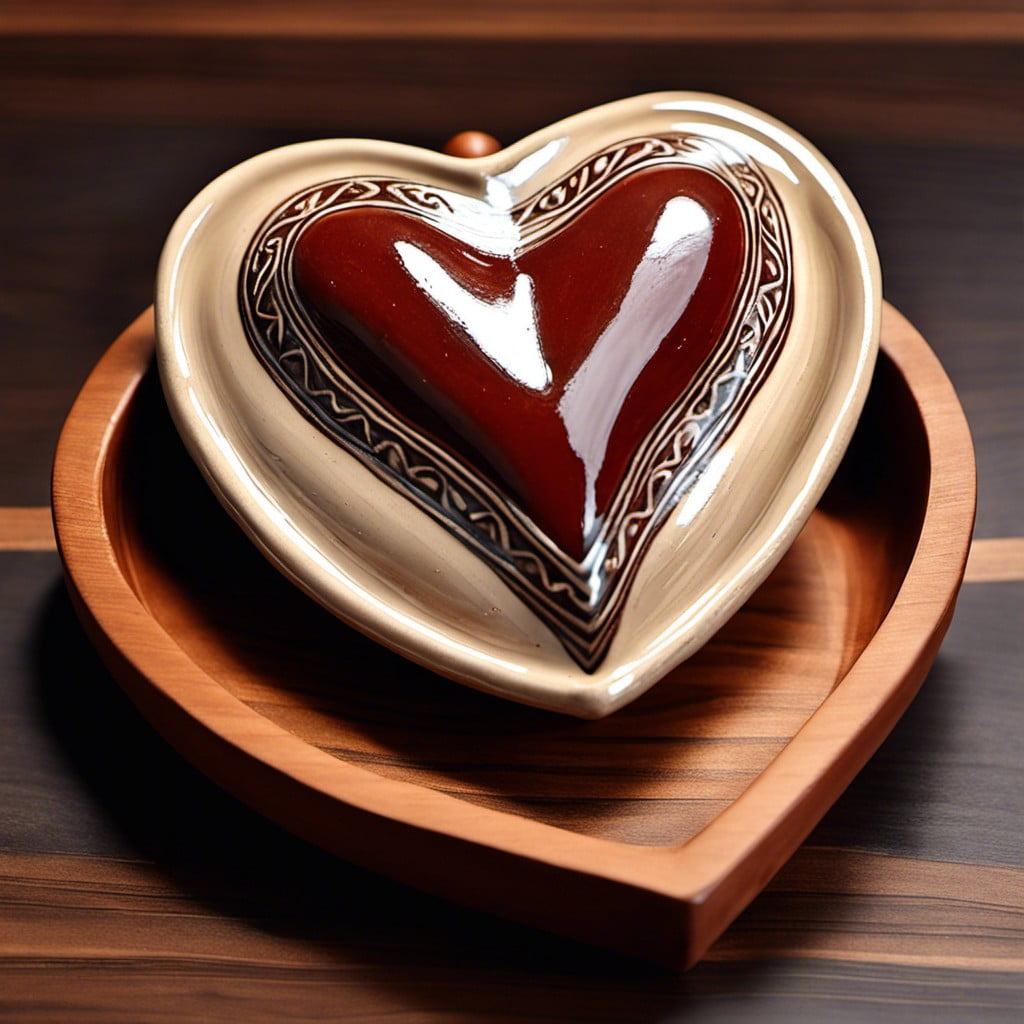
The creation of this dish commences with the molding of clay into a heart shape – a simple yet elegant design perfect for storing your favorite rings, bracelets, or earrings. Employ the slab technique: roll out your clay evenly, cut out the heart shape, and smooth the edges with a rib tool for the refined shape.
The beauty of this project lies in its openness to customization. Choose to add names, initials, or meaningful symbols, using clay tools to carve these in before the first kiln firing.
When it comes to glazing, colors can range from delicate pastel hues for a soft look, to bold, dramatic shades for a statement piece. Clear glaze, on the other hand, enhances the earthy beauty of the raw clay. After the glaze firing, this pottery tray culminates in a functional, yet personal item for use or gift-giving.
Remember to take precautions when using pottery tools and kiln; safety first always! Pointer: the slab construction technique means less clay required and quicker drying times. This idea combines creativity, resourcefulness and practicality in one.
Monogram Clay Dishes
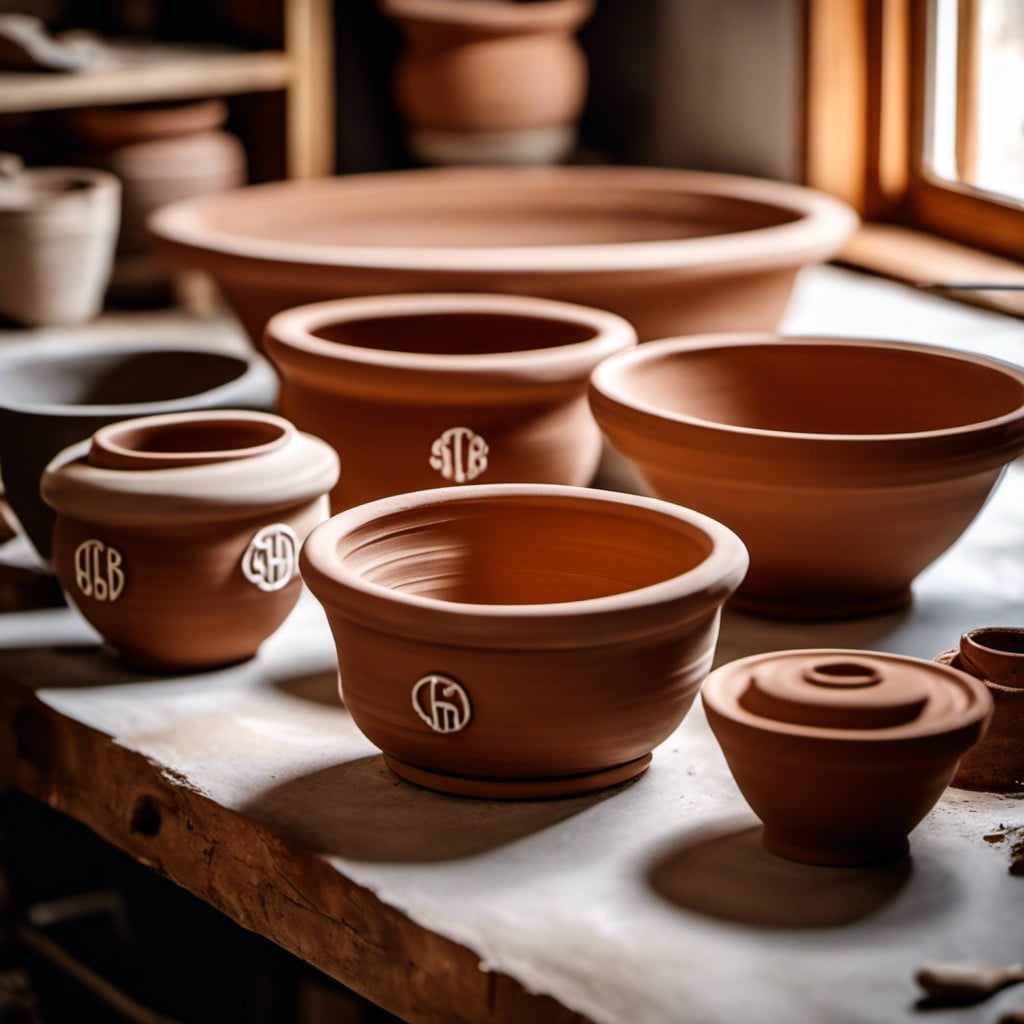
Creating these personalized vessels starts with rolling out a suitable amount of clay, then cutting into your desired shape. A round dish does exceptionally well in holding jewelry or small office supplies. Once you’ve achieved the ideal shape, emboss your initial using a rubber stamp. Leave it to dry overnight to ensure a solid structure.
After drying, the key step is firing it in a kiln. Take note, once the clay heats up, it undergoes a transformation, changing into a ceramic material. Post-firing, you can now move on to painting. Choosing a color that complements your space adds a nice touch.
The beauty of this project is in the flexibility. Stylize to your heart’s content! Remember, the final design should not only reflect your personal taste but also coordinate with your existing home decor. Lastly, don’t forget to seal your creation with a coat of clear varnish for added shine and longevity.
Whether done single-handedly or with family, making these monogram clay dishes offers a blend of personalization, functionality, and artistic expression. So go on, explore your creativity and craft something uniquely yours!
Pixel Art Tray
In creating a pixel art tray, compressing intricate graphics to minute squares aids in generating a captivating design, reminiscent of the retro art style. This method consists of the following key points:
- Scale down: To start, it’s all about minuscule squares. Think tiny, even the smallest detailing should be expressed through these petite pixels.
- Colors: Variety is your friend here. Take full advantage of the color spectrum since each pixel can play a significant role in compositional clarity.
- Strategic placement: Every little square is part of a bigger image. Detail placement and color distribution will enhance the overall visual effectiveness of your tray.
- Consistency: Maintaining pixel dimensions uniformly ensures the design coherence.
- Design Complexity: Be it a simple geometric pattern or a complex image, achieving it pixel by pixel gives the final output its unique charm.
Through patience and precision, this technique transforms ordinary trays into pop-culture personified functional pieces that bear nostalgic value.
Modern Geometry Inspired Tray
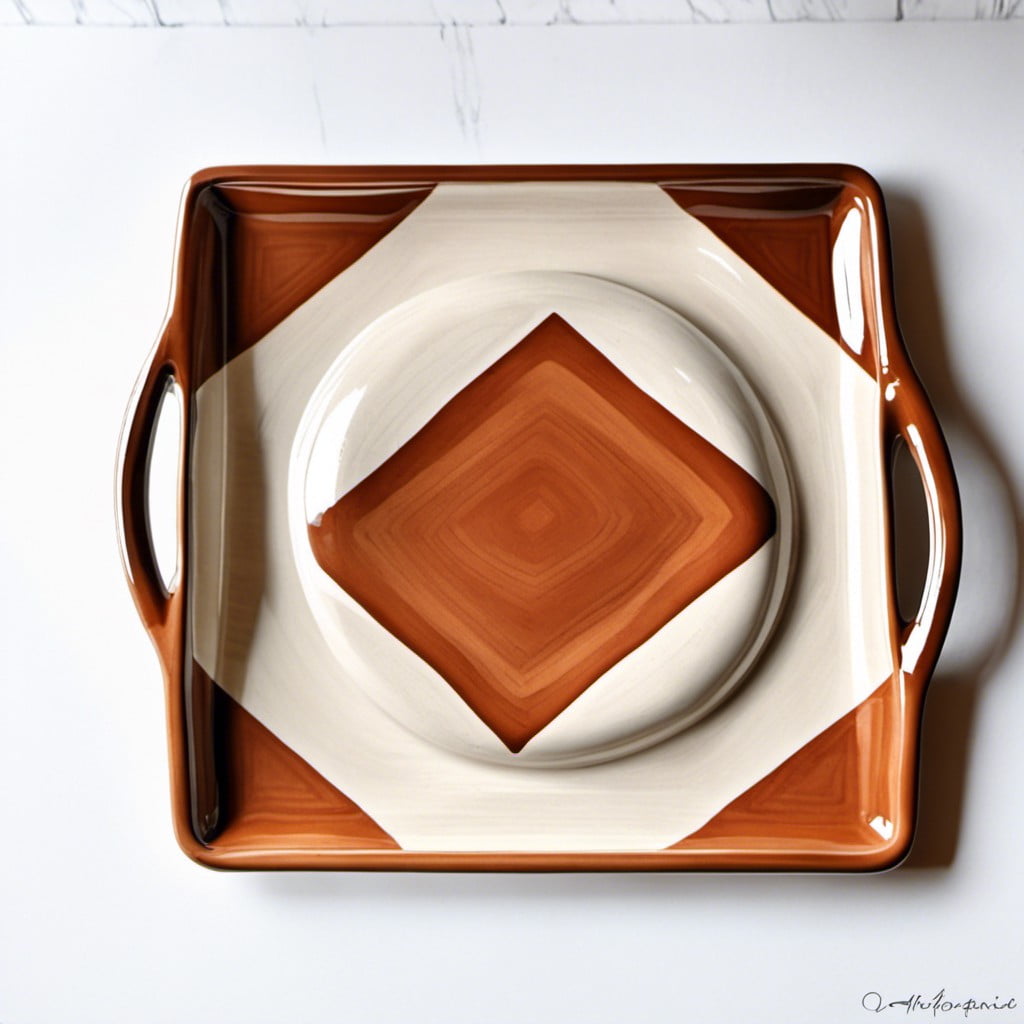
With bold lines and sharp angles, this design draws inspiration from the stark yet harmonious aspects of geometric patterns. There’s an exciting mix of depth and flatness, thanks to a clever use of three-dimensional geometric forms. This project allows you to explore numerous shapes such as rectangles, squares, hexagons, or any polygon of choice.
Firstly, draft your desired pattern on the clay slab. Precision is key here, so ensure that your corners are sharp and your lines straight for a clean, contemporary look. A ruler or a stencil can be quite handy for this stage.
Secondly, you will be carving out these shapes to create a recessed pattern. This gives your tray a tactile and visually enticing attribute. Be gentle whilst carving, taking care not to cut through the base of the tray.
Lastly, always remember to smooth out any rough edges with a sponge or a smooth rock. This ensures a refined finish. Your choice of glaze can add another dimension to the pattern. A translucent or a gloss glaze can enhance the depth perception, while a matte finish brings out the texture. Have some fun experimenting!
Ultimately, the Modern Geometry Inspired Tray allows you to blend creativity with structural dynamism, resulting in an aesthetically pleasing piece of functional pottery.
Seashell Embossed Dish
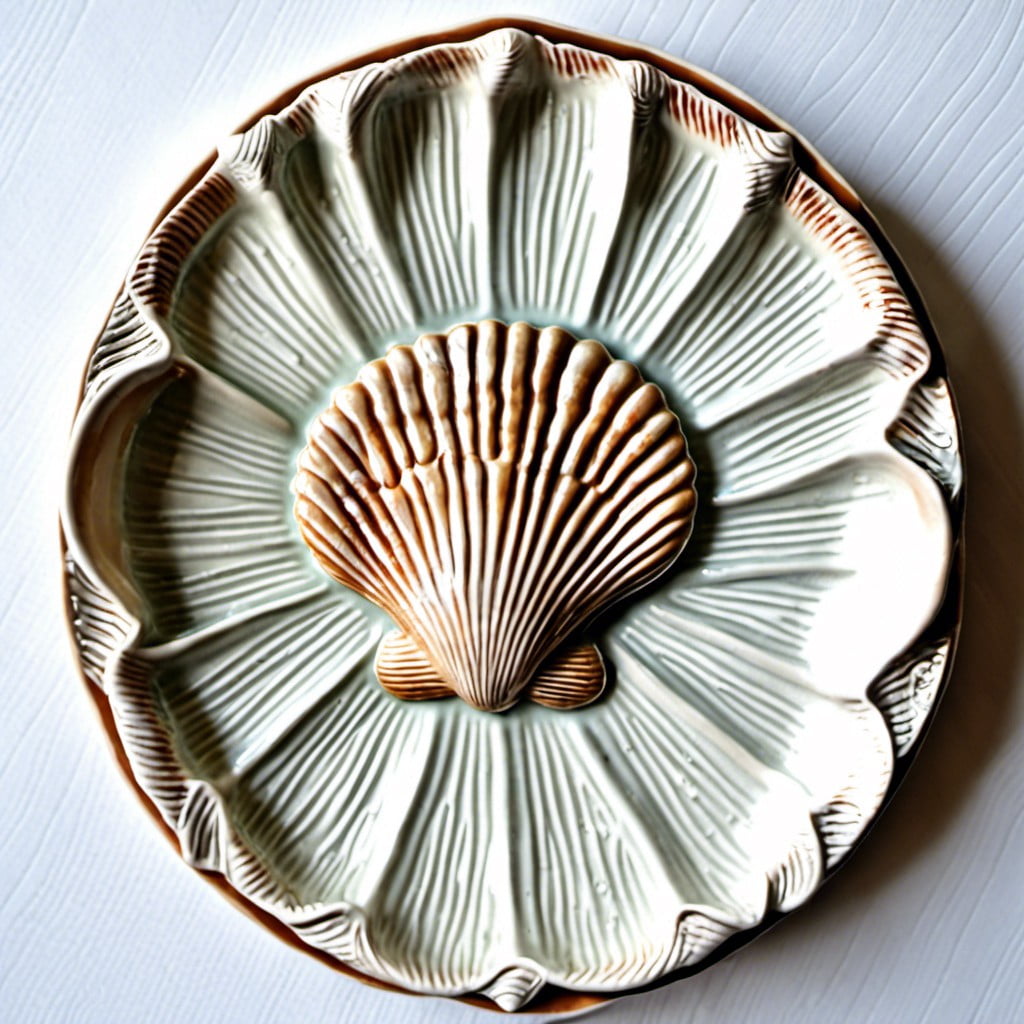
Crafting this dish brings a delightful coastal touch to any space, holding onto summer memorabilia. Begin with rolling a slab of clay and pressing your chosen seashells into it to leave beautiful natural impressions. Upon removing shells, smooth the edges for a polished look.
Focus on uniqueness; no two seashells are the same, therefore every impression is exclusive. This approach helps to blend artistic flair with natural elements, crafting something truly unique.
For a shimmering finish, apply a liquid clay glaze before firing. Consider colors like hues of the sea or pearlescent whites to highlight the indentation detail. It’s the perfect way to store trinkets or serve snacks, with an added taste from the ocean.
Remember to wear safety gear like aprons and gloves during glazing and firing processes. Exercising caution at each stage of creation is paramount to the successful completion of your seashell embossed dish.
Ideas Elsewhere
- https://www.renegadehandmade.com/15-creative-clay-tray-ideas/
- https://www.giftedartisan.com/pottery-by-form/plates-platters/
- https://ceramicartsnetwork.org/daily/article/How-to-Make-a-Cool-Textured-Handbuilt-Tray-from-One-Slab-of-Clay
- https://thepotterywheel.com/slab-pottery-ideas/
- https://wheelandclay.com/blog/pottery-ideas-for-beginners/
Read More Like This
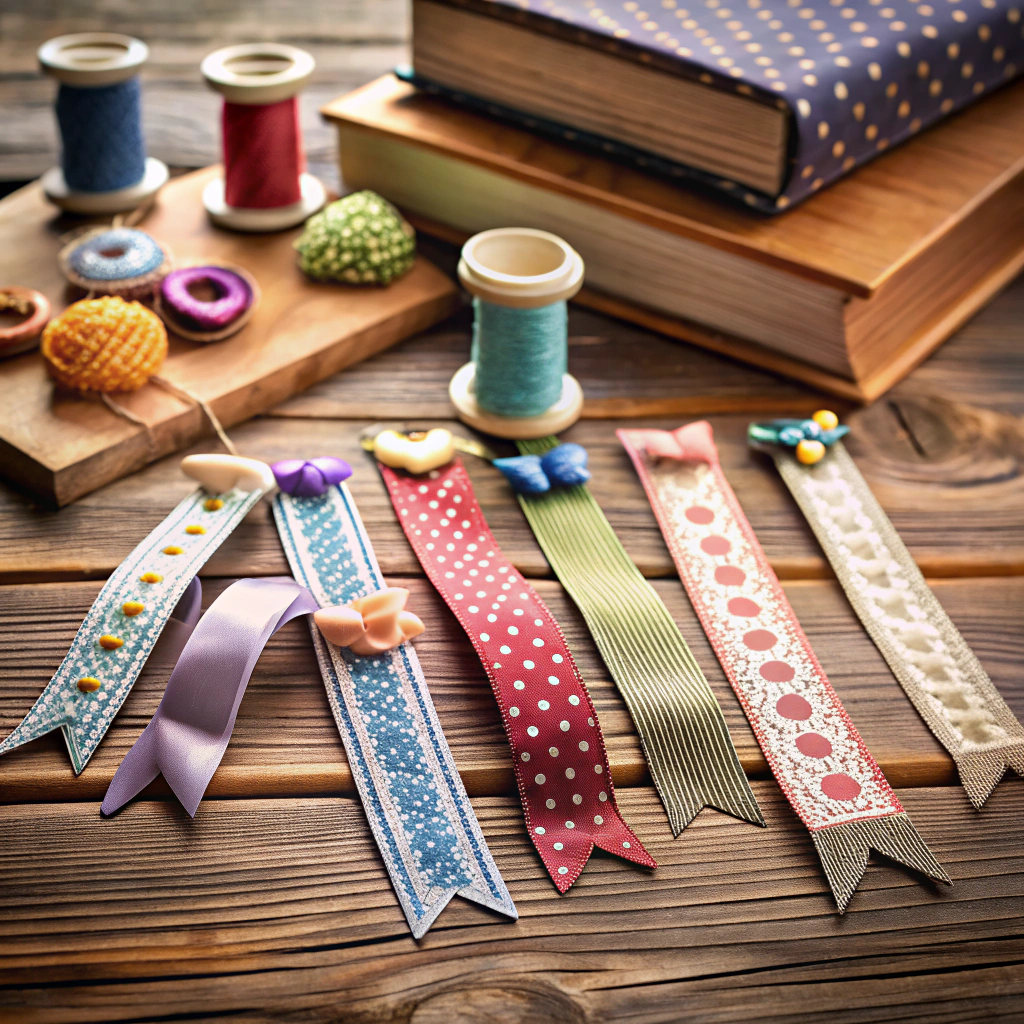 15 Creative Ribbon Decoration Ideas You’ll Love
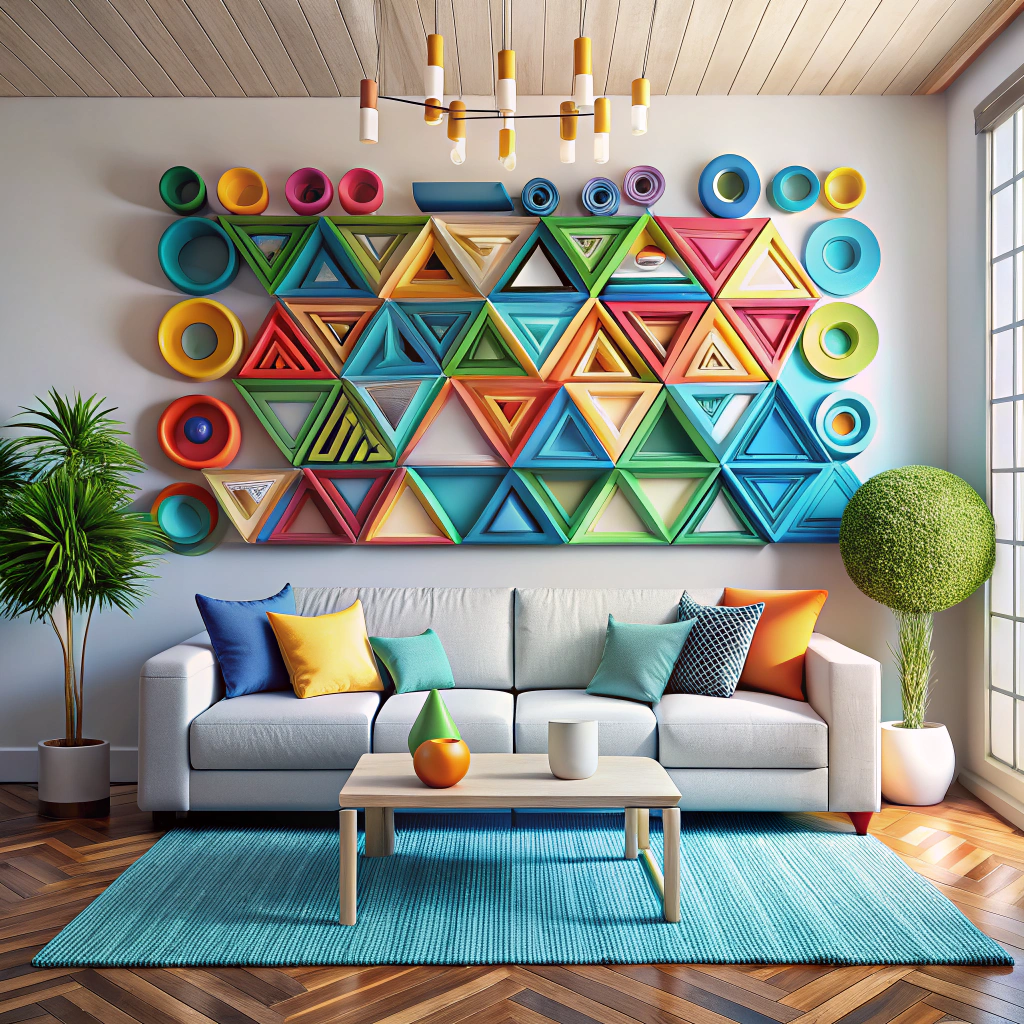 15 Ingenious Pool Noodle Decoration Ideas
 15 Creative Ideas for Wedding Car Decoration
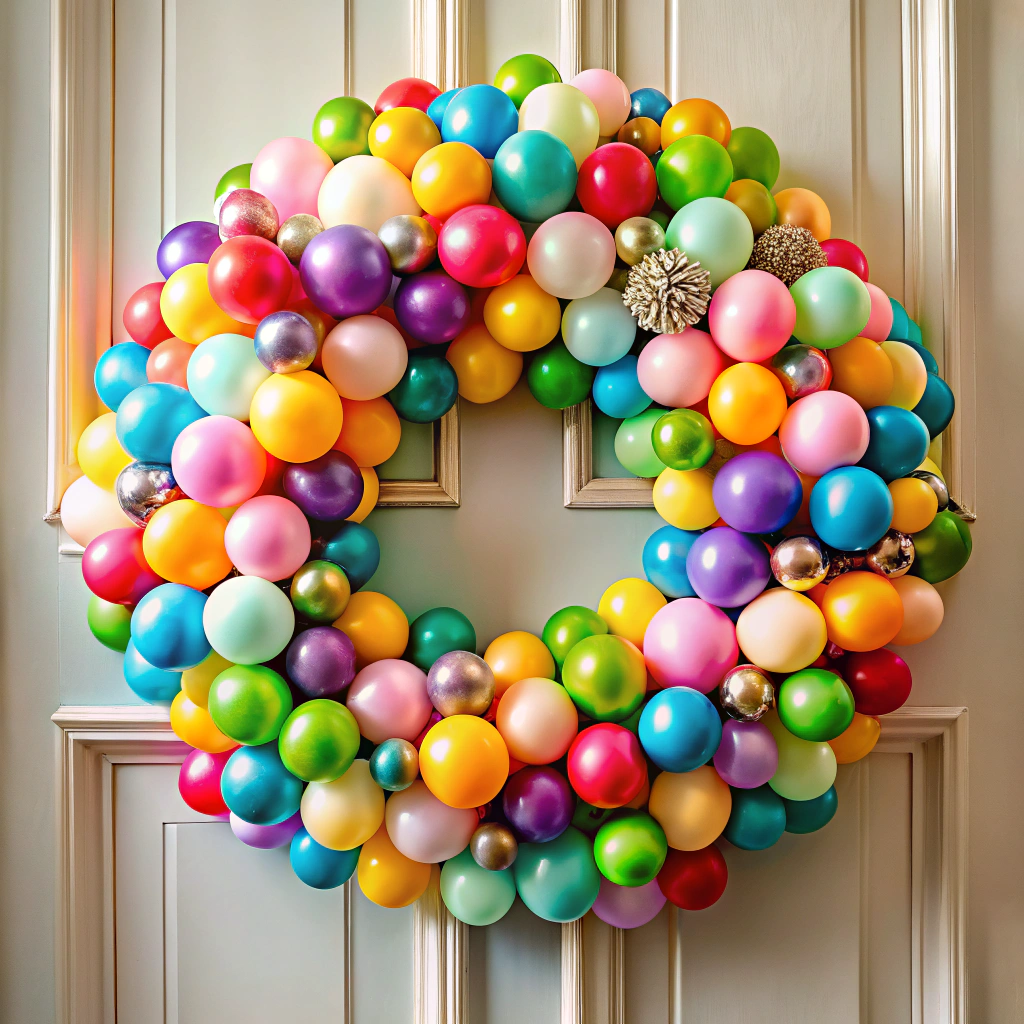 15 Simple Balloon Decoration Ideas
 15 Indian Corn Decoration Ideas for a Festive Home
Recap: