Last updated on
Discover the effective steps to repair unsightly laminate floor bubbling and restore your flooring’s pristine appearance in no time.
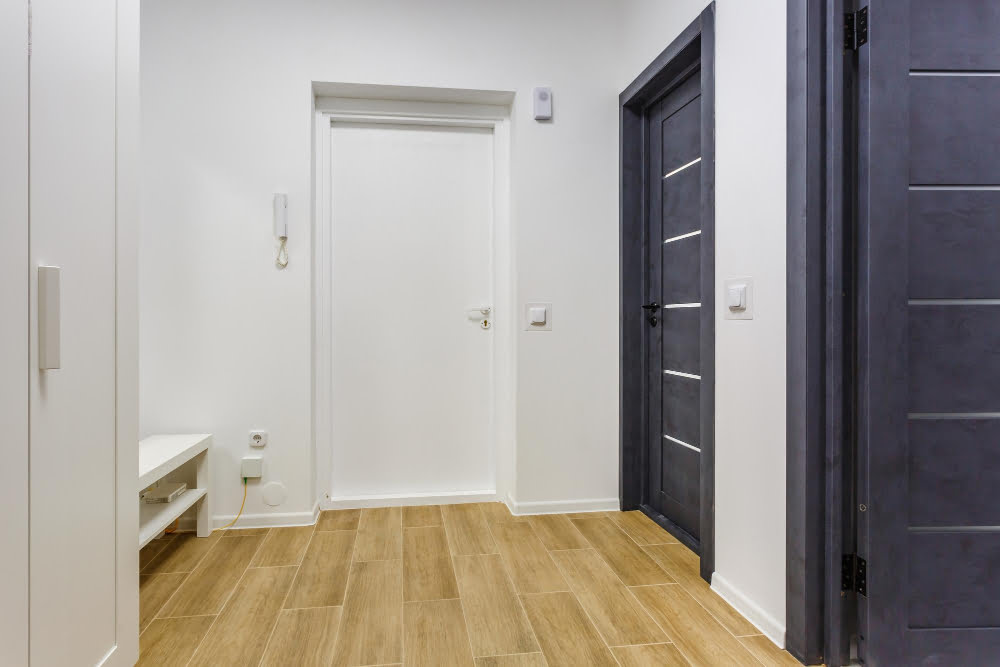
Laminate flooring is a popular choice for homeowners because of its durability and affordability. However, one common issue that can arise with laminate floors is bubbling.
This can be caused by various factors such as moisture, improper installation or poor quality materials. Not only does it look unsightly, but it can also compromise the integrity of your flooring.
Don’t worry though, in this article we’ll provide you with some easy and effective tips on how to fix laminate floor bubbling so you can keep your floors looking their best for years to come!
Key takeaways:
- Identify the root cause of laminate floor bubbling.
- Inspect the subfloor for potential issues.
- Check for moisture problems and address them promptly.
- Assess installation errors and consider warranty coverage.
- Examine expansion gaps and evaluate floor cleaning methods.
Identifying the Causes of Bubbling
Before you can fix laminate floor bubbling, it’s important to identify the root cause of the problem. Bubbling can be caused by a variety of factors, including moisture issues, improper installation techniques or poor quality materials.
One common culprit is water damage from spills or leaks that seep into the flooring and cause it to swell and bubble up.
Another potential issue is an uneven subfloor that causes pressure points on certain areas of your laminate flooring. This can lead to bulging in those spots over time.
In some cases, bubbling may also be due to expansion gaps not being left during installation or incorrect cleaning methods used on your floors.
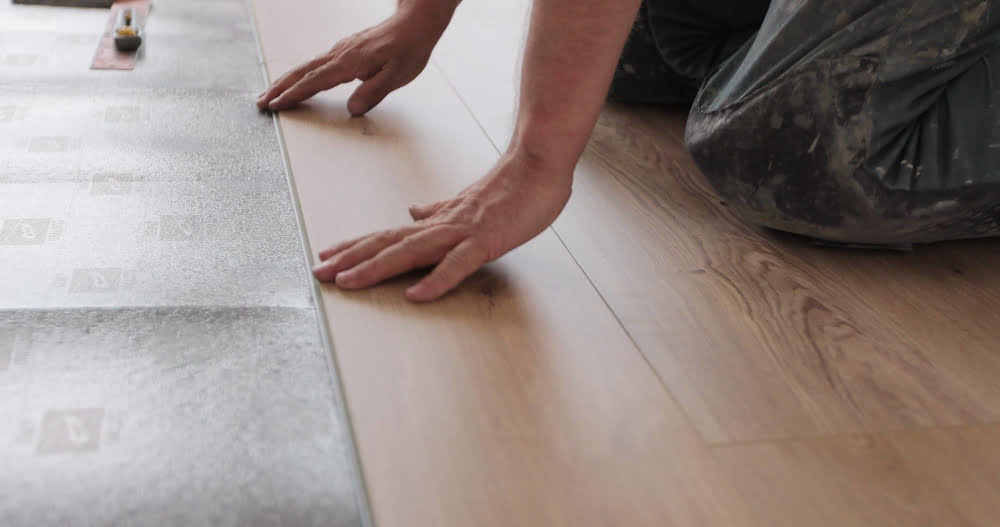
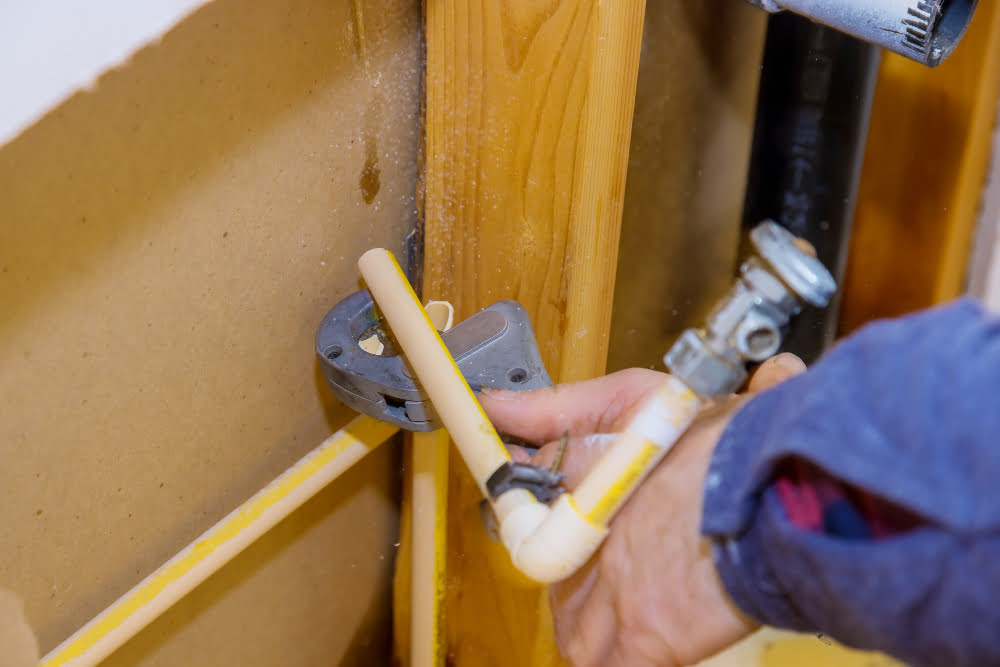
Inspecting the Subfloor
The subfloor is a crucial component of your laminate flooring installation and can significantly impact its longevity. If there are any issues with your subfloor, such as unevenness or damage, it can lead to bubbling in your laminate floors.
To inspect the subfloor for potential problems that may be causing bubbles in your floorboards, start by removing baseboards and quarter-round moldings around the perimeter of each room where you have installed laminate flooring. Then examine every inch of exposed surface area on top of which you laid down underlayment before installing planks.
Look out for signs like cracks or gaps between boards that could indicate an uneven surface beneath them; water stains from leaks; rotting wood due to moisture exposure over time; or other structural defects like warping caused by temperature changes over time.
Checking for Moisture Issues
If you suspect that moisture may be the culprit, it’s important to check for any signs of water damage or leaks in your home. Start by inspecting areas around windows and doors, as well as near plumbing fixtures such as sinks and toilets.
You can also use a moisture meter to test the humidity levels in your home. Ideally, indoor humidity should be between 30-50%.
Anything above this range can cause problems with your flooring.
If you do find evidence of water damage or high humidity levels, it’s important to address these issues before attempting any repairs on your laminate floors. This may involve fixing leaky pipes or installing a dehumidifier in damp areas like basements.
Assessing Installation Errors
If your flooring was not installed correctly, it can lead to gaps between planks that allow moisture to seep in and cause bubbling. To assess whether installation errors are causing your laminate floor bubbles, you should inspect the edges and seams of each plank for any visible gaps or unevenness.
If you notice any issues with the way your flooring was installed, such as a lack of expansion space or incorrect underlayment placement, it’s important to address these problems before attempting any repairs. In some cases, retrofitting may be necessary to correct major installation errors.
It’s also worth noting that if you hired a professional installer for your floors and they were improperly installed leading to bubbling issues later on down the line – check if there is an existing warranty on their workmanship which could cover repair costs.
Examining Expansion Gaps
They allow the planks to expand and contract with temperature changes, preventing buckling or warping. However, if these gaps are not properly installed or maintained, they can lead to bubbling issues.
To examine expansion gaps for potential problems, start by checking the perimeter of your room where the floor meets walls and other fixed objects like cabinets. If you notice that there is no gap between your flooring and these structures or it’s too narrow (less than 1/4 inch), this could be a problem.
Another issue that may arise from improper expansion gap installation is when debris accumulates in them over time. Dirt buildup can cause pressure on planks leading to bubbling issues as well as damage during contraction/expansion cycles.
Evaluating Floor Cleaning Habits

However, improper cleaning techniques can cause bubbling or other damage to your floors. To evaluate your floor cleaning habits, start by reviewing the manufacturer’s instructions for recommended products and methods.
Avoid using excessive water when mopping as this can seep into the seams between planks and cause swelling or warping over time. Instead, use a damp mop with a mild cleaner specifically designed for laminate floors.
Avoid using abrasive cleaners or tools such as steel wool pads that can scratch the surface of your flooring. If you have pets in your home that shed frequently, be sure to sweep up pet hair regularly so it doesn’t accumulate on top of the floor causing scratches.
Addressing Minor Bubbling
First, use a sharp utility knife to make an incision in the center of the bubble. Be sure not to cut too deeply into the flooring underneath.
Next, lift up one edge of the bubble and apply some wood glue or adhesive under it using a syringe or dropper. Press down firmly on top of the lifted area and wipe away any excess glue with a damp cloth.
Once dry, sand down any rough edges with fine-grit sandpaper until smooth and level with surrounding areas. Touch up any color discrepancies by applying matching laminate floor repair putty over repaired areas.
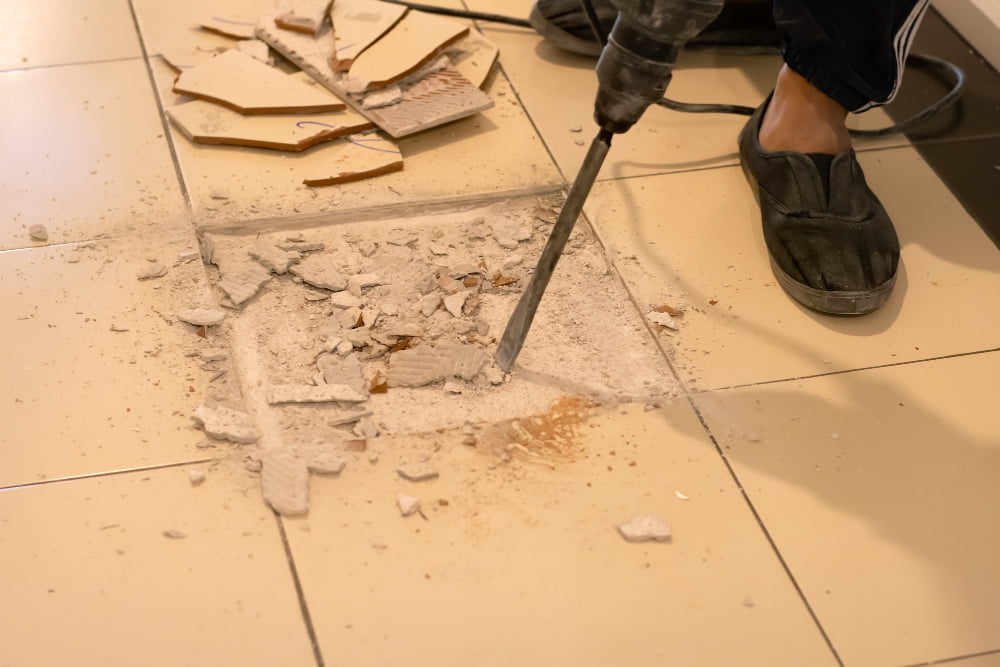
Repairing Extensive Damage
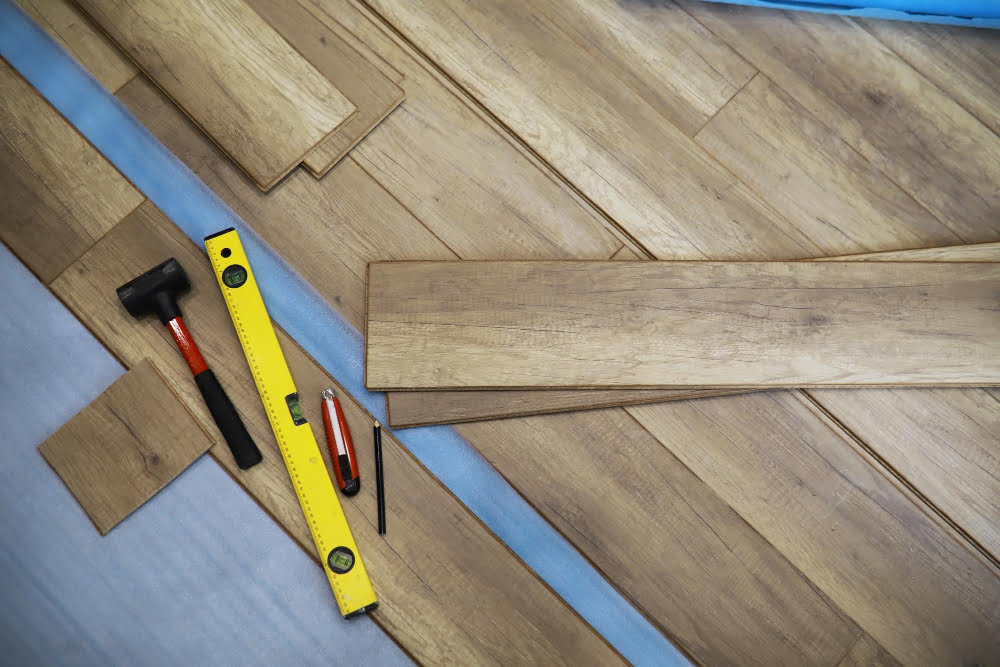
In some cases, this could mean replacing entire planks or sections of flooring. To do this, you’ll need a few tools such as a circular saw and chisel.
Firstly, remove any damaged planks by cutting them out with the circular saw and then prying them up with a chisel. Be careful not to damage surrounding planks in the process.
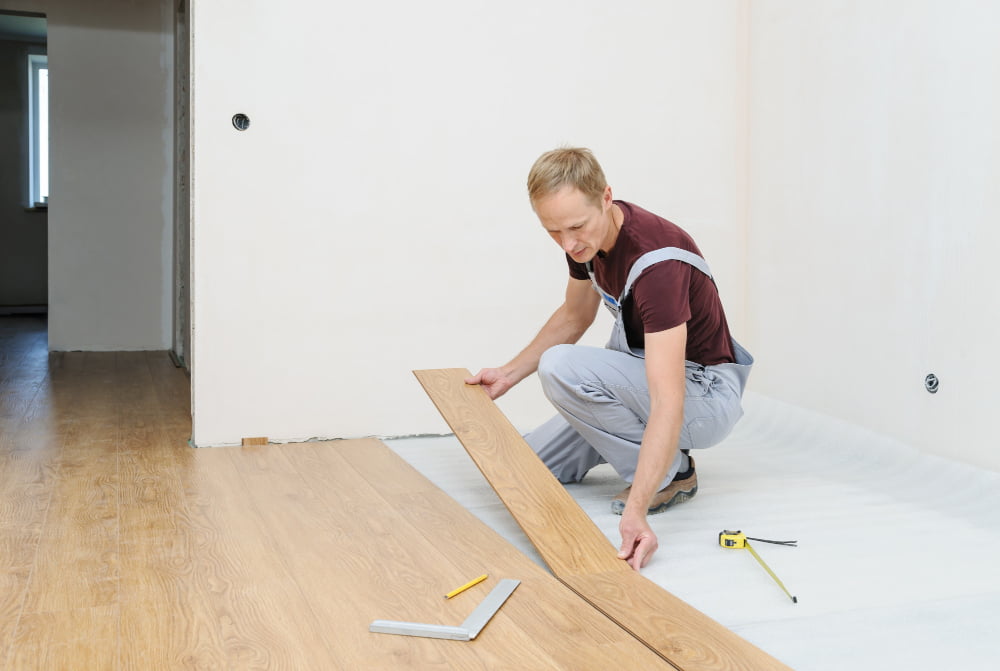
Next, measure and cut replacement pieces of laminate flooring that match your existing floorboards’ size and style using a table saw or jigsaw.
Once you have new boards ready for installation, apply adhesive along their edges before fitting them into place carefully. Use clamps or heavy objects like books to hold down each board until they dry completely.
Use wood filler on any gaps between boards before sanding down rough spots so that everything looks seamless once again!.
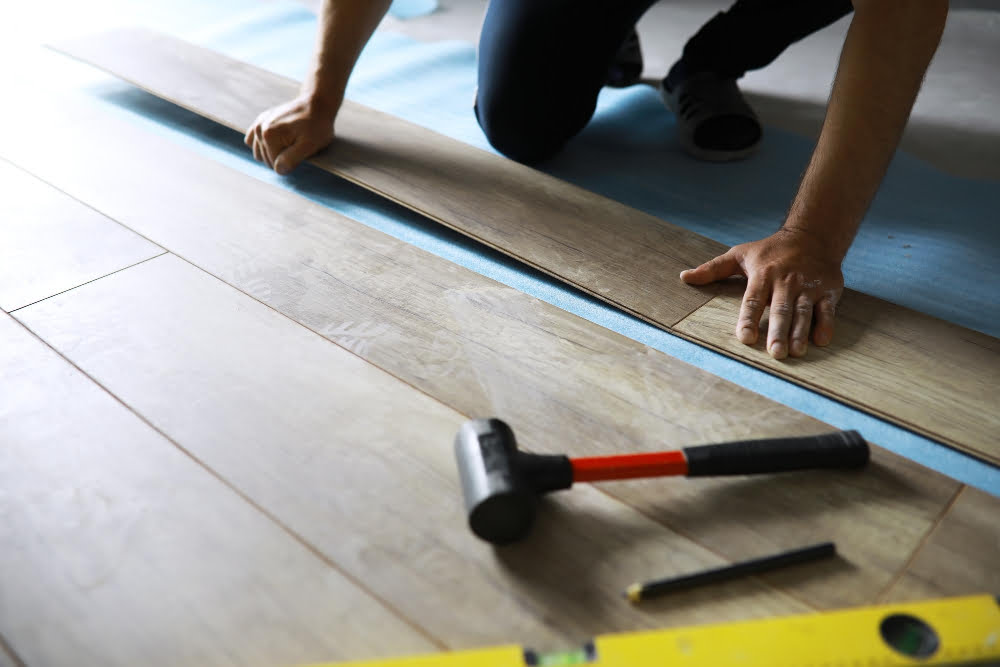
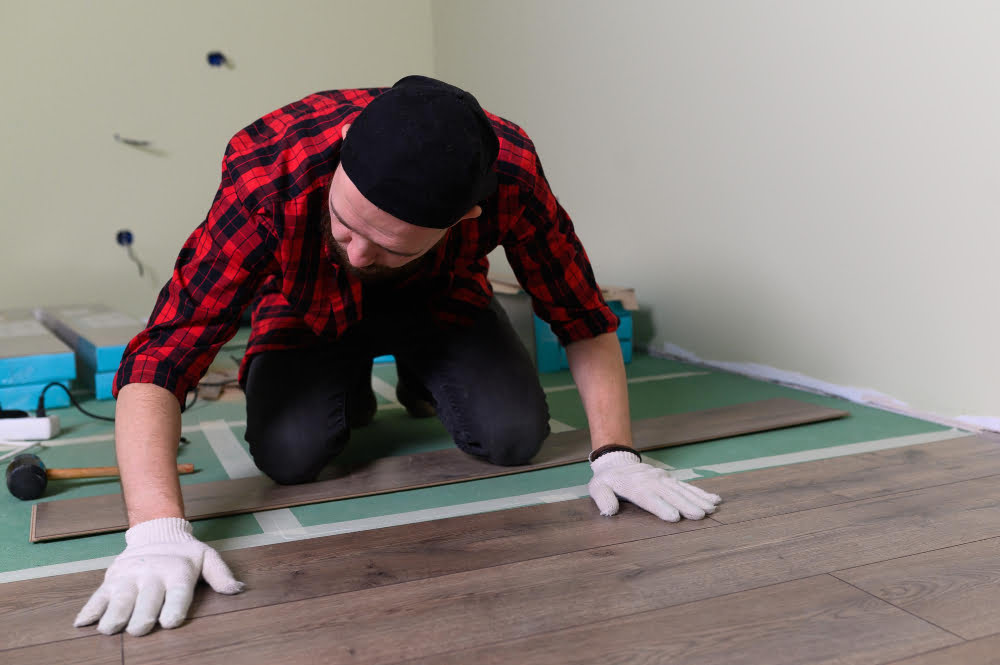
Replacing Damaged Planks
Replacing a single plank can be done relatively easily and quickly with the right tools and materials.
First, remove any furniture or objects from the affected area. Then, use a circular saw or handsaw to cut through the center of the damaged plank lengthwise.
Be sure not to damage surrounding planks during this process.
Next, carefully remove both halves of the damaged plank using pliers or another tool that allows for precision without damaging adjacent flooring pieces.
Once removed, measure and cut your replacement piece accordingly before fitting it into place in between existing planks. Use wood glue along all edges where new meets old flooring for added stability before securing with finishing nails if necessary.
Fixing Moisture Problems
If you suspect that moisture is causing your flooring issues, it’s important to address the problem as soon as possible. The first step in fixing moisture problems is identifying where the excess water or humidity is coming from.
If you have a leaky pipe or appliance, fix it immediately to prevent further damage to your floors and home. You may also need to install a dehumidifier if high indoor humidity levels are causing condensation on your floors.
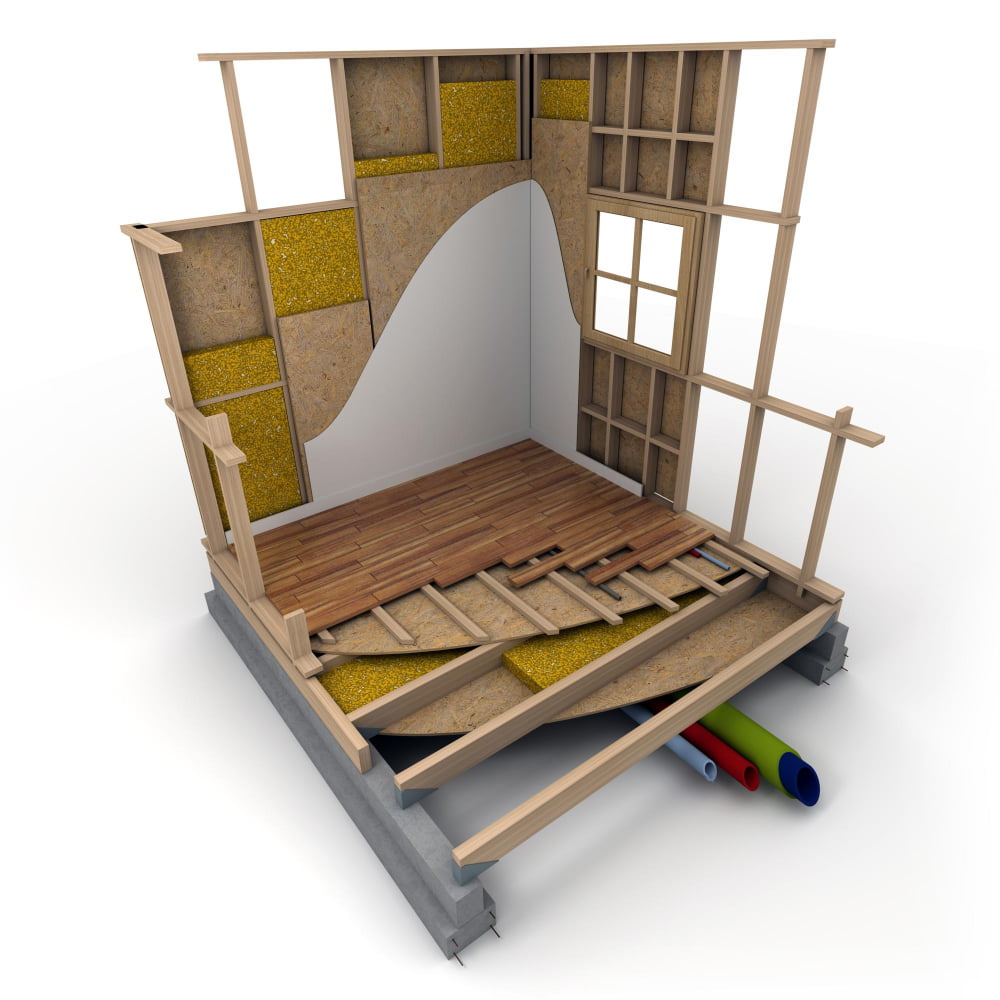
Another way to prevent moisture-related bubbling in laminate flooring is by installing a vapor barrier underneath the subfloor during installation. This will help protect against any potential water damage from below.
In some cases, removing and replacing damaged planks may be necessary if they have been exposed to excessive amounts of water for an extended period of time.
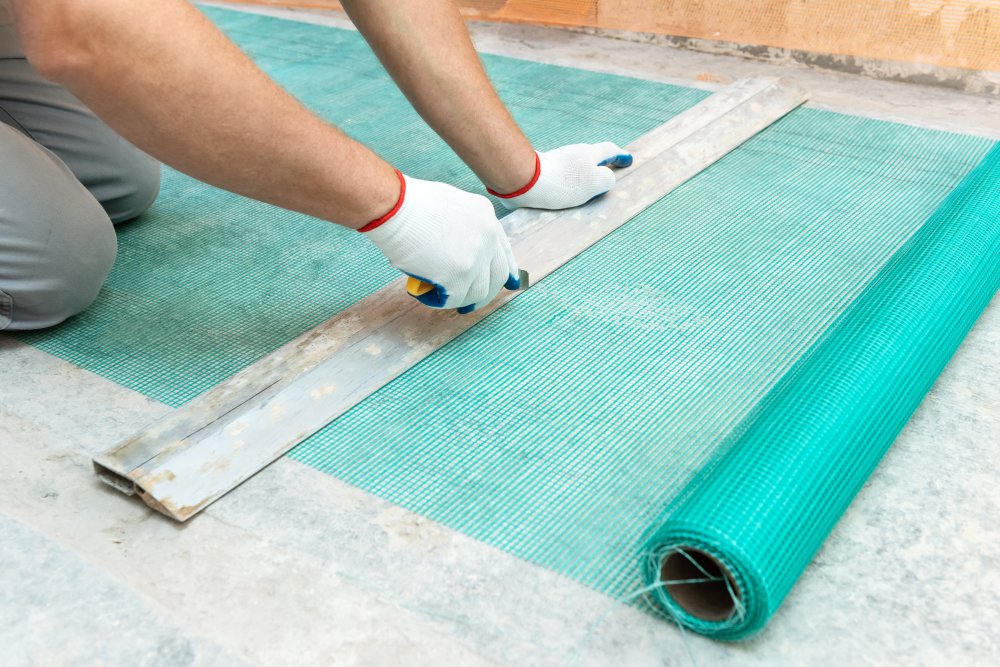
Retrofitting the Installation
This involves removing the existing flooring and installing a new subfloor before laying down fresh planks of laminate. While this can be a costly option, it’s often necessary if there are significant moisture issues or installation errors that cannot be fixed with minor repairs.
Retrofitting also provides an opportunity to upgrade your flooring materials or change up the design of your space entirely. It’s important to hire a professional for this type of job as they will have experience in handling such complex installations.
Maintaining Laminate Floors

One of the best ways to do this is by keeping them clean and dry. Avoid using excessive water when cleaning your floors as moisture can seep into the seams and cause swelling or warping.
Instead, use a damp mop or cloth with a mild cleaner specifically designed for laminate flooring. Be sure not to leave any standing water on the floor after cleaning.
Another way to maintain your laminate floors is by placing felt pads under furniture legs and avoiding dragging heavy objects across them which can scratch or damage their surface.
Consider investing in an area rug for high traffic areas such as entryways or hallways where wear and tear are more likely. This will help protect your flooring from scratches while also adding some style and warmth to space.
Preventing Future Bubbling
One of the most effective ways to do this is by ensuring proper installation. If you’re installing new laminate floors, make sure that they are installed correctly and according to manufacturer instructions.
Another way to prevent future bubbling is by maintaining a consistent indoor humidity level. High levels of moisture can cause swelling and warping in your flooring, leading to unsightly bubbles over time.
Consider investing in a dehumidifier if necessary.
It’s also essential not only clean but properly maintain your floors regularly using appropriate cleaning techniques for laminate floors such as sweeping or vacuuming with soft-bristled attachments and mopping with minimal water usage.
Lastly, be mindful of heavy furniture placement on top of the floor surface; use felt pads under furniture legs or casters so they don’t scratch or dent the surface which could lead eventually lead up bubble formation due uneven pressure distribution on planks underneath them.
Laminate Flooring Warranty Concerns
However, it’s important to understand the terms and conditions of your warranty before attempting any repairs yourself. Some warranties may require that you use specific products or installation methods, and failure to comply with these requirements could void the warranty altogether.
Before making any repairs on your laminate floors, take some time to review the manufacturer’s warranty information carefully. If you’re unsure about anything in particular or have questions about what is covered under the warranty, don’t hesitate to contact customer service for assistance.
It’s also worth noting that not all types of damage are covered by laminate flooring warranties. For example, if bubbling occurs due to improper maintenance or exposure to excessive moisture levels beyond what is considered normal wear and tear – this may not be covered by most manufacturers’ policies.
Hiring Professional Help

A flooring specialist can assess the damage and provide expert advice on how to fix laminate floor bubbling effectively. They have access to specialized tools and equipment that can make repairs quicker and more efficient than doing it yourself.
When hiring a professional, do your research first. Look for licensed contractors with experience in repairing laminate floors specifically.
Check their reviews online or ask for references from previous clients.
While hiring a pro may cost more upfront, it could save you money in the long run by preventing further damage or costly mistakes during repair attempts.
Laminate Floor Moisture Barriers
To prevent moisture from seeping into your flooring, it’s essential to install a moisture barrier before laying down your laminate planks. A moisture barrier is a thin layer of material that acts as a shield between the subfloor and the laminate flooring.
There are different types of moisture barriers available in the market, including plastic sheeting, roofing felt paper or foam underlayment with an attached vapor barrier. The type you choose will depend on various factors such as budget and personal preference.
When installing a moisture barrier, ensure that it covers every inch of your subfloor without any gaps or overlaps to avoid trapping any air pockets underneath which can cause further damage over time.
By taking this extra step during installation, you can significantly reduce the risk of future bubbling caused by excess humidity levels in your home.
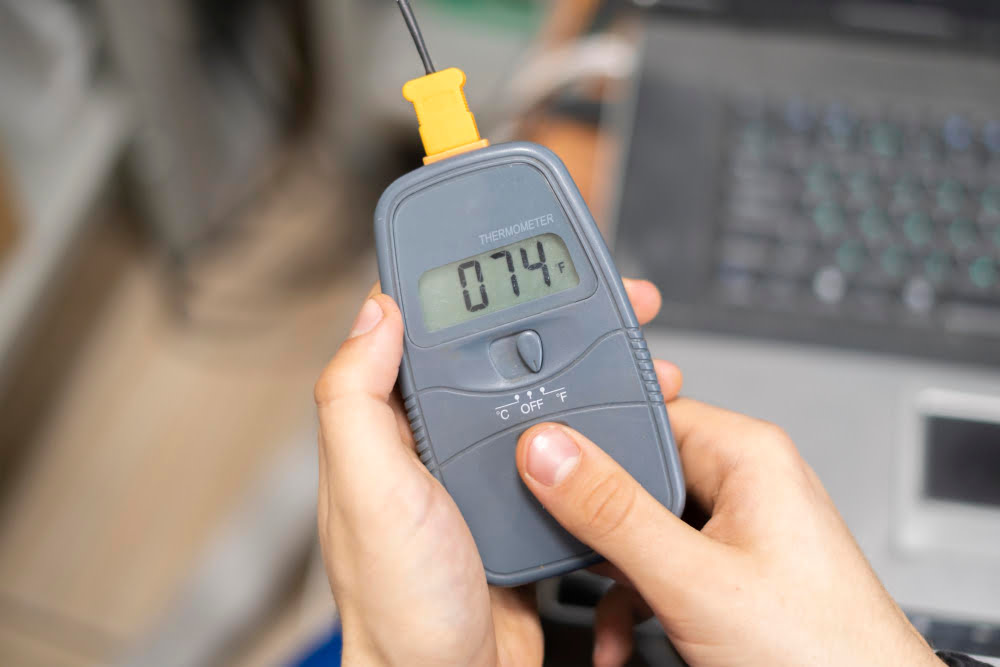
Monitoring Indoor Humidity Levels
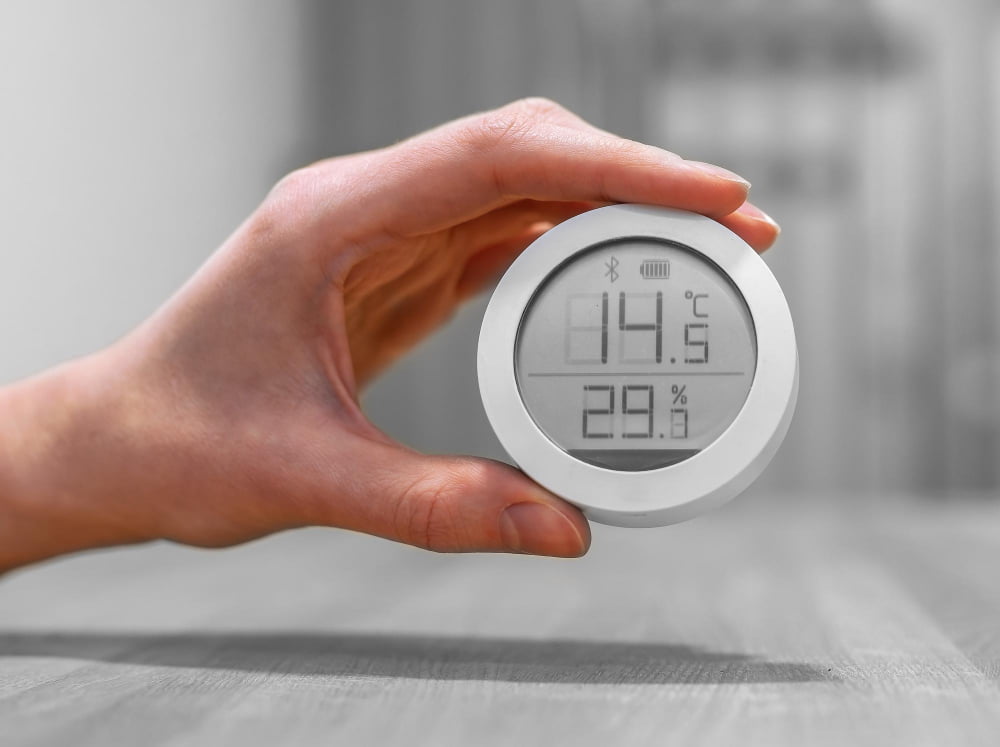
High humidity levels can cause the planks to expand and buckle, leading to unsightly bubbles on your flooring. To prevent this from happening, it’s important to monitor indoor humidity levels regularly.
The ideal range for indoor relative humidity is between 30% and 50%. You can use a hygrometer or a smart thermostat with built-in sensors to measure the level of moisture in your home.
If you notice that your indoor air is too humid, there are several steps you can take to reduce it.
Firstly, ensure proper ventilation by opening windows or using exhaust fans in bathrooms and kitchens when cooking or showering. Secondly, consider investing in a dehumidifier which will help remove excess moisture from the air.
Proper Cleaning Techniques for Laminate Floors

However, it’s important to use the right cleaning techniques as harsh chemicals or abrasive tools can damage the surface of your flooring.
To clean your laminate floors effectively, start by sweeping or vacuuming up any loose dirt and debris. Then, use a damp mop with a mild cleaner specifically designed for laminate flooring.
Avoid using excessive water as this can seep into the seams between planks and cause bubbling.
It’s also crucial to dry off any excess moisture after mopping with a clean towel or microfiber cloth. This will help prevent water from penetrating beneath the surface of your floorboards.
Immediate Steps to Take When Bubbling Occurs
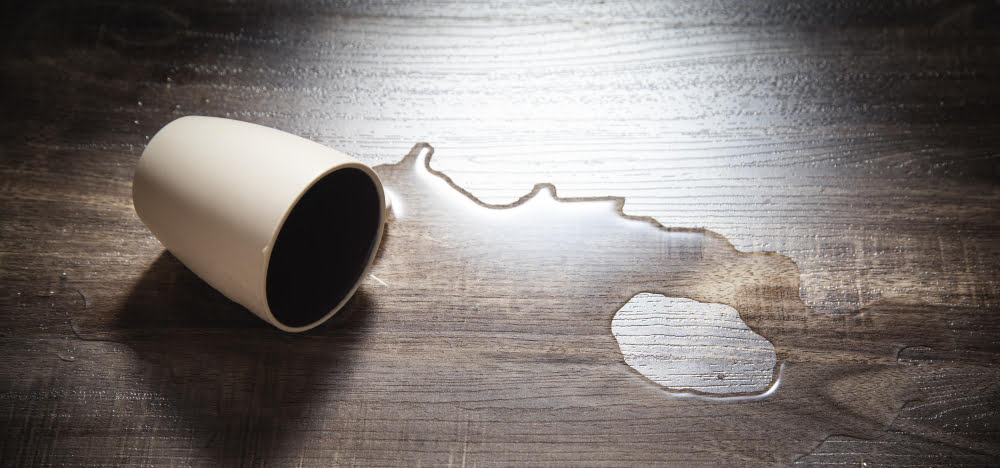
The first step is to identify the cause of the problem. If it’s due to moisture, try drying out the affected area with a fan or dehumidifier.
If there are any spills or standing water, clean them up immediately and thoroughly.
Next, inspect the flooring for any signs of damage such as cracks or chips in individual planks. This will help determine if you need a minor repair or if more extensive work is required.
It’s also essential not to ignore small bubbles as they can quickly escalate into larger ones that may require costly repairs down the line.
Post-Installation Care and Maintenance
Proper post-installation care and maintenance can go a long way in keeping your laminate floors looking great for years to come. One of the most important things you can do is keep your floors clean and dry.
Avoid using excessive water when cleaning, as this can seep into the seams between planks and cause swelling or warping over time.
Regular sweeping or vacuuming with a soft-bristled attachment will help remove dirt and debris that could scratch or damage your flooring’s surface. If spills occur, be sure to wipe them up immediately with a damp cloth.
Another key factor in maintaining laminate flooring is protecting it from direct sunlight exposure which may cause fading over time; consider installing window treatments such as blinds or curtains if necessary.
Make sure furniture legs have felt pads attached underneath them so they don’t scratch the floor when moved around during daily use. By following these simple tips for post-installation care and maintenance of your laminate floors, you’ll be able to enjoy their beauty for many years without worrying about unsightly bubbling issues cropping up again!
FAQ
What causes laminate flooring to bubble up?
Laminate flooring bubbles up due to moisture causing expansion and contraction of wood materials, often resulting from incorrect humidity during installation or improper cleaning methods.
Can you fix water damaged laminate flooring?
No, you cannot fix water damaged laminate flooring, but you can replace the damaged boards with leftover or matched new ones, ensuring the floor is completely dry before repairs.
What are the effective prevention methods for laminate floor bubbling?
To effectively prevent laminate floor bubbling, ensure proper installation, maintain ideal humidity levels, avoid excessive water exposure, and promptly clean spills.
How do you properly repair minor and severe bubbling on laminate floors?
To properly repair minor and severe bubbling on laminate floors, address minor bubbling by using glue to reattach the laminate and fix severe bubbling by replacing damaged planks.
Is it more cost-effective to replace or repair bubbling laminate flooring?
It is more cost-effective to replace bubbling laminate flooring than to repair it.
Read More Like This
 15 Funny Graduation Cap Ideas to Make Your Big Day Unforgettable
 15 Unique DIY Christmas Decorations Ideas for a Festive Home
 15 Creative Science Fair Board Ideas to Amaze Your Audience
 15 Handmade Envelope Decoration Ideas for Creative Gifting
 10 DIY Gifts for the Whiskey Lover in Your Life
Recap: