Last updated on
Because fixing peeling laminate flooring can instantly improve the aesthetics of any room, it’s crucial to understand the step-by-step process in this article.
Experiencing peeling on your laminate floor can be both frustrating and unsightly. The good news is, fixing the issue doesn’t necessarily require professional intervention. With the right tools and a bit of know-how, you can restore your laminate flooring back to its original pristine condition.
This article will guide you step by step, detailing the materials needed, preparation, and the actual fixing process. We’ll cover everything you need to know about effectively repairing peeling laminate flooring, ensuring you’re equipped with the necessary information to get your flooring looking fresh and new again.
Key takeaways:
- Incorrect installation and low-quality adhesives cause peeling.
- Moisture and humidity can lead to laminate floor peeling.
- Proper maintenance is crucial to prevent peeling.
- Clear the area and remove the peeling laminate carefully.
- Clean and dry the floorboards before applying adhesive or using a repair kit.
Common Causes of Peeling Laminate Floors

The first major reason behind the peeling issue is incorrect installation. Perhaps the planks were not properly aligned or have experienced shifting over time. Additionally, the use of low-grade adhesives during the installation process contributes to the problem.
Another potent factor contributing to laminate floor peeling is moisture and humidity. Laminate flooring can’t tolerate excessive moisture. Disruptions such as spills not cleaned up promptly, or a highly humid environment, can seep into the laminate layers causing them to swell and peel.
Last but not least, inappropriate or infrequent maintenance can lead to peeling. Using abrasive cleaners or tools, for example, can wear away at the laminate’s protective layer, making it susceptible to peeling. To maintain the integrity and longevity of your flooring, regular and appropriate care is vital.
Incorrect Installation Methods

Often, improper installation leads to laminate floor peeling. Below you’ll find key points to remember for a successful setup:
1. Ensuring the floor is thoroughly clean, dry and level before starting any installation process is critical. Any irregularities can cause peeling later.
2. Use of an appropriate underlayment creates a solid, stable base, providing much-needed support to your laminate flooring and preventing future peelings.
3. Using the correct tools to lay the laminate boards, such as a pull bar or tapping block, can prevent damaging the click-lock system. Mistreatment during the installation can set the flooring up for future problems, including peeling.
4. Avoiding close edges when placing the planks and maintaining a safe distance from the wall for expansion space, can also prevent peeling.
Remember these points during next laminate installation to increase the lifetime and quality of your flooring.
Issues With Moisture and Humidity
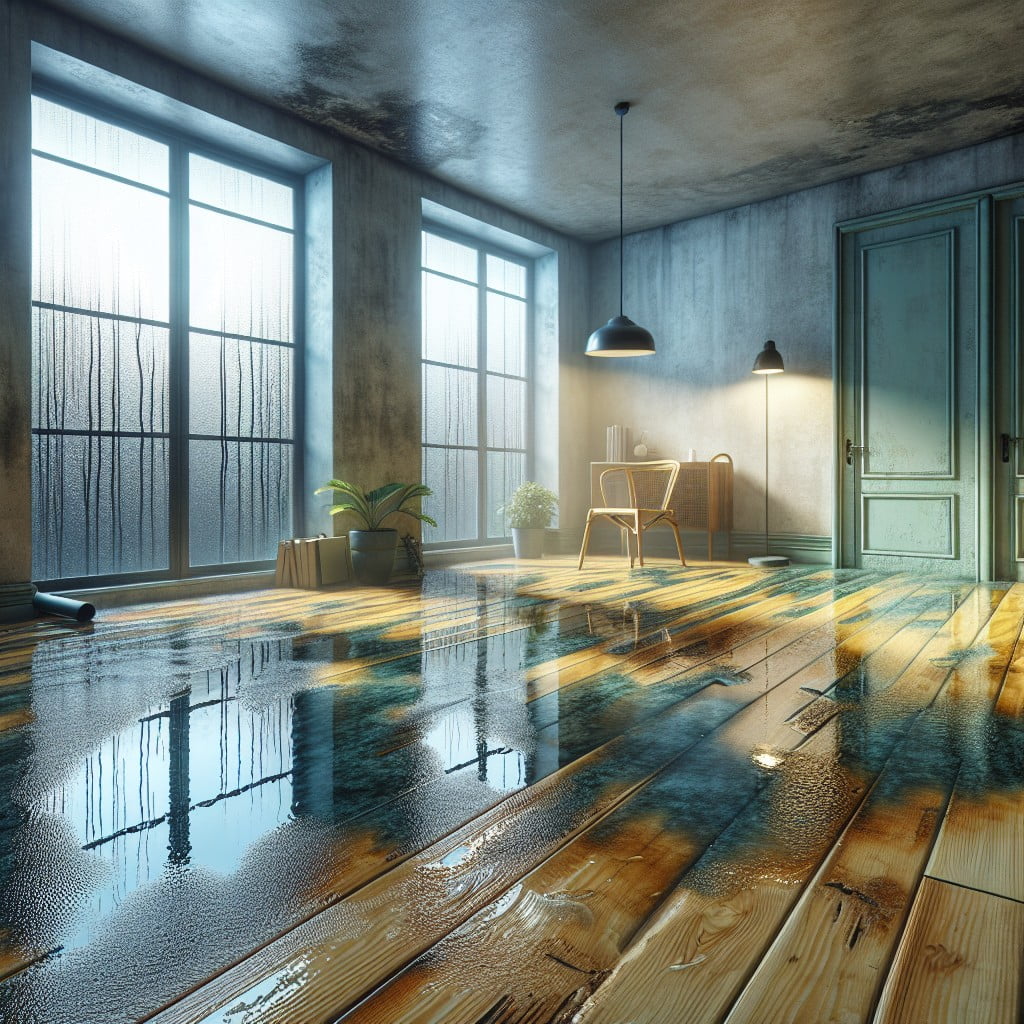
Elevated levels of moisture and humidity have a profound effect on laminate flooring. This is due primarily to laminate’s porous nature, allowing the absorption of water and causing the floor to swell. In these conditions, laminate flooring is susceptible to peeling, curling, or warping.
Persistently humid environments, frequent spills, or inadequate cleaning can all contribute to moisture build-up. Also, underlying issues such as leaks or damp subfloors can magnify the problem.
To counteract this, it is vital to ensure your laminate flooring is laid on a dry, flat surface. Be sure to clean spills immediately and avoid excessive water during routine cleaning. Using a dehumidifier in damp environments can also manage humidity levels, offering your laminate flooring the best protection against peeling.
Lack of Appropriate Maintenance
There are a few practical steps you can follow to preserve the integrity of your laminate flooring:
1. Clean Spills Promptly: Liquids can easily seep into tiny cracks and cause laminate surfaces to bubble or peel.
2. Light Cleaning: Sweeping or vacuuming gently helps remove abrasive dirt particles that can degrade laminate over time.
3. No Wet Mops: Using a well-wrung mop or a special laminate cleaner is preferable. Excessive water can cause damage.
4. Use Furniture Pads: These basics protect the laminate from scratches or pressure points from heavy furniture, reducing chances of peeling.
5. Keep Sun Exposure Minimal: Direct sunlight accelerates wear and can cause delamination.
For effective maintenance, practice patience and attentiveness – harmful agents may be not always visible to the naked eye, so regular checks are key.
Prepare the Area
Start by clearing all furniture and rugs from the affected area. This will allow you to have a clear, unobstructed view of the peeling laminate floor and make it easier to work. Ensure to thoroughly clean the floor surface with a broom or vacuum to remove dust and debris, which might affect the adherence of the new laminate or repair material.
If positioned in a high traffic area of your home, consider restricting access to the area during the repair process to prevent accidental damage or disruption. Lastly, gather all necessary tools and materials and place them within easy reach. This efficient arrangement streamlines your laminate floor repair process, making it smooth and hassle-free.
Remove the Peeling Laminate
Once preliminary steps of identifying the cause and preparing the repair area are complete, it’s time to proceed carefully. Donning protective gear – like gloves and safety glasses – is always a smart first step to keep yourself safe from splinters and dust particles.
Isolating the damaged plank is fundamental to prevent causing any surrounding planks from getting damaged during the repair process.
With a putty knife, gently begin to lift the peeling laminate – it’s preferential to start at the corners as it makes the job a lot easier. Remember to do this gently to prevent further damage to the plank underneath. Patience is key here, rushing the process could risk unnecessary damage and extra repair work.
Now, for laminate sheets, you’ll want to peel back the areas until you reach a point where the laminate is still fully adhered. If it’s a laminate plank, however, you may need to entirely remove the plank – taking extra care to not damage the tongue and groove edges.
In some cases, heat may aid in loosening the adhesive bond. A hairdryer could work in such instances – move it gradually over the area, applying gentle heat while carefully lifting the laminate.
Once done with this careful step, your floor is now ready for the subsequent repair stages.
Clean and Dry the Floorboards
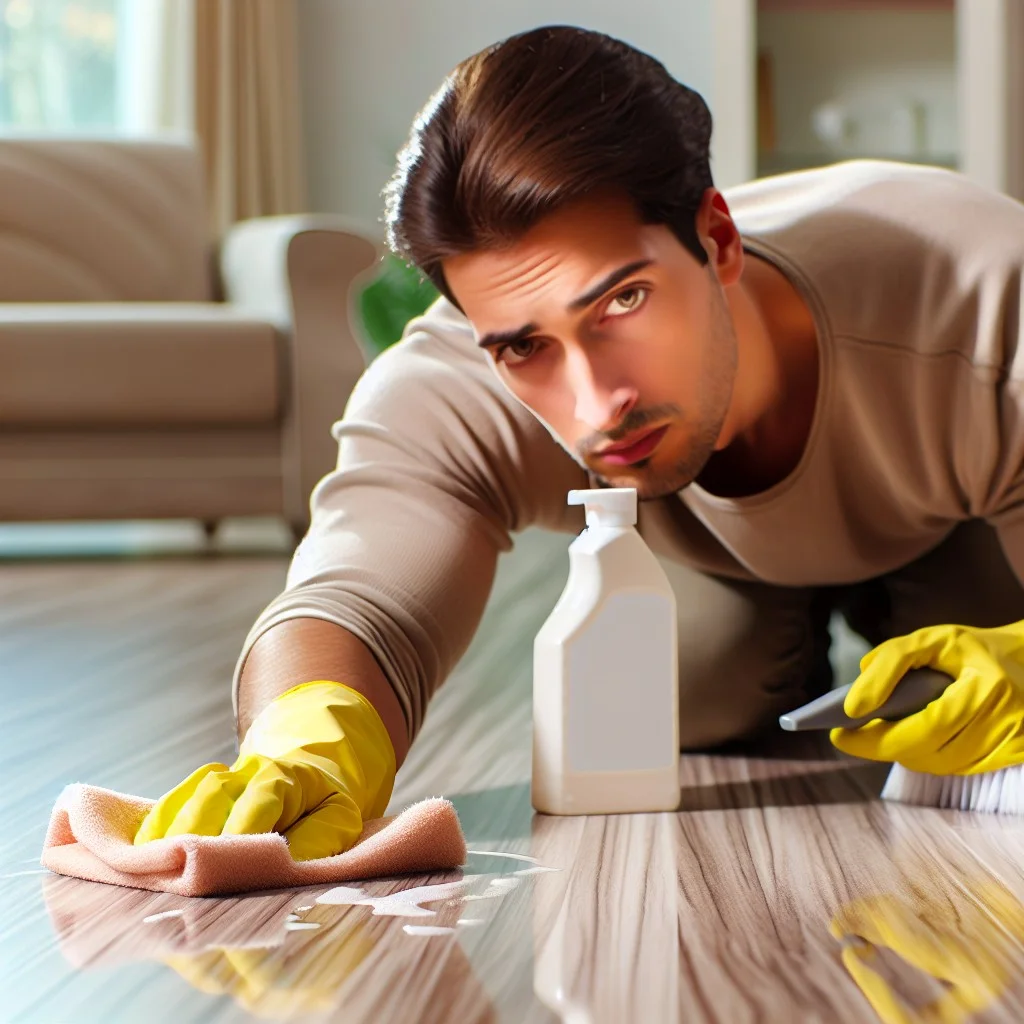
After removing the peeling laminate, it’s crucial to meticulously clean the exposed floorboards underneath to ensure any dirt, grime, or adhesive residue is ridded. Use a damp microfiber cloth or sponge, focusing particularly on areas where the peeling laminate originally resided.
Following the cleaning, it’s an absolute must to dry the space thoroughly. Any residual moisture can diminish the effectiveness of the new adhesive and compromise the repair job’s longevity. Utilize a dry cloth or, for optimal results, a hairdryer or fan for quick and thorough drying. It’s also essential to ensure the area is free from humidity during this process.
In the preparation phase, remember that any overlooked dampness could lead to blistering or future peeling issues. Therefore, take your time during this stage, as meticulous cleaning and drying will pave the way for a successful laminate floor repair.
Apply Adhesive to the Floorboards
Having the floorboards clean and dry removes concerns of moisture interfering with the adhesion process. Now, take the adhesive, whether it’s glue or epoxy gum, and apply it onto the affected floorboards. Swipe it evenly over the surface, covering all spots where the laminate will sit. Make sure the adhesive is spread out well, leaving no lumps or poolings. This ensures a smooth, flush fit when you replace the laminate. Remember, some adhesives require a waiting period to become tacky before laminate application; adhere to specified instructions. Variance in application based on adhesive type is expected, so always follow the manufacturer’s guidelines.
Considerations On Using Glue or Epoxy Gum for Repair
When selecting glue or epoxy gum for laminate repair, keep in mind their distinct properties and ideal usage scenarios. Opt for glue when dealing with minor peeling or loose planks; its ease of usage makes it suitable for such straightforward repairs.
For more severe damages, consider epoxy gum. This two-part adhesive, consisting of a resin and a hardener, sets quickly and firmly. It’s perfect for filling wider gaps and cracks, standing up well to temperature variations and moisture.
Regardless of your choice, ensure the product is suitable for laminate flooring and non-toxic, especially if you have pets and children in the house. Always follow the manufacturer’s instructions for the best result. Also, remember to let the adhesive set and dry completely before stepping on the repaired area to prevent further damage.
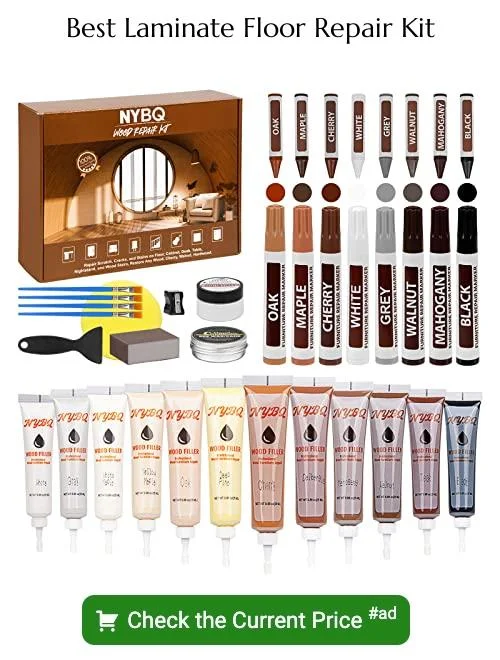
Use of Laminate Repair Kit
A laminate repair kit can be a savior when you are dealing with peeling issues. This kit typically comes with a putty knife, assorted colors of putty, and a color guide. Make sure to select the putty color that matches your floor for the ideal repair job.
The first step is to mix the putty colors using the guide until you achieve the matching color. Apply the putty to the damaged area uniformly using the provided knife, filling up holes and cracks. Wipe away excess putty and let it dry thoroughly. Remember, apply only a thin layer at a time to avoid lumps. After the material has cured, it becomes solid, matching the texture of your laminate and concealing the damaged area seamlessly. A good repair kit can make your laminate floor look as good as new when used correctly.
Method of Using Wood Putty
To tackle the peeling, wood putty can be a helpful tool. It’s a substance you can mold to fit into cracks and crevices. Let’s delve into the procedure:
First, ensure to pick the correct shade that matches your flooring. It can be mixed with other colors if you can’t find the perfect match.
You’ll need to knead the putty until it’s soft. This will make it easier to manipulate into the necessary shape. Apply it to the damaged area using a putty knife. Smooth it over so it’s flush with the laminate surface.
Once applied, allow it to dry, following the manufacturer’s specified time. While it does, resist the temptation to touch or work on the area.
After the drying period, it can be lightly sanded for a more even finish. Be gentle to avoid causing further damage to your floor.
Remember, using putty is a beneficial method for small, simple fixes. It’s not an all-encompassing solution for bigger flooring issues.
Application of Hard Wax for Filling
To apply hard wax, you’ll need a specialized wax kit that matches your floor color. This kit usually includes different shades of wax blocks, a wax heater, a scraper, and a smoothing tool.
Begin by heating the wax until it melts. Meanwhile, clean the damaged area to ensure there are no dust or debris.
Once the wax is ready, carefully pour it into the floor peeling. Make sure to overfill it, since the wax tends to shrink as it cools. Let it dry for a few minutes until it’s solid but pliable.
Then, use the scraping tool to level the wax with the surface of the laminate.
For a smoother finish, use the smoothing tool by gently running it across the wax-filled area. It helps create a flawless surface that blends seamlessly with the rest of the floor.
Despite being slightly laborious, this process offers an excellent solution for minor scrapes and peelings.
Install the New Laminate Planks
With your clean, dry, and prepped floorboards ready, it’s time to start the installation process. Here’s how to proceed:
1. Position the new laminate plank correctly: Ensure the plank’s tongue side faces the center of the room, and the groove side is against the wall. This positioning enables an easier installation process.
2. Install starting from the left corner: Begin the installation from the left corner of the room and progress to the right. This direction ensures the tongues and grooves between planks align correctly, forming a seamless look.
3. Attach it according to manufacturer’s guidelines: Depending on the locking system your laminate flooring uses, interlock or snap each plank into place one by one.
4. Confirm the edges are secure: Press down the edges to see if they fit snugly. If not, re-align and attach them again. This step ensures a smooth and uniform surface.
5. Maintain uniformity: Keep each subsequent plank flush with the previous ones to maintain a uniform appearance.
Remember, perfection is significant here. Even the slightest misalignment can cause issues down the road!
Relevant Advice On Replacing the Boards
Board replacement is only necessary when re-gluing unrepairable damaged pieces. When procuring replacement planks, ensure they match the original flooring in pattern and color. Similarly, the thickness should be consistent for a seamless fit.
When laying down the new board, align it carefully to its neighbors, ensuring the locking system securely fits into place. Apply slight pressure or tapping motion to help with the positioning and bonding. Leave no gaps to prevent moisture penetration and potential future damage.
While working, always remember to handle the planks gently to prevent inadvertently damaging the edges or the locking system. Lastly, be mindful of the room’s humidity, a critical element for laminate flooring. Use a dehumidifier, if necessary, to maintain a favorable environment.
Steps for Changing a Board in the Middle of the Flooring
Begin by gently lifting the surrounding boards to expose the damaged piece. Exercise caution to avoid damage to adjacent planks. With a suitable tool, remove the malfunctioning board, while ensuring all four edges are undamaged. Sweep or vacuum the exposed area to rid it of dust or debris.
Next, take a new laminate plank to replace the damaged one. Often, the tongues of the board need to be trimmed off to assist with placement in the middle of your floor layout. A fine-tooth saw or utility knife would handle this task perfectly.
Now, apply a flexible 100% silicone sealant to the back of the laminate plank. This sealant acts as an adhesive, securing your board into position. Lower the new piece into the opening where the faulty plank was removed and gently apply pressure, ensuring it fits perfectly into its new home.
Finally, wipe off any excess sealant that oozes out using a dry cloth. Allow ample time to dry as per the sealant’s manufacturer instructions. After the sealant cures, reposition the nearby planks back into their original state.
Allow Laminate Planks to Dry
Following the successful replacement or repair of laminate planks, an essential step is giving them ample time to dry. Taking this time is crucial to ensure the adhesive used bonds correctly to the floorboards underneath, solidifying the planks in their place. Rushing the process can lead to improper fixation and potential peeling again in the future.
So, remember:
- 1. Be patient and give the adhesive sufficient time to dry adequately. Depending on the type of adhesive used, this could vary.
- 2. Ensure a dry environment with low humidity. High humidity can prolong the drying process or compromise the bonding of the adhesive.
- 3. Avoid any foot traffic on the newly repaired area. The pressure can cause shifting or damage the adhesive’s bonding process.
- 4. Allow at least 24 hours for the adhesive to fully cure before resuming regular use of the area. Depending on the specific brand of adhesive and the room’s environmental conditions, this time might be longer. Always refer to the adhesive manufacturer’s instructions.
Following these tips guarantees optimal results and minimizes the chance of dealing with peeling problems again.
Test the Repaired Area
Following a successful repair, it’s vital to ensure the fixed area behaves as expected under regular wear and tear. Begin with a visual inspection, checking for any discrepancies in the level between the new and surrounding planks. If you don’t see any visible issues, gently walk over the fixed section, feeling for any unusual movement underneath your feet.
Subsequently, carry out a more rigorous test by placing some weight, such as a heavy furniture piece, on the fixed area. This will mimic regular foot traffic and furniture load the floor experiences. If an inappropriate repair has been done, the problem area might sink under weight or produce squeaky sounds, indicating a revisit of the repair steps taken.
After confirming that the repair is undetectable and blends seamlessly with the rest of the floor, clean the area thoroughly. Dust, debris, or any left glue residue can scratch or distinguish the repaired laminate. Therefore, use a soft cloth or mop and a cleaning product suitable for laminate flooring.
Doing these activities in sequence will give you confidence in the quality of your repair work!
Additional Tips and Considerations
Keep in mind that adhesives function best when the temperature is warm, not scorching hot. If working in the winter, it’s advisable to increase the room temperature slightly for effective adhesion. Always double-check the instructions on adhesive product packaging to ensure you’re applying it correctly. Also, double-check that you’re using the right adhesive for your type of laminate flooring.
Apart from adhesives, there are specific tools designed for laminate floor repairs, such as floor gap fixers and laminate floor pull bars, which make the task easier and faster. These tools help align and place the laminate in its precise position without any damage or stress to its structure.
When using a laminate repair kit or a hard wax kit, be careful to match the color precisely. An inaccurate color match can lead to a patchy look. It’s also crucial to apply the repair compound in the right manner, without excessive use. Too much repair compound may dry and crack over time, leading to repeat issues.
For regular maintenance, dry cleaning methods are often better for laminate floors as excess moisture can lead to peeling. Tools such as dry mops or vacuum cleaners are usually a safe and efficient choice.
Lastly, remember to treat the underlying cause of peeling to avoid a recurrence. This might be as simple as adjusting room humidity levels or as involved as checking for leaks and bad installations.
Preventative Methods to Avoid Peeling
Proper installation is an effective primary deterrent. Engage a professional or follow the manufacturer’s guidance meticulously. Absence of moisture is crucial. Always make sure your floor is dry and free from humidity. Use recommended sealants if possible. Aim to control the room’s climate, using dehumidifiers if needed.
Regular maintenance can also prove beneficial. Use cleaning products that are specifically designed for laminate floors. Avoid using excessive water and harsh chemicals that can seep into the seams and cause damage. Furthermore, use soft cloths or mops, as coarse materials could scratch the surface over time and lead to peeling.
Lastly, quick repair of minor damages is integral. Once you see a bit of peeling or damage, attend to it immediately. Neglected minor damages can soon turn into major ones, causing the entire laminate to start peeling. Proper furniture placement and adjustment also prevent undue pressure leading to peeling. Utilize furniture pads on the legs of tables, chairs, and other hefty items. Regular inspection aids in identifying stress points on your floor, ensuring the problem is acted upon swiftly before it escalates.
Maintenance Tips to Prolong the Lifespan of Laminate Flooring
To uphold the high quality and visual appeal of your floor, heed the following tips:
1. Regular Cleaning: Dust and dirt can be abrasive, which if left unchecked, can wear down your floor’s protective layer. Use soft-bristled brooms or a vacuum with a hard floor attachment to clean regularly.
2. Avoid Moisture: Water is a laminate floor’s worst enemy. Wipe up spills immediately to prevent water from seeping into the seams between planks, which can cause them to swell and lift.
3. Use Proper Cleaning Products: Avoid using soap-based detergents or abrasive cleaners, as they can leave a dull finish on your floor. Use a cleaner specifically designed for laminate floors.
4. Utilize Mats and Rugs: Entry mats will catch much of the dirt that could otherwise scratch your floor. Also, use rugs in high traffic areas to minimize wear and tear.
5. Furniture Pads: Use felt or rubber pads under the legs of your furniture to avoid scratching the floor when moving items around.
6. Keep Pets’ Nails Trimmed: Pets’ nails, especially from dogs, can scratch your laminate floor. Regular trimming helps to ward off any potential damage.
7. Protect from Sunlight: Over time, direct sunlight can fade the color of your laminate floor. Use blinds, curtains or other window coverings to protect your floor from sunlight.
How Regular Inspection Helps Maintain Quality
Continual examination of your laminate flooring plays a critical role in maintaining its top-notch quality. An early discovery of minor damages allows for quicker and less-costly repairs. It holds off potential complexity that comes with extensive, neglected damage.
Look out for common signs such as raised edges, discolored spots, or changes in texture. Even small peels or cracks can be early signs of peeling, so immediate attention is requisitely crucial.
Remember, maintaining the quality of your laminate floors isn’t just for aesthetics, it is as well about your floors’ functionality and longevity. With regular monitoring, you get ahead of significant issues and can address them before they develop into more substantial problems. Hence, inspection is an essential part of the laminate flooring maintenance routine.
In your regular checks, remember to review high-traffic areas rigorously. These are typically the first to show wear, and catching issues here early can save considerable time and cost in repairs. Overall, a dedicated regular inspection schedule helps maintain the health and attractiveness of your laminate floors.
Advice On Proper Cleaning Techniques
Regular sweeping or dusting is essential to maintain the integrity of laminate floors. Always use a soft-bristle broom or a dry dust mop. Remember, tiny bits of dirt and dust can cause scratches, hence regular cleaning is crucial.
Avoid using steam mops or traditional wet mops; these might generate excessive moisture, exacerbating peeling issues. Instead, use a damp cloth for spot cleaning or a mop slightly dampened with special laminate-floor cleaner for comprehensive cleaning.
Never apply wax or polish designed for hardwood floors. These products might create a slick surface or cause discoloration, adding to the wear and tear of the laminate.
Lastly, in case of spills, act immediately and wipe them off. Prolonged exposure to liquids can lead to peeling or warping. As benign as it may seem, even a small water spill can lead to major issues if ignored. With these practices, your laminate floor’s beauty can be preserved efficiently.
FAQ
Can you repair peeling laminate flooring?
Certainly, peeling laminate flooring can be repaired using a touch-up or repair kit that matches the color of your flooring, and putty is effective for larger areas.
How do you fix a laminate floor that is lifting?
To fix a laminate floor that is lifting, identify the cause, remove the affected planks if they’re water-damaged, thoroughly dry the area using towels or a fan, and then replace and reinstall the planks.
What causes laminate to peel?
Laminate peels due to factors like excessive moisture, temperature fluctuations, sunlight exposure, and low-quality materials.
Can you repair damaged laminate flooring?
Yes, damaged laminate flooring can be repaired, especially minor chips and scratches, but deep gouges often necessitate the removal and replacement of the entire board.
What are the best tools and supplies required to fix peeling laminate flooring?
The essential tools and supplies required to fix peeling laminate flooring include adhesive or glue specially designed for laminate, a putty knife, a roller, a piece of wax paper, and weights or heavy books.
How can one effectively prevent laminate floors from peeling in the future?
To effectively prevent laminate floors from peeling in the future, ensure regular cleaning, avoid using abrasive cleaners, and maintain the room’s temperature and humidity at optimal levels.
Is it possible to restore the original appearance of laminate floor that has been peeled?
Yes, it’s possible to restore the appearance of a peeled laminate floor by replacing damaged planks or using repair kits designed for laminate flooring.
Read More Like This
 15 Funny Graduation Cap Ideas to Make Your Big Day Unforgettable
 15 Unique DIY Christmas Decorations Ideas for a Festive Home
 15 Creative Science Fair Board Ideas to Amaze Your Audience
 15 Handmade Envelope Decoration Ideas for Creative Gifting
 10 DIY Gifts for the Whiskey Lover in Your Life
Recap: