Last updated on
Installing multiple pendant lights can dramatically transform your living space because these fixtures add depth, ambiance, and a touch of elegance to any room.
In the world of interior decor, multiple pendant lights installation can transform an average room into something sublime. This process, while seeming intricate, is actually quite straightforward once understood.
This article will serve as your expert guide, equipping you with detailed instructions on achieving an impressive multiple pendant lights setup. Whether it’s beautifying your kitchen island, dining area, or bathroom vanity, this guide contains everything to ensure a stress-free installation.
Unearth the tips and tricks, safety measures, tools required, and step-by-step procedures to journey from a pendant light novice to a skilled DIY decorator by the end of this read. Follow along to illuminate your space with that desired striking or cozy vibe using pendant lights.
Key takeaways:
- Choosing the right pendant light for your space: consider ceiling height, light function, room size, and decor style.
- Types of pendant lights suitable for different rooms: task lighting for the kitchen, lantern-style pendants for dining spaces, bell-shaped pendants for bedrooms, and mini pendant lights for bathrooms.
- Required tools for installing pendant lights: screwdriver, voltage tester, wire strippers, pliers, wire nuts, ladder, and light bulbs.
- Safety precautions when installing pendant lights: turn off power, use a voltage tester, work on a stable ladder, wear protective gear, and seek professional help if needed.
- Planning the layout for multiple pendant lights: sketch a floor plan, consider furniture placement, determine the number and spacing of lights, and install them at the right height.
Choosing the Right Pendant Light for Your Space

Understanding your space is essential in achieving an effective lighting setup. Pendant lights come in a variety of sizes, materials, and designs, each suitable for different environments. Here are a few considerations:
1. Ceiling height: Tall ceilings can accommodate larger, more prominent fixtures. Lower ceilings benefit from mini or shorter pendant lights, which won’t overwhelm the space.
2. Light function: Task-oriented spaces, such as over a kitchen island or a workstation, rest best under bright, focused pendants. Contrastingly, ambient lighting calls for softer diffused styles, perfect for greeting areas or over dining tables.
3. Room size: Smaller rooms shine best with proportionate, fewer pendants. Spacious rooms, however, can easily take on grand multi-light pendants or clusters of individual lights.
4. Decor style: Finally, choose a design in harmony with your existing interiors. For example, an urban industrial setting works wonders with metal and exposed bulb designs while a minimalist space would pair well with sleek, slimline fixtures.
Types of Pendant Lights Suitable for Different Rooms
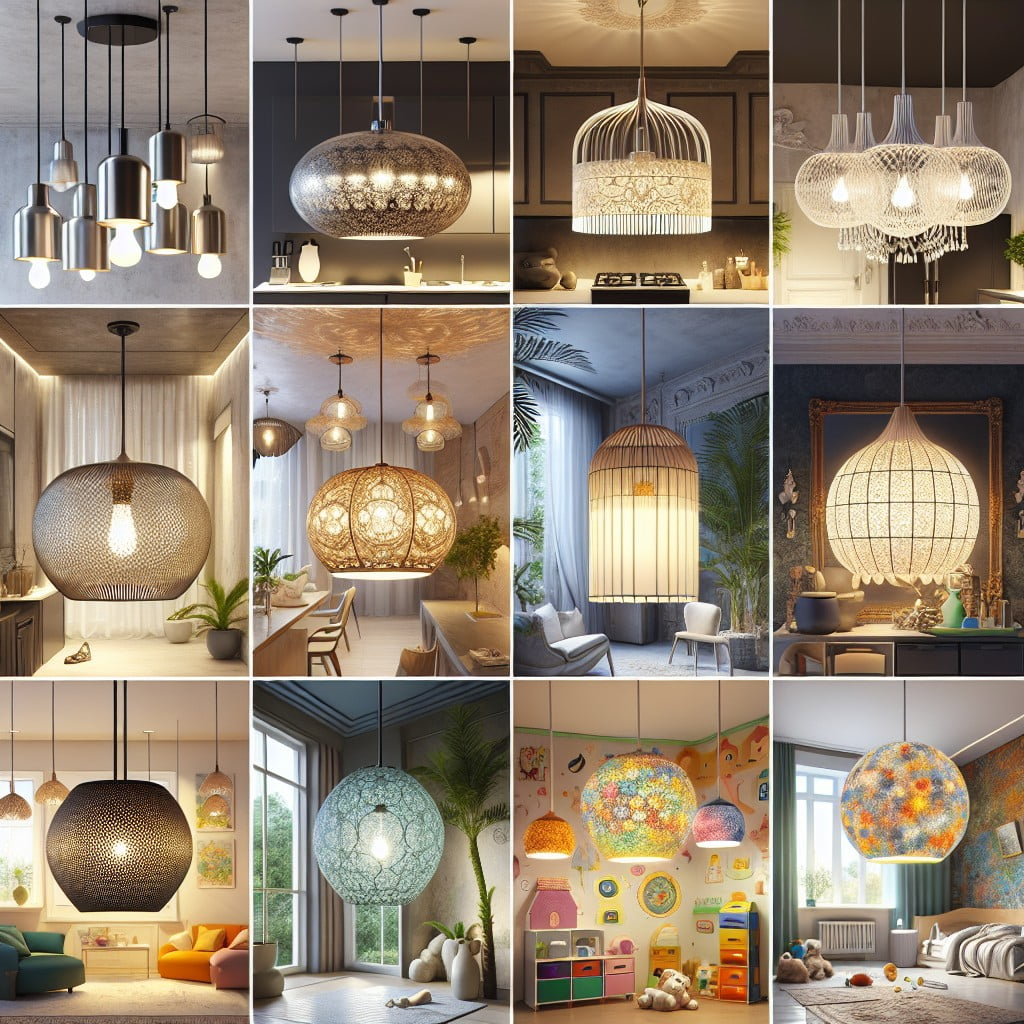
Deciding on the perfect pendant light depends on the room and its function. In the kitchen, try task lighting – look for options with brighter bulbs and downward shades. Dining spaces, on the other hand, offer the freedom for more decorative and ambient lighting like lantern-style pendants.
Is the living room your target? Opt for multiple drum-pendant lights to give a wider spread of softer lighting. Bedrooms provide a more intimate setting – a couple of small, bell-shaped pendant lights would be ideal for a cozy atmosphere.
For higher moisture areas, such as the bathroom, ensure your choice is safe and rated for damp locations. Consider a mini pendant light for minimalistic style and practical illumination. Lastly, in hallways or entrance areas consider cluster pendants which offer welcoming light while creating a strong aesthetic impression.
Remember, the type of bulb you choose will also impact the overall mood and brightness – from warm dimmable LEDs to daylight bright fluorescents, the choice is yours to customize.
Required Tools for Installing Pendant Lights

Before rolling up your sleeves, let’s gather all tools to ensure a smooth installation process. A simple flathead or Phillips screwdriver often leads the show, based on the screws the light fixture comes with.
A voltage tester is instrumental in confirming power is off prior to beginning work, an essential safety measure. Wire strippers and pliers are needed for handling electric wires while wire nuts will secure them together.
A ladder, usually a 6-foot for standard ceiling heights, ensures easy access to the installation area. Finally, remember to have your light bulbs on hand. Depending on the pendant’s design, you might require specific bulbs, smaller or LED versions.
From using the correct tools to opting for the right bulbs, these essentials promise to streamline the process while keeping safety at the forefront.
Safety Precautions When Installing Pendant Lights

Before diving into the installation process, it’s vital to prioritize safety above all else. Begin by turning off the power source at the circuit breaker box to avoid any electrical mishaps. Better yet, employ a voltage tester to ensure no currents are flowing through the wires you’ll be handling.
Remember, working on a stable ladder, preferably with a partner at hand, will significantly reduce the chances of accidents. Always wear protective gear, including safety goggles and gloves. Lastly, if the project feels overwhelming or the electrical wiring appears complex, don’t hesitate to seek professional help. Safety should never be compromised.
Planning the Layout for Multiple Pendant Lights
Before you start drilling holes and hanging fixtures, careful planning for the placement of multiple pendant lights is key. Here’s a simple guide:
1. Sketch a rough floor plan: This helps visualize where the lights will hang, ensuring they neither obstruct paths nor cause any inconvenience.
2. Factor in furniture placement: Decide where lights will be in relation to tables, kitchen islands, or counters. Ensure they are well-placed for tasks undertaken in these areas.
3. Number of lights: Too many lights close together can cause glare, unintentionally creating harsh light spots.
4. Spacing: As a guide, aim for about 30 inches apart for pendants over a counter or island. However, this is not a rule. The size of the pendant and the room will also influence spacing.
5. Height: Install pendant fixtures high enough to prevent anyone from bumping their heads, yet low enough to provide focused lighting.
6. The rule of thirds: A design principle which suggests dividing space into thirds both horizontally and vertically for balanced spacing.
Pay attention to the existing electrical layout too, to avoid major rewiring work. The goal is to create an aesthetically pleasing, efficient, and effective lighting arrangement.
Ideal Distances Between Hanging Pendant Lights
Determining the right spacing between your pendant lights is essential for balanced illumination and to avoid cluttering the ceiling with lights too close together. When installing multiple pendants above a kitchen island or a dining table, the industry standard suggests a distance of 30 inches from the center of one light to the center of the next. However, the exact distance can be fine-tuned to accommodate the size of the table or island, as well as the size and number of pendants.
In a hallway or open living space, aim for a spacing of about 5-6 feet between each light to create a well-lit and harmonious look. Keep in mind the height of the ceiling and the intensity of the light each pendant emits while deciding on this.
Remember, while uniform distance is a safe option, a staggered arrangement or varied distances between lights can create visual interest and break the monotony in larger rooms. As a rule of thumb, always ensure the lights don’t obstruct the line of sight or pose a head-bumping risk. Placement will impact usability and the overall aesthetic of your space significantly.
Step-by-Step Guide to Installing Multiple Pendant Lights
Starting with the first location, cut a hole for the pendant light fixture following the manufacturer’s measurements. Turn off electrical power from the main circuit breaker before beginning. Run a separate cable from one light box to the next using a tape measure to guide; repeat this process for all pending pendant locations.
In each box, attach the wires accordingly: black (hot) wires to black, white (neutral) wires to white, and finally ground the wires to the grounding screw in the box. Secure all wire connections with wire nuts. It’s important to keep the coloring consistent for a safe and effective installation.
Feed the cables through the nipple of the mounting strap of the lighting fixture. Follow the manufacturer instructions to correctly assemble and attach the pendant light onto the mounting bracket. Make sure the light fixture is secure. Repeat this process for all pendant lights.
Once all lights are installed, switch on the power from the main breaker. Check each pendant light to ensure they are functioning properly. With a successful test, your installation is complete. Remember, with electric installations, it’s paramount to prioritize safety; always consider hiring licensed electricians if you’re uncertain.
Connecting Multiple Pendant Lights With Wire Connectors
To connect several pendant lights using wire connectors, properly aligning and twisting the wires together is essential. Follow these steps for a seamless installation:
1. Switch off the power: Always ensure safety. Cut off the electricity supply to the circuit you’re working on.
2. Identify the wires: Pendant lights generally have three wires; hot (black), neutral (white), and ground (green or bare copper wire). Ensure to match these with corresponding wires in your electrical box.
3. Align the wires: Line up the stripped ends of the corresponding wires from the pendant light and the electrical box.
4. Connect the wires: Twist a wire connector clockwise on to each pair of wires until they’re snug and secure. Always start with the ground wire, then neutral, and finally the hot wire.
5. Tuck the wires: Once connected, fold the wires neatly into the electrical box.
Following these steps will ensure a secure connection of your multiple pendant lights while maintaining safety standards.
Effective Cable Management for Multiple Pendant Lights
When handling the electrical wiring component of your setup, it’s crucial to keep cables neat and organized. This not only makes maintenance easier in the future but also avoids any potential safety hazards caused by tangled or overlapping wires.
Follow these practical tips for smart cable management:
- Streamline: Start by running all wires in the same direction along the ceiling or wall, creating a cohesive bundle.
- Conceal: Consider using wire tracks or moldings to hide the cables. They are available in various colors and styles to complement your room’s aesthetic.
- Clamp: Use cable clamps to secure the wires. Distance them evenly to prevent sagging.
- Protect: Always use cable covers especially when wires cross walkways or doors to prevent tripping and damage.
- Label: When working with multiple wires, it’s a good practice to label them. It will make identifying the correct circuit easier during maintenance or future alterations.
- Length: Keep wires as short as possible. Reducing excess lengths can significantly minimize the potential of unwieldy cabling and reduce electrical resistance.
Adopting these techniques will create a cleaner, safer, and more efficient lighting setup, enhancing both its functionality and visual appeal.
Turning a Pendant Set Into a Chandelier
Complementing an existing theme or establishing a refreshing one, hanging multiple pendant lights together in a cluster creates a custom chandelier effect. The drama and visual interest achieved are sentimentally profound. The process involves picking identical or complementary pendant lights and varying the hang lengths for a cascading effect.
1. Identifying the Central Point: The center point of the configuration is where all the pendant lights meet. This is crucial in achieving a harmonious look.
2. Selecting the Cord’s Length: The height of each pendant light is integral to overall aesthetics. Opt for different cord lengths to bring dynamism to the arrangement.
3. Proper Coordination: If working with pendant lights of varying designs or sizes, arrange them such that the pattern appears balanced.
4. Ensuring functionality: The chandelier effect should not compromise the functionality of the light. Confirm that the light coverage is an improvement from a single pendant.
5. Electrical Compliance: Check with an electrician if your ceiling junction box can handle the load of multiple pendant lights. This avoids overloading the electrical setup.
6. Installation: Pendant lights are simply screwed into the electric box. However, re-arrange the cord lengths as desired, ensure pendants hang at different depths while still grouped closely.
Remember, each pendant light should complement the other, either contrasting or matching, and fuse together to form a unique chandelier that adds character to your space. It’s all about balance, coordination and the essence of lighting.
Troubleshooting Common Issues During Pendant Light Installation
When confronted with difficulties, don’t panic. Many issues can be swiftly solved with some know-how.
Firstly, if your light doesn’t turn on, your bulb could be the culprit. Try replacing it with a new one. If the problem persists, check your wiring, ensuring the live and neutral wires are properly connected.
An unevenly hanging pendant light can be another common issue. Double-check your measurements and adjust the cord lengths accordingly. Additionally, check the securing mechanism – the fastenings may need tightening.
If your pendant light is flickering, the bulb may not be compatible with your light fitting. Check the manufacturer’s specification and replace the bulb accordingly. Alternatively, it may be a loose connection. Turn off the power, confirm all connections are secure, then turn the power back on.
Lastly, if the pendant light overheats, ensure you are using the correct wattage for the light, as exceeding this can cause overheating. Always remember to turn off the power before performing any maintenance. This can prevent accidental shocks and ensure a safe troubleshooting process.
These mentioned points will help you efficiently solve common issues, making your pendant light installation a breeze.
FAQ
Can you wire multiple pendant lights together?
Yes, you can wire multiple pendant lights together by using wire connectors to ensure all wires are connected correctly.
Does each pendant light need a junction box?
Each pendant light necessitates a separate junction box for proper installation.
Can you hang 2 pendant lights?
Yes, you can hang 2 pendant lights above a kitchen island, ideally 30-32" above the island’s top and spaced at least 30" apart from the center of the island.
How is the spacing of multiple pendant lights determined?
The spacing of multiple pendant lights is typically determined by dividing the length of the surface to be lit, such as a kitchen island or dining table, by the number of lights desired plus 1, which ensures evenly distributed coverage.
What is the proper height to hang a pendant light over a kitchen table?
The proper height to hang a pendant light over a kitchen table is between 30 and 36 inches above the table’s surface.
Are there specific electrical codes relevant to installing pendant lights?
Yes, electrical codes such as the National Electrical Code (NEC) require pendant lights to be installed by a licensed electrician and maintain a minimum clearance of 12 inches from the ceiling and 30 inches from the tabletop or floor.
Read More Like This
 15 Funny Graduation Cap Ideas to Make Your Big Day Unforgettable
 15 Unique DIY Christmas Decorations Ideas for a Festive Home
 15 Creative Science Fair Board Ideas to Amaze Your Audience
 15 Handmade Envelope Decoration Ideas for Creative Gifting
 10 DIY Gifts for the Whiskey Lover in Your Life
Recap: