Last updated on
We will walk you through the simple steps to replace a pendant light cord effectively and safely.
Are you tired of staring at that outdated pendant light hanging in your living room? Perhaps the cord is frayed or the color no longer matches your decor. Whatever the reason, replacing a pendant light cord is a quick and easy way to update the look of any room.
As a seasoned home decorator, I’ve replaced my fair share of pendant light cords and I’m here to guide you through the process step-by-step. In this article, we’ll cover everything from choosing the right replacement cord to safely installing it yourself without hiring an electrician.
So grab your tools and let’s get started!
Key takeaways:
- Safety Precautions: Turn off power, wear protective gear, call electrician if unsure.
- Tools and Materials: Wire cutters, screwdriver, pliers, replacement cord.
- Removing Old Cord: Switch off power, remove decorative elements, gently pull out cord.
- Wiring New Cord: Strip insulation, connect hot, neutral, and ground wires.
- Attaching Pendant Light: Thread cord through fixture, secure screws, test installation.
Safety Precautions
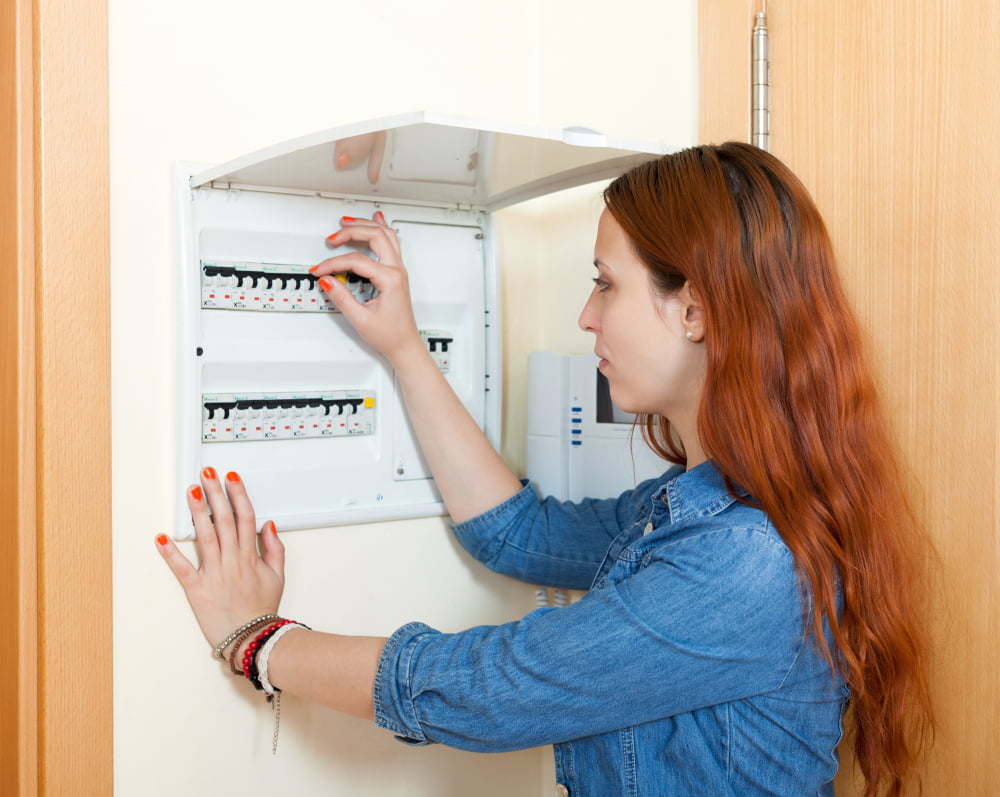
Before diving into replacing a pendant light cord, it’s important to take some safety precautions. First and foremost, make sure that the power is turned off at the circuit breaker before you begin any work on your electrical system. This will prevent any accidental electrocution or damage to your home’s wiring.
Always wear protective gear such as gloves and safety glasses when working with electrical components. Make sure that you have a sturdy ladder or step stool to reach high ceilings safely.
Lastly, if you’re not comfortable working with electricity or unsure about anything in this process, don’t hesitate to call an electrician for assistance.
Tools and Materials
You’ll need a few basic items that you may already have in your toolbox or can easily purchase at any hardware store.
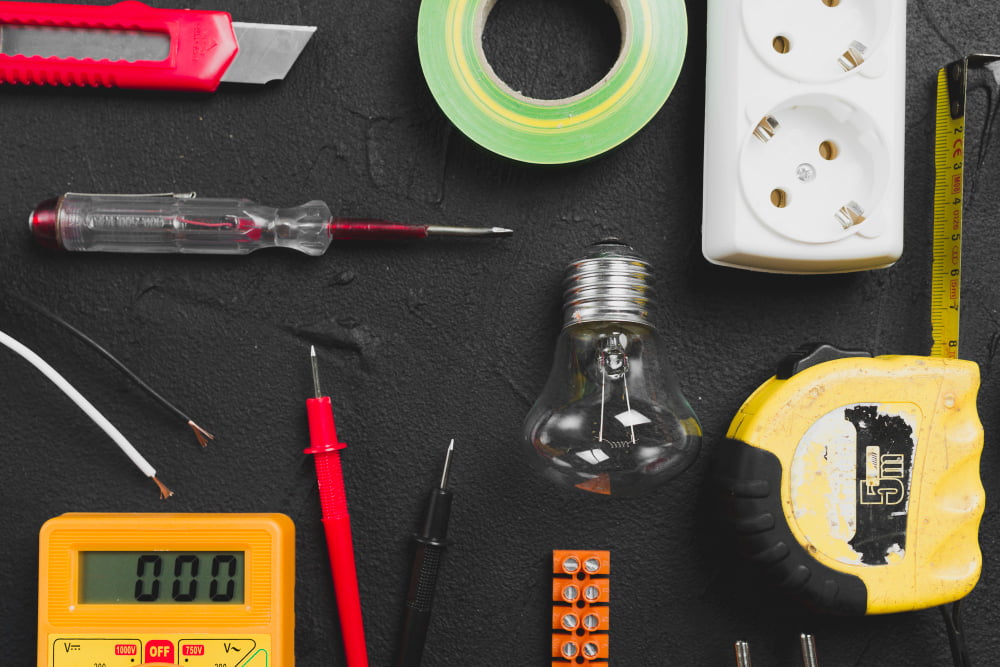
Tools:
- Wire cutters
- Screwdriver (flathead or Phillips)
- Pliers
Materials:
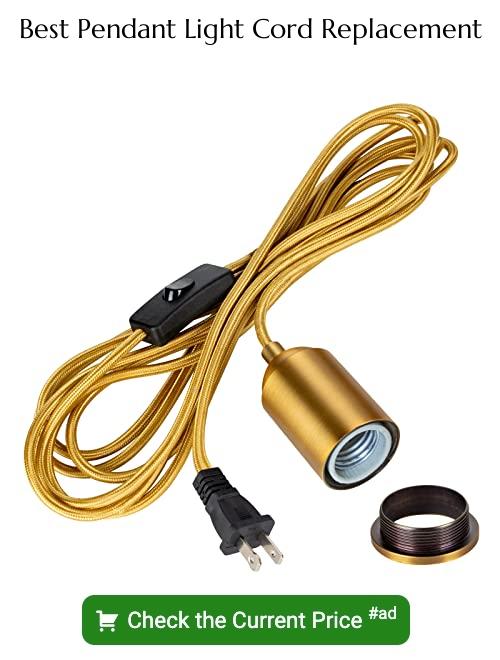
- Replacement pendant light cord
- Make sure to choose one with the same wattage rating as your old cord.
- The length should be long enough to reach from the ceiling to where you want your pendant light fixture to hang.
- Choose a color that matches your decor.
That’s it! With these simple tools and materials, you’re ready to replace that outdated pendant light cord and give new life to any room in your home.
Removing Old Cord
This can be done by switching off the circuit breaker or unscrewing the fuse that controls your light fixture. Once you’ve ensured that there’s no electricity running through it, remove any decorative elements such as shades or bulbs from your pendant light.
Next, locate where the cord enters into your pendant and gently pull it out of its socket. You may need a pair of pliers if it’s stuck in place due to age or corrosion.
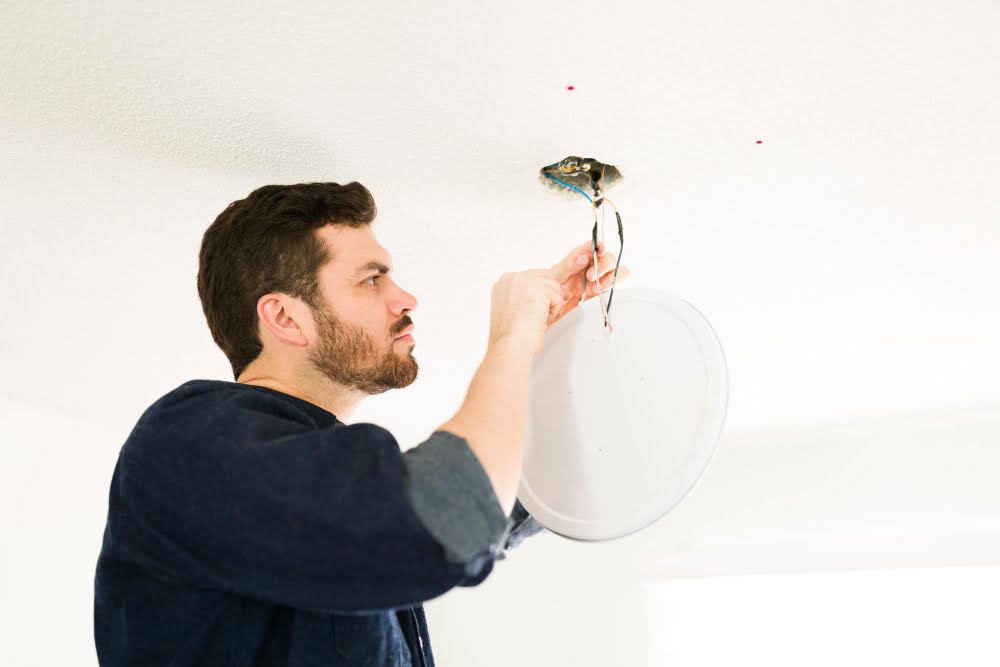
Wiring New Cord
First, strip about 1/2 inch of insulation from each of the wires on your new cord. You should see two wires: one smooth and one ribbed or marked with a stripe.
Next, locate where your old pendant light was wired into your ceiling electrical box. There will be three wires coming out of this box: black (or red), white and green (or bare copper).
The black or red wire is known as “hot,” while the white wire is “neutral” and green/bare copper is “ground.”
To connect these to your new pendant light cord:
- Twist together the hot wire from both cords.
- Secure them with a plastic twist-on connector.
- Repeat this process for both neutral wires.
- Twist together ground/bare copper wiring.
Attaching Pendant Light
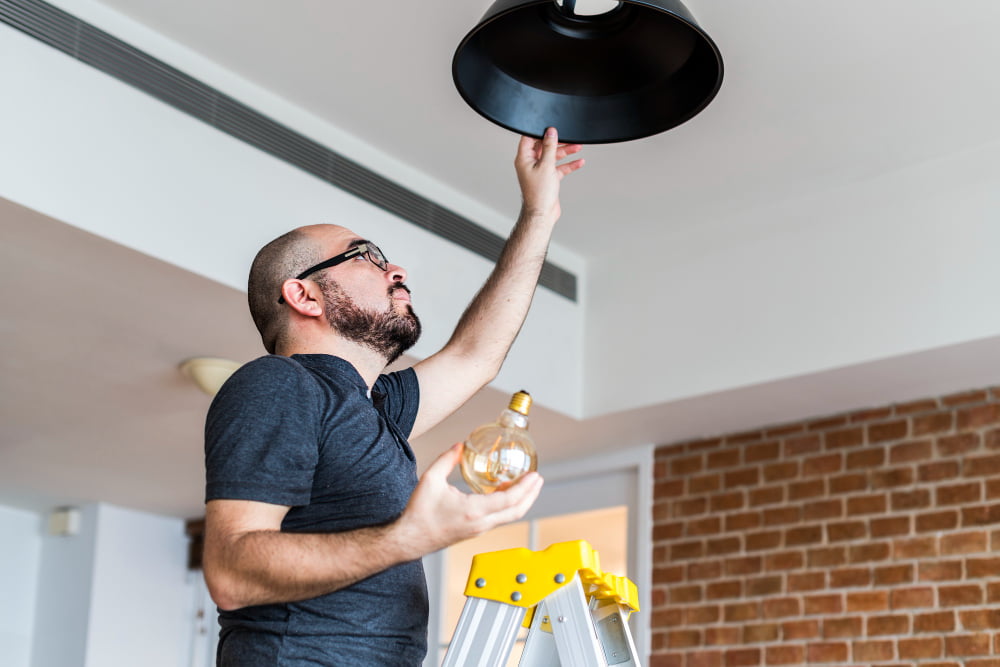
First, carefully thread the cord through the base of your pendant light fixture. Then, use a screwdriver to secure any screws or bolts holding the fixture.
Next, make sure that all wires are tucked neatly inside and not visible outside of the fixture. This will ensure a clean and professional look once everything is installed.
Turn on power at your circuit breaker box and test out your new installation by flipping on the switch! If everything looks good and works properly, congratulations – you’ve successfully replaced a pendant light cord yourself!.
Remember: if at any point during this process you feel uncomfortable or unsure about what to do next – don’t hesitate to call in an electrician for help.
Testing Installation

Before turning on the power, double-check that all connections are secure and there are no exposed wires. Once you’re confident everything is in order, turn on the circuit breaker or flip the switch to see if your new pendant light illuminates as expected.
If everything looks good but your light still isn’t working, try replacing the bulb with a fresh one. If that doesn’t work either, it may be time to call an electrician for further assistance.
Testing your installation is crucial for ensuring safety and functionality of your newly installed pendant light cord. So take a moment to admire how much better this simple update has made your room look!
Read More Like This
 15 Funny Graduation Cap Ideas to Make Your Big Day Unforgettable
 15 Unique DIY Christmas Decorations Ideas for a Festive Home
 15 Creative Science Fair Board Ideas to Amaze Your Audience
 15 Handmade Envelope Decoration Ideas for Creative Gifting
 10 DIY Gifts for the Whiskey Lover in Your Life
Recap: