Last updated on
Each room’s ambiance depends greatly on lighting; therefore, changing your pendant light shade is crucial because it not only modifies the aesthetics but also influences the mood of your space.
Swapping out an old pendant light shade for a fresh new one can rejuvenate and make a significant impact on your room’s overall ambiance without breaking the bank.
In the following article, you will find a simple, step-by-step guide that covers all aspects of changing a pendant light shade.
Whether you aim to infuse an inviting warmth, a cozy chic, or a modern minimalist style, this tutorial will walk you through the process.
Furthermore, you’ll find essential tips on safety and light bulb choices to ensure an efficient and secure fixture replacement.
With this comprehensive guide at your disposal, you’re well on your way to adding a wonderful, fresh touch to your room’s lighting in no time.
Key takeaways:
- Diffusion of Light softens harsh glare, creates gentle radiance.
- Shades protect the bulb, extend life, prevent injury.
- Light shades enhance the room’s design and style.
- Proper shade selection optimizes energy efficiency.
- Shade changes impact mood lighting, create desired atmosphere.
Understanding the Importance of a Pendant Light Shade
Pendant light shades not only provide a method of controlling the intensity and dispersion of light but also contribute significantly to the overall interior design aesthetic. Here are several essential aspects of their importance:
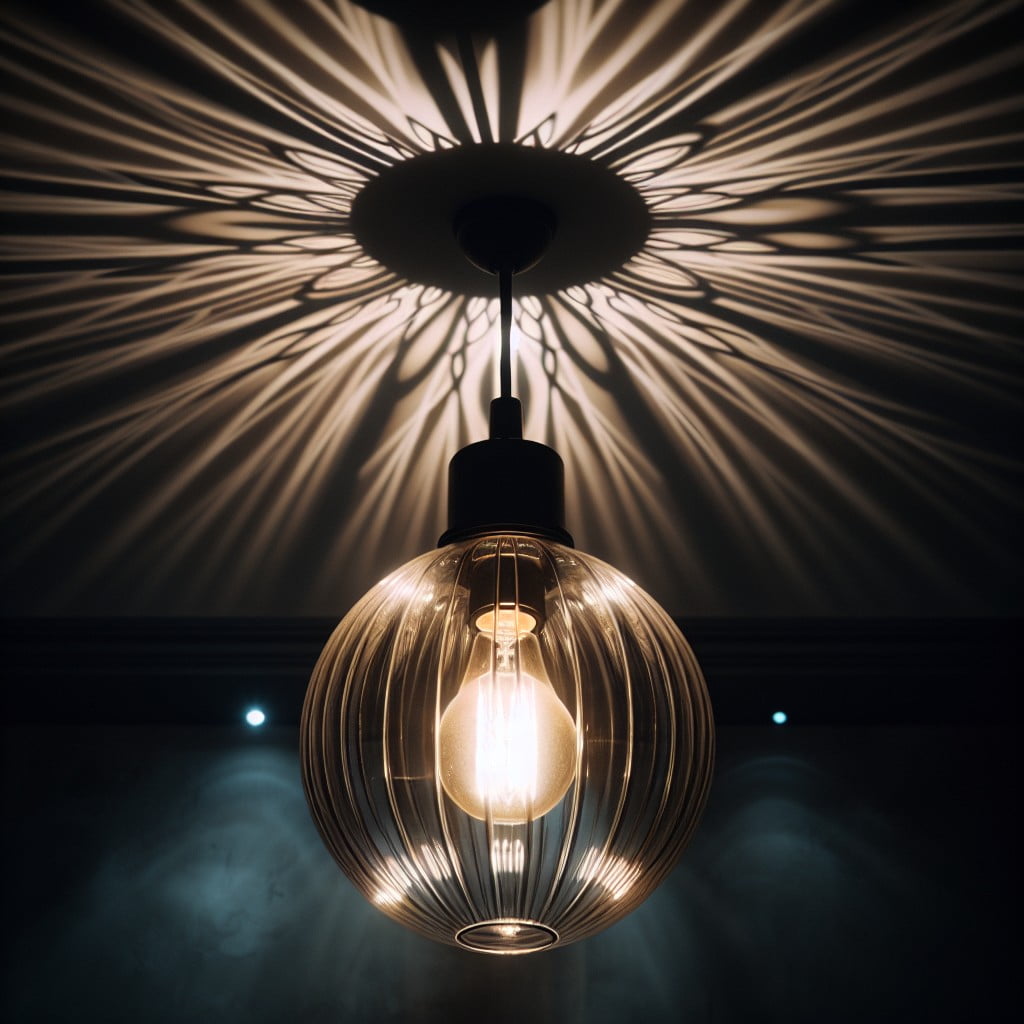
1. Diffusion of Light – By scattering light, shades soften the harsh glare produced by bulbs. This diffusion creates gentle radiance, which can augment the ambiance and comfort in a room.
2. Dealing with Glare – Light shades can help to block any direct harsh light, reducing eye strain and the risk of headaches.
3. Interior Design – Light shades come in a variety of shapes, colors, and designs, making them crucial elements in a room’s design. They can help to establish or enhance a particular style or theme.
4. Protection – The shades protect the bulb from damage, thus extending its life. They also safeguard the occupants from potential injury resulting from direct contact with the hot bulb.
5. Energy-Efficient – Certain light shades can optimize light usage, making your home more energy efficient.
6. Mood Regulation – Light shades are instrumental in controlling mood lighting for rooms. Whether it’s a dim, cozy atmosphere you want, or an intense, lively feel, pendant light shades can help you attain the desired effect.
Remember, thoughtful choice and strategic placement of shades can dramatically transform your living space and enhance the overall lighting scheme.
Benefits of Changing a Pendant Light Shade

Switching out your pendant light shade provides an avenue for reinventing your space. With a simple change, outdated fixtures can be turned into contemporary elements, reigniting your interior’s visual appeal.
The new shade allows you to manipulate lighting, impacting the overall ambiance of the room. Brightness, contrast, and mood can be altered through this strategy, catering to your specific needs and preferences.
Introducing a different pendant light shade boosts the creative value of your interiors. It’s an opportunity to blend or accentuate colors, complement the existing décor, or infuse a personal touch into your home.
Lastly, a fresh pendant shade ensures the fixture operates effectively. Aged shades may show signs of wear and tear, impairing the lighting quality, whereas a new shade ensures a functional and captivating light source.
How to Determine the Right Time to Change Pendant Light Shade
Aging, physical damage, and outdated design are three core indicators your pendant light shade needs a change.
Firstly, over time, shades can lose their original appeal and luster or might seem worn out, making them less effective in both design and functionality. This wear can diminish their effectiveness in controlling the room’s lighting.
Secondly, visible physical damage like chips, cracks, or discoloration signal an immediate need for replacement. Sometimes, neglect or accident may lead to such damage, transforming the shade from a decorative item to an eyesore.
Lastly, if the pendant light shade no longer matches your room’s décor, or if it feels outdated, a change could refresh the room’s ambiance. Fashion evolves, and light shades aren’t an exception. An upgrade helps in keeping your space in tune with the latest interior design trends.
Signs That the Pendant Light Shade Needs Replacement
Regular maintenance and inspection are key to keeping pendant light fixtures in top shape. Note that persistent dust or dirt may cause the shade to become discolored or dull, this can affect both the shade’s look and the richness of light in your space.
Cracks and chips also call for attention; while they may appear minor, they can expand over time and lead to total breakage. Further, they also pose safety threats as they may cause the shade to fall suddenly.
Something else to lookout for are heat spots – areas on the shade that seem overly hot. This could hint at a compatibility issue between the bulb wattage and the shade material. Prolonged exposure to excessive heat could warp or discolor the shade.
Lastly, if the shade consistently rattles or seems unstable despite creditably securing all fittings, it might be an indication that the fixture is no longer as robust as it once was. This could hasten wear and tear, making a replacement necessary sooner rather than later. It is crucial to address these signs promptly to keep your space both safe and visually pleasing.
Next, we look into some safety precautions before proceeding with the change.
Safety Precautions Before Changing a Pendant Light Shade
Before embarking on the task, your safety is paramount. Initiate by switching off the power source connected to the light fixture to avoid electrical shocks. This can usually be done at the circuit breaker; ensure you select the correct one. Use a non-contact voltage tester to confirm the power is off – it’s a valuable tool for double-checking electrical safety.
Remember to always use a sturdy and suitable ladder when dealing with overhead elements. A step stool or chair can pose unwarranted risks of slipping or falling, and therefore should be avoided.
Furthermore, it’s good practice to have an assistant nearby. They can handle tasks such as passing tools, and more importantly, they’re at hand if an unexpected situation arises.
Lastly, always wear protective gear, such as gloves and safety glasses. This will protect you from potential fragments or dust released as the old shade is removed. By following these steps, you’re ensuring a safe process, paving the way for a successful upgrade. Be sure to keep these pointers in mind when shifting to the removal and installation phases.
Preparing the Needed Tools for Changing a Pendant Light Shade
Having the right tools at your disposal will make the entire process smoother and quicker. First off, a screwdriver will be essential for freeing the old shade from its fixture. Depending on the specifics of your light fixture, a Phillips or a flat-head might be necessary – make sure to check before starting.
A measuring tape will be useful, as well. Accuracy matters when getting the dimensions of the old shade and ensuring the fit of your new one. If you’re not confident with eyeballing the dimensions, there’s no harm in double-checking with a measuring tape.
Since safety should always be a priority, a ladder is needed to reach the fixture safely, especially for higher ceilings. A stable, sturdy ladder would be ideal. Using a chair or unstable surface can lead to accidents, which we undeniably want to avoid.
Lastly, you may need adjustable pliers, which will help grip, twist, or turn things when necessary. A soft cloth or gloves can also be useful to handle the glass shades without smudging or scratching them. Always remember: being equipped with the right tools will set the rest of the task up for success.
Detailed Guide On How to Remove an Old Pendant Light Shade
First, ensure you have switched off the power from the main source to avoid any electrical mishaps. It is a critical step that should never be overlooked. Once you’ve ensured safety, gather a stepladder, screwdriver, and a soft cloth or towel.
Climb your stepladder to reach the pendant light comfortably. Use your cloth to gently clean away any dust or cobwebs from the fixture. This allows for easier work and less mess.
Find the small screw or knob usually located at the top of the light shade. Using your screwdriver, gently unscrew this. Hold the shade with your free hand to prevent it from falling. Once the screw is loose, carefully lower the light shade. Do remember, some shades might have a few additional small screws holding them. Make sure to loosen all of them.
Be mindful while handling the old shade, especially if it’s made of breakable material like glass. Safely dispose of the old shade or store it away if you plan to reuse it. Now, your light fixture is ready for a new shade.
Dealing With Complications During the Shade Removal
Unexpected hurdles may arise while removing the old shade. In the face of such predicaments, remain calm and focused. Here are a few ways to navigate through them effectively:
1. If the shade is firmly attached, try to gently rotate it. Excessive force might lead to breakage, so proceed with caution.
2. A rusty fixture can be challenging. Apply a rust remover, available at hardware stores, to loosen the grip.
3. If the shade is glued, a hairdryer can help soften the adhesive. Direct the warm air towards the glue for a few minutes then carefully pry it off.
4. Tools can sometimes slip or fail. Always use the correct tool for each step. For instance, use a wire stripper for wires, not scissors.
5. If the shade is stuck due to paint, a utility knife can be used to slice through the paint around the fixture.
6. Be prepared for a possible cleanup. Lay a sheet below the work area to collect any fallen debris.
Always remember, patience and care are crucial in avoiding further damage to your pendant light or injury to yourself.
How to Measure for a New Pendant Light Shade
Knowing the precise measurements required ahead of shopping for your new shade can save time and prevent unnecessary returns. Here are some essential tips to guide you:
- 1. Diameter: Use a tape measure to find the widest part of your existing shade, this spans from one edge to the other. It’s essential to maintain proportion to the light fixture and room size.
- 2. Height: The distance from the top to the bottom edge of the shade should be noted. Remember, a shade that’s too tall can seem overpowering, while a short one might look oddly out of place.
- 3. Fitter Size: The part of the shade that attaches itself to the light fixture defines the fitter size. Measure the diameter of this area. This ensures your new shade fits seamlessly onto your existing pendant light fixture.
- 4. Hanging Height: Ponder over optimal hanging height. Consider room traffic and the tasks performed under the light, if known already, add it to the height measurement.
Remember, while measurements are practical considerations, the shade’s style, material, and design hold equal importance, reflecting your personal taste and completing the room’s aesthetic.
Moving Existing Pendant Light Fixtures If Necessary
Having known when and how to replace your pendant light shade, it’s time to assess the position. There are circumstances where you may need to adjust your current light fixture’s placement to ensure that your new shade fits perfectly and illuminates the space as desired.
Firstly, evaluate the light spread in your room. The fixture should be centered over the space it’s intended to illuminate. If it’s over a dining table or kitchen island, centric placement is crucial. It’s also important to make sure the light doesn’t obstruct views or create unwanted glare.
Secondly, take into consideration the height of your ceiling. The rule of thumb is to hang the pendant light 28 to 34 inches above a table surface. However, if your ceiling is higher than eight feet, consider adding an additional 3 inches for each additional foot of ceiling height.
Lastly, don’t neglect traffic flow. It’s crucial to ensure that the pendant light doesn’t interfere with movement through the space.
Taking these points into consideration will help you to determine if moving your existing pendant light fixtures could grant you optimum functionality and aesthetic results. Adjustments may require rewiring which could be complex, so when in doubt, always consult a qualified electrician.
Selecting a Suitable New Pendant Light Shade
In the selection process, consider functionality and aesthetics. The shade must emanate a sufficient amount of light for the room’s purpose, and taste and style come into play as you assess its impact on the room’s décor.
Choose transparent or semi-transparent shades for maximal light emission. If the aim is to achieve a soft, diffused light, opaque or heavily tinted shades serve the purpose. Note that the material of the shade plays a part in light diffusion: metal shades often direct light downwards, while glass or fabric shades can allow more light to permeate.
Think about the color palette and style of the room. If the décor is minimalist and modern, a simple geometric-shaped shade in a subtle color might be a great fit. For a traditional setup, a classic dome or bell shade in warm tones could be more suitable.
Don’t neglect the size which must be proportionate to the room and the light fixture itself. Too small a shade may render the light barely noticeable, while an overly large one may throw off the room’s equilibrium.
Lastly, certain designs may be more or less conducive to cleaning, a factor worth considering for long-term maintenance.
Different Materials of Pendant Light Shades and Their Features
Glass dominates the pendant lighting world, offering high light transmission, elegance, and easy cleaning. Sturdy and versatile, it suits various designs, from traditional to contemporary.
Opting for metal shades opens up an industrial, rustic realm. Highly durable, metal withstands high heat and increases downward light directionality, making it perfect for task-focused areas.
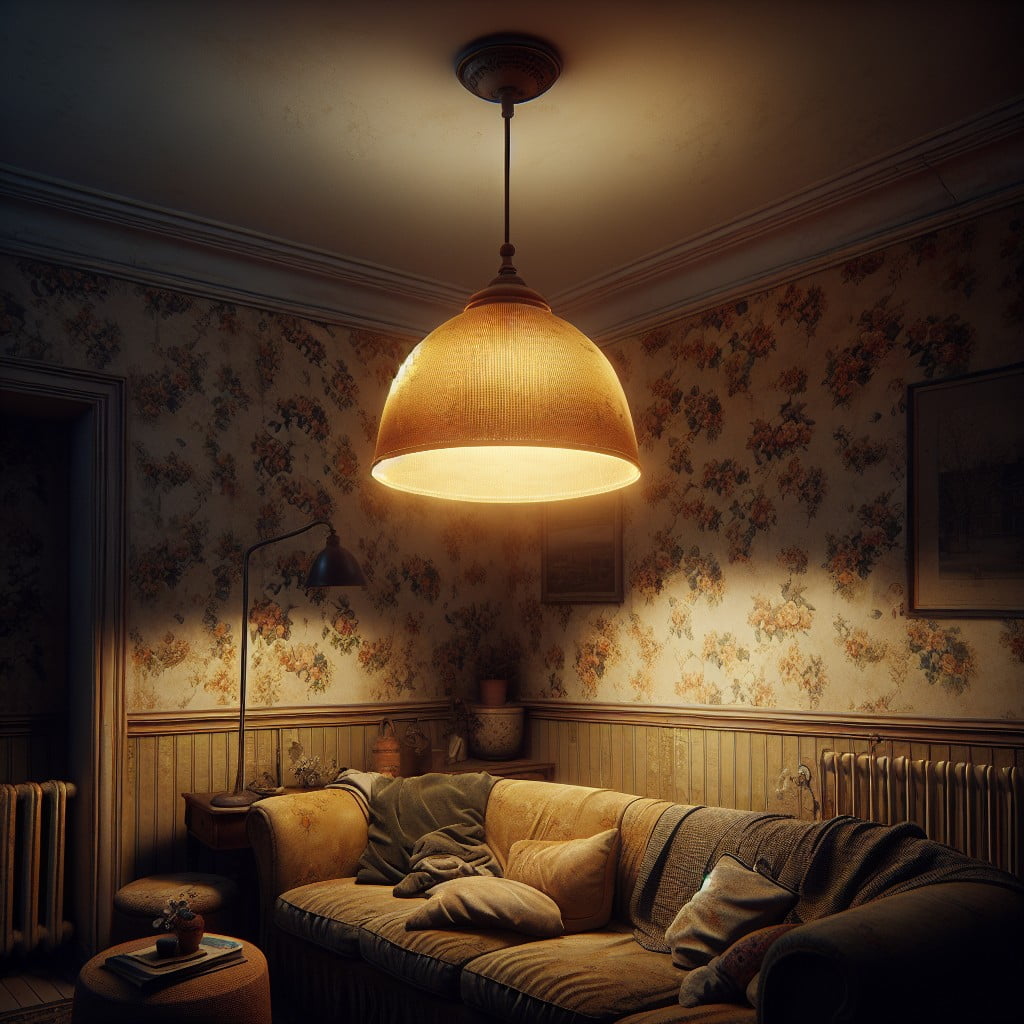
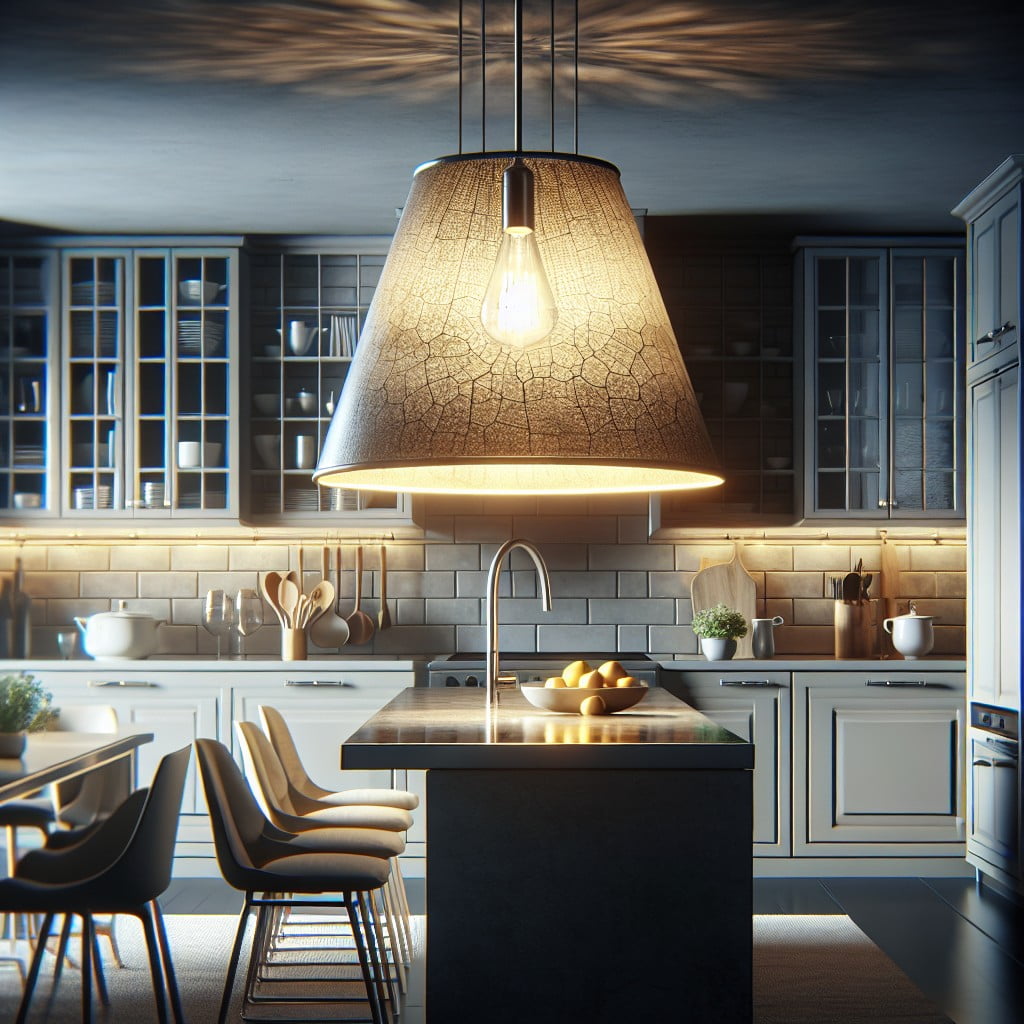
Fabric shades, often made from linen or silk, soften light effectively, delivering a warm and cozy ambiance. However, they require careful, frequent cleaning to avoid dust build-up.
Plastic or acrylic shades are budget-friendly options that offer endless style variation and colors. They aren’t as heat resistant as other materials and may discolor over time.
Ceramic and porcelain, typically handcrafted, bring an artisan touch to interiors. While they limit light dispersion, they create stunning visual effects, particularly when intricately pierced or carved.
Wood or rattan shades are ideal for eco-centric, Scandinavian, or Bohemian interiors. They provide a natural, earthy flair, though they often involve higher maintenance requirements.
Keep in mind, material choice impacts not only aesthetics but also durability, maintenance level, and light quality. Therefore, it’s key to pinpoint the right match for your specific room and lighting needs.
How Colors and Designs Can Impact Room’s Aesthetics
Selecting colors and designs for your pendant light shade is not merely an aesthetic choice but plays a vital role in enhancing your room’s overall appearance.
Bright shades lend a cheerful and lively ambiance, ideal for social spaces like the living room or kitchen. On the contrary, muted colors, such as cream or taupe, bring about a soothing atmosphere, apt for bedrooms or study rooms.
Design also makes a difference. Geometric patterns bestow a modern and sleek look, whereas floral or vintage designs radiate a classic, timeless charm. Transparency impacts light distribution, with clear glass or fine mesh offering a direct, bright light, and opaque or frosted materials diffusing a softer glow, thus creating different mood settings.
Furthermore, align the pendant light shade design with the room’s existing décor to create a cohesive look. For a minimalist space, opt for simple, clean lines, while a room with ornate furnishings would benefit from a more elaborate shade design. Always remember, your light shade is not just a lighting accessory, but a statement piece that can elevate your interiors.
Detailed Guide On How to Install the New Pendant Light Shade
Start by thoroughly cleaning the area where your new light shade will be hung. Make sure the light fixture and bulb have completely cooled if they were previously used.
Next, first and foremost, disconnect the pendant light from the power source. This is a crucial safety step.
Once it’s safe to proceed, examine the fixture. Most pendant lights have some form of fitting that must be unscrewed to allow the shade to be affixed. This could be a ring or a set of small screws around the side of the bulb socket.
Proceed to fit the light shade to the pendant using the suitable fitting method. If your new shade is a screw-on type, secure it to the pendant light by threading it onto the fixture. For those using a shade with retaining screws, position the shade on the pendant and secure it with the retaining screws. Ensure that all fittings are snug but not overly tight.
After installing the shade, it’s time to replace the bulb. Choose a bulb that matches the specifications of both the pendant light fixture and the shade. Remember, more delicate materials or darker colors may require lower wattage bulbs.
Finally, reconnect the pendant light to the power source, then switch the light on to test the installation. If the light functions as expected and the shade is securely in place, the process is complete. However, if you encounter any issues, disconnect the pendant light from the power source, recheck your installation process, and if necessary, seek professional help.
Ensuring the Pendant Light Shade Is Secured Correctly
After properly positioning the new shade, check it by gently wiggling to ensure it doesn’t move freely. The small screws and nuts holding the shade should be tightened firmly, but be cautious not to over-tighten as this can risk cracking the shade.
In adherence to safety measures, make sure the pendant light is at sufficient height, preventing the chance of accidents. Precision is crucial in achieving balance and symmetry with other lighting features in the room. To ensure correct alignment, use a level tool.
For double reassurance, inspect the light fixture after a few days of use to detect any indication of misalignment or loosening. If you notice an irregular movement, tighten the screws again or seek professional help if the problem persists.
Remember, a secured light shade not only enhances your home aesthetics but offers safety and longevity of the fixture.
Dealing With Complications During the Shade Installation
Here are a few pointers when faced with complications during the installation process:
1. If the new shade does not fit on your existing fixture, double-check the measurements. It might simply be a matter of wrong sizing. If so, consult with a lighting expert to find out if an adapter or a different fixture is required.
2. Difficulty in securing the shade could be attributed to a missing or damaged fixture ring. If the ring is missing, purchase a replacement. If it’s damaged, a new one might be necessary.
3. If the bulb doesn’t light up after installation, be sure to check if it’s firmly screwed in. If that does not work, inspect the wiring. Do consider calling a professional if you sense electrical issues are at play.
4. When the pendant light hangs too low or too high, its height needs to be adjusted. Depending on the design of your lighting fixture, this could be achieved by removing links from a chain fixture or trimming a rod fixture.
5. Trouble with attachment points could be easily solved by tightening screws. If the points themselves seem weak or damaged, they might require a replacement or rearrangement.
While you can encounter these common complications, don’t be discouraged. Effectively addressing these issues can enhance your DIY skills and ensure that your pendant light shade is safely and properly installed.
Ways to Maintain and Clean Your Pendant Light Shade
Consistent maintenance of your light shade significantly extends its lifespan. Dust and grime accumulation can dull their appearance over time, hence the need for regular cleaning.
1. Dusting: Use a feather duster or a soft cloth to gently remove dust. This may need to be done weekly, depending on the room’s dust level.
2. Deep cleaning: For glass or plastic shades, you can occasionally do a deeper clean. Remove the shade and wash with warm soapy water. Rinse carefully and dry thoroughly before reinstallation. Be sure to avoid harsh chemicals which could damage the material.
3. Special materials: If your shade is made with fabric or paper, avoid using liquid cleaners. Opt for a dry cleaning method, or better still, follow the manufacturer’s cleaning instructions.
4. Light bulb maintenance: Frequently check and replace the light bulb if necessary. Not only does this keep your pendant light functional, but it also prevents potential damage to the shade from a faulty bulb.
Adhering to these maintenance practices will keep your pendant light shade in optimal condition and enhance its durability. Remember that following cleaning instructions for specific materials is crucial to avoid inadvertent damage.
Troubleshooting Common Pendant Light Shade Problems
At times, you may face specific challenges related to your pendant light shade. Let’s delve into some common issues and how you can fix them:
1. Light Bulb Flickering: Often, this is due to a loose light bulb. Ensure the bulb is securely twisted into the socket. If the problem persists, the issue may be with your electrical wiring, and you should consult a professional.
2. Difficulties in Removing the Old Shade: When you struggle to detach the existing shade, apply a small amount of WD-40 to the screws or fixtures. Gently wiggle the shade, but do not force it as it might break.
3. Inadequate Lighting: If your new shade emits insufficient light, consider using a higher wattage bulb or a bulb with a higher lumen rating. Remember not to exceed the maximum wattage recommended by the fixture manufacturer.
4. Unstable Shade: Should your new shade wobble or seem insecure, recheck the tightening of screws or clamps. If it’s still unstable, you might need a supporting ring or an additional fixture.
5. Changing Light Bulb Frequently: If bulbs burn out frequently, try switching to LED bulbs, which last longer. Alternatively, the fixture may have a lower than desired wattage rating – look for a fixture that supports higher wattages if this is the case.
Ensure always to switch off and disconnect the light from power before attempting to troubleshoot or fix problems to prevent accidents. Always remember that some issues may require a certified electrician’s help, especially those related to wiring or electrical requirements.
Differentiating Between DIY Tasks and Professional Help for Pendant Light Change
While the process of changing a pendant light shade can be a simple DIY task for many, it can get tricky for others. Important is to know one’s limit and when to call a professional electrician.
DIY tasks typically include removing the old shade, measuring and selecting the new one, and replacing it. These steps require a basic understanding of how your light fixture works, the ability to safely navigate electrical elements, and a few handy tools.
Alternatively, serious complications such as damaged wiring, faulty fixture, or complex installation methods safely fall into the professional’s realm. If you notice sparking, feel uncomfortable with the task, or it’s required by local regulations, it’s best to hire a professional.
Keep in mind, if you’re inexperienced with electrical tasks, what could be a minor DIY job can quickly escalate into a serious issue. So, consider your comfort level and knowledge base when deciding whether to DIY or seek help. And remember, when in doubt, always lean on the side of caution.
FAQ
Can I replace a pendant light shade?
Yes, you can replace a pendant light shade, provided you know your fitter size and choose a shade that isn’t proprietary to any specific brand of fixture.
Is it easy to change out pendant lights?
Yes, changing out pendant lights is relatively easy; with an existing junction box, it typically involves four steps and can be completed in about half an hour.
Can you use a regular lamp shade on a pendant light?
Yes, a regular lampshade can be used on a pendant light by disassembling the standard pendant light kit for the lampshade to be attached.
What tools are necessary for changing a pendant light shade?
To change a pendant light shade, you need a ladder, safety glasses, protective gloves, Phillips screwdriver, and a new light shade.
Are there specific types of pendant light shades that are easier to replace than others?
Yes, screw-on and clip-on pendant light shades are usually the easiest to replace due to their simple attachment mechanisms.
How can you ensure safety while attempting to change a pendant light shade?
To ensure safety while changing a pendant light shade, turn off the electricity at the circuit breaker, use a sturdy stepladder, and wear safety glasses.
Read More Like This
 15 Funny Graduation Cap Ideas to Make Your Big Day Unforgettable
 15 Unique DIY Christmas Decorations Ideas for a Festive Home
 15 Creative Science Fair Board Ideas to Amaze Your Audience
 15 Handmade Envelope Decoration Ideas for Creative Gifting
 10 DIY Gifts for the Whiskey Lover in Your Life
Recap: