Last updated on
Giving new life to an old tree stump is no longer a challenge because they can be transformed into quirky decor pieces, enhancing your landscape beautifully.
I’ve designed unique illustrations for these ideas. I hope you get inspired!
Excited about sprucing up your garden with a touch of creativity? Tree stumps often pose a challenge in landscape aesthetics, frequently mulled over for removal or camouflage. Yet, with a dash of innovation, these natural components can be transformed into stunning eye-catchers.
While the internet bristles with tree stump ideas, our aim today is to delve into a new realm of possibilities, presenting not just an enhancement of existing ideas—which can be found in the resources at the end of this article—but also to transcend the conventional. A myriad of unique, fresh concepts at unprecedented angles await your exploration, tailored to help you transform that overlooked tree stump in your garden.
Carve It Into a Totem Pole

Transforming your tree stump into a totem pole can infuse your garden with a touch of personal heritage or fantasy. Here are some points to guide you through the concept:
- Identify the cultural significance or personal symbolism you wish to depict before you begin carving. Totem poles traditionally tell stories or represent important family or cultural heritage.
- Consider hiring a professional woodcarver if you’re unfamiliar with woodcarving techniques. This ensures your vision is realized safely and artistically.
- Select the proper tools for carving, such as chisels, gouges, and a mallet. Always wear protective gear like gloves and safety glasses.
- Start with rough shapes and work your way to fine details. Remember to frequently step back to assess your work from a distance.
- Treat the wood post-carving with a sealant to protect it from the elements, thus preserving your artwork for years to come.
- Enhance your totem pole with paint or stains if desired, choosing colors that stand up to outdoor conditions.
This approach not only recycles the stump but also creates a striking conversation piece that celebrates storytelling and art.
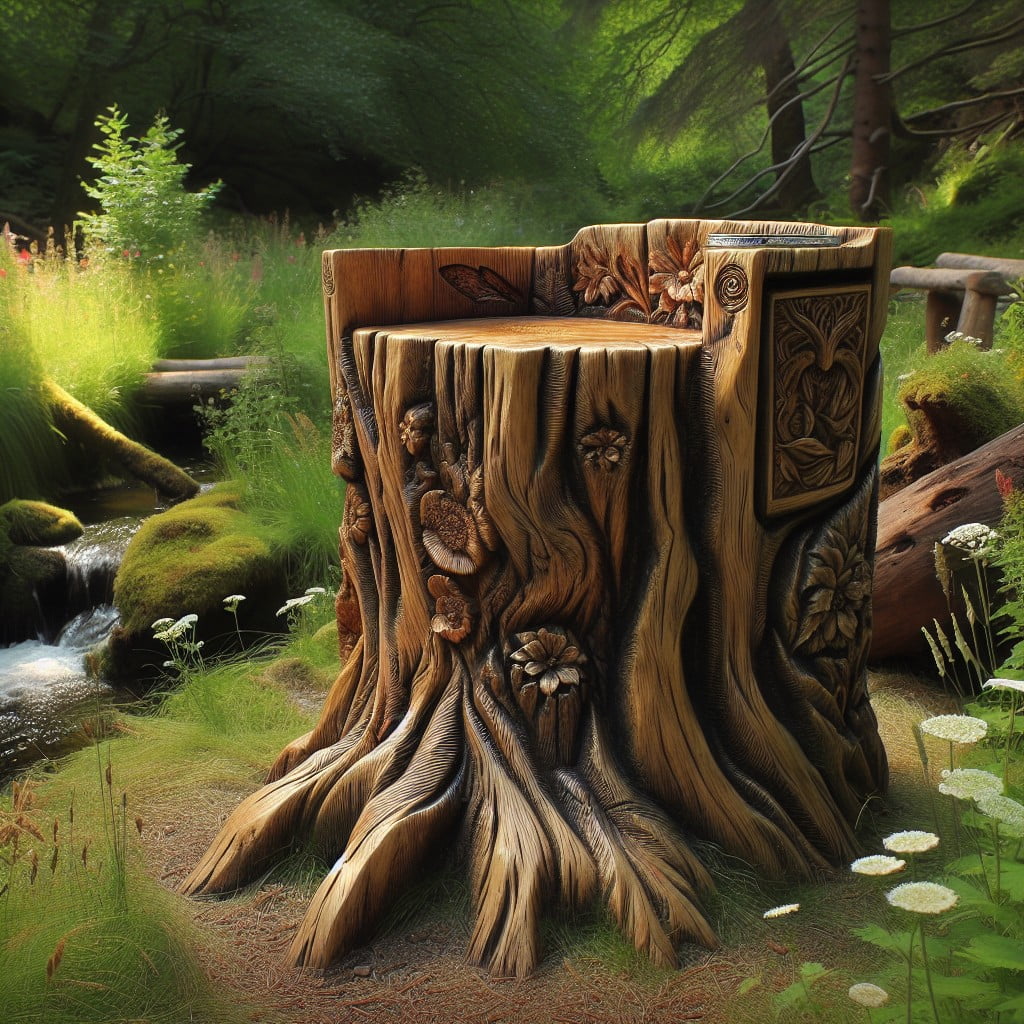
Use It As a Base for a Sculpture

Transforming an old tree stump into the base for a sculpture can elevate your garden’s visual appeal and showcase your creative flair. Its natural texture provides a sturdy foundation, blending seamlessly with outdoor art pieces.
Here are a few points to guide you through this process:
- Choose a sculpture that complements the size of the stump for visual balance.
- Secure the sculpture firmly to ensure it can withstand elements like wind or rain.
- Consider treating the stump with a sealant to protect both the wood and the sculpture from weather damage.
- Integrate the stump’s shape into the design of the sculpture, using its form to enhance the artwork’s aesthetics.
- For a dynamic interaction with the environment, select materials that age gracefully, lending character as they weather over time.
By following these pointers, you can artistically repurpose a tree stump into an outdoor display that captures attention and inspires imagination.
Turn It Into a Unique Mailbox Stand
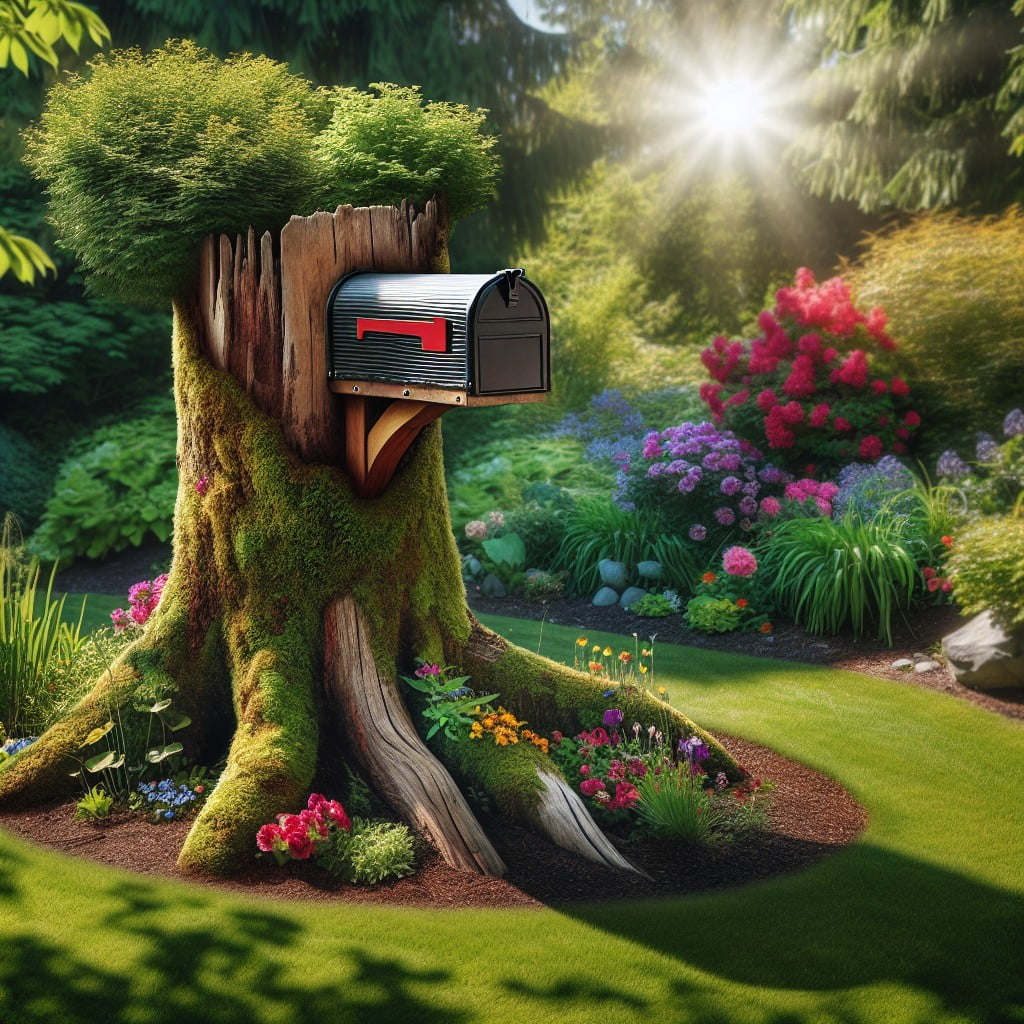
Transforming an old tree stump into a mailbox stand adds a touch of whimsy and natural charm to your curbside. The inherent sturdiness of the stump provides a solid foundation for your mailbox, ensuring durability against the elements.
To accomplish this, measure the height of the stump and cut it to your preferred level, remembering that postal regulations often require mailboxes to be at a certain height. Once cut, sand down the top to create a flat surface on which the mailbox can be securely mounted. Drill holes to fit the mailbox post or base and use exterior-grade screws to affix it.
For a finished look, you might consider sealing the stump with a weatherproof lacquer, which will protect the wood and prolong the life of the stand. Additionally, personalize the mailbox by painting or staining the stump to match your house’s trim or incorporating designs like house numbers or patterns that reflect your personality.
This approach not only recycles the stump but also enhances the curb appeal of your home with a stand that’s both functional and full of character.
Create a Garden Parasol Stand
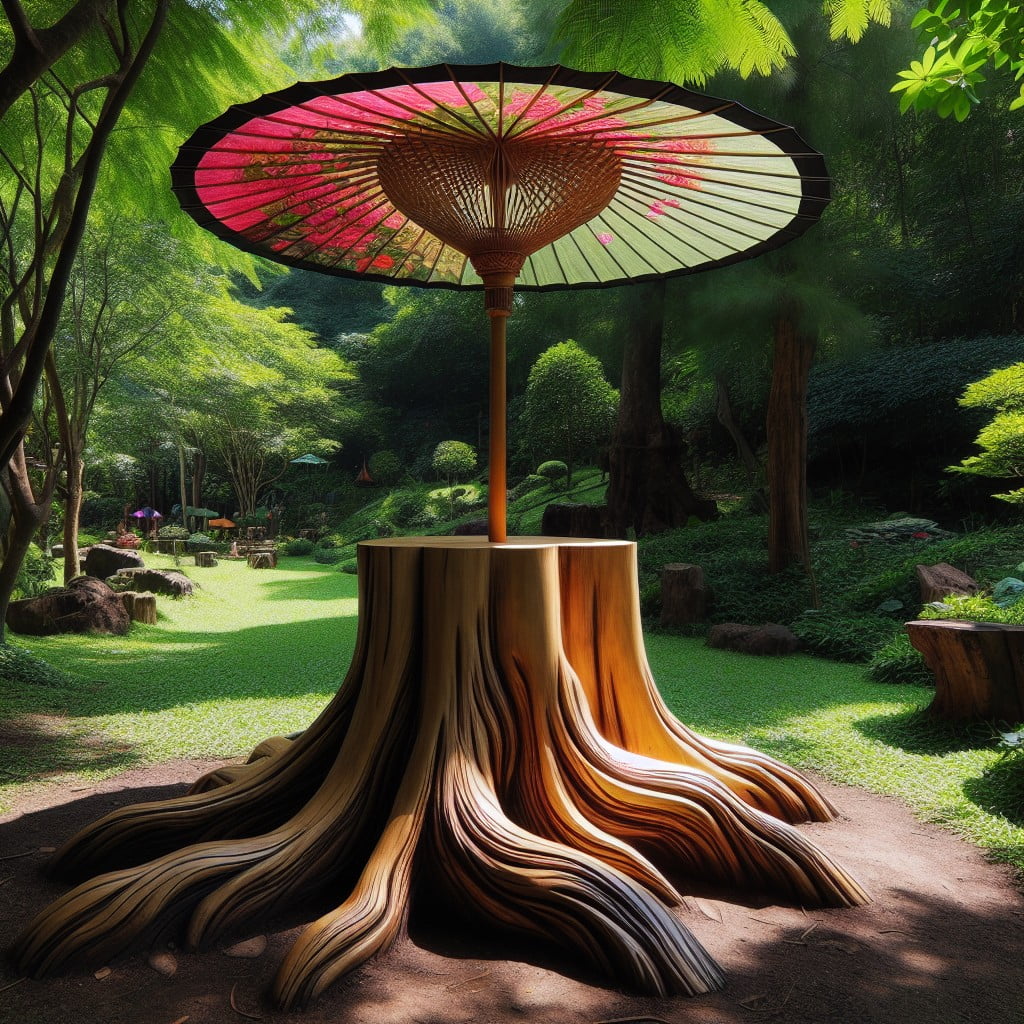
Transforming a leftover tree stump into a parasol stand is an innovative way to add shade and charm to your garden.
To begin, ensure the stump is level and stable enough to support a parasol.
If needed, sand the top surface to achieve a flat base.
Next, measure the diameter of your parasol pole and drill a hole into the center of the stump to accommodate it.
It’s important to use a drill bit that matches the size of the pole for a snug fit.
For added durability, consider installing a metal sleeve within the hole.
This will help protect the wood and prevent the parasol from wobbling.
After securing the parasol, you can personalize the stump by staining or painting it to match outdoor décor.
Surrounding the base with potted plants or climbing vines can also integrate the stand into the natural beauty of your garden.
This simple project not only repurposes the stump but also creates a functional and picturesque outdoor element.
Make a Butterfly Feeder

Transforming an old tree stump into a butterfly feeder not only serves as an enchanting garden feature but also supports local biodiversity. To get started, create a shallow depression at the top of the stump to hold the nectar. This can be achieved by chiseling out a small area or using a natural hollow.
Next, fill the depression with a mix of sugar water, overripe fruit, or sponge soaked in butterfly nectar recipe to attract these colorful insects. Ensure the feeder is regularly cleaned to prevent the growth of mold and replenish the food source to keep butterflies returning.
Adding a couple of flat stones around the stump provides sunny spots for butterflies to warm up in the morning light. Surrounding the stump with native flowering plants will supplement their nectar intake, and aid in butterfly conservation. Remember, the feeder’s success depends not only on its attractiveness to butterflies but also on the absence of pesticides in the surrounding environment.
Create a Hollow Candle Holder

Transforming your tree stump into a candle holder adds a touch of enchantment to your outdoor space. The natural textures of wood coupled with flickering candlelight create a cozy atmosphere for evenings in the garden.
To get started, here’s what to do:
- Hollow out the center: Use a drill with a large bit or a chisel and hammer to create a cavity in the top of the stump that’s deep enough to safely contain candles.
- Sand the edges: Smooth any rough spots around the hole to prevent unwanted splinters and give a more finished look.
- Select your candles: Fit the hollow with appropriate sized candles or use tealights for a subtler effect.
- Enhance fire safety: Line the cavity with a fire-resistant material or place candles in protective glass jars.
- Seasonal touches: Add seasonal decor around the candles for a festive touch, such as pinecones in the winter or fresh flowers in the spring.
By following these steps, you’ll enjoy a functional art piece that enhances the ambiance of your outdoor gatherings.
Convert It Into a Rustic Clock

Transform your tree stump into a functional timepiece, blending natural charm with utility. Here’s how to embark on this creative project:
– **Select the right size**: Ensure the stump surface is large enough to accommodate clock hands and numbers. – **Prepare the surface**: Sand down the stump to create a smooth face for the clock components. – **Choose your style**: Decide between painted numbers, carved digits, or attaching metal figures for a more polished look. – **Install the mechanism**: Secure a battery-operated clock kit at the stump’s center and attach the hands. – **Weatherproof if needed**: Consider a weather-resistant sealant if your clock will be exposed to the elements. – **Personalize**: Add a final touch by staining or painting the stump for a customized look that complements your outdoor space.This conversion not only upcycles an unused stump but also gives you a statement piece that naturally merges with the surroundings.
Make It a Dynamic Art Piece

Embrace the uniqueness of your garden’s natural features by transforming an old tree stump into an eye-catching piece of outdoor art.
Begin by sanding down the rough edges to create a smooth canvas.
Experiment with exterior paints and stains to apply abstract designs, floral patterns, or even a portrait of your favorite woodland creature.
For a three-dimensional effect, attach objects such as mosaic tiles, colorful stones, or pieces of mirrored glass.
These materials not only repurpose your stump, but they also reflect the garden’s beauty, making your art change with the light and seasons.
To protect your creation from the elements, seal it with a weatherproof varnish.
This project not only adds personality to your outdoor space but also becomes a conversation starter and a reflection of your creative spirit.
Convert It Into a Tool Stand
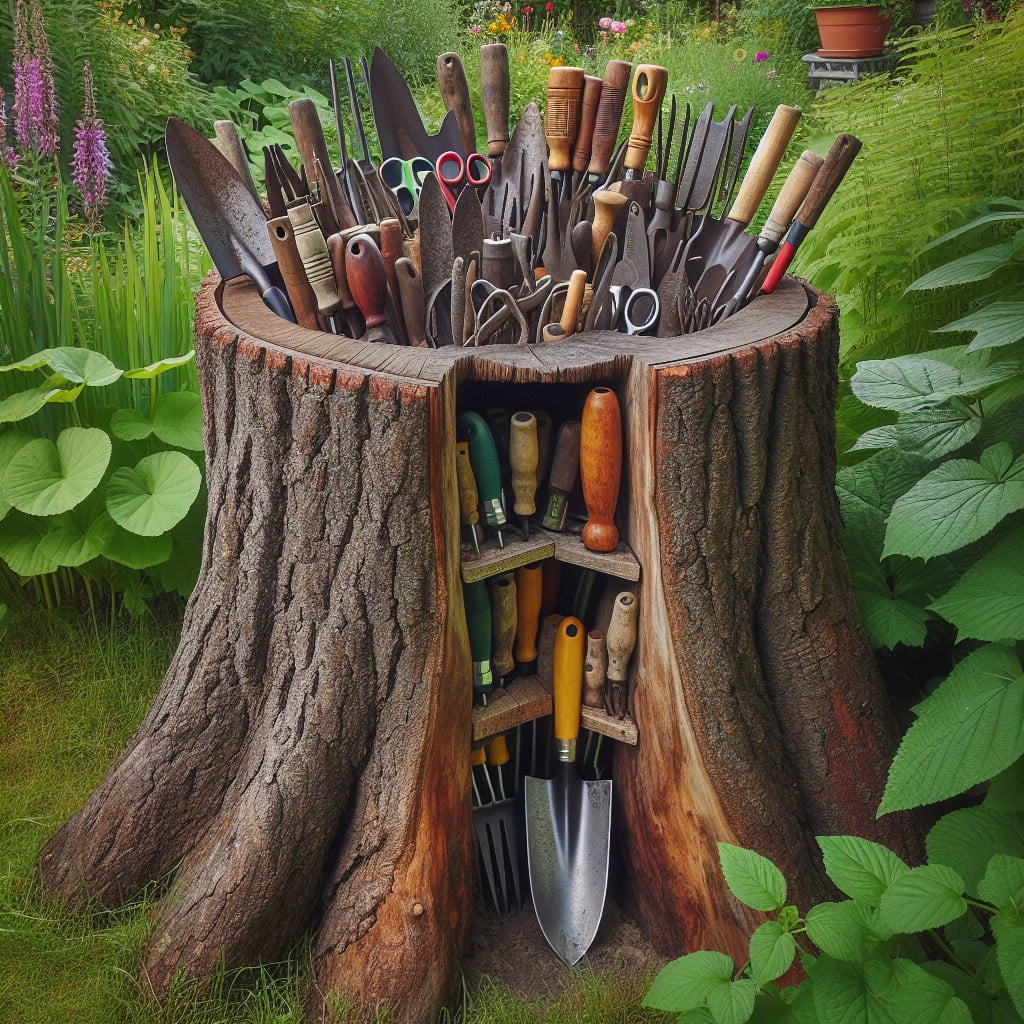
Transform your tree stump into a practical tool stand with minimal effort while adding a touch of rustic charm to your garden area. Here’s how to maximize this natural resource:
- Drill Holes for Tool Handles: Measure and mark spots suitable for the handles of your commonly used tools—shovels, rakes, or hoes. Using a spade bit, drill holes to accommodate the diameters of the handles.
- Flatten the Surface: Ensure the top of the stump is level. If it isn’t, sand it down or cut it flat to provide a stable base for the tools to stand on.
- Add Hooks for Smaller Tools: Screw in hooks or nails around the stump’s circumference. These can hold gloves, hats, or small gardening tools like pruning shears and trowels.
- Preserve the Wood: Consider treating the stump with a wood preservative to protect it from the elements and extend its life as a tool stand.
- Customize for Convenience: Personalize your tool stand further by painting the stump or adding a clear sealant to enhance the stump’s natural patterns.
With these steps, you can turn a tree stump from an unused piece of wood into a functional feature that organizes and beautifies your garden space.
Grow Orchids On It

Tree stumps provide a natural, organic platform to showcase the exotic beauty of orchids. The key to successfully using a stump for growing these elegant plants lies in simulating their natural epiphytic or lithophytic conditions, where orchids thrive on other plants or rocks rather than in soil.
- Attach orchids to the stump using non-toxic, natural materials like cotton string or strips of pantyhose, which won’t damage the plant but will hold it securely as it establishes itself.
- Select a variety of orchids that are suitable for your climate and the amount of sunlight your stump receives; many orchids prefer dappled light, mimicking their native understory habitats.
- Use sphagnum moss to retain moisture around the orchid’s roots, as this will help to prevent them from drying out, especially during warmer weather.
- Water regularly but avoid overwatering, as orchids prefer well-draining conditions and can easily rot if left in standing water.
- Fertilize with a balanced orchid food during the growing season to provide the necessary nutrients for flowering and growth.
- Monitor for pests and treat accordingly, as orchids can sometimes attract insects like scale or mealybugs, which can be controlled with horticultural oils or insecticidal soaps.
Repurposing a tree stump as a natural orchid display not only adds a unique touch to your garden but also provides a conversation starter and a habitat for these stunning flowers.
Create a Bee House

Transforming an old tree stump into a bee house is not only a creative endeavor but also one that serves a valuable ecological purpose by supporting local bee populations. Here’s how to accomplish this:
1. Drill Holes: Use a drill to create a variety of holes in the stump at varying diameters. This will accommodate different species of solitary bees who are looking for nesting sites.
2. Vary the Depth: Holes should be between 3 to 6 inches deep to provide a range of nesting preferences for the bees.
3. Smooth Edges: Ensure the entrance to each hole is smooth to prevent bees from harming themselves as they move in and out.
4. Avoid Treatments: Refrain from applying chemical sealants or stains, which could harm the health of the bees.
5. Provide Shelter: If the stump is in a sunny location, consider adding a small roof or overhang to protect it from direct rain.
6. Offer Mud Source: Some species of bees require mud to construct their nests. Consider placing a small dish of clay-rich mud near the stump.
By taking these steps, you’ll provide a haven for bees, which are vital pollinators, and contribute to the wellbeing of your garden’s ecosystem.
Make a Miniature Zen Garden
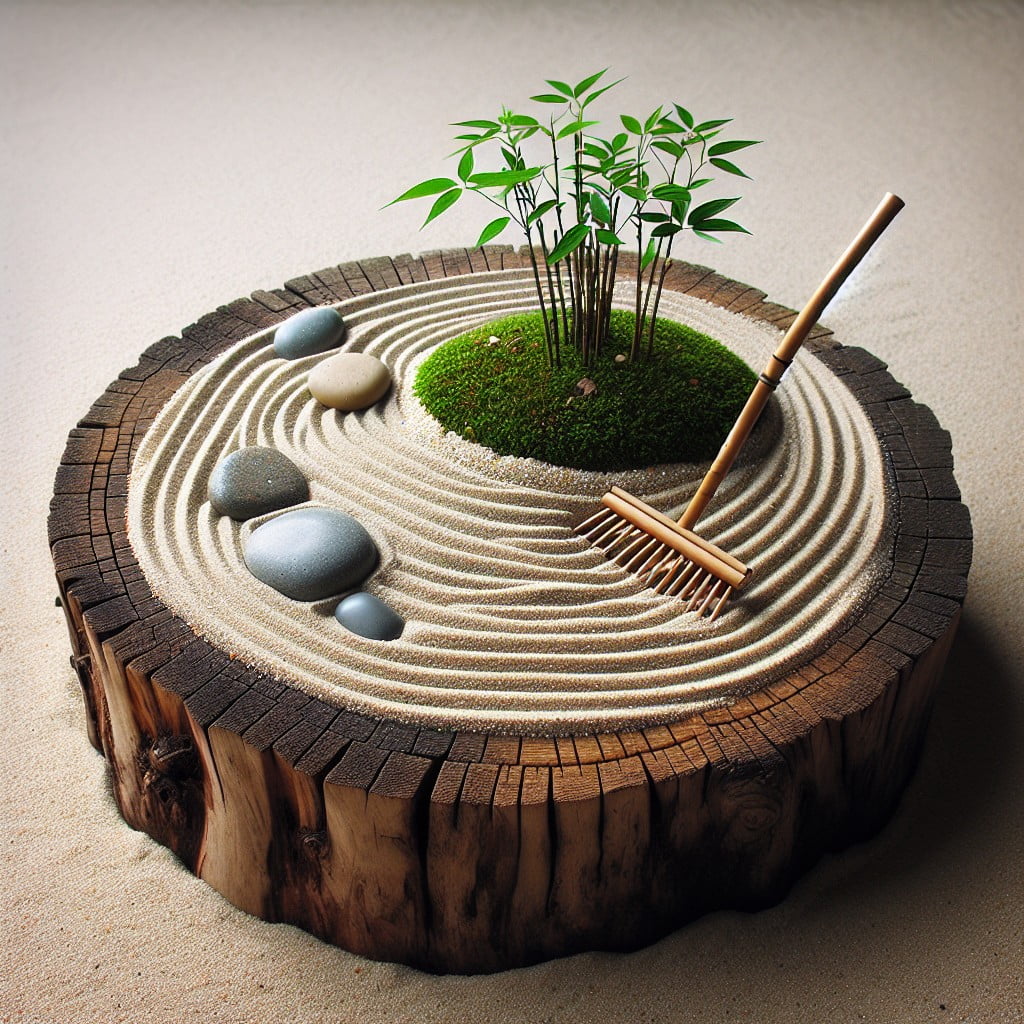
Transforming your old tree stump into a miniature Zen garden provides a peaceful retreat right in your own yard. Simply clear the surface and rim of the stump to create a level area for your garden. You can sand it down for a smooth texture or maintain its natural rugged appearance for added character.
Next, fill the top with a layer of fine sand or gravel, which will be the base of your Zen garden. This material is ideal for creating patterns that represent ripples of water. With a few small stones or rocks, you can add elements of natural design, symbolizing mountains or islands.
Incorporate a miniature rake made from twigs or a small hand rake to adjust the sand or gravel, cultivating serene patterns reflective of flowing water or gentle waves. This practice encourages mindfulness and relaxation.
Optionally, add petite plants such as moss or small succulents to bring a touch of greenery to your creation, reinforcing the essence of a tranquil garden. These plants require minimal care, fitting perfectly with the low maintenance nature of a Zen space.
Remember, the beauty lies in simplicity and the personal touches you bring to this serene garden feature.
Use It As a Stand for Wind Chimes
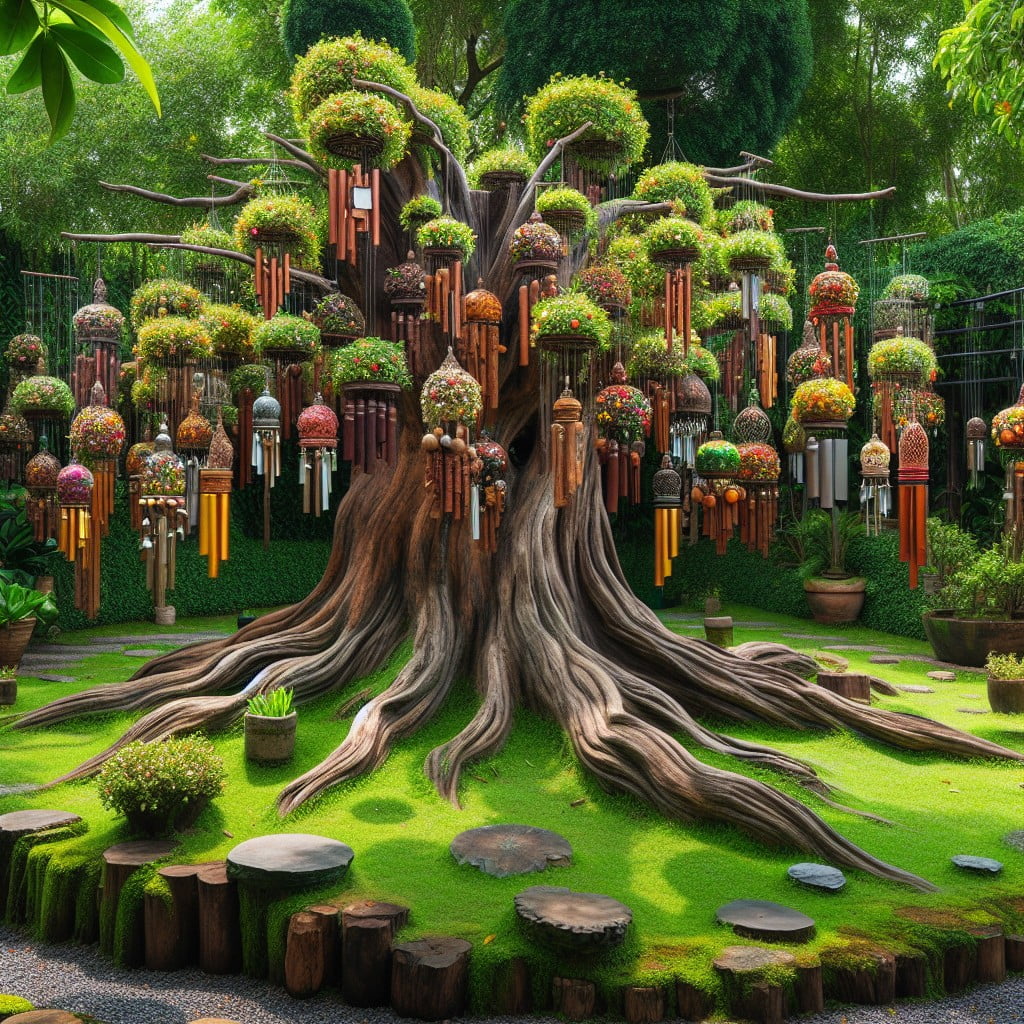
Transforming an old tree stump into a wind chime stand adds a whimsical touch to any garden. To achieve this:
- Choose a sturdy wind chime that complements the natural surroundings.
- Ensure the stump is trimmed flat on top for stability.
- Install a durable hook or metal hanger securely into the stump, considering the wind chime’s weight.
- Hang the chime at an appropriate height to capture the breeze without obstruction.
- Surround the base with low-lying flowers or creeping plants to enhance its aesthetic appeal.
This simple yet creative use brings melodic charm to your outdoor space, creating an ambiance of tranquility.
Convert It Into a Rustic Lantern Stand

Transforming a tree stump into a lantern stand adds a cozy, ambient light source to your outdoor space. This project combines functionality with aesthetic appeal, creating a warm, welcoming environment in your garden or yard.
First, ensure the stump’s top surface is flat and stable enough to safely hold a lantern. Sanding may be required for a smooth finish. To protect the wood and bring out its natural textures, apply a wood sealant, which also increases longevity.
Next, choose lanterns that complement your outdoor decor. They can be hung from hooks or simply placed on the stump. For a more enchanting look, consider using multiple small lanterns at varying heights.
Lastly, ensure to use weather-resistant materials and opt for solar-powered or battery-operated lanterns to avoid wiring complications. Regular maintenance, such as cleaning the lantern glass and checking the light sources, will keep your rustic lantern stand shining bright throughout the seasons.
Make a Key Holder for Garden Shed
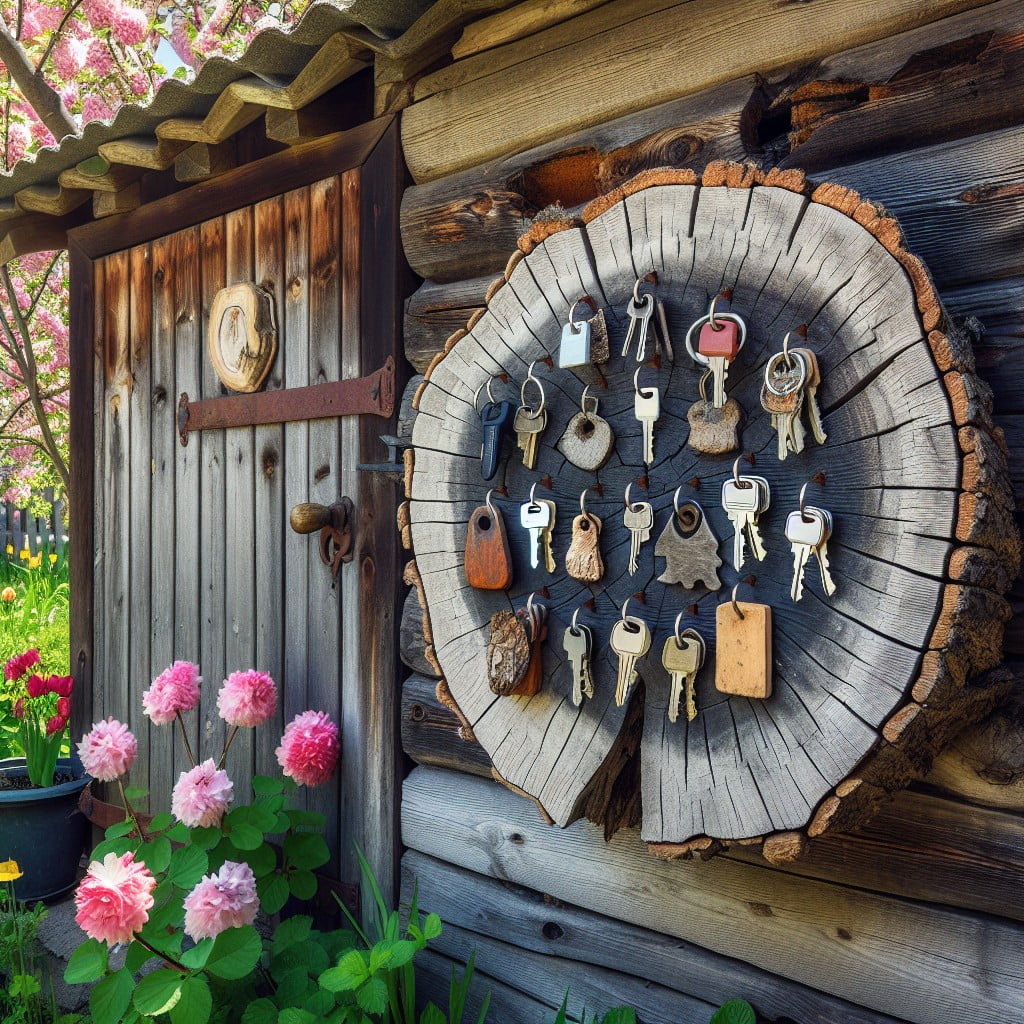
Transforming a tree stump into a key holder combines functionality with rustic charm.
Attach a variety of decorative hooks around the stump’s perimeter.
These can be simple, wrought iron hooks or ones with ornate designs, depending on your aesthetic preference.
Ensure they are securely fastened into the wood to hold the weight of the keys.
Consider treating the stump with a sealant to protect it against weathering, especially if the garden shed is exposed to the elements.
This step also helps preserve the wood’s natural beauty and prevents it from rotting.
For a more personalized touch, you might want to add a small sign with your family name or a welcome message above the hooks.
If the stump is tall enough, it can also double as a post for hanging small garden tools or gloves, incorporating additional utility.
Remember to place your stump-key holder at an easily accessible height next to your garden shed’s door.
This convenience will ensure your keys have a designated spot right where you need them.
Turn It Into a Festive Holiday Display

By incorporating seasonal decorations, your tree stump can become the centerpiece of festive outdoor decor. For Halloween, consider carving jack-o-lantern faces or placing spooky figures around the stump.
During Christmas, wrap it with string lights and top it with a star or an angel to mimic a tree. You can also add a red ribbon or adorn it with holly for a classic holiday look.
For a more interactive display, use the stump as a base for a DIY advent calendar where small treats or notes can be hidden within drilled holes or attached hooks.
With a bit of creativity, this natural remnant offers endless possibilities to celebrate every holiday with a touch of nature’s charm.
Craft a Natural Christmas Tree Stand

Transforming a tree stump into a natural Christmas tree stand adds a touch of rustic charm to your holiday decor. To achieve this:
- Measure the diameter of your Christmas tree trunk and ensure it can fit into the center of the stump.
- Hollow out the center of the stump to the appropriate depth, creating a snug fit for the tree trunk.
- Secure the tree by drilling holes at an angle from the outside of the stump into the space where the tree trunk sits, and insert long screws to hold the tree in place.
- For additional stability, attach metal brackets or use shims around the base of the tree, if necessary.
- Sand the top and sides of the stump to prevent snags and splinters, and consider sealing the wood to preserve it through the season.
- Decorate the stump with festive elements like garland, berries, or a string of lights for that extra sparkle in your holiday display.
This DIY approach not only recycles an existing natural element but also serves as a conversation starter and can be a cherished part of your family’s Christmas tradition for years to come.
Use It As Base for a Bird Feeder
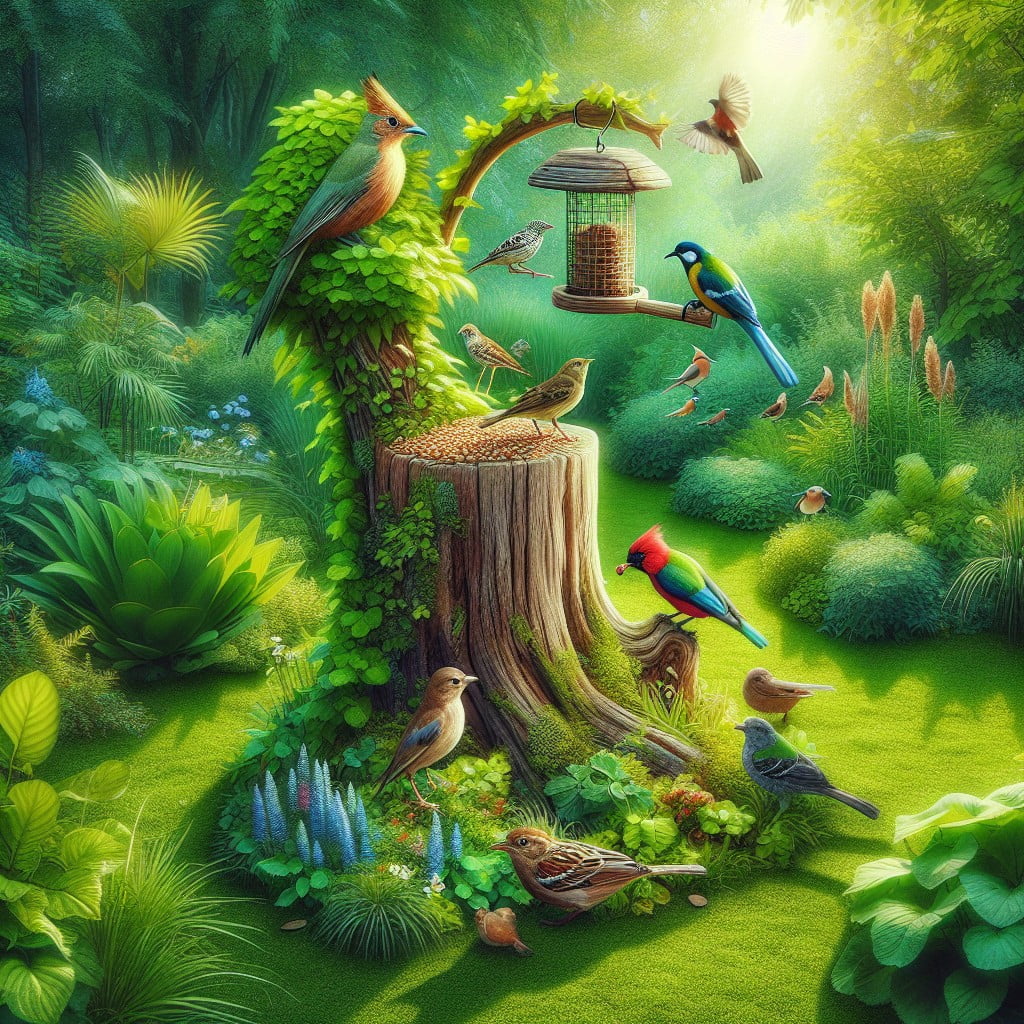
When incorporating a former tree stump into your garden’s ecosystem, embracing its utility for wildlife is a remarkable idea. By transforming it into the base for a bird feeder, you not only upcycle the stump but also attract various bird species, creating a lively and interactive natural space.
To achieve this, mount a bird feeder directly onto the stump’s surface using a sturdy bracket or hook. You can also hollow out part of the stump to place birdseed directly inside for a more integrated look. Choose a feeder style that complements the height and size of the stump and ensures it’s easily accessible for refilling and cleaning.
Opt for a design that suits the local bird population’s feeding habits for the best results. Remember, consistent replenishment and maintenance will encourage regular visits from your feathered friends, further bringing your garden to life.
Create a Rustic Beverage Cooler Stand
Transforming your old tree stump into a beverage cooler stand adds a charming and functional touch to any outdoor gathering spot. To achieve this:
- Hollow out the center of the stump to a depth that can accommodate the size of a metal or plastic tub, ensuring enough space to fill with ice and beverages.
- Sand the top and the hollowed area to prevent splinters and create a smooth surface for your cooler.
- Treat the wood with a weather-resistant sealant to protect it from the elements and prolong its life as your new cooler stand.
- Place the tub inside the stump, fill it with ice, and arrange your drinks for a quaint, rustic addition to your backyard parties.
- For ease of use, consider attaching a bottle opener to the side of the stump, and think about installing a drain to make emptying melted ice simpler.
By following these tips, you create an attractive and practical cooler that keeps guests refreshed and compliments the natural aesthetics of your outdoor space.
Turn It Into a Welcome Sign Holder
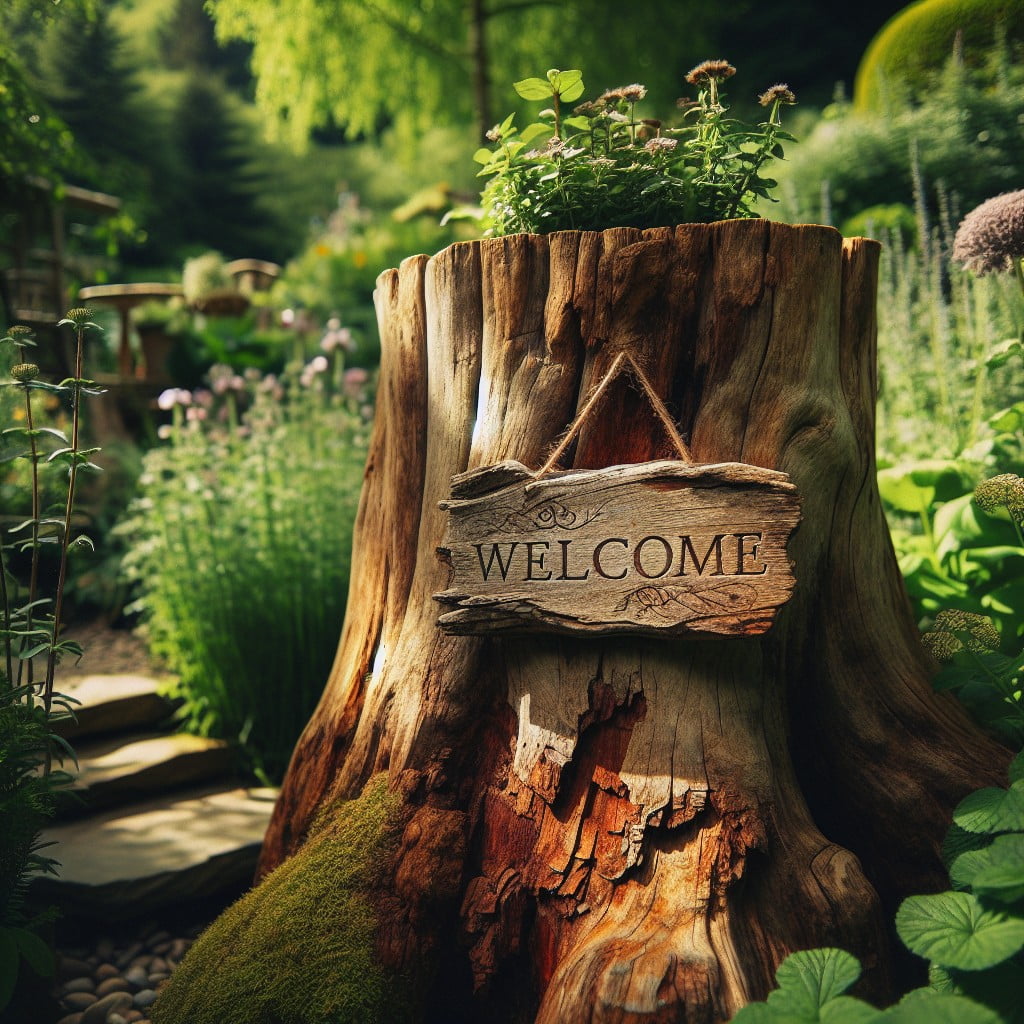
A tree stump, located strategically at the entrance to your home or garden, can warmly greet guests with a bit of creativity. By attaching a sturdy piece of wood or a painted sign directly to the stump’s face, you create a rustic, welcoming vignette.
Ensure the sign is weatherproof to withstand the elements, and choose a font or design that complements your home’s aesthetics. For an extra touch of charm, consider flanking the sign with seasonal flowers or climbing plants to integrate your new welcome sign holder seamlessly into the surrounding landscape.
This repurposing also helps in conserving the habitat for any critters that might have made the stump their home.
Ideas Elsewhere
- https://www.lawnstarter.com/blog/tree-care/tree-stump-ideas/
- https://www.bobvila.com/slideshow/the-best-and-weirdest-things-you-can-do-with-a-tree-stump-51341
- https://www.homesandgardens.com/gardens/tree-stump-ideas
- https://www.ruralsprout.com/tree-stump-ideas/
- https://empressofdirt.net/tree-stumps/
Read More Like This
 15 Homecoming Decoration Ideas to Elevate Your Celebration
 15 Christmas Cake Decorating Ideas to Sweeten Your Holidays
 15 Outdoor Party Tent Decorating Ideas for a Magical Celebration
 15 Ideas for Welcome Home Decorations
 15 Cheap Table Decoration Ideas to Elevate Any Gathering
Recap: