Last updated on
Dive into the world of artistic creativity as this article enlightens you on transformative basket decoration ideas, prematurely catalysing a love for such bespoke crafts, because every home can be even more special with these hand-made adornments.
I’m proud to share my own article and unique designs on 20 Creative Basket Decoration Ideas, and I sincerely hope you find it as inspiring and enjoyable as I did crafting them.
Basket decoration is a versatile and creative way to add a unique touch to your home. Whether you’re looking to create a rustic centerpiece, a stylish storage solution, or a festive holiday display, baskets can be transformed with just a few simple materials and a bit of imagination.
This article will guide you through an array of basket decoration ideas, offering detailed instructions for each project. From natural elements like flowers and greenery, to craft supplies like paint and ribbon, you’ll learn how to utilize various materials to achieve the desired look.
So, whether you’re a seasoned DIY enthusiast or a beginner looking for an easy project, these basket decoration ideas are sure to inspire.
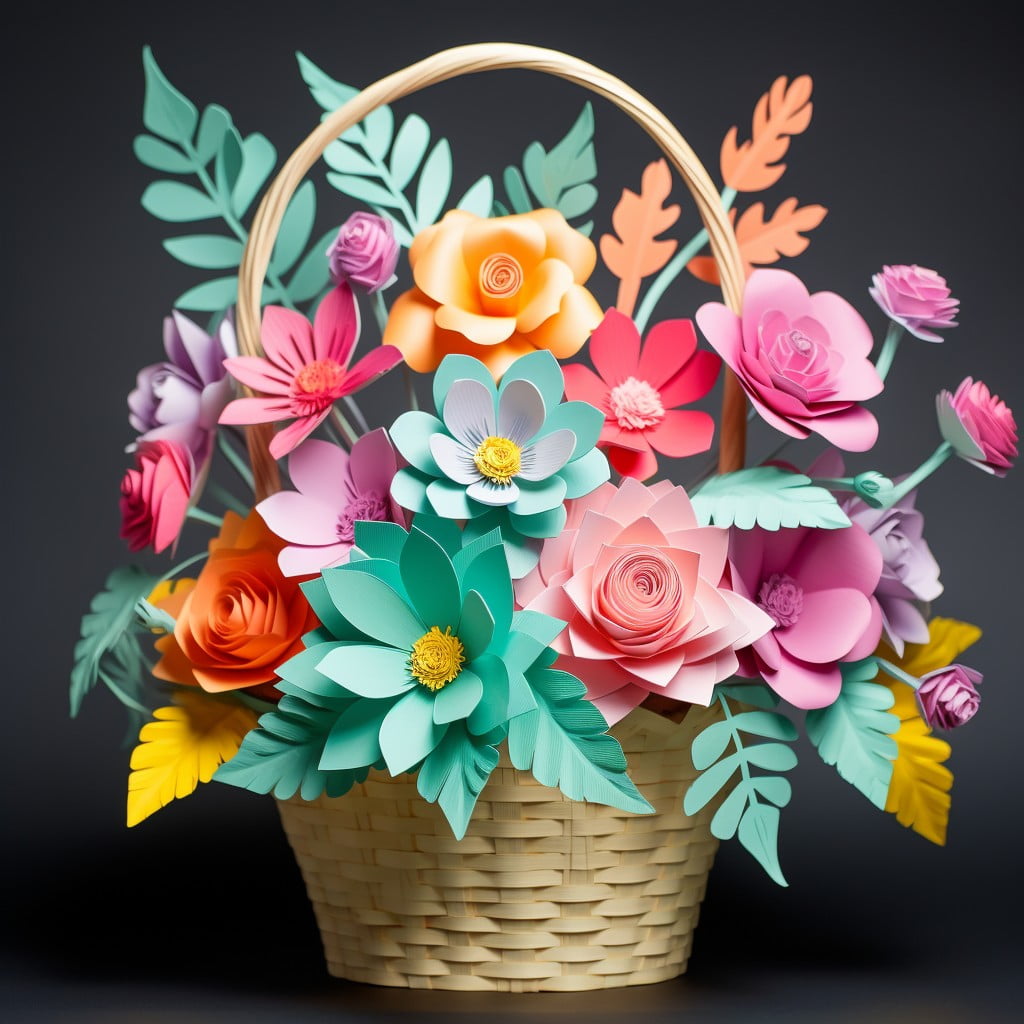
Floral-themed Basket
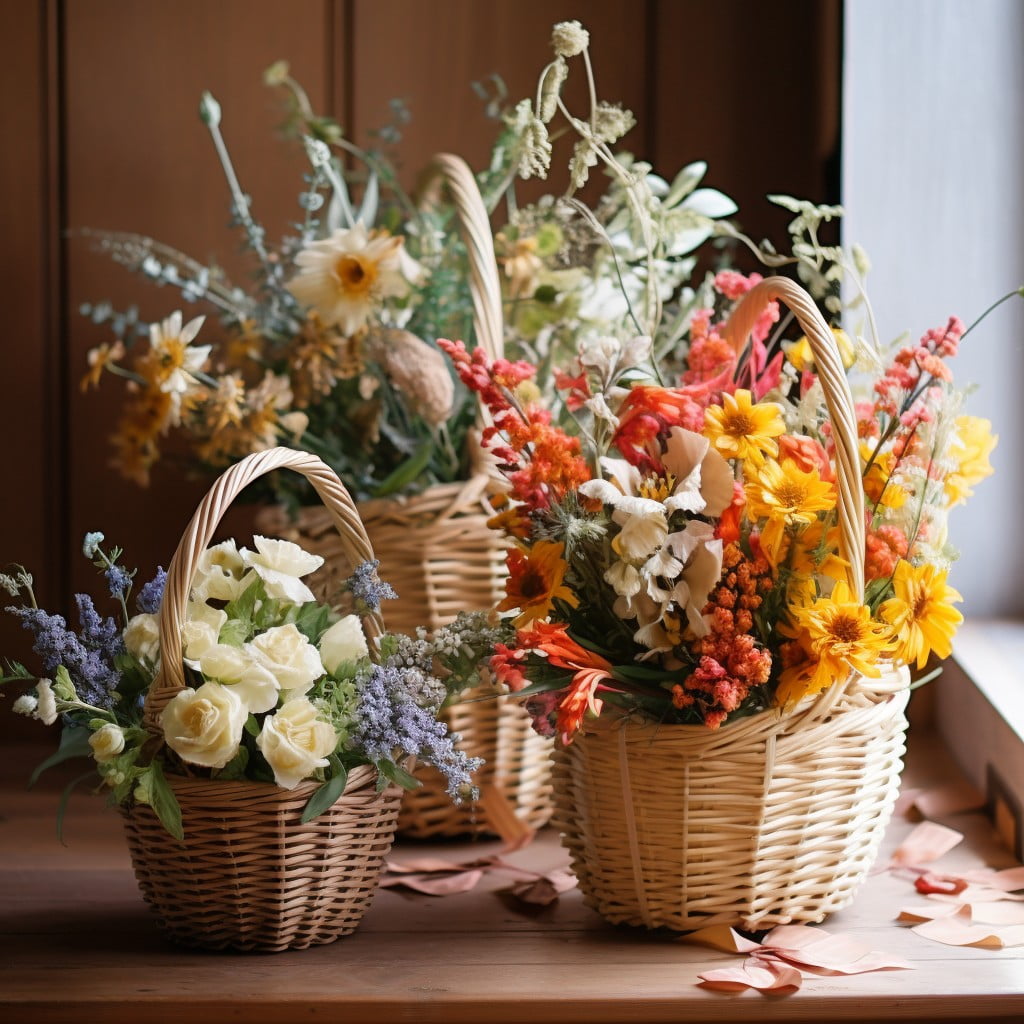
Embellishing a basket with vibrant colors and fragrances of flowers instantly breathes life into any room. Opt for soft hues of roses for a romantic touch or sunflowers for a burst of cheerfulness. Combine with lush green ferns to frame and accentuate the flowers.
Choose faux flowers for long-lasting aesthetics; with today’s variety and quality, no one can tell the difference. However, real, fresh flowers contribute not only visually, but also aromatically, for a more comprehensive sensory experience.
Remember, symmetry isn’t necessarily needed. Asymmetrical arrangements, with flowers on one side or flowing over the edge, can provide a dynamic, appealing look.
Experiment with flower head sizes for visual diversity or stick to one type for a minimalist, cohesive style. You can even try drying flowers for an earth-toned, antique effect!
Putting flowers in a basket isn’t just about throwing them in – careful selection of flower types, colors and arrangement styles can transform a simple wicker basket into an enchanting piece of decoration. Just remember to keep the setting and the theme in mind – any basket can be floral, it’s how you do it that makes it unique!
Easter Egg Basket
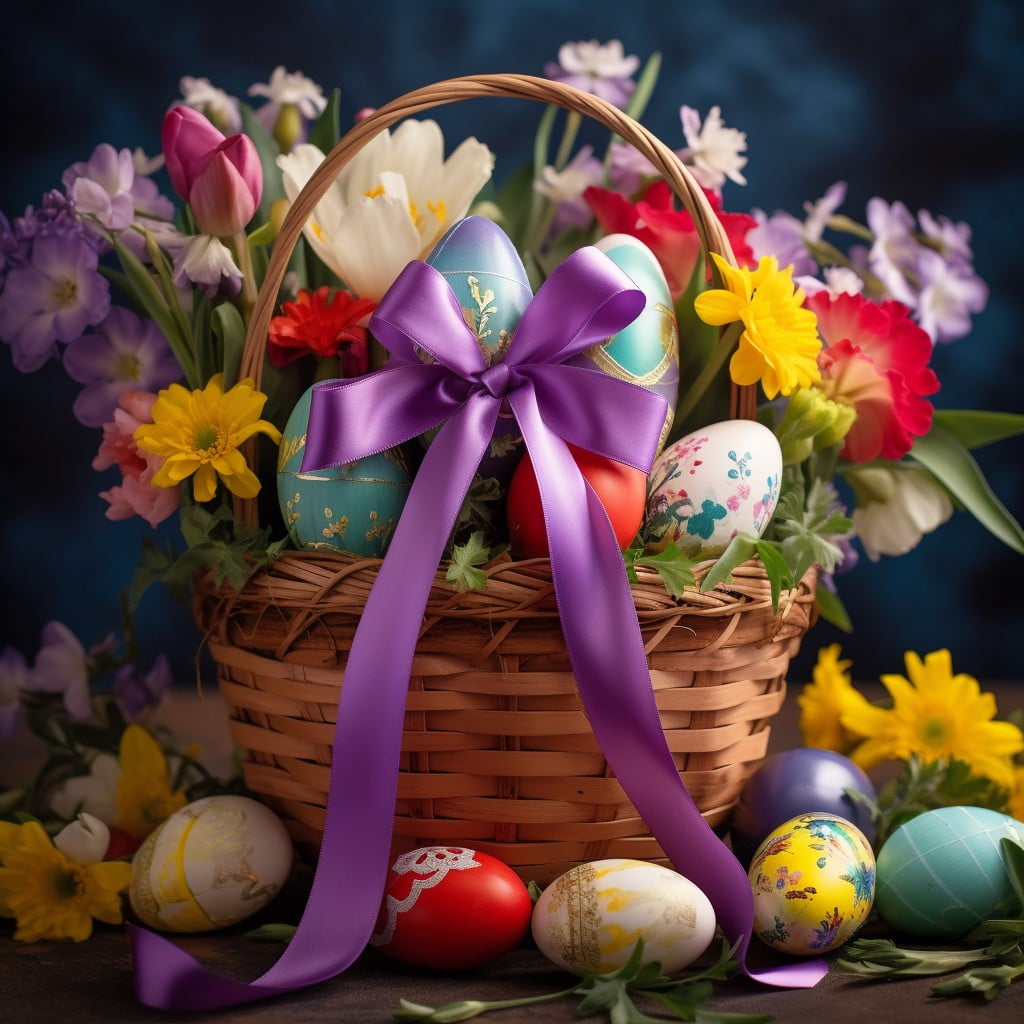
An Easter egg basket radiates charm and festivity. It’s a great creative endeavor that you can make unique and personalized. To bring it to life:
1. Choose the Right Basket: Choose a basket that’s wide and shallow, so the eggs are visible and don’t pile up on each other, risking damage.
2. Add a Layer of Grass: Whether you opt for colorful shredded paper, plastic Easter grass or a more sustainable option like real grass or moss, this creates a soft layer for your eggs to rest on.
3. Add Varied Eggs: Diversify your eggs with different sizes and colors. Incorporate painted wooden ones, plastic eggs filled with candies, or traditionally dyed Easter eggs.
4. Personalize: Add a personal touch with themed decorations related to the receiver’s interests.
5. Add Additional Gifts: Sprinkle in small wrapped chocolates, peeps, or toys. These little surprises bring an additional fun element to the Easter egg basket.
6. Presentation: Lastly, put a pretty bow or ribbon around the handle for the perfect finishing touch.
Remember, the beauty of an Easter egg basket is its customization. It can be as simple or elaborate as you’d like. Express creativity through it and have fun in the process.
Fruit Arrangement Basket

An array of colorful fruits can transform an ordinary basket into a vibrant centerpiece. Here are a few concepts:
1. Selection and Placement: Choose fruits based on their visual appeal and size. A mix of apples, oranges, grapes, and bananas adds color while offering a variety in sizes.
2. Container: Opt for a sturdy basket that can hold the weight of the fruits. A wooden or wicker basket with a flat bottom works best.
3. Protection: Line the basket with a light, food-safe tissue paper or cloth before arranging fruits. This adds visual interest and safeguards against any potential spoilage seeping into the basket fibers.
4. Arrangement: Larger fruits should be at the bottom, forming a stable base. Tier smaller fruits on top, ensuring all fruit types are visible from every angle.
5. Preserving Freshness: Keeping fruits at their prime is key. A cool place away from direct sunlight helps preserve freshness and color longer.
Rustic Wooden Basket
To achieve that sought-after pastoral appeal, materials and design are critical. Opt for a basket made of raw, untreated wood. The roughness adds an authentic touch of rugged beauty. Homegoods or craft stores often carry such baskets in various shapes and sizes.
A simple way to enhance the rustic feel is to fill the wooden basket with items that echo the simplicity of rural life. You might opt for hand-knitted wool throws, vintage books, or burlap-wrapped planters.
A rough hessian ribbon or twine around the handle of the basket adds to the charm. To raise the aesthetic value, consider nestling a few sprigs of dried lavender or rosemary here and there.
The key is to retain the natural, untouched beauty of the wood, avoiding overly polished or modern elements. This helps form a comforting, warm atmosphere in any room where the basket is placed. So, whether it’s in a cozy cottage or an urban apartment, a rustic wooden basket can be a delightful nod to the bucolic charm of countryside living.
Baby Shower Themed Basket
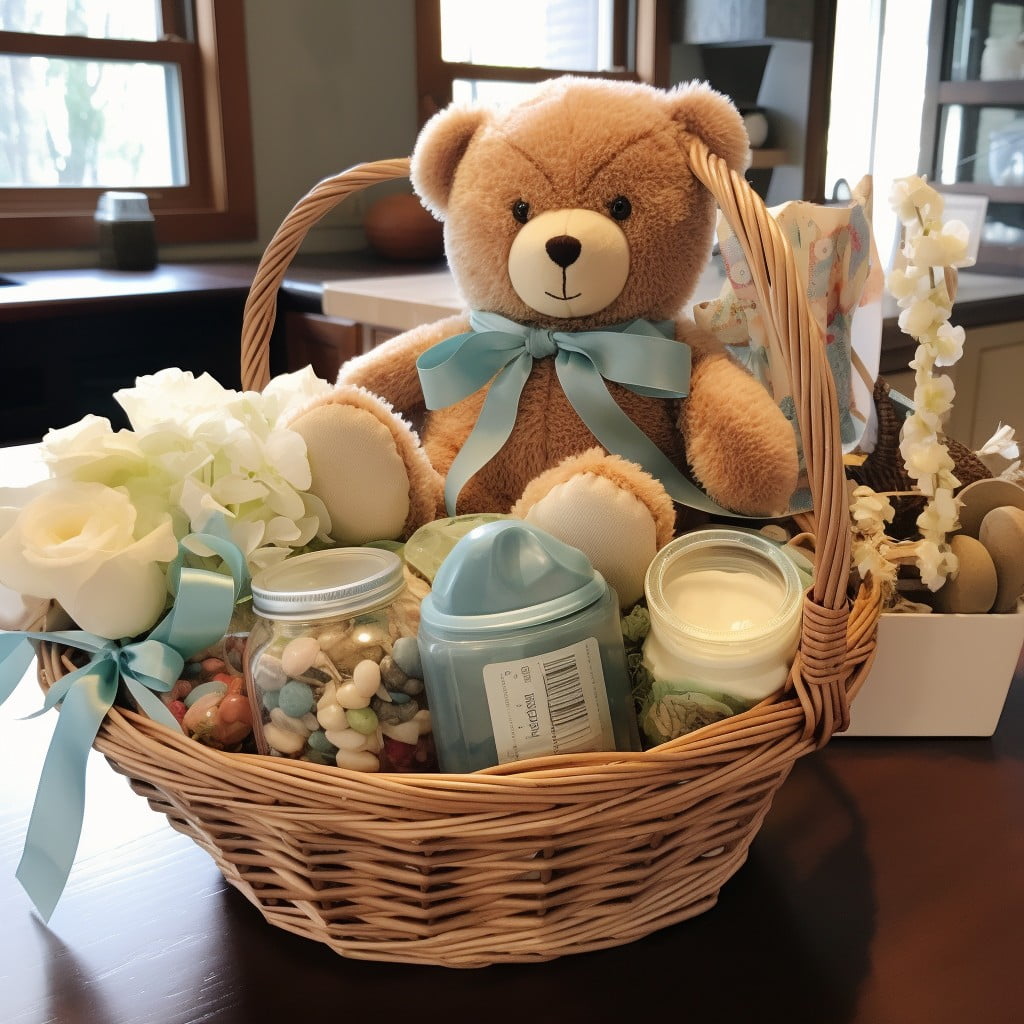
In creating the perfect gift for a soon-to-be mom, a bit of creativity goes a long way. Opt for a sturdy, white wicker basket: it’s not only stylish, but its neutral tone depicts innocence symbolic of the newborn.
Embellish with soft blue and pink ribbons depending on the baby’s gender, or stick to pastel-themed ribbons if it’s a surprise. Now for the heart of the basket, place gifts such as onesies, booties, and cute baby apparel gently rolled or folded in the basket.
Don’t forget to include essential items like diapers, bottles, and gentle soaps. Arranging a small plush toy and baby books at the top presents a playful aesthetic. For the final touch, wrap the basket in transparent cellophane to hold everything together, making sure the beautiful contents are visible and enticing.
Isn’t this an adorable way to welcome a bundle of joy?
Beach Themed Basket
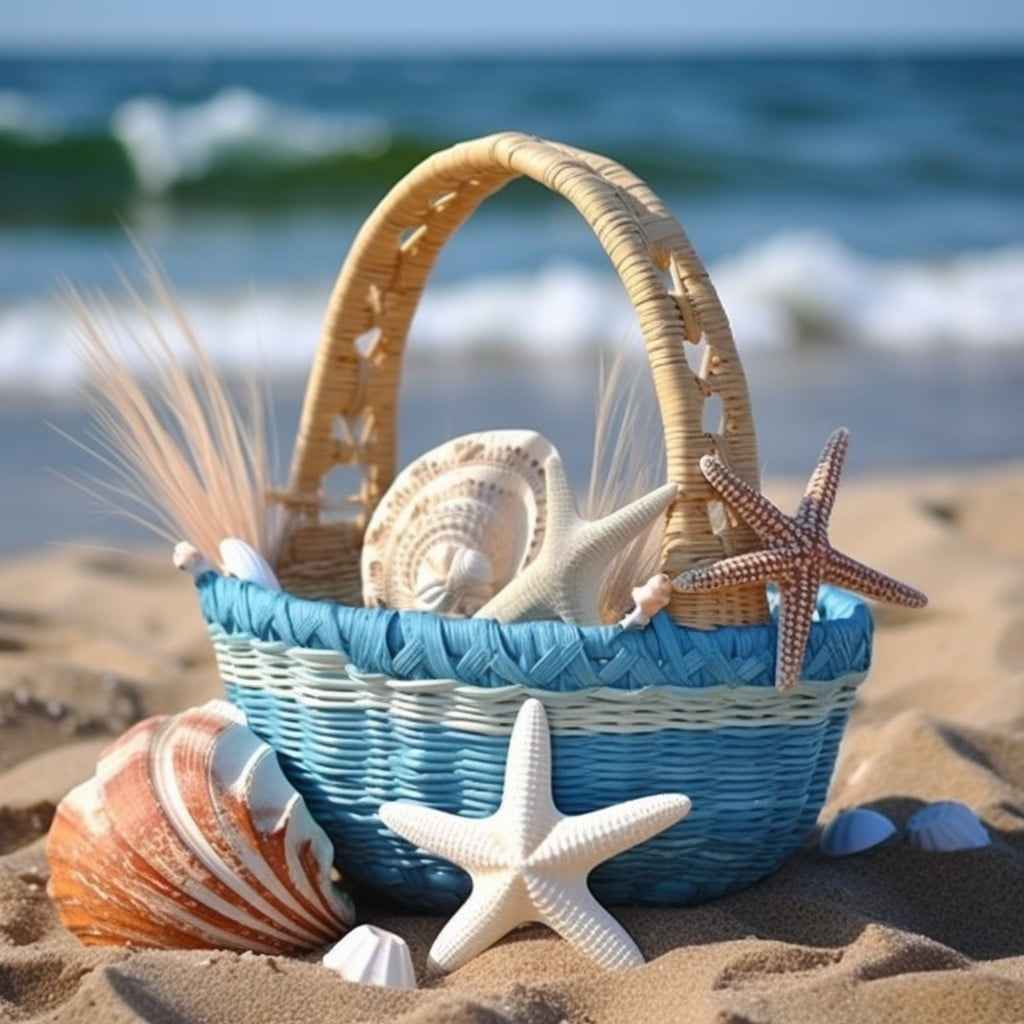
To recreate a charismatic coastal charm, prioritise materials like driftwood, seashells and starfish. Choosing a loose weave basket infuses an airy, light feel synonymous with the beach. Natural colors such as soft blues, whites, and tans enhance the seaside aesthetic.
1. Start by selecting your basket – wicker or straw options give that relaxed, beachy vibe.
2. Choose filler – white tissue or shredded paper mimic the look of sand.
3. Add larger items first – think beach-themed books, sunscreen, or a fashionable sun hat.
4. Incorporate smaller items next – seashells, a small bottle of sand, or a coastal-themed candle can add charm.
5. Garnish with faux seaweed or bits of fishing net for authenticity.
6. Consider topping off your arrangement with a crisp, white bow for a refreshing pop.
Remember, the end goal is creating a basket that feels like a miniature beach vacation. The more personalized and thoughtful your items, the more special your beach-themed basket will be.
Garden Tools Basket
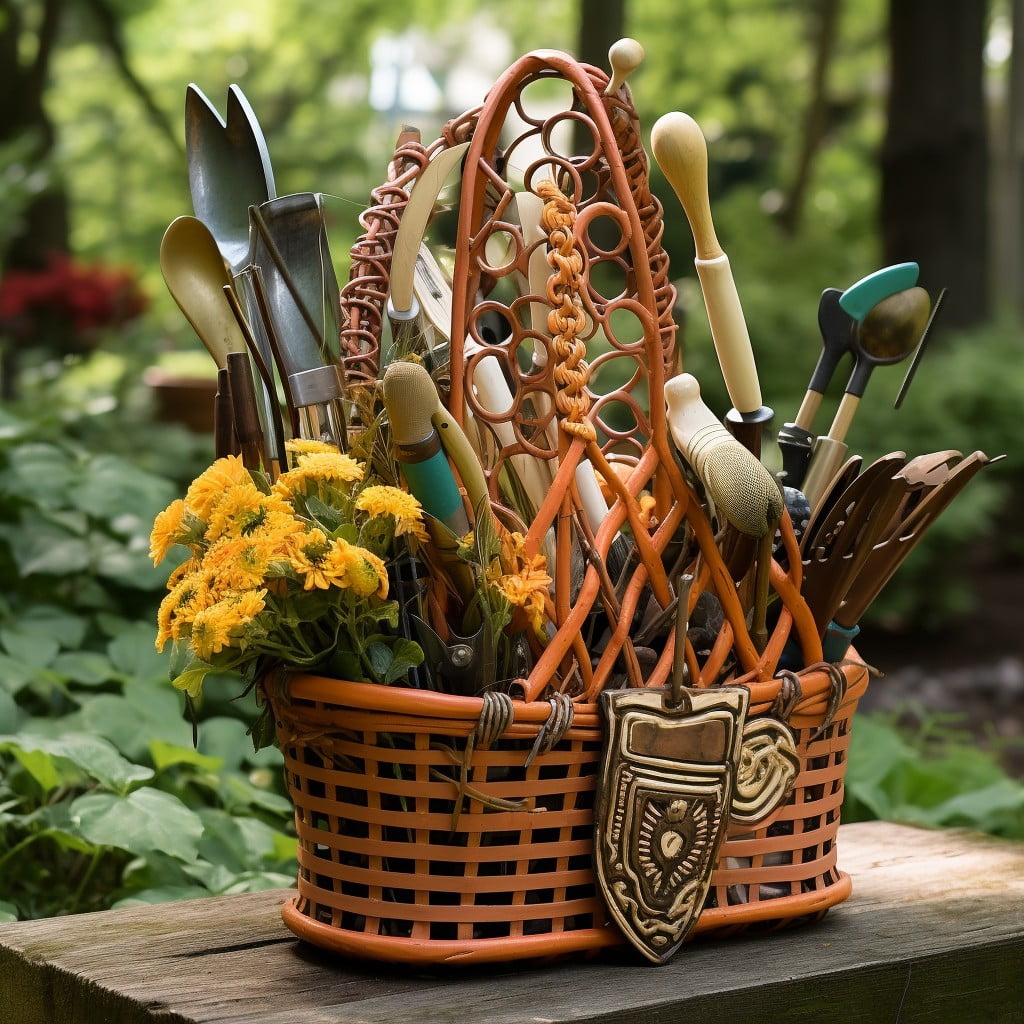
A garden tools basket provides a functional, yet stylish method for storing gardening essentials. Key elements include practical tools, such as trowels, pruners, and gloves, conveniently tucked into the basket.
Experiment with a variety of basket materials to find one that suits your style – wicker, metal wire, or even a canvas tote. Don’t forget to incorporate a DIY flair with touches of personalization; consider painted tool handles or a monogrammed canvas tote.
Arrange items carefully for optimal space usage and easy accessibility. Heaviest items should be placed at the bottom to provide stability. Stick long tools vertically to prevent tangling and keep smaller accessories like seeds and gloves in the upper region for easy retrieval. Labels could enhance organization.
Don’t shy away from aesthetics. It’s not just about utility; decorators can embellish the basket’s exterior with silk flowers, ribbons, or attach a miniature chalkboard for a rustic feel. The end result should blend seamlessly into your garden decor while keeping your essential tools at arm’s reach. And remember, the best tool is the one that’s within reach when you need it.
Basket With Ribbon Accessories
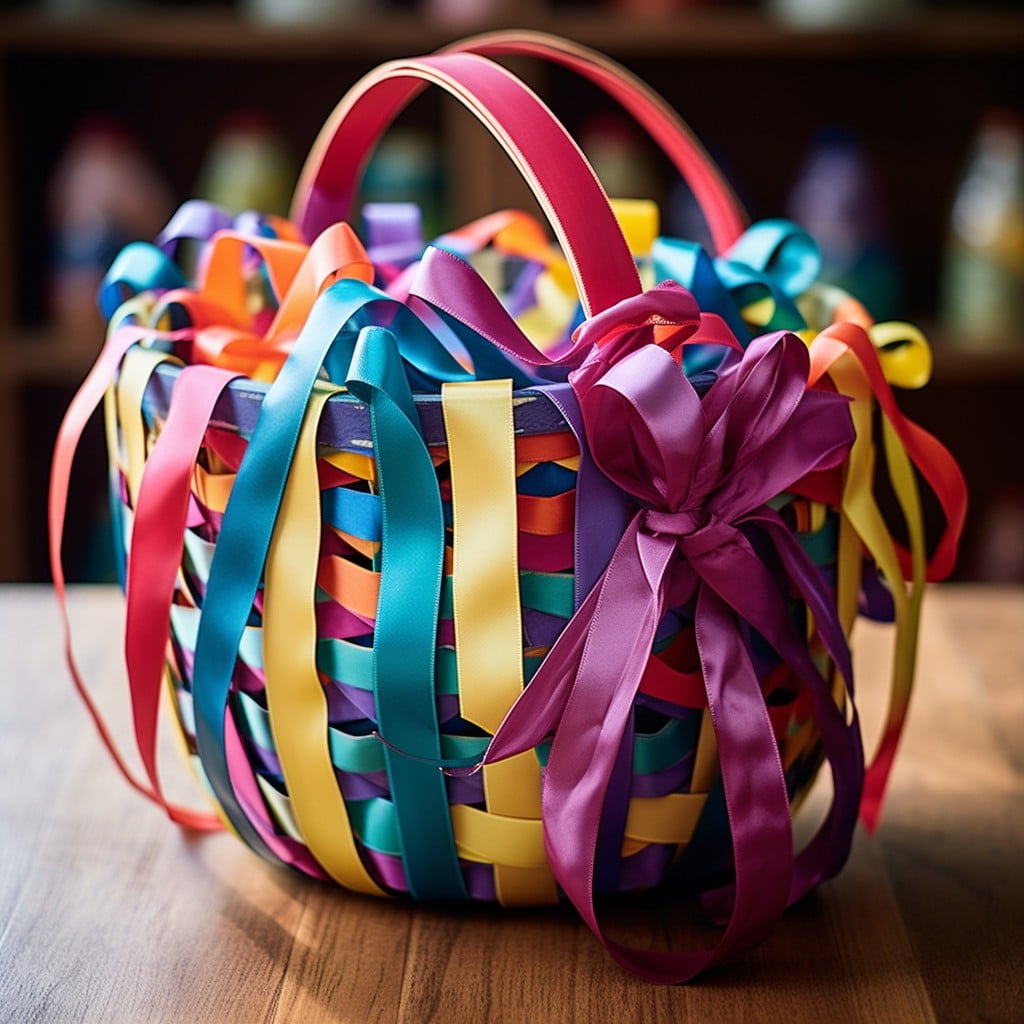
Ribbon boasts versatility and simplicity. From bows to knots, cascades to loops, all serve as stunning additions to your basket decor.
Following are some pointers to consider:
- 1. Select high-quality satin or organza ribbons.
- 2. Use different ribbon thicknesses depending upon the basket size – thicker for large baskets, slender for smaller ones.
- 3. Complement the ribbon color with the main content of the basket. A champagne-colored ribbon, for example, can enhance a wine and cheese basket.
- 4. Get creative with styles. Experiment with bows, curls, loops, and more.
- 5. For a more rustic look, try combinations of burlap ribbon with lace.
- 6. Multi-layer bows with different colored ribbons can give your basket a wow factor.
- 7. A trailing cascade of ribbon adds elegance, especially to a tall, standing basket.
- 8. For longer visual appeal, coat the ends of the ribbon with clear nail polish to prevent fraying.
Remember, the ribbon’s goal is not just to look pretty, but to draw all elements of the basket together into a harmonious visual composition.
Candle-lit Basket
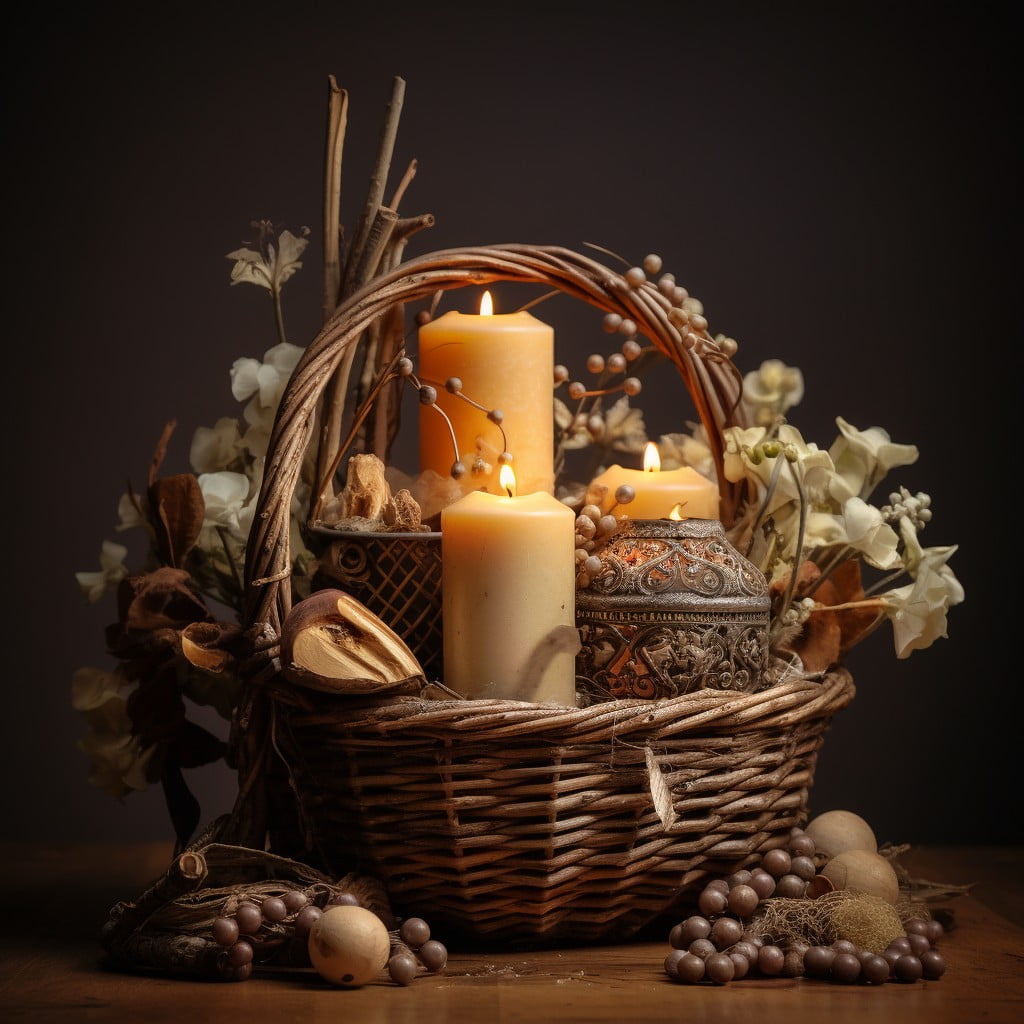
To create an enchanting atmosphere, a candle-lit basket is a wonderful option. It involves setting up a cozy and inviting display that appeals to both sight and scent senses.
1. Selection: Opt for candles varying in sizes or colors. Consider scented varieties for a boosted sensory appeal.
2. Arrangement: Organize the candles in the basket maintaining a safe distance from each other. Levels can be created with smaller candles at the front and taller ones at the back.
3. Padding: Add straw, pebbles, or glass beads to secure the candles in place. This also adds texture to our candlelit ensemble.
4. Basket decoration: Decorate the basket with ribbons, flowers, or sequins. However, keep flammable ornaments at a safe distance from the flames.
5. Maintenance: Ensure candles are extinguished when unattended to prevent any accidents.
Remember, safety is vital when you’re working with flammable items. A candle-lit basket can provide a calming ambiance, making any space feel more homey and welcoming.
Wine and Cheese Basket
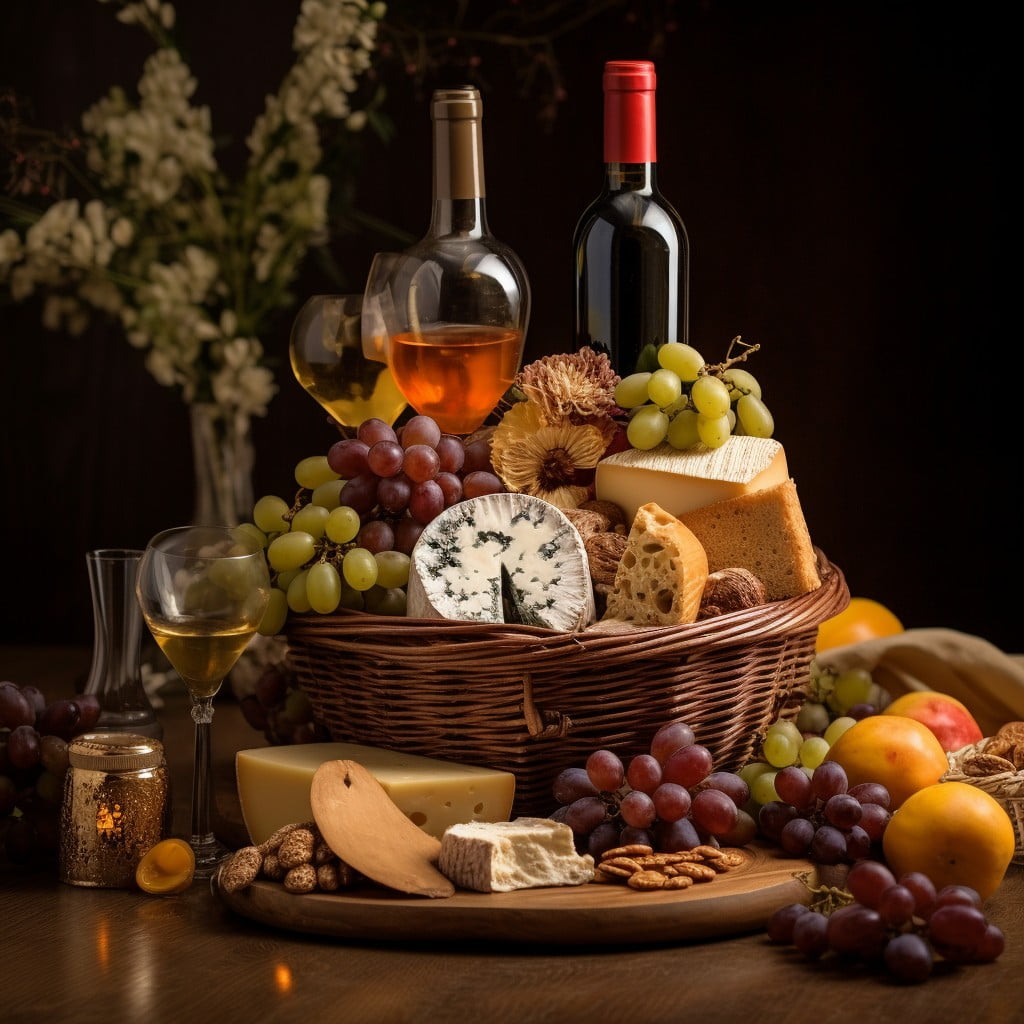
To underscore elegance and sophistication, a careful selection of paired wines and cheeses is vital. Starting with a well-constructed basket, typically wicker, ensure that it is lined with a cheese-friendly material like parchment paper or a clean cloth.
The cheese assortment should include a range: hard cheeses like Gouda, semi-soft varieties such as Camembert, and a soft type like Brie. For a touch of essence, consider a blue cheese variety. Ideally, go for locally produced or artisan cheeses to elevate the basket’s uniqueness.
As for wine, aim for diversity too. Include a full-bodied red, a crisp white, and perhaps a dessert wine. Remember, wine and cheese complement each other; bold wines pair well with strong cheeses while light wines tend to go with mild cheeses.
Lastly, uplift the look and feel of the basket with accented accessories. Consider oak wine stoppers, elegant cheese knives, a petite cheeseboard, or even a paneled cheese guide. Add a few sprigs of rosemary or dried flowers for a decorative finish that enhances the overall aesthetic appeal.
Spa Essentials Basket
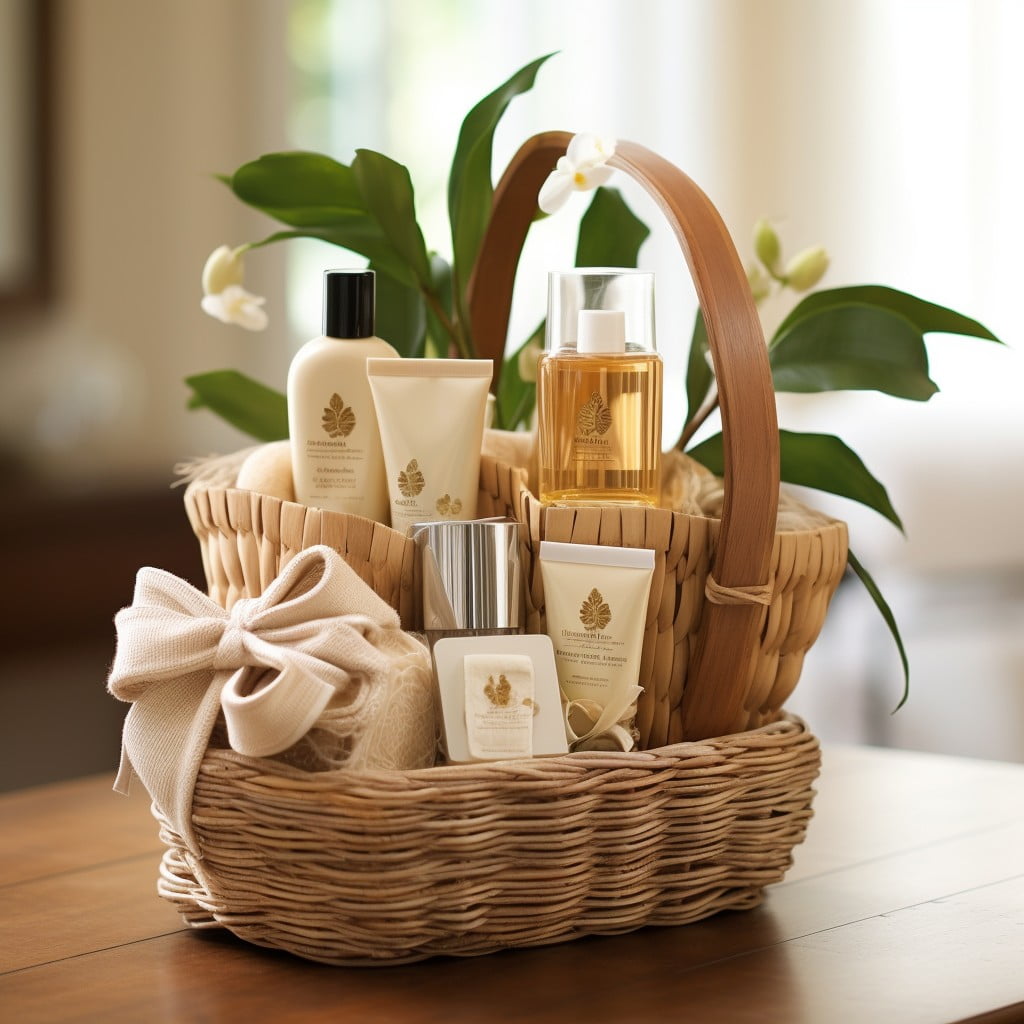
To create an alluring and visually pleasing spa essentials basket, here are some creative pointers.
1. Shred some pastel tissue paper, placing it at the base for a soft, luxurious touch.
2. Include a variety of bath accessories – from scented candles to bath bombs, essential oils, and fluffy towels for a diverse look.
3. Arrange items based on heights and sizes to maintain visual interest. Start with bigger items in the back.
4. Bottles of scented lotion or scrub can be wrapped in matching ribbon to add color while keeping the theme.
5. Place smaller items like nail polish or compact mirrors in freestanding mini containers within the basket.
6. Consider color schemes and scents which complement. Lavender, eucalyptus, or rosemary provide a soothing experience.
7. Include a natural loofah or bath sponge to add texture.
8. A sleek bathrobe rolled could serve as an attractive center of attention.
Remember, the aim is to entice the senses with the basket. Not only should it look appealing, but also be a fragrant, tactile treat giving the recipient an immediate sense of relaxation and indulgence.
Art Supplies Basket
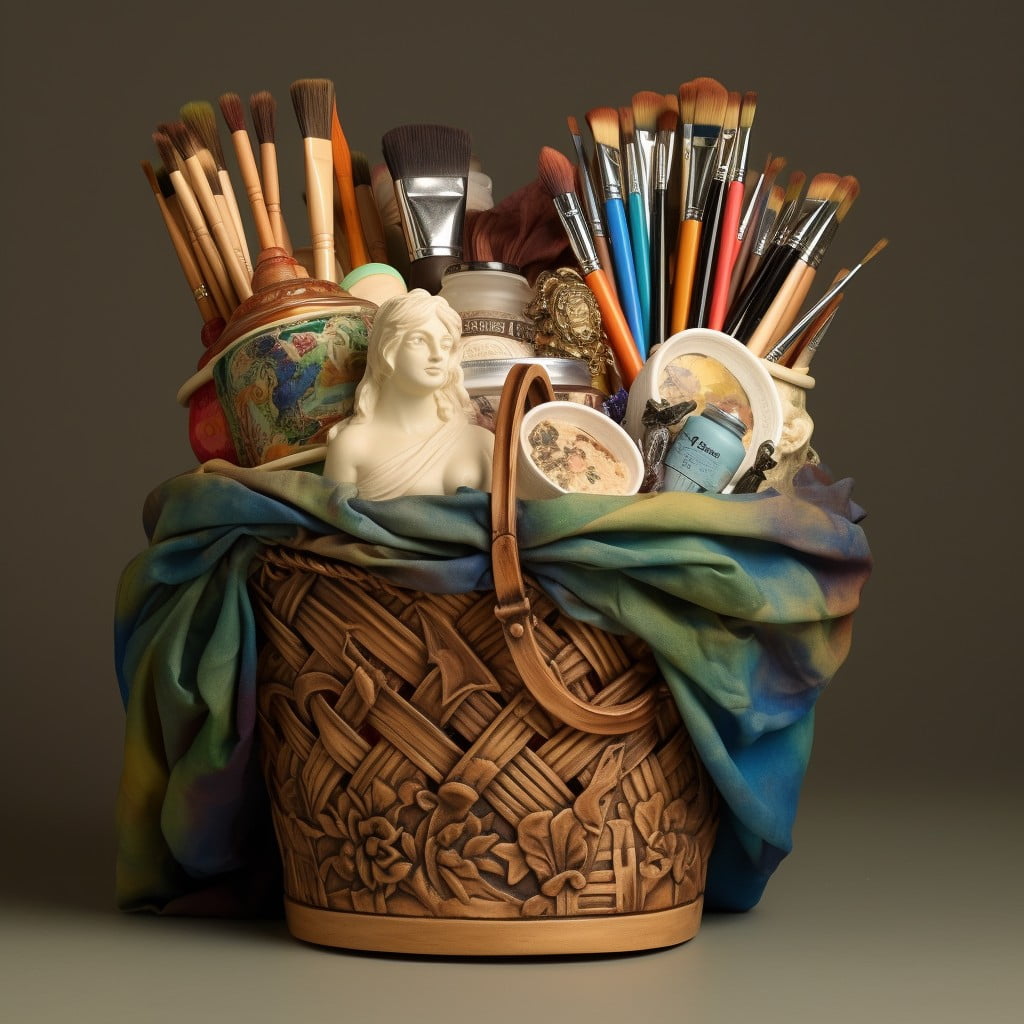
Colorful sketchpads, pencils, and paints; artists live for these. An art supplies basket is a personal, creative, and functional decorative piece. It provides a unique blend of utility and aesthetics, ideal for an artist or hobbyist’s space.
1. Content Value: Fill the basket with quality art supplies depending on the specialty of the recipient. It could contain watercolor sets, premium sketch pens, color pencils, or professional drawing sheets.
2. Visual Appeal: Use colored markers and vibrantly hued sketchpads for the outer layer. It adds to the visual richness, creating a delightful array of colors.
3. Arrangement: Position larger items, like sketchbooks and color sets, at the bottom. Layer up with smaller items such as pencils and markers.
4. Personalize: Add a customized touch. It could be a hand-written note stuck on a drawing pad or a personalized sketch pen set.
5. Accessorize: Decorate the basket handles with artistic tags or paintbrush charms. It aligns perfectly with its theme, boosting its appeal.
Remember, the art supplies basket is a nexus of expression and creativity. Its success lies in not just looking artistically appealing, but also in delivering utility and stimulation for the artist.
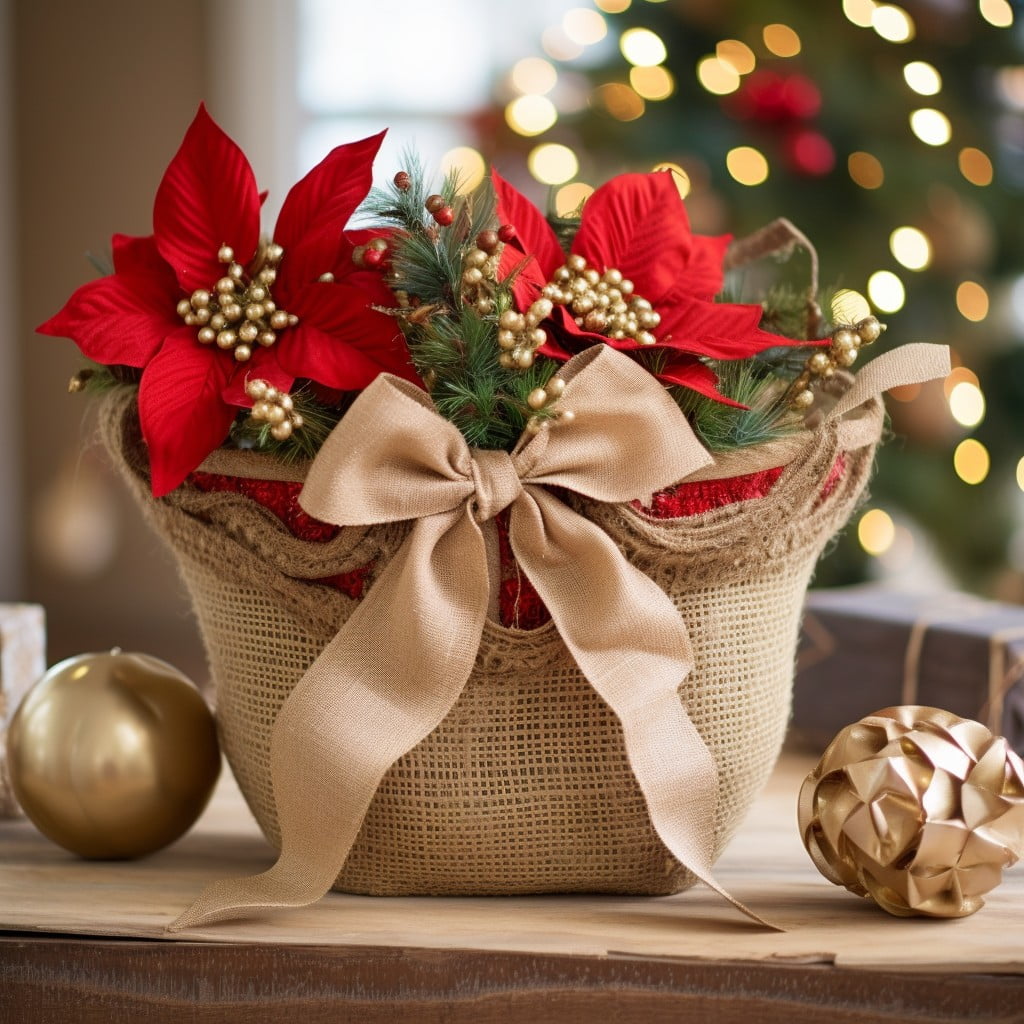
Christmas-themed Basket
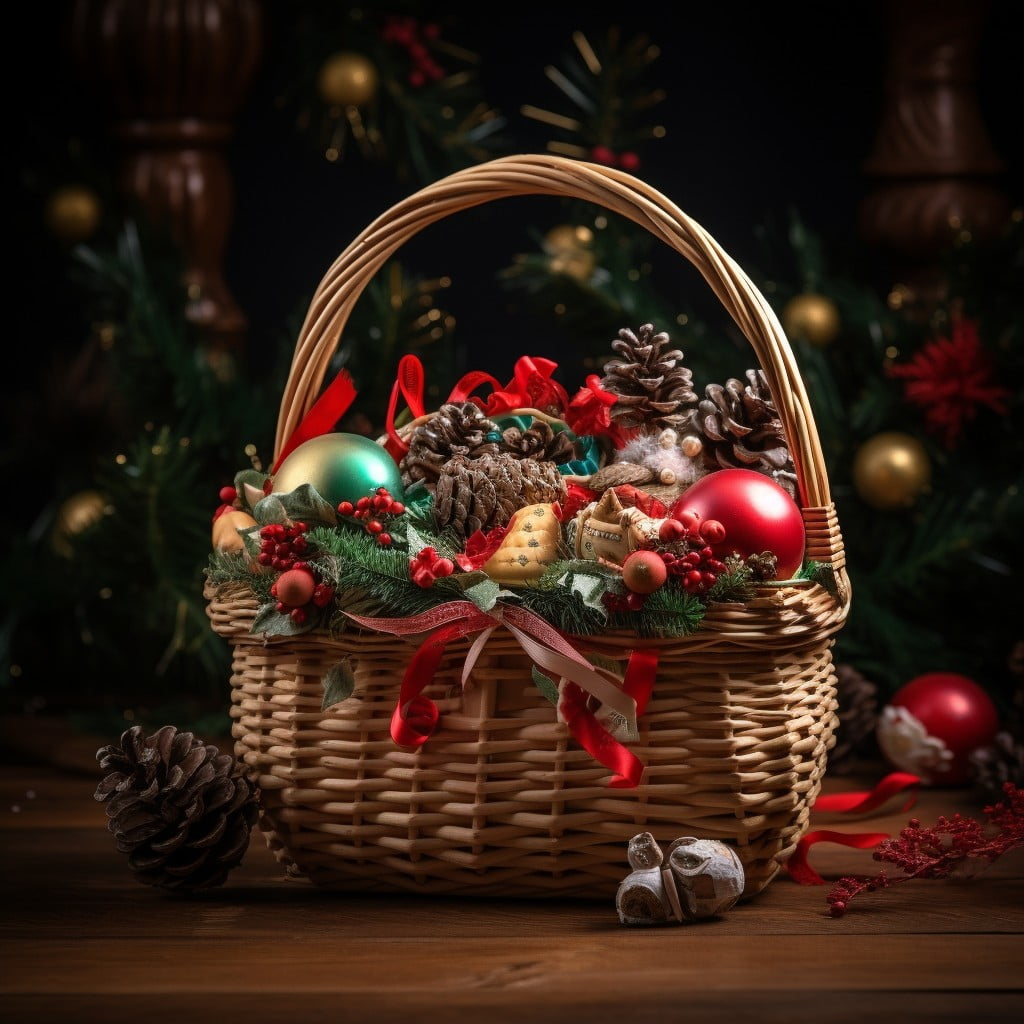
Jumping right in, remember the key to a successful yuletide ensemble is capturing the spirit of the season. Use traditional Christmas colors such as red and green, but do not shy away from silver, gold or even white to bring a dash of winter’s charm.
1. Start with a red or green basket, perhaps even one that has a mix of both colors.
2. Fill the basket with an assortment of hand-picked ornaments – think glittery snowflakes, miniature Santa dolls or tiny Christmas trees.
3. Include a string of LED lights to add a touch of glowing warmth. Battery-operated ones are a good pick.
4. Incorporate seasonal fruit and treats such as candy canes or gingerbread cookies, to add an edible element.
5. Sprinkle in pine branches, mistletoe or holly leaves for that fresh Christmas scent and texture.
6. Lastly, wrap the handle with a satin ribbon and place a large bow on top as a finishing touch.
Remember, you don’t need to include every suggested item. Mixing and matching based on personal tastes or what you already have on hand can create a unique basket that is equally as festive.
Burlap-wrapped Basket
Starting this project is rather straightforward. The main item you’ll need is a roll of burlap, which can be found at most craft stores or online. Burlap is a really affordable, versatile, and eco-friendly material that achieves a rustic and chic look in a snap.
Step one is measure and cut the burlap to fit around your chosen basket; ensure there’s enough to cover the interior and exterior.
Then, apply a layer of adhesive, such as a hot glue gun or quick-drying fabric glue, to the basket. Press the burlap into the glue, and allow it to set.
You can enhance this look by adding embellishments. Stencils with acrylic paint are a popular choice, notably white or cream paint for contrast. Others prefer natural elements like pinecones, dried flowers or hessian flowers.
One last note, don’t forget to secure the edges of the burlap to prevent it from fraying! A quick hem or dab of glue on the edges will usually do the trick.
Remember, the key to the perfect burlap-wrapped basket lies in the details, so take your time, have fun with it, and enjoy the process!
Chalk Paint Decorated Basket
Once you’ve secured your favorite basket, a smooth and porous type usually works best, you’re ready to dive into the chalk paint process.
1. Choose your chalk paint: Chalk paint typically results in a matte, vintage finish popular for its elegant charm. Pick your color wisely considering the room aesthetics where the basket will be placed.
2. Clean the basket: Before you get started with painting, make sure to clean the basket of any dirt or dust that might interfere with the paint’s adherence.
3. Apply first coat: With a suitable size brush, apply the first coat of chalk paint. It’s important to ensure every nook and cranny is covered for a uniform finish.
4. Second coat: Allow the first coat to dry thoroughly. A second coat can sometimes add the antiqued, textured effect many desire when using chalk paint.
5. Distressing (Optional): If desired, you can use a piece of sandpaper to gently distress areas of the basket after the paint has dried. This step is not mandatory but creates a more vintage look.
6. Sealant: Lastly, apply a sealant to protect your fresh paint job from scratches and fading. Apply with a clean brush and let it dry fully before usage.
Transforming a basket with chalk paint, along with a little creativity, can be a delightful project adding a personal touch to your decor.
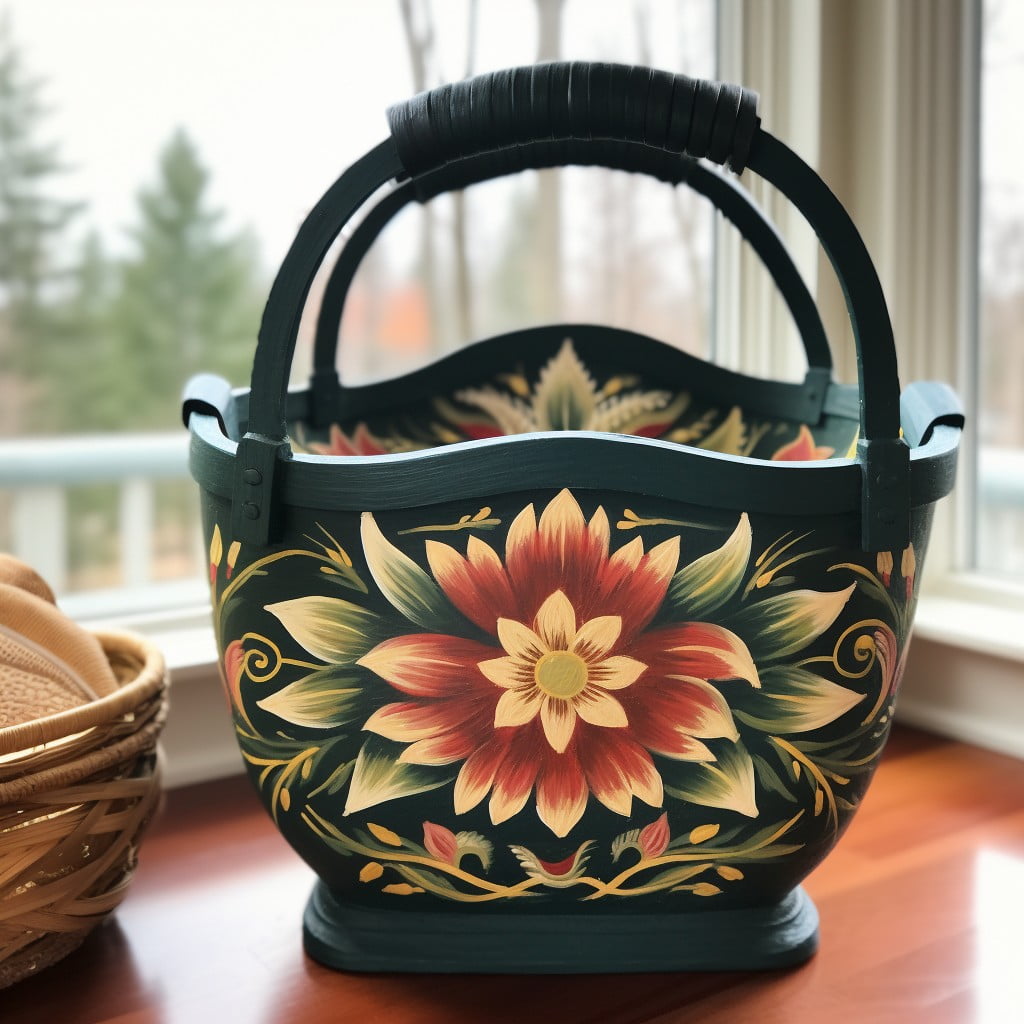
Yarn-woven Basket
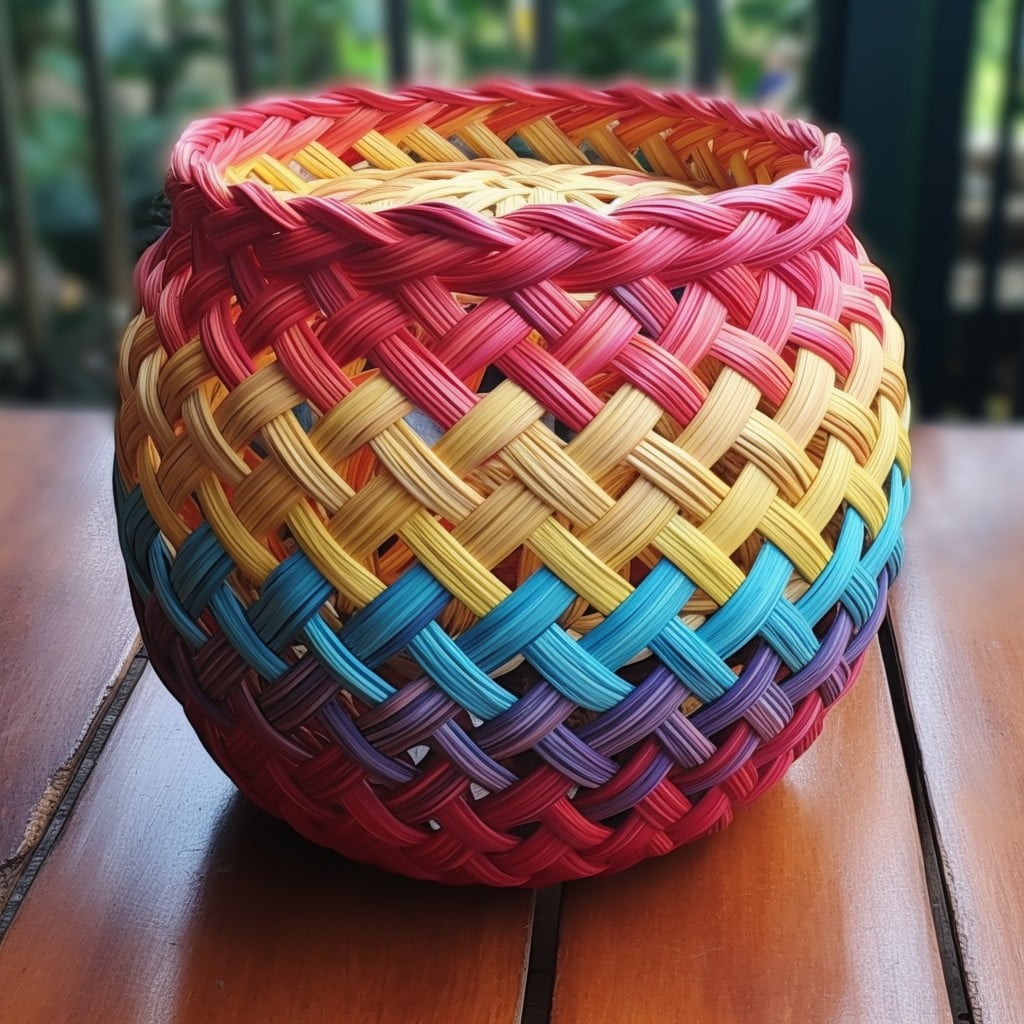
Starting with a simple, undecorated basket, you can transform it into something eye-catching with a bit of yarn. The yarn-woven pattern can infuse a pop of color, providing a personalized touch.
1. Selecting Yarn: Choose yarn colors that match the room’s decor or party theme. Don’t limit yourself to a single color; alternating shades can add depth to your design.
2. Basket Preparation: Before starting, ensure the basket surface is clean and dry. If it’s a used basket, a gentle wipe-down would suffice.
3. Weaving Technique: There are numerous weaving techniques – over-and-under, figure-eight, or tabby are just a few possibilities. Each provides a unique pattern to the basket.
4. Securing Yarn: Always secure the yarn at the beginning and end of the weave. This will ensure the yarn does not unravel over time. A simple knot hidden at the basket’s base or inside should suffice.
5. Detailing: Adding a pom-pom or tassel can give it a fun twist, while sticking to a monochromatic palette might lend a more refined aesthetic.
Remember, there’s no right or wrong in the realm of creativity. Let your creative juices flow and make your woven-baskets as unique as your imagination allows.
Crystal and Pearl Adorned Basket
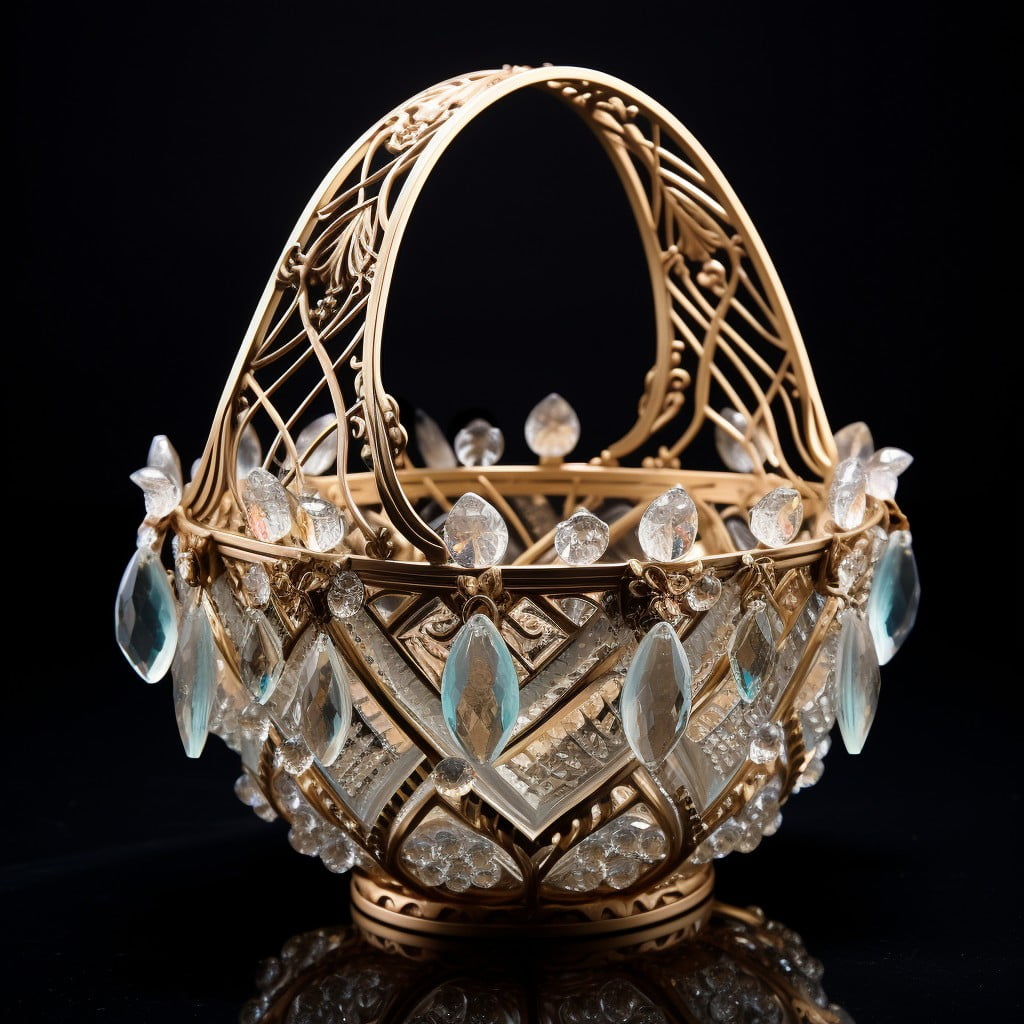
Adorning a basket with crystals and pearls provides an elegant touch, perfect for special occasions. In fact, this decoration style lends itself to a luxurious aesthetic, ideal for wedding décor or a sophisticated gift.
1. Selection: Choose crystals and pearls that complement the color of the basket. It’s the subtle accents that could make all the difference.
2. Design: Arrange your materials first before you glue. Perhaps pair a large crystal with a cluster of pearls, or create a trailing pearl design for a classy touch.
3. Adhesive: Use strong, clear-drying adhesive to avoid any unsightly residue.
4. Setting: Allow the decorated basket ample time to dry, preferably overnight.
5. Content: Fill the basket with items that will enhance its elegance. Think satin covered chocolates, a bottle of sparkling wine or draped, soft material.
Remember, the key to a beautiful crystal and pearl adorned basket lies in the details. A thoughtfully designed piece can offer both functionality and a lovely visual impact.
DIY Paper Flowers Basket
Creating your own paper flowers to adorn a basket can be both a fun and practical solution. Experiment with a variety of blooms such as roses, daisies, or sunflowers for wow-factor variety.
Here are the essential steps:
- Cut colored paper: Choose the color you prefer for your flowers and cut them into shapes according to the flower you want to make. Get creative – variety adds visual interest.
- Assemble the flowers: Once your parts are cut, assemble them into flower shapes. Secure them with clear glue for best results.
- Attach the flowers: Carefully glue your paper flowers onto your basket. Arrange them thoughtfully for a more appealing look.
- Let it dry: Leave the basket to dry overnight. This crucial step ensures your flowers adhere properly to your basket.
Remember, the result doesn’t have to be perfect. The charm of the DIY paper flower basket is in its hand-crafted and personalized nature. Happy crafting!
Vintage Fabric Lined Basket
Firstly, there’s the selection process. Opting for fabrics with intricate patterns or detailing adds an antique air. Paisleys, florals, and plaids are just a few examples. The fabric doesn’t need to be authentically old, the objective is to capture that traditional charm.
Second, measure and cut the fabric to fit. It should line the interior and hang over the exterior. A pin or two can help secure the fabric in place.
Now, the tricky part, affixing the cloth to the basket. There are several methods here, but fabric adhesives work best. Apply the bonding element evenly, adhere the fabric, then allow proper drying time.
Next, addressing the overlay on the exterior. A neat, sharp cut around the basket’s edge makes for a clean line. Alternatively, the fabric could be folded over the edge, secured with a hot glue gun.
Lastly, the basket’s handle. The option exists to wrap it with excess fabric or leave it bare, incorporative of the vintage-inspired look either way. Both provide a nice contrast and texture variation.
By following these steps, a vintage fabric lined basket can bring whimsical charm to any space, serving as a stylish storage solution or a stand-alone decoration piece.
Basket Decorated With Washi Tape
Washi tape, originating from Japan, makes a versatile and creative decorating tool. Easy to use, the tape comes in a myriad of colors and designs to suit any aesthetic. To bring your basket to life, choose a variety of washi tapes that complement each other or the theme of your basket.
Begin by thoroughly wiping the surface of your basket to help the tape stick better. Cut or tear the washi tape into the desired lengths, and start attaching it horizontally, vertically, or even diagonally across the basket surface. You can wrap whole panels for a bold effect, or create stripes, plaids or other patterns for a subtler look.
For a more personalized touch, use washi tape to make small flags or pennants, paper flowers or other shapes to drape over the side, or to trim the basket handle. Washi tape decoration is an affordable, enjoyable way to reuse and personalize baskets for any occasion. Remember, the only limit to decorating with washi tape is your imagination.
Read More Like This
 15 Homecoming Decoration Ideas to Elevate Your Celebration
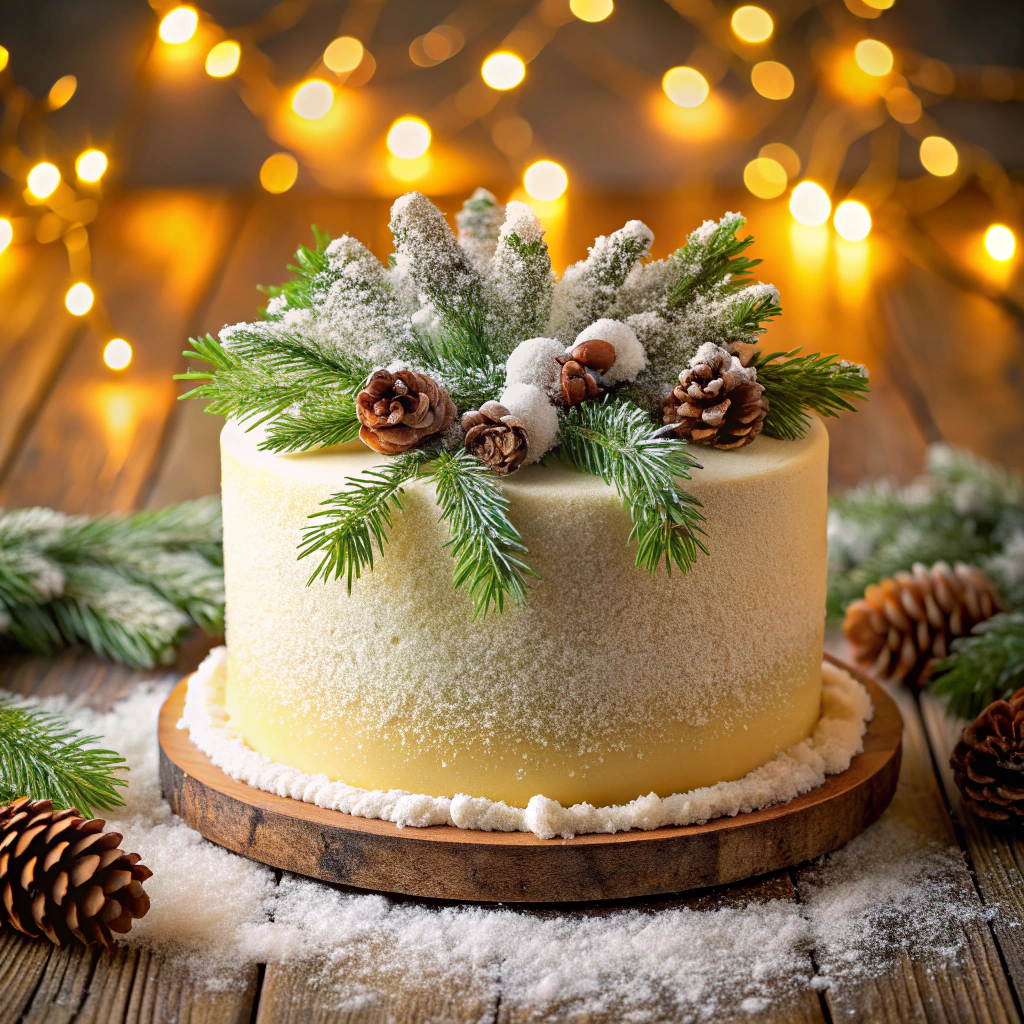 15 Christmas Cake Decorating Ideas to Sweeten Your Holidays
 15 Outdoor Party Tent Decorating Ideas for a Magical Celebration
 15 Ideas for Welcome Home Decorations
 15 Cheap Table Decoration Ideas to Elevate Any Gathering
Recap: