Last updated on
The best way to make a mosaic tile flush is to use a tile leveling system or a leveling compound. Read on for details of this project.
First, lay the tiles in the desired pattern and insert the leveling clips between them. Use a tool to level the clips and ensure all tiles are even taller. Once set, remove the clips and apply a thin layer of leveling compound over uneven areas. Allow it to dry before grouting.
As I walked into my friend’s newly renovated bathroom, I immediately saw the stunning mosaic tiles on the shower wall. The intricate patterns and colors added a unique touch of elegance to the space.
However, as I ran my fingers over the surface, I noticed some tiles were not flush. It was a slight imperfection, but it bothered me nonetheless.
After research and trial and error, I discovered several techniques for making mosaic tile flush. Whether you’re a DIY enthusiast or a professional contractor, these tips will help you achieve a flawless finish for your next project.
So please sit back and let me share my knowledge in this informative guide on making mosaic tile flush!
Key takeaways:
- Use a tile leveling system or leveling compound.
- Choose high-quality tiles that are easy to work with.
- Prepare the surface by cleaning and leveling it properly.
- Plan the layout and mark the design before installation.
- Cut and fit tiles carefully to avoid bumps and ridges.
Choosing the Right Tile
When creating a beautiful mosaic tile design, choosing suitable tiles is crucial. Not all tiles are created equal; some may be more difficult to work with than others.
As I continued my research on how to make mosaic tile flush, I learned that selecting high-quality tiles can make a significant difference in achieving a smooth finish.
My friend had opted for glass mosaic tiles in her bathroom renovation project. While they looked stunning once installed, they were also quite challenging to work with due to their delicate nature.
Glass mosaics require extra care during installation as they can easily crack or chip if mishandled.
On the other hand, ceramic or porcelain mosaics are more durable and easier for beginners to installing without damaging them accidentally. They come in various sizes and shapes, making them versatile enough for any design you have in mind.
Ultimately, your choice of material will depend on your budget and personal preference, but consider these factors when selecting: durability of the material; ease of installation; size & shape options available; color range offered by the manufacturer, etc.
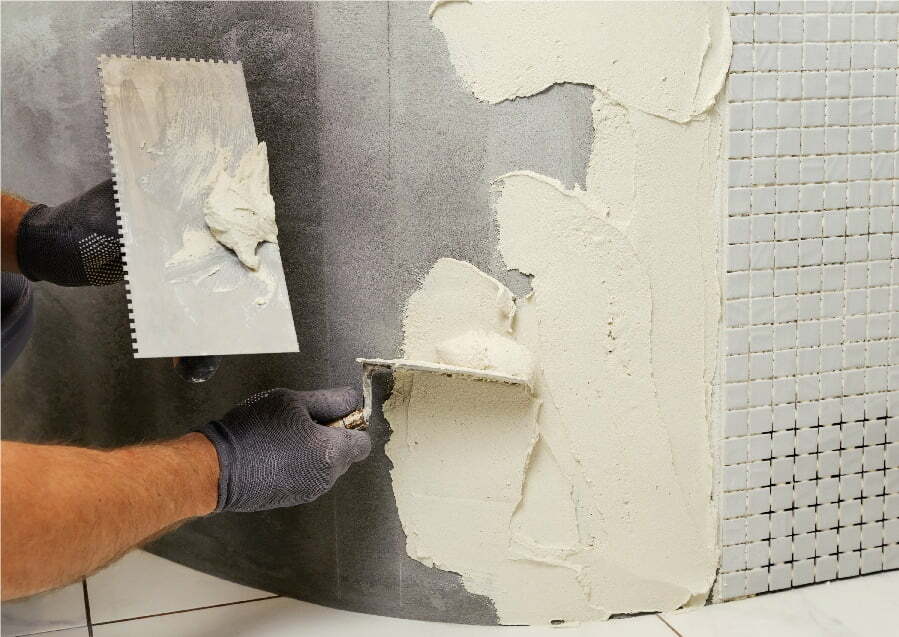
Preparing the Surface
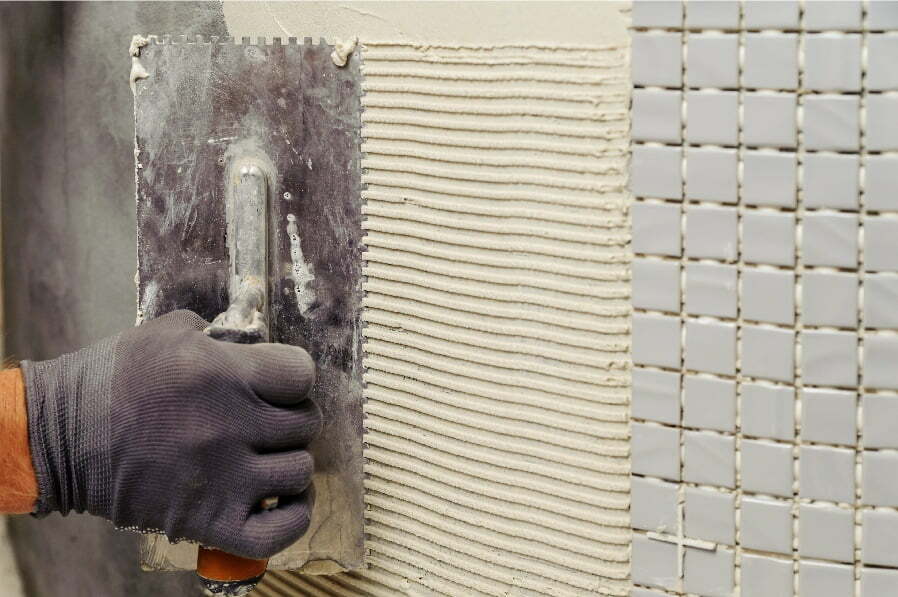
Before making mosaic tile flush, preparing the surface properly is crucial. I noticed some wall areas in my friend’s bathroom were not completely flat and had small bumps or dips.
These imperfections can cause tiles to sit unevenly and create an unappealing finish.
To ensure a smooth surface for your mosaic tiles, clean the area thoroughly with soap and water. Next, use a level tool to check for any high or low spots on the wall.
If you find any bumps or dips in your surface, you may need to sand them down using coarse-grit sandpaper until they’re even with surrounding areas.
In some cases where there are significant irregularities on your wall surfaces, such as large cracks or holes, filling these gaps is necessary before installing new tiles. Once you’ve prepared a clean and level base for your mosaic tile installation project, it’s time to lay out patterns!
Laying Out Your Design
Before you start laying your mosaic tiles, it’s essential to have a clear plan in mind. This will help ensure that the finished product looks cohesive and professional.
To begin, measure the area where you’ll install the tiles and sketch a rough design on paper.
As I continued my friend’s bathroom renovation project, I realized that laying out our design was crucial for achieving flush mosaic tiles. We spent hours measuring and marking each tile placement before installation.
One helpful tip is to use painter’s tape or chalk lines to mark off your design on the surface where you’ll install the tiles. This will give you a visual guide as you work and help keep everything aligned properly.
Another thing to consider when planning your layout is how many full-sized pieces of tile can fit into each row or column without any cuts or adjustments. Doing this can save time during installation by reducing the unnecessary cutting of individual pieces later.
Taking these steps may seem tedious at first but trust me, they are worth it in ensuring an aesthetically pleasing final result with flush mosaic tiling!
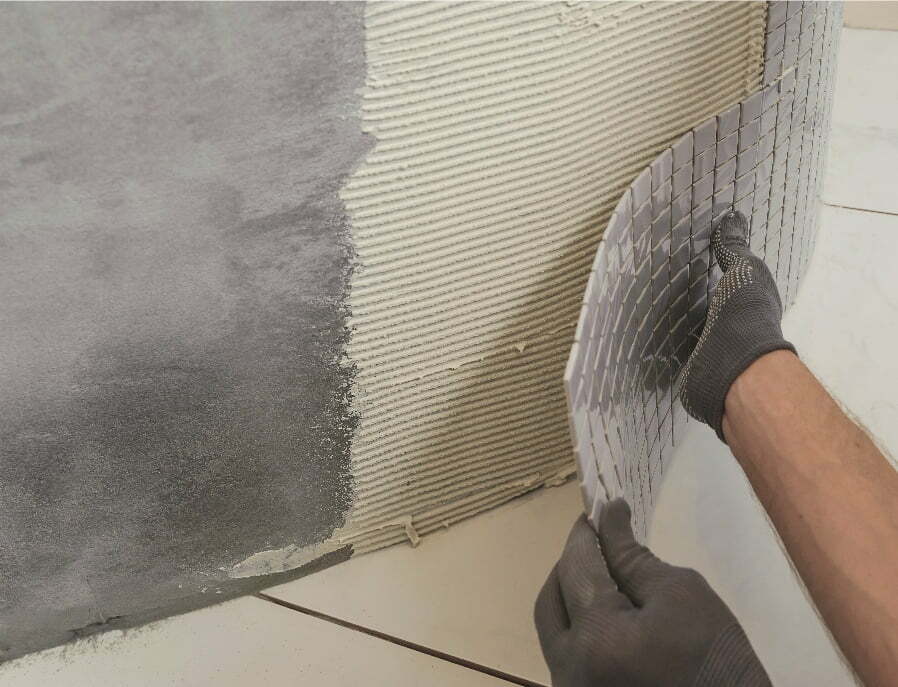
Cutting and Fitting Tiles

Cutting and fitting the tiles is one of the most critical steps in creating a flush mosaic tile surface. While examining my friend’s bathroom, I noticed some tiles were cut unevenly or did not fit appropriately into their designated spaces.
This can cause bumps and ridges on the surface, making it difficult to achieve a smooth finish.
To avoid this issue, measuring each tile carefully before cutting them with a wet saw or tile cutter is crucial. Getting each piece right may take some trial and error, but taking your time during this step will save you from headaches later on.
Once all your tiles are cut and ready for installation, test-fit them onto your wall or floor before applying any adhesive. This will allow you to make any necessary adjustments before permanently setting them.
By taking care during the cutting and fitting process, you’ll be well toward achieving a beautiful flush mosaic tile surface that adds elegance and sophistication to any space!
Grouting and Finishing
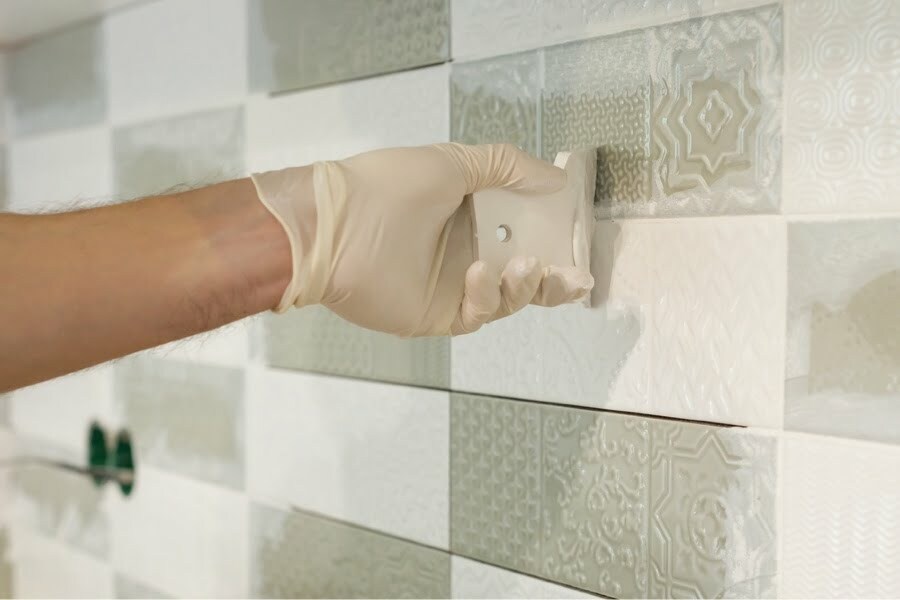
Once you have laid your mosaic tiles, the next step is to grout and finish them. This process involves filling the gaps between each tile with a special cement, sand, and water mixture.
Grouting not only helps to secure the tiles in place but also gives them a polished look.
As I continued my research on making mosaic tile flush, I learned that grouting could be tricky if not done correctly. One common mistake is using too much water when mixing the grout, which can cause it to shrink or crack as it dries.
To avoid this issue, start by adding small amounts of water at a time until you achieve a thick paste-like consistency. Apply the grout evenly over all areas of your tiled surface using a rubber float tool or squeegee.
After applying enough pressure for proper adhesion between tiles and removing excess material from joints with an appropriate tool such as a sponge trowel or scraper blade, let dry completely before wiping away any remaining haze left behind by excess residue from cleaning up after the installation process has been completed successfully!
Read More Like This
 15 Homecoming Decoration Ideas to Elevate Your Celebration
 15 Christmas Cake Decorating Ideas to Sweeten Your Holidays
 15 Outdoor Party Tent Decorating Ideas for a Magical Celebration
 15 Ideas for Welcome Home Decorations
 15 Funny Graduation Cap Ideas to Make Your Big Day Unforgettable
Recap: