Last updated on
This article explores the world of inexpensive large planter ideas because they are an excellent solution for bringing life to your living space, even on a budget.
“I’m thrilled to share this article and the associated designs I’ve crafted on 20 affordable large planter ideas with you; I truly hope they inspire your indoor and outdoor spaces as much as they’ve ignited my creativity in the process of creating them.”
Finding inexpensive large planter ideas can be a challenge, but there are countless creative and budget-friendly solutions out there. From repurposing old items to using inexpensive materials, you can create unique and stylish planters that will add a touch of charm to your home or garden.
This article will provide you with a variety of innovative ideas, complete with detailed instructions and material suggestions, to help you create large planters without breaking the bank. You’ll discover how to turn everyday items into unique plant homes, and how to use affordable materials to craft your own custom planters.
So, get ready to roll up your sleeves and unleash your inner DIY enthusiast.
Using Old Wooden Crates
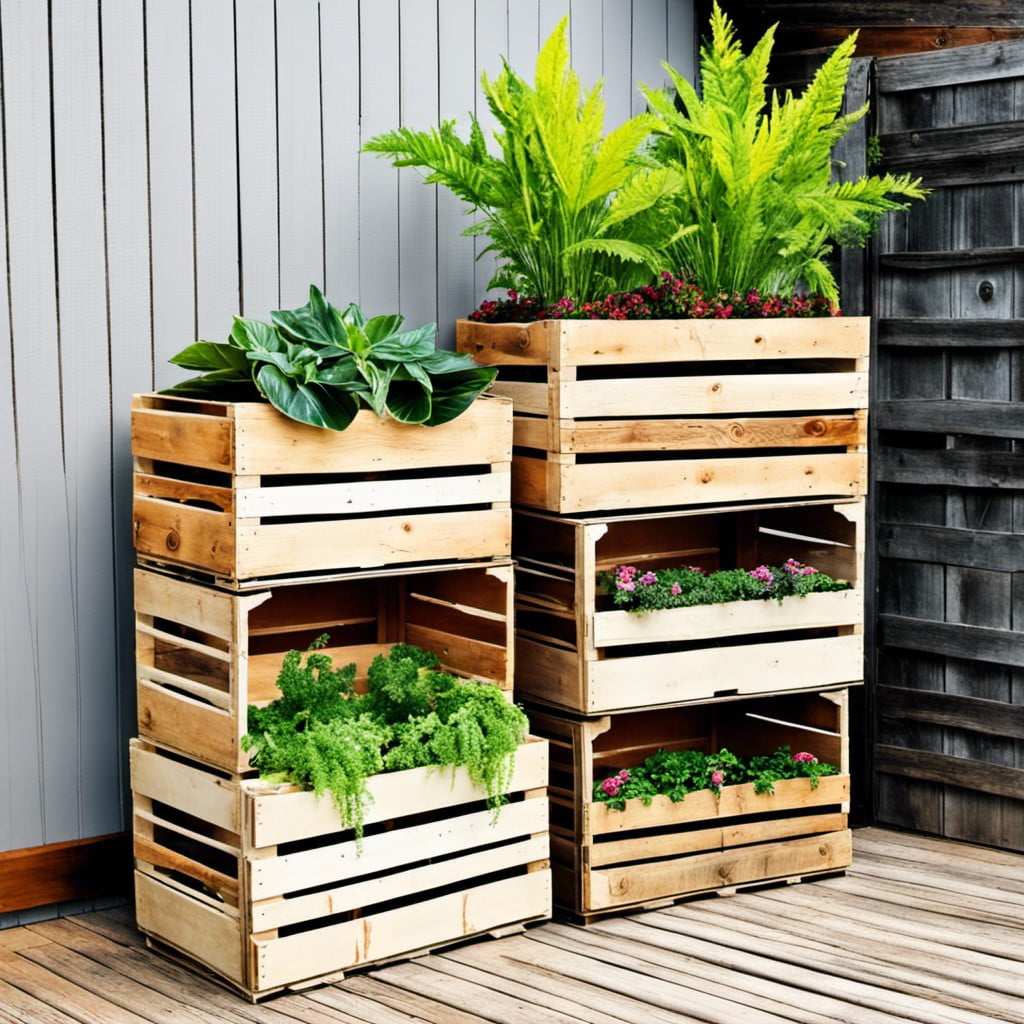
Repurposing wooden crates into lovely planters is as attractive as it’s resourceful. Here are some quick ideas to get you started:
- Size Variety: Select crates of varying sizes, this increases visual interest when they’re grouped together.
- Protection: Use a plastic liner for the inside of the crates to protect the wood from rot.
- Drainage: Remember to add drainage holes at the bottom.
- Interior Setting: Can be used as an indoor decor element, bringing nature into the home.
- Exterior Use: Perfect for creating a rustic allure in gardens, patios, or balconies.
- Vertical Gardens: Crates can also be wall-mounted providing a unique take on vertical gardens.
- Personal Style: Paint or stain your crates as per your colour preference.
These simple yet effective ideas will ensure you create stunning wooden crate planters on a budget. Next, let’s explore repurposing large buckets.
Repurposing Large Buckets
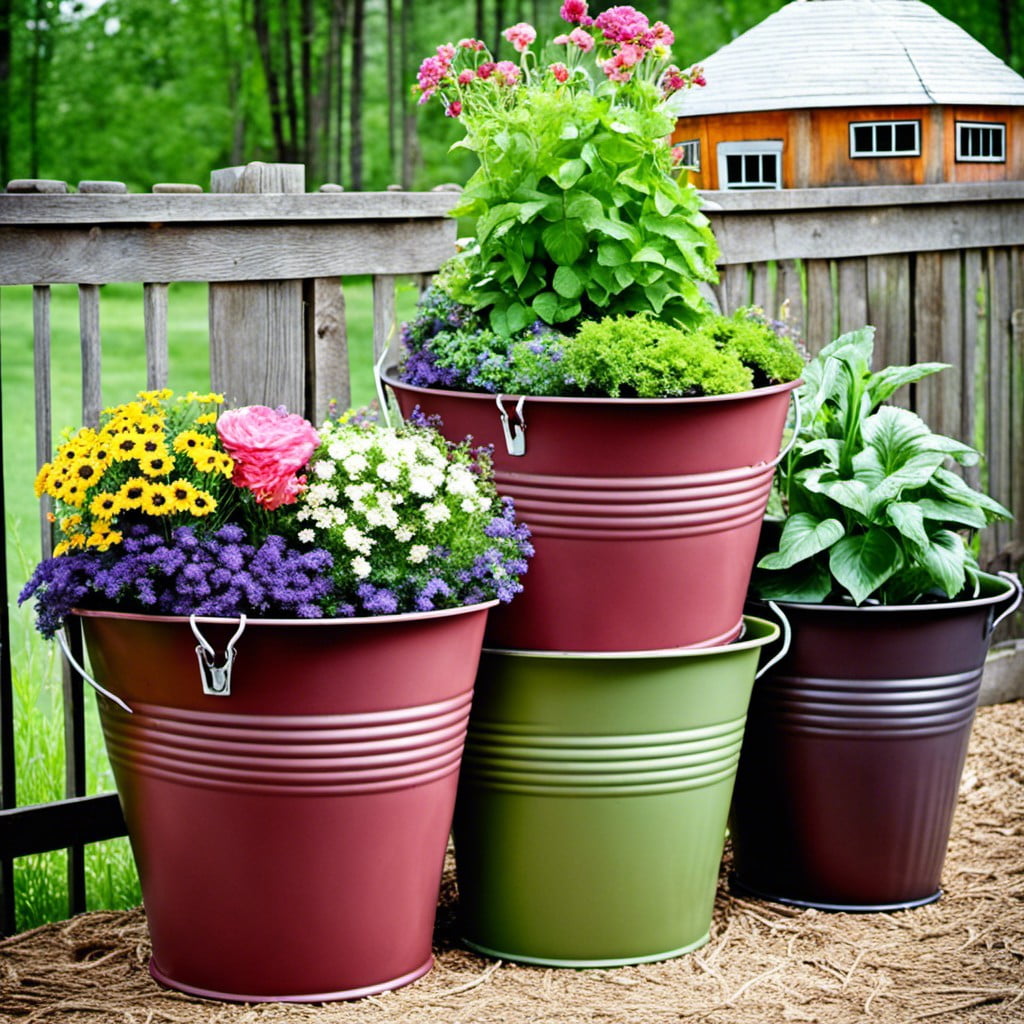
The first step to success in this DIY project is choosing an aesthetic bucket that suits your style. Remember, any plastic or metal container with sizeable dimensions can serve as a planter. Next, by drilling a few holes in the bottom, you facilitate drainage to prevent root rot in your plants.
Once ready, fill the bucket with a good quality potting mix, leaving about 2 inches from the rim. Then, settle your chosen plants into the earth, ensuring they are firmly positioned.
In terms of design, painting the exterior could be a fantastic way to incorporate your personal touch. Whether it’s a single color, abstract design, or stenciled pattern, the choice is yours!
Remember, the bucket’s handles can also serve as an ideal holder for plant tags or miniature decorative items. The transformation from a mere utility bucket to a customized, eye-catching planter is surely a joy to behold.
Regular water and plant care are, of course, necessary to ensure the flourishing of your green friends.
Stacking Old Tires and Painting Them
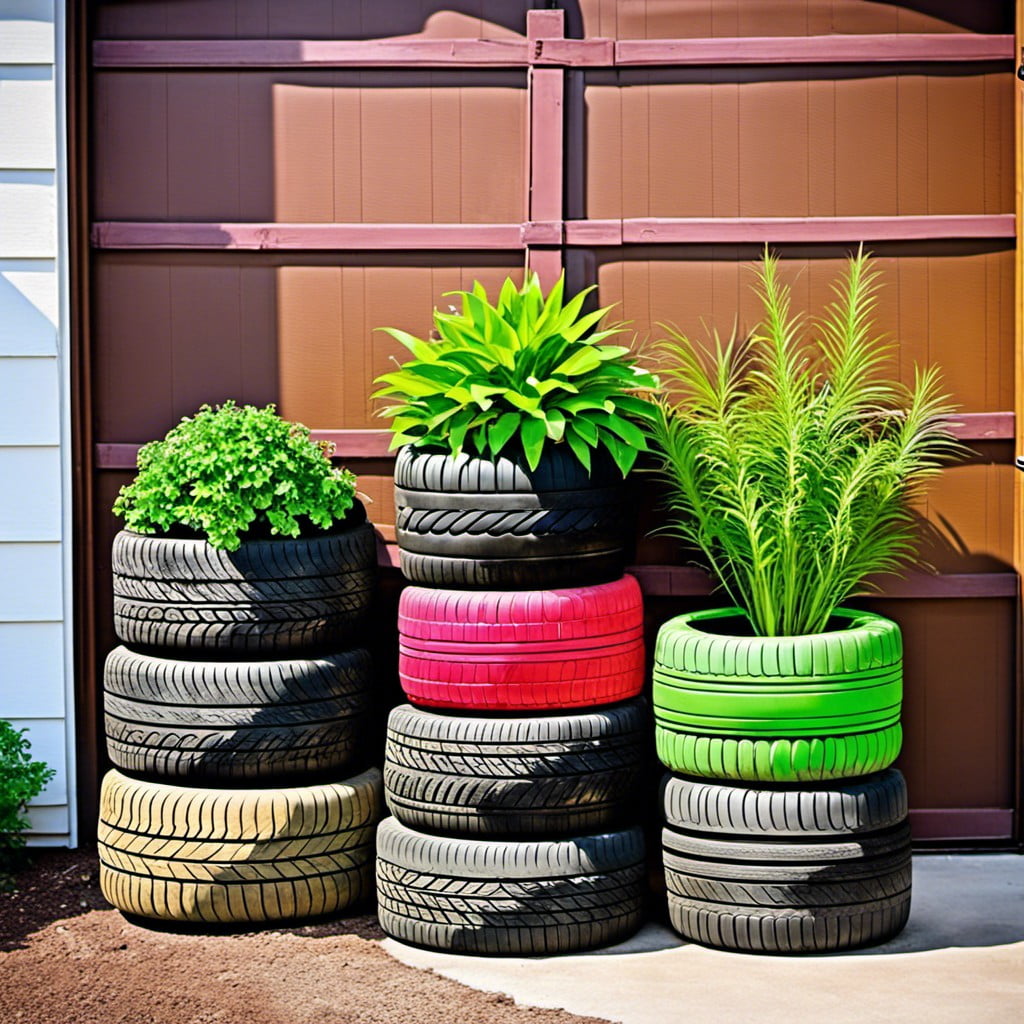
A little ingenuity and a splash of color can turn old tires into charming planters. This recycling project is straightforward and suitable even for amateur DIY enthusiasts.
1. Gather and stack several discarded tires. Depending on your design preference, you can vary the number.
2. Thoroughly clean the tires. Use warm soapy water to remove dirt, oil, and any residue.
3. Once dry, apply a coat of primer. This prepares the tire surface for painting, creating a smooth, adherable surface.
4. Get creative with paints. Choose colors that complement your outside spaces or go bold with bright hues for an eye-catching display.
5. Add drainage holes in the bottom tire. This ensures any excess water will not pool inside the tire, protecting your plants’ roots.
6. Fill the stacked tires with soil and plant your favorite flowers or shrubs. The beauty of tire planters is they can accommodate a variety of plant sizes.
Remember, it’s not just about boosting your curb appeal, but also repurposing materials that would otherwise end up in a landfill.
Converting a Vintage Suitcase
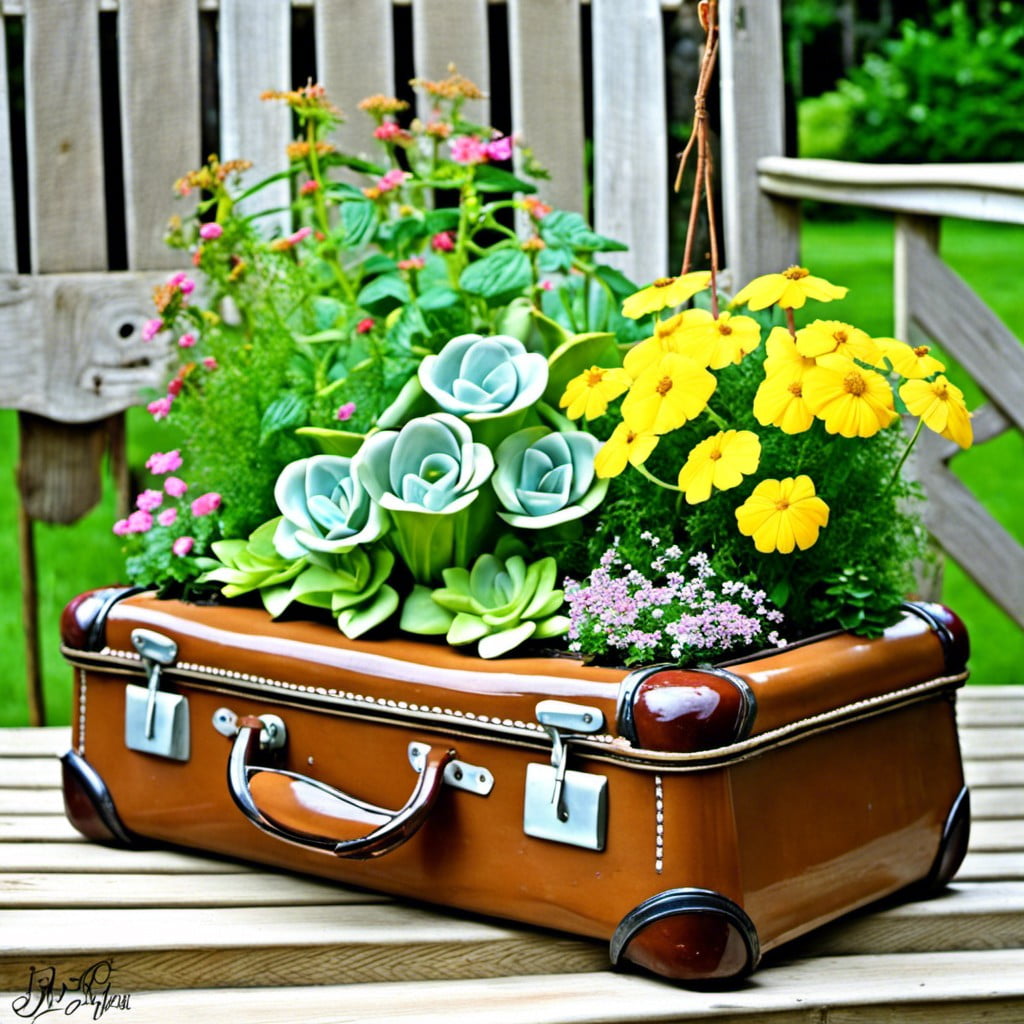
Roll up your sleeves and take a step back in time by getting ready to work with a vintage suitcase. Emanating timeless charm, suitcases also provide plenty of depth for soil and plant roots.
To transform one into a planter, follow these simple steps:
- Prep the suitcase: Clean it thoroughly to get rid of dust or spider webs inside. Check for any major damages, it’s crucial to pick a suitcase that is sturdy enough to hold soil and plants.
- Drill Holes: Essential for drainage, plant health, and preventing waterlogged soil. Consider the suitcase material when deciding on the best drill bit.
- Protect: Apply a layer of waterproof sealant to the interior. This will help preserve the lifespan of the suitcase by preventing water damage.
- Create a Barrier: Line the suitcase with landscape fabric. This prevents soil from falling out while still permitting adequate drainage.
- Add Soil: Fill the suitcase with a suitable potting mix for your chosen plants.
- Plant: Arrange and embed your chosen flora.
Make sure your new planter gets the right amount of sunshine, and remember to water it regularly. With time, you’ll have a blooming garden straight out of a nostalgic dream!
Creating Cement Planters
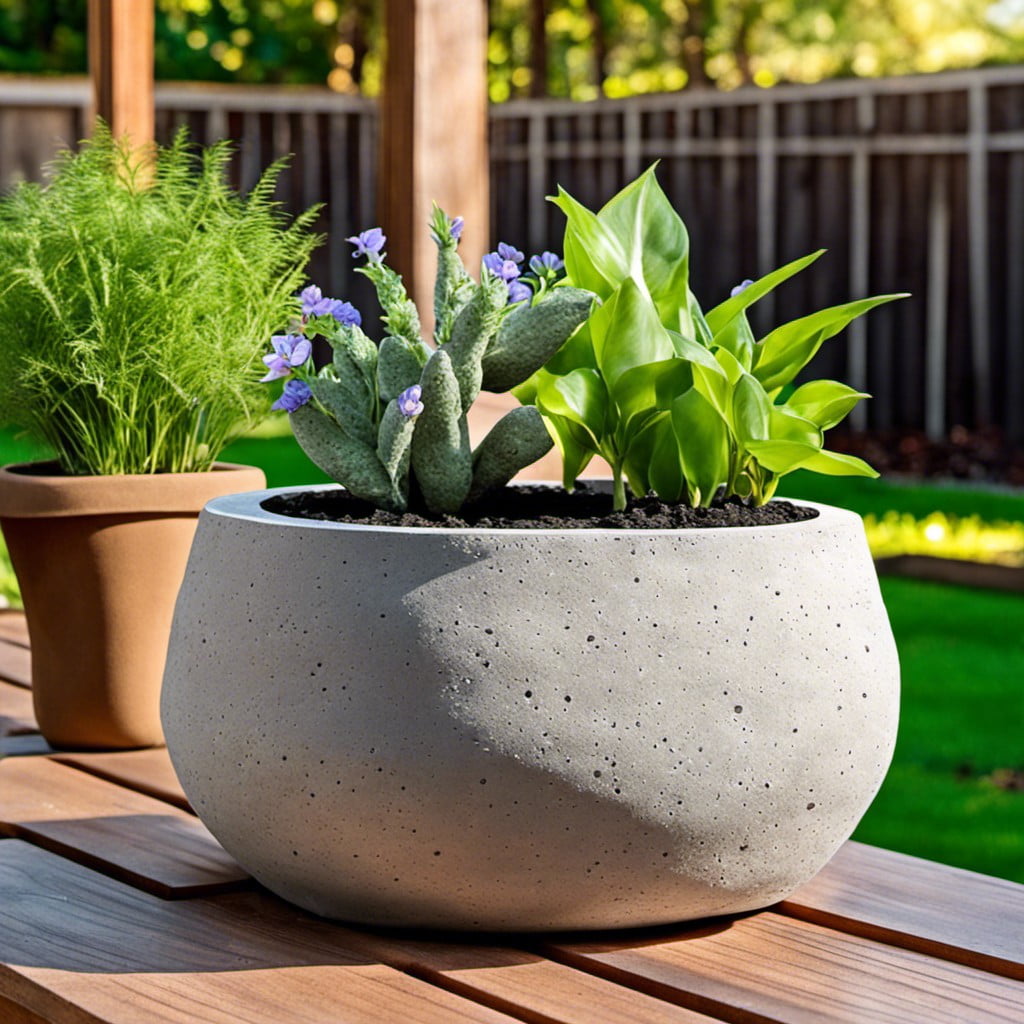
In the world of DIY, the usability, affordability, and visual versatility that cement offers make it a popular choice among enthusiasts. To craft a planter, you will need readily available materials like cement mix, sand, water, a mixing container, and molds in various shapes and sizes. Normally, containers used for food or household chores serve as suitable molds.
Once you have your materials, follow these simple steps:
- Mix the cement and sand in a 3:1 ratio, adding water until it forms a thick, pourable paste.
- Pour the mix into your chosen outer mold. Press the smaller, inner mold into the mix, leaving space for your plants.
- Allow the cement to cure for at least 24 hours, or longer for larger planters.
- Remove the molds, then smooth any rough edges with sandpaper.
- Finally, let the planter dry fully before adding soil and plants.
This approach provides a creative, cost-effective solution to spruce up your garden or indoor space with planters tailored to your preference. Plus, maintaining these cement planters is hassle-free, as they withstand various weather conditions and years of use.
Utilizing Wheelbarrows
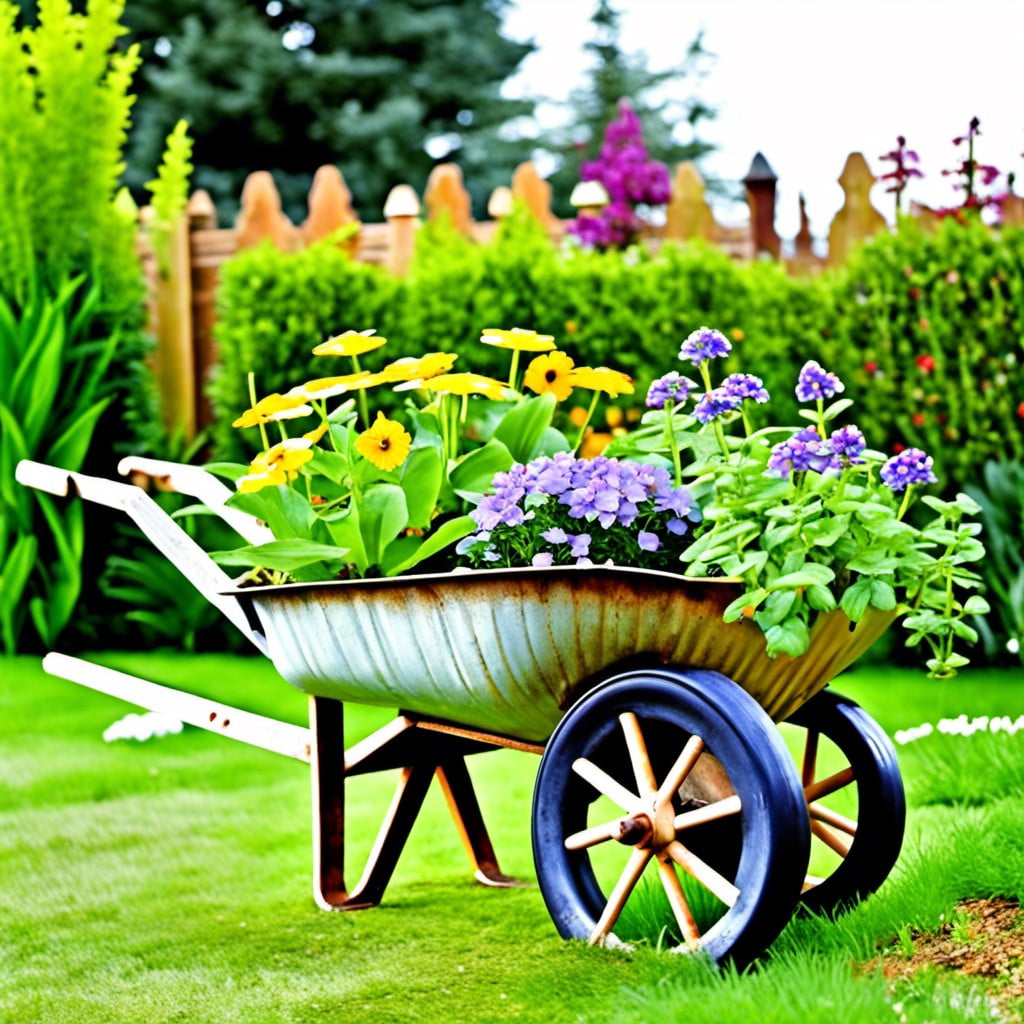
The charm of a rustic wheelbarrow as a planter is undeniable. It can wonderfully house a variety of plants while enhancing your outdoor decor uniquely.
Here are some key points to make the most of this accent piece:
- Choose Wheelbarrow: You can use a used or new wheelbarrow, depending on your preference. If you are going for an old-world charm, an aged wheelbarrow will better stand out.
Prep: If it’s an old wheelbarrow, clean it thoroughly. For a new wheelbarrow, rusting details or faux paint aging can add character.
Drainage: Ideal conditions for most plants require adequate drainage. Drill holes in the base if they aren’t already there.
Fill: Add a layer of stones or broken terra cotta pieces at the bottom for extra drainage before adding your soil.
Plant: Consider the visual combination of plants regarding their colors and heights. Usually, a mix of tall, low, and trailing plants work best.
Location: Since wheelbarrows are portable, you can choose a sunny spot one season and easy to move if the needs of your plants change with the seasons.
Remember to water and care for your new wheelbarrow garden as you would with any other planter features in your outdoor space.
Painting Large Coffee Cans
With their cylindrical shape and sturdy material, these household items transform into perfect planters. Begin with removing the labels and ensure it’s clean both inside and out. A rust-resistant primer, applied as the first coat, ensures the paint adheres thoroughly while safeguarding the can from weather elements, especially if kept outdoors.
Choosing suitable paint is key. Opt for acrylic or latex paint and let your creativity flow. You may stick to solid colors, use stencils, or even free-hand a design if you’re artistic. Remember, lighter colors reflect sunlight, while darker shades absorb it.
Drainage is vital for plant health. To create the necessary holes, you can use a drill or a large nail and hammer. Generally, 4-5 holes spaced evenly on the bottom should suffice.
To avoid direct contact with the bottom, place some pebbles or pottery shards before adding your potting soil. These elements facilitate better drainage and avoid root rot. Make sure to place your new coffee can planter on a small dish to capture the excess water.
Embellishing with ribbons, strings, or even fabric can add an extra layer of personality to your little garden. Just make sure any added decorations are weather-resistant if your planter is going to be left outside.
Transforming coffee cans into adorable planters is both a budget-friendly and environmentally conscious endeavor. It’s proof that sometimes the best materials for a project are already at hand.
Reusing Old Washing Machine Drums
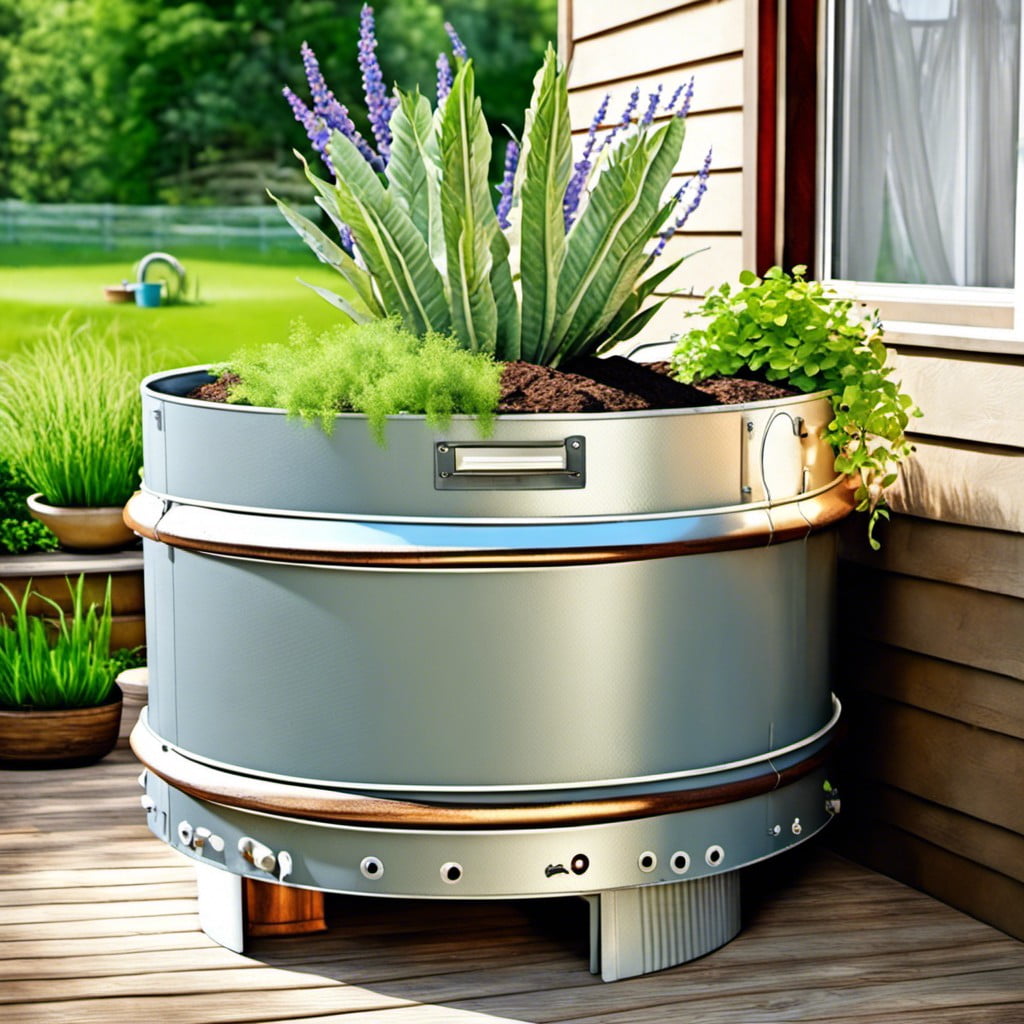
Efficiency and aesthetics meet when a washing machine drum evolves into an innovative planter. The perforated interior ensures excellent drainage and aeration – key for optimal plant health. “Upcycling” is not just eco-friendly but budget-friendly too, as old drums often find a second life at negligible cost.
Follow these simple steps:
- Thoroughly clean the drum to remove any detergent or fabric softener residue.
- Choose a location with proper sunlight for your future “drum planter”, considering its heavy weight once filled with soil.
- If you want to elevate the drum, add casters or a sturdy stand at the bottom. Ensure stability!
- Fill the drum with potting soil, compost, and your selected plants. Mix in a slow-release granular fertilizer to give your plants a nutrient boost.
Suitable for all types of plants from flowers to vegetables, the metallic finish of a washing machine drum can add modern flair to an otherwise green landscape.
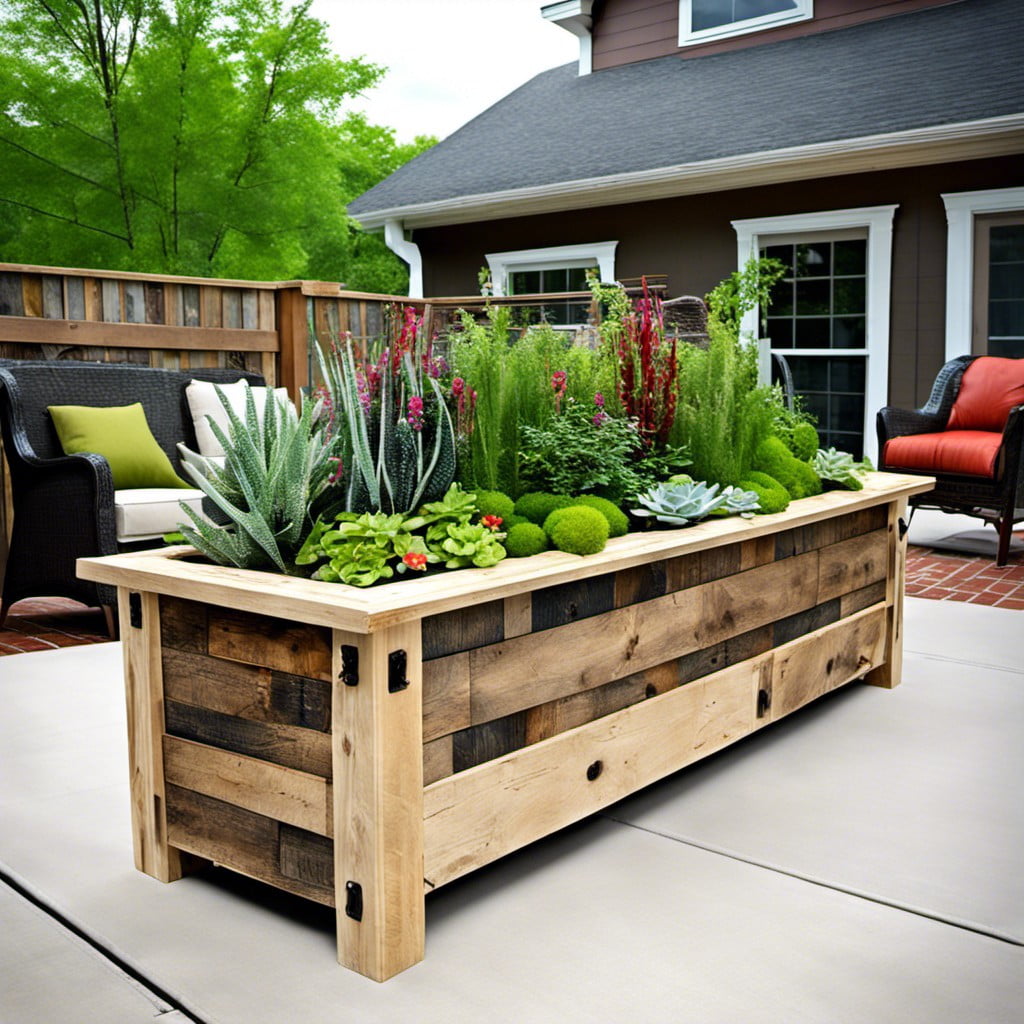
Turning Wooden Pallets Into Planters
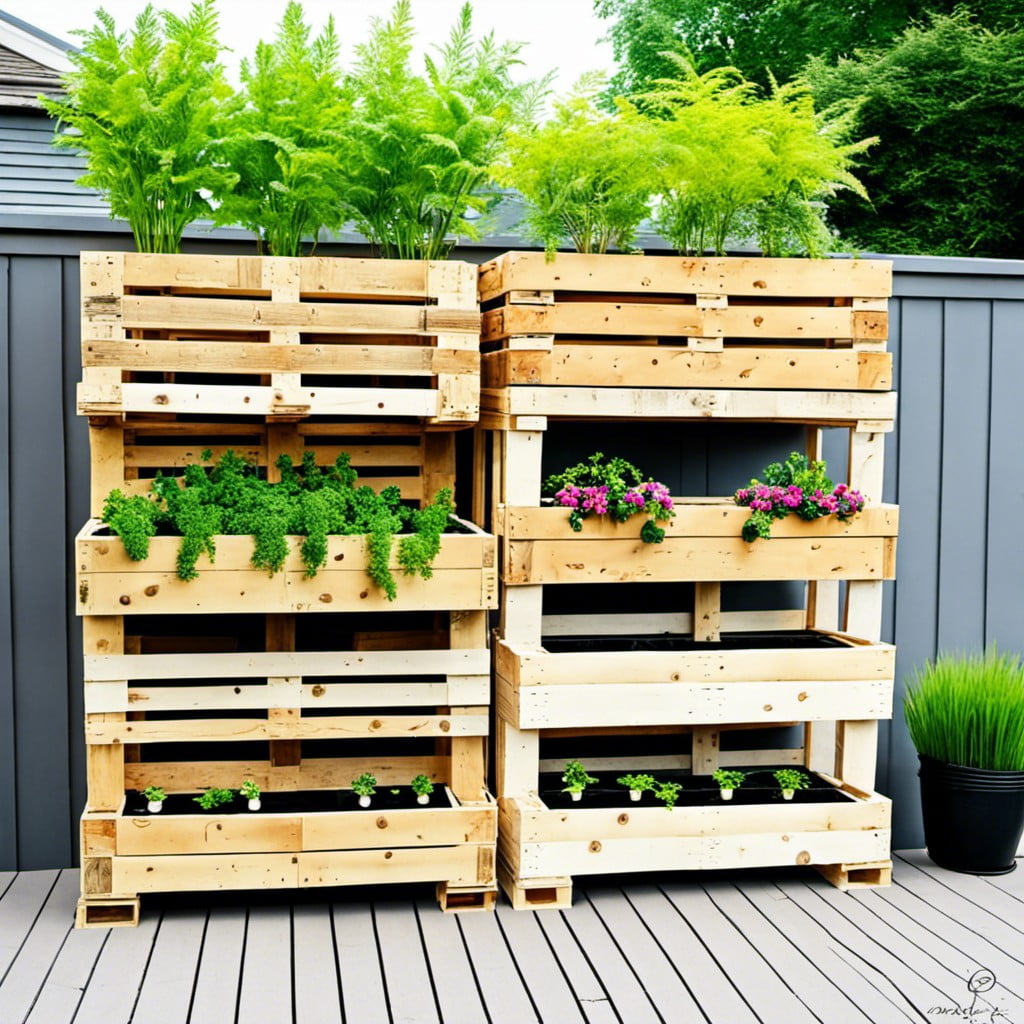
Selecting a wooden pallet, ideally untreated to prevent chemicals from leaching into the soil, kick-starts your project. The pallet’s slats are the perfect partitions for multiple plant varieties.
Start by adding a layer of landscape fabric to the back and sides to hold the soil in place. Staple it down, ensuring complete coverage. Next, pack your pallet with potting soil – a lush, nutrient-rich choice guarantees robust plants.
Remember, smaller plants often work best due to the limited growing space.
When planting, insert them through the slats, arranging them as desired. This vertical garden trend allows you to maximize space in tight quarters – think urban balconies or small patios.
Ensure the pallet is secure and safe to prevent toppling. Water regularly, but avoid overwatering as it may lead to rot. Offering sunlight as per the plant’s need boosts growth and ensures your greenery thrives.
Use this simple technique to breed a living, breathing wall of floral beauty.
DIY Painted Terracotta Pot
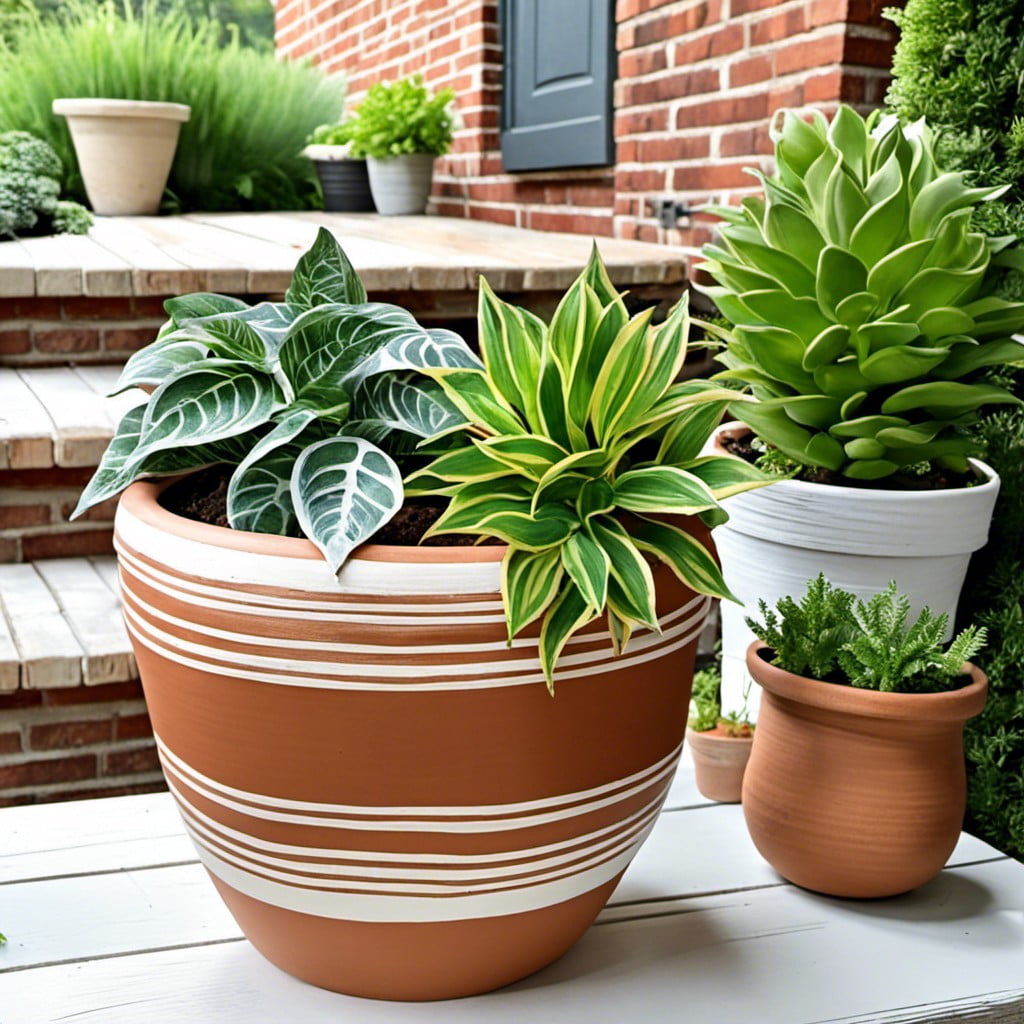
Diving right into our terracotta adventure, a blank pot serves as the perfect canvas. Follow the steps below to transform your planter into a piece of personalized decor:
- 1. Clean the pot
Before starting, ensure your pot is free from dirt to avoid bumps on your painted surface. - 2. Select the right paint
Acrylic or spray paints are perfect choices for terracotta. They dry quickly, come in a variety of colors, and are durable enough for outdoor use. - 3. Decorate as desired
This is where your creativity comes into play. Use stencils, create geometric patterns, or let your paint brush wander freely. Remember, there’s no right or wrong in art. - 4. Sealant Application
After your artwork has dried, apply a clear sealant to protect your design from weather elements and watering routines, giving longevity to your creation.
The beauty of a DIY painted terracotta pot is that it can be as complex or as simple as you wish. It’s your pot, let it reflect your style!
Up-cycle a Dresser Into a Planter

Delving into this creative project will bring a delightful vintage charm to your garden. Discarded or thrift store dressers are ideal for this, ones with a few drawers are a plus.
First and foremost, ensure the dresser is sturdy enough to hold the weight of soil and plants. If possible, treat the dresser with a weather-resistant finish to prolong its life outdoors.
Sort the drawers alternating between open and closed positions, creating a tiered effect. The open drawers will become planting areas, while the closed ones support the structure.
Drill holes in the bottom of each open drawer for proper drainage to avoid waterlogging and root rot. Now, fill the drawers with potting soil and your chosen plants.
Remember, consider the light requirements of your plants when choosing the location for your dresser planter. Lastly, it’s time to watch your new garden piece flourish and enhance your outdoor space’s aesthetics.
Using a Log or Stump As a Planter
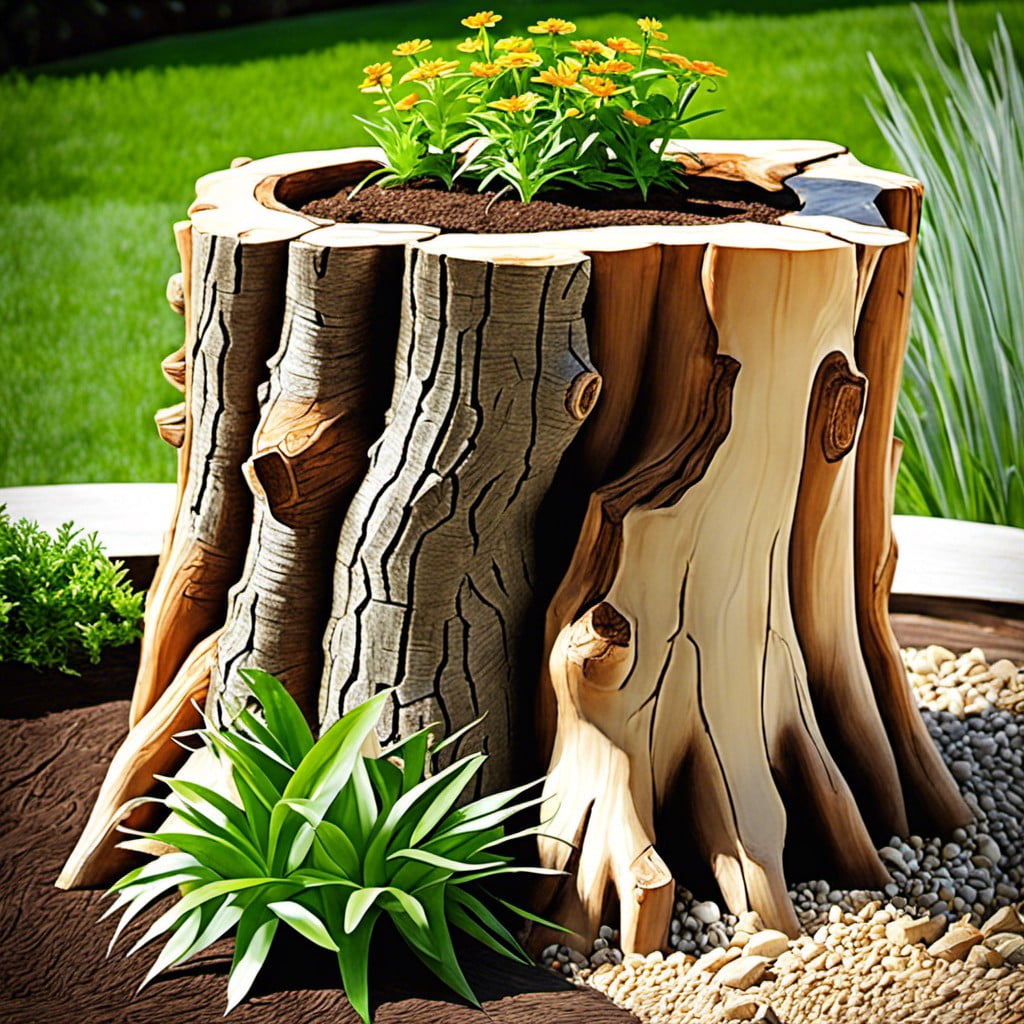
Utilizing natural materials like logs and stumps not only saves money but also adds a rustic element to your garden. You can select any size of log or stump, which offers the flexibility to accommodate various plant sizes.
First and foremost, hollow out the center of the log or stump to create a cavity. This can be achieved using a chisel or a simple hand drill. With stumps, consider leaving a border for enhanced stability.
Secondly, ensure there is adequate drainage. You can do this by drilling small holes at the bottom of the cavity. These holes will prevent excessive water retention that could rot the plant’s roots.
Next, fill the cavity with good quality garden soil, leaving just enough room for the plants.
Advancing with planting, you can choose from a variety of plants. If the cavity is small, consider smaller plants, like African violets or succulents. For larger hollows, you may go for bigger, taller plants.
Lastly, remember to add a layer of mulch around the plants. This will aid in moisture retention and keep weeds at bay. Regular maintenance, including watering and adding fertilizer, will keep your log or stump planter thriving.
Using Large, Plastic Storage Bins
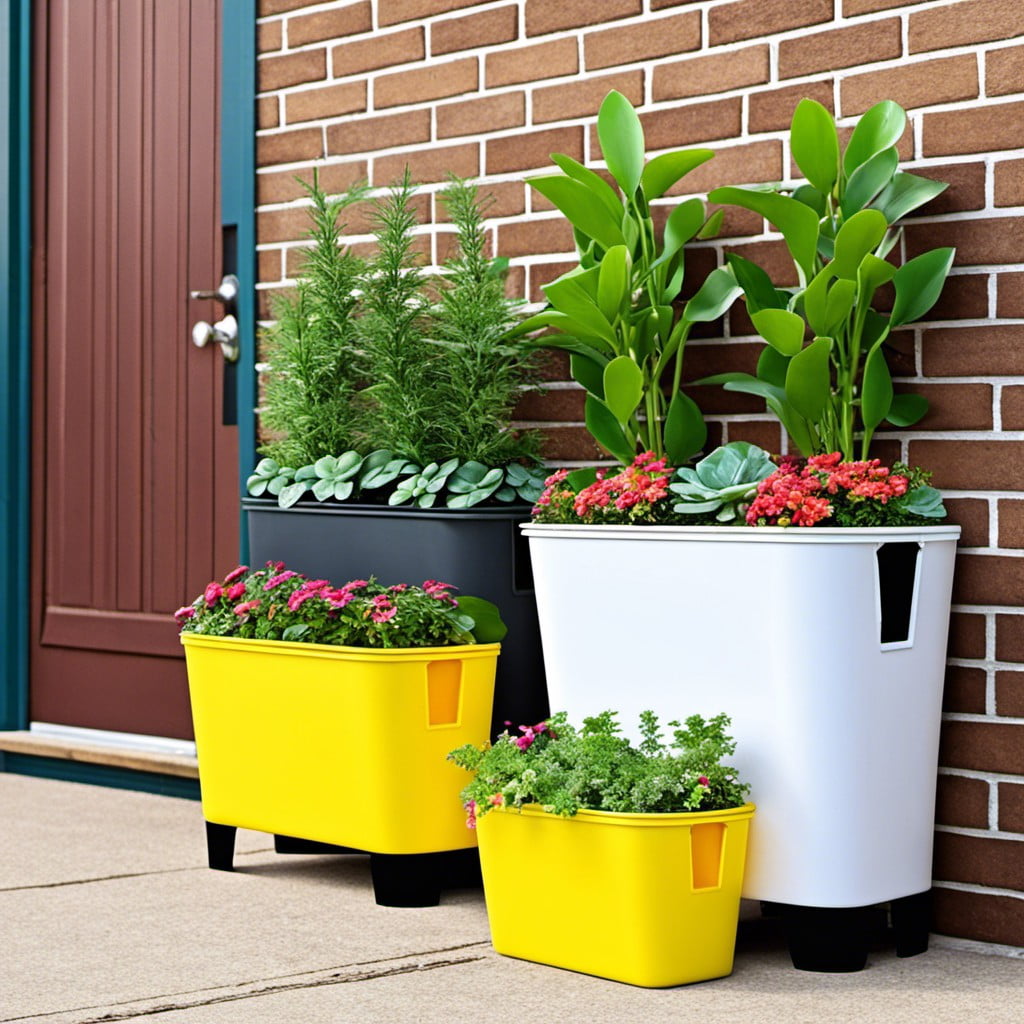
Plastic storage bins offer an affordable and efficient planter solution. They come in various sizes and depths, accommodating an array of plants.
To transform these functional items into homes for your greenery, simply follow these steps:
- Drill drainage holes: Proper aeration and water flow are crucial for plant health. Drill multiple holes in the bin’s bottom.
- Fill with potting soil: Opt for a mix that best suits your plants. Fill the container half or two-thirds full.
- Plant: Insert your plants or seeds, ensuring they have enough space to grow and spread out.
- Place in suitable location: Depending on your plant’s light needs, position your new bin planter in a suitable spot.
- Decorate (optional): To enhance aesthetic appeal, stickers, paint, or exterior fabric can mask the bin’s utilitarian origins.
- Water: Lastly, water your plants according to their needs.
Excelling in durability, versatility, and cost-effectiveness, plastic storage bins make valuable additions to your garden.
Turning a Children’s Red Wagon Into a Planter
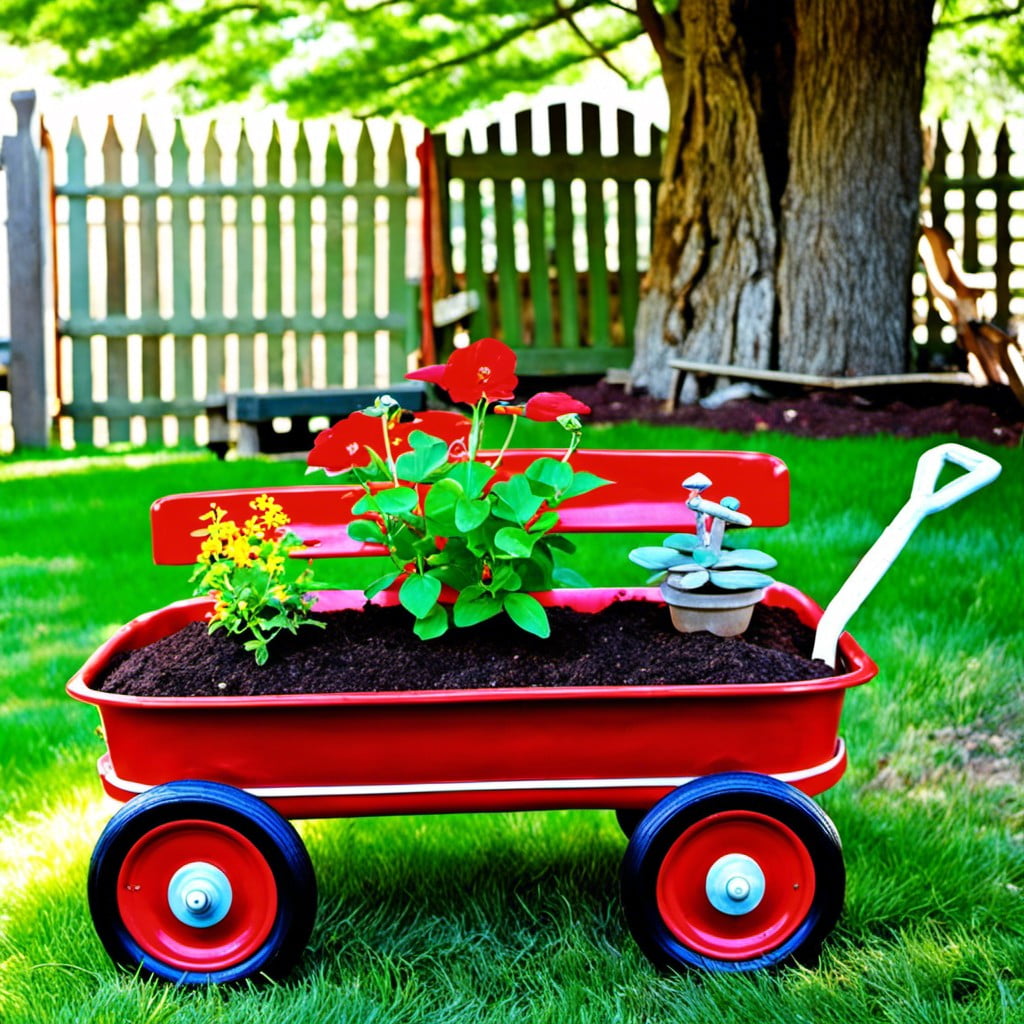
To begin, ensure the chosen wagon is clean and safe from jagged edges. You may opt to preserve its original paint if it’s in good condition or add a new coat for a fresh look. Equally important is the preparation of proper drainage to avoid waterlogged plants. This can be achieved by drilling two or three holes at the bottom of the wagon.
Next, fill the wagon with quality potting soil. Remember, the soil plays a major role in plant growth so don’t cut corners here. Select plants of varying heights, colors, and textures to make the planter visually dynamic. Taller plants can be placed in the center or back, while shorter ones go around the edge.
Caring for your wagon-planter is similar to any in-ground garden, involving regular watering and occasional fertilizing. However, refrain from overwatering as the wagon’s bed might foster excessive moisture retention.
Lastly, the mobility of your wagon planter provides an advantage. If the plants in it require varying amounts of sunlight, simply move the wagon to accommodate these needs. This adds both functionality and visual interest to your gardening endeavors.
Concrete Block Planters
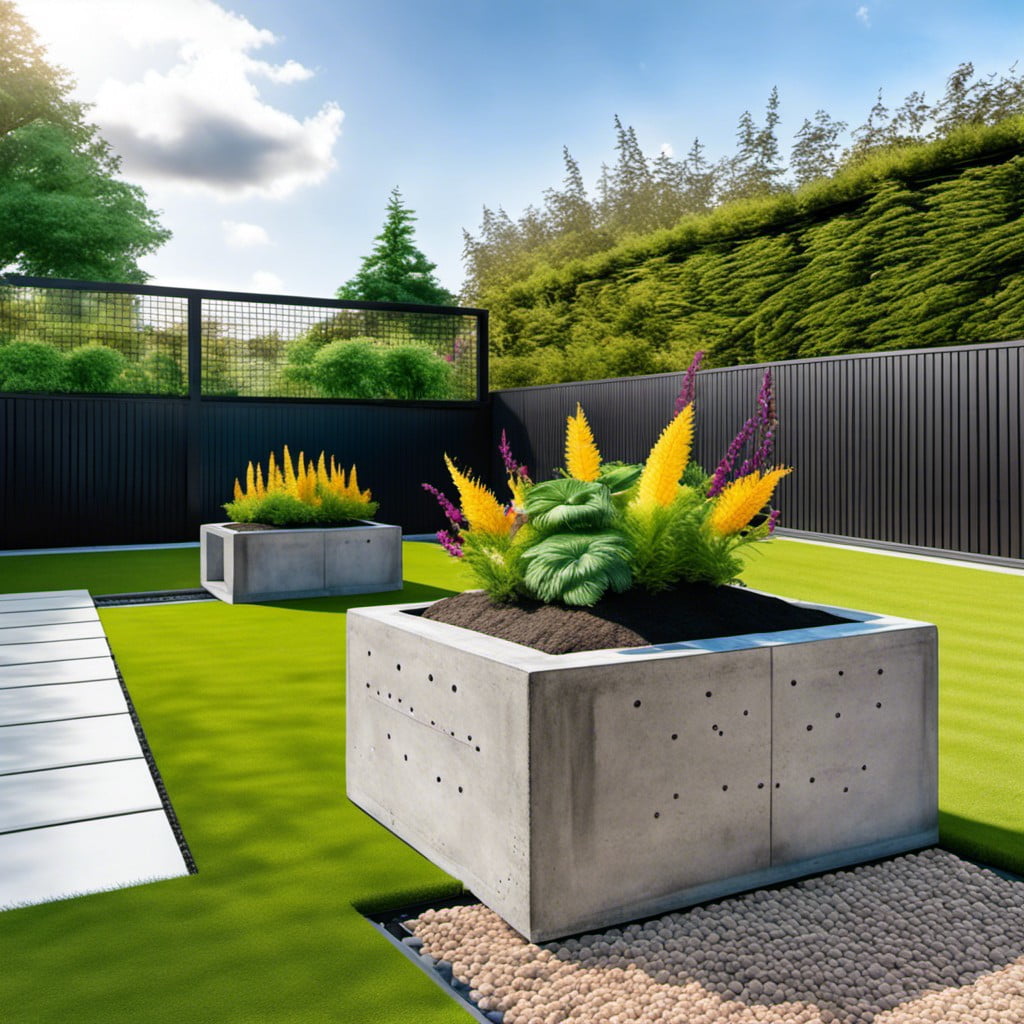
Making use of concrete blocks for planters opens up a world of opportunities for customization.
1. Ideal for Herbs and Succulents: Due to their size and depth, concrete blocks are perfect to house smaller plants like herbs, succulents, and cacti.
2. Easy Customization: Concrete blocks can be painted or decorated to fit any style. Display your creativity with colorful patterns or keep it minimalistic with a single hue.
3. Versatile Setup: Arrange these sturdy building materials in a variety of ways for diverse layouts. Opt for a single row arrangement for narrow spaces or stack them up to create a multi-level garden.
4. Durable: Withstand all types of weather. These planters will serve you for many seasons without wearing out.
5. Simple Drainage: Their hollow nature ensures excellent drainage, preventing water pooling.
Remember, safety first while handling these hefty blocks. And to seal concrete blocks if they’re to be painted. Happy Gardening!
Using an Old Bicycle and Baskets
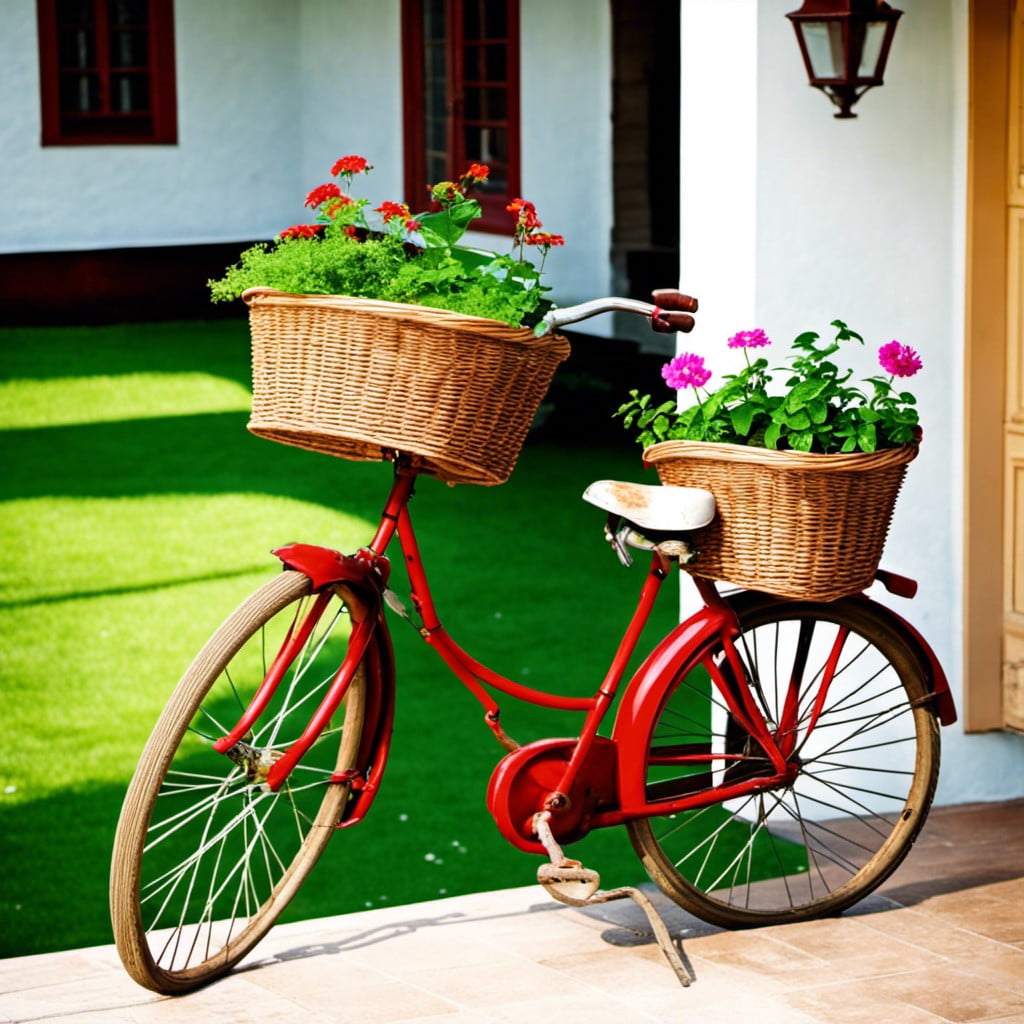
Repurposing an old bicycle to serve as a large planter adds a whimsical touch to your garden, marrying creativity with functionality. Let’s delve into the steps involved:
1. Locate a bicycle. An unused bike already in your shed would work perfectly. Yard sales and thrift stores are also good places to locate inexpensive old bicycles.
2. Identify baskets. The existing bicycle basket may be used, or additional baskets can be fixed onto the back seat and sides of the bike for more space. Woven wicker baskets offer a natural look that complements plants, but any large, durable basket would suffice.
3. Prep and paint. To make your planter truly unique, consider painting the bicycle and baskets in bright, vibrant colors. Use weather-resistant paint to ensure your creation stands up to the elements.
4. Install the baskets. Use sturdy materials such as zip ties or brackets to attach the baskets securely.
5. Choose your plants. Choose a variety of different-sized plants for a striking display. Trailing plants can be used to create the illusion of movement.
6. Plant and enjoy. Transfer the chosen plants into the baskets and fill with dirt as needed. Be sure to regularly water and maintain your plants for the best results.
This approach gives a second life to an old bicycle and creates a unique garden centerpiece filled with flora, introducing a romantic, vintage flavor to your outdoor decor.
Fiberglass Planter – Homemade
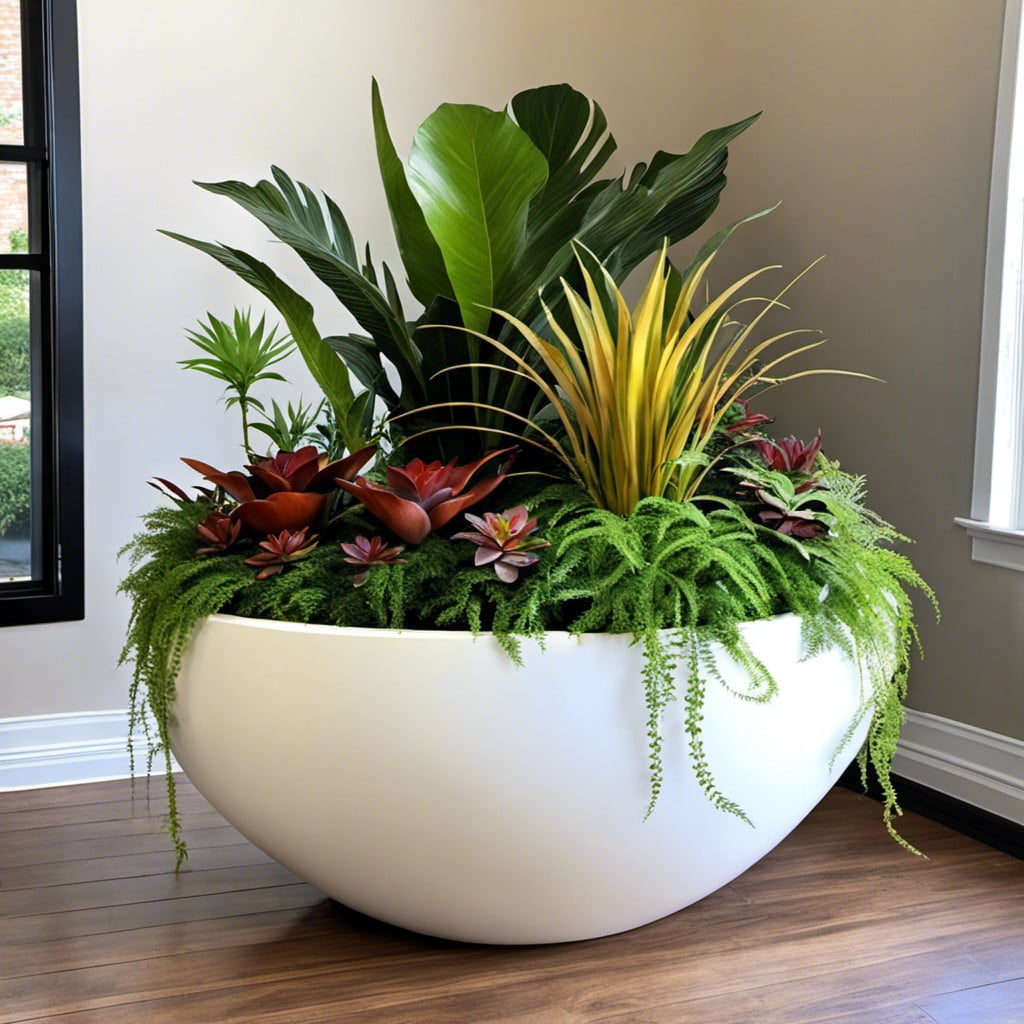
Constructing your own fiberglass planter provides an interesting and engaging project. It doesn’t require serious craft skills and the materials needed are quite affordable.
Here is a quick rundown of the process:
- Start by deciding on the shape and size of your planter. A simple, box-like design can be a good starting point.
- Construct this shape using foam or cardboard. This will form a mold which can be covered in wax-coated tape to prevent sticking.
- Mix the fiberglass resin according to the package instructions.
- Apply layers of fiberglass cloth to the mold with the resin. Aim for at least 3-4 layers for durability.
- Once fully hardened, remove the mold.
- Sand out any rough edges and paint in your preferred color to achieve a finished appearance.
Remember, safety precautions should be observed while working with fiberglass resin, including wearing safety glasses and gloves. And there you have it – a personalized, homemade fiberglass planter that adds a unique touch to your living space.
BBQ Grill Planter
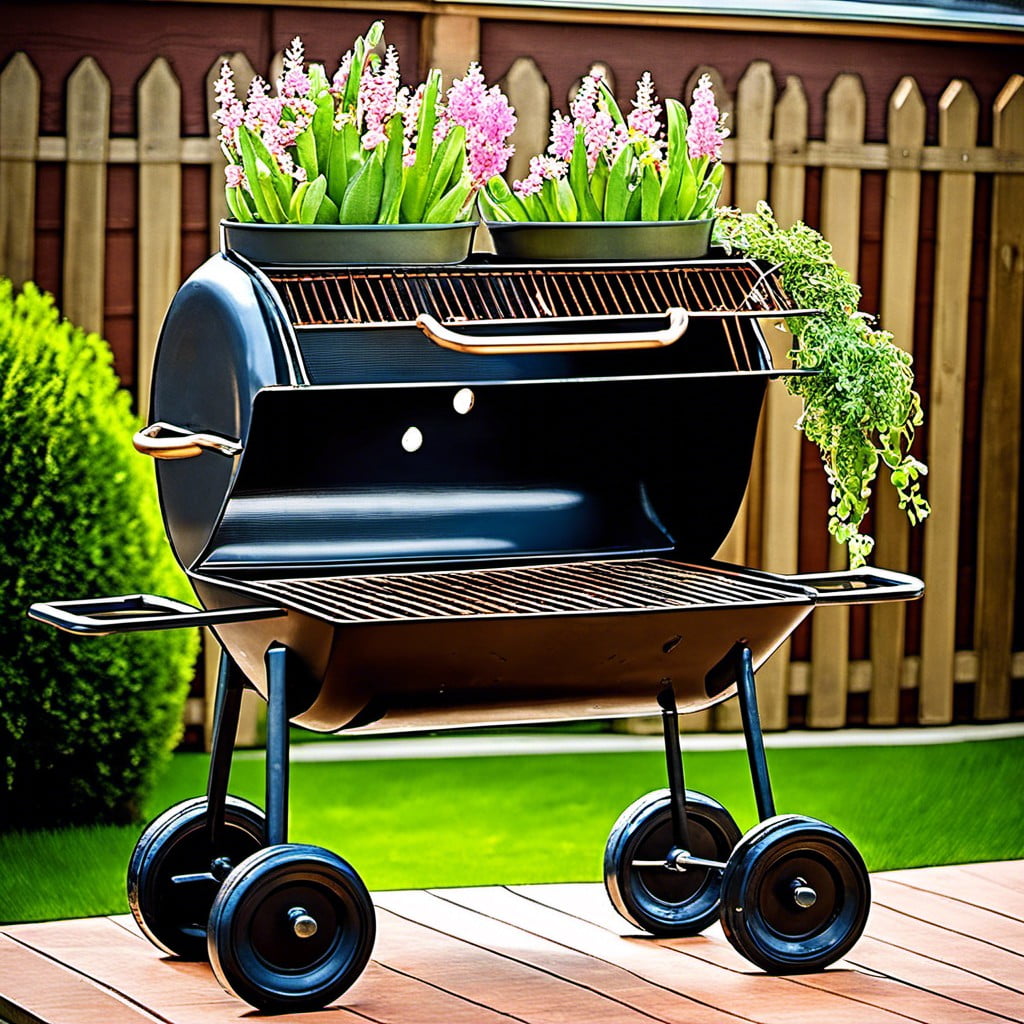
Transforming unused barbecue grills into planters is a marvelous method to add a hint of whimsy to your garden. The grill lid provides an ideal opportunity for large-scale plants, while the bottom part can be filled with more petite greenery varieties.
Keep in mind these key points:
- 1. A good cleanup is vital, especially if the grill has been idle for a while, to eliminate any unsafe residues.
- 2. Drill drainage holes in the bottom of the grill for optimal plant health.
- 3. In the subject of soil, choose a high-quality variety that suits the plants you’re opting to use.
- 4. Lastly, consider the location. Picking a sunny spot is key for plant growth if you’ve chosen sun-loving varieties.
By repurposing a BBQ grill, you are not only being resourceful, but also creating an exciting talking point and statement piece for your garden.
Reclaimed Miscellaneous Indoor/outdoor Items
Exploring options, look to those items that may be otherwise sitting idle or destined for the garbage. Consider items like old watering cans, boots, or even an unused birdcage. Giving these items a new life as planters not only reduces waste but adds a unique, personal touch to your garden.
Small plastic toys can house succulents, while larger items like an umbrella stand can accommodate a sizable fern. The key is to ensure the item can hold soil and allow for proper drainage.
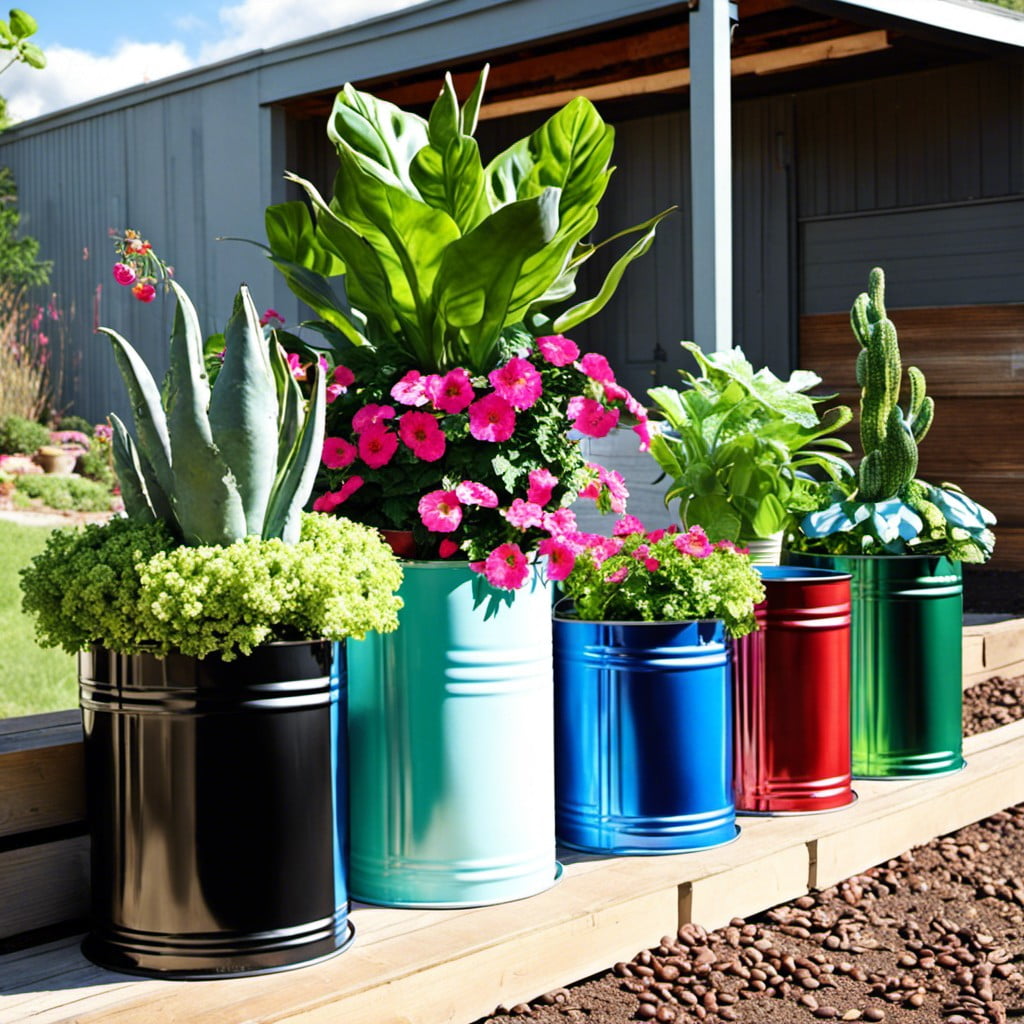
Upcycled Tin Cans
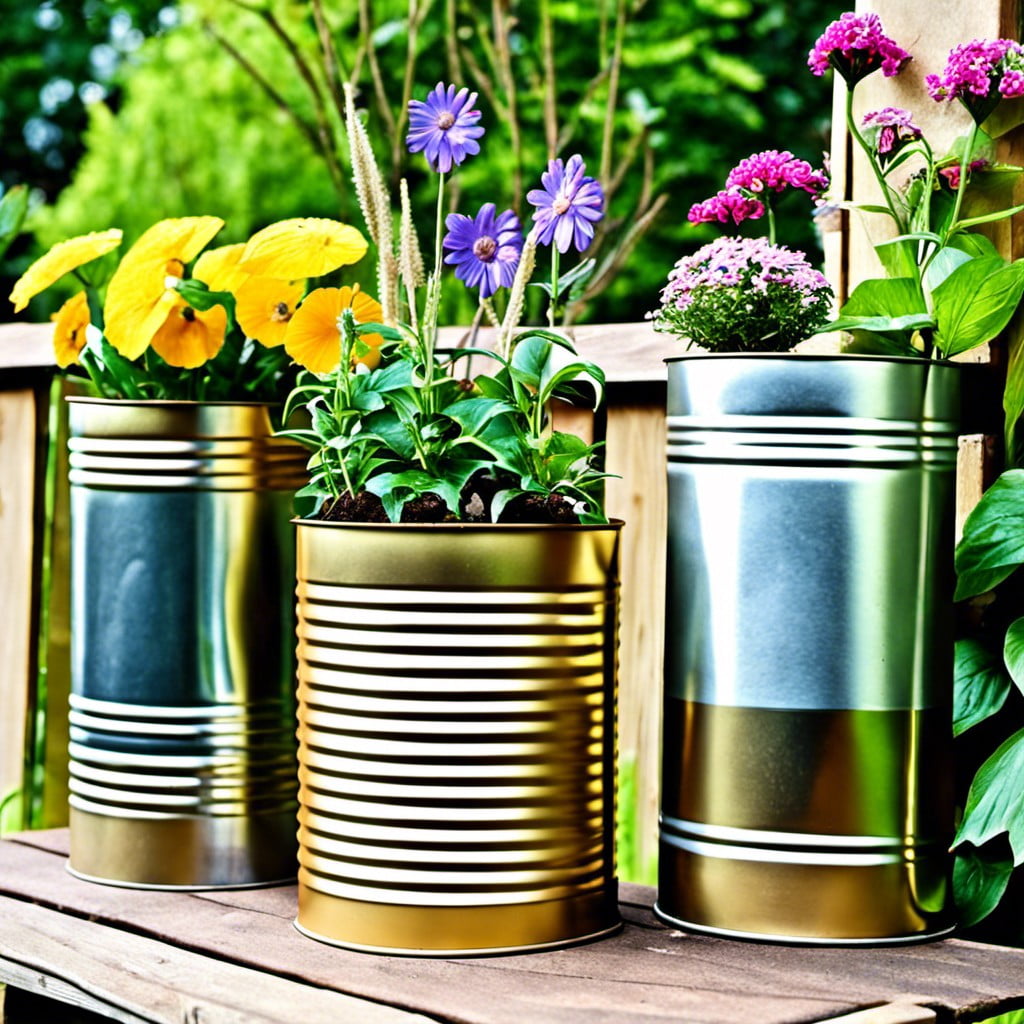
To embark on this project, gather some empty tin cans – your pantry probably has several. Give them a good wash and remove any labels. Safety first: use a pair of pliers to bend in sharp edges.
A crucial step is drainage. Drill a few holes in the bottom to promote better water management for your plants.
Now, the fun part – decoration. Using all-purpose paint, give each can a personalized touch. The more colors, the merrier! Go wild with polka dots, or keep it elegant with simple stripes.
When the paint dries, choose your plants. Herbs do especially well in these hip, new homes.
Remember, the sun is your plant’s best friend. Make sure they are placed in sunlit areas.
In a line or grouped together, you’ve got yourself an eccentric, vibrant garden right there! Easy on the pocket, and a feast for the eyes.
Read More Like This
 15 Funny Graduation Cap Ideas to Make Your Big Day Unforgettable
 15 Unique DIY Christmas Decorations Ideas for a Festive Home
 15 Creative Science Fair Board Ideas to Amaze Your Audience
 15 Handmade Envelope Decoration Ideas for Creative Gifting
 10 DIY Gifts for the Whiskey Lover in Your Life
Recap: