Last updated on
Get those green thumbs ready because this article is teeming with creative DIY planter ideas tailor-made to enrich your gardening experience and revamp your space.
I’ve designed unique illustrations for these ideas. I hope you get inspired!
Stepping into the world of home decor, the beauty of DIY planter ideas holds a significant place. While there’s an abundance of existing ideas out there, this article aims to provide a refreshing perspective on DIY planter concepts.
From easy-to-craft designs to the innovative use of materials, the list is teeming with inspiration for a new project. The end of this article will include resources to some of the top existing ideas if you’re interested in more variety. However, the primary focus is to introduce fresh, unique angles that aren’t typically found on the internet.
Let’s explore the greenery in a new light and spruce up your space with some inventive DIY planters.
DIY Pedestal Planter
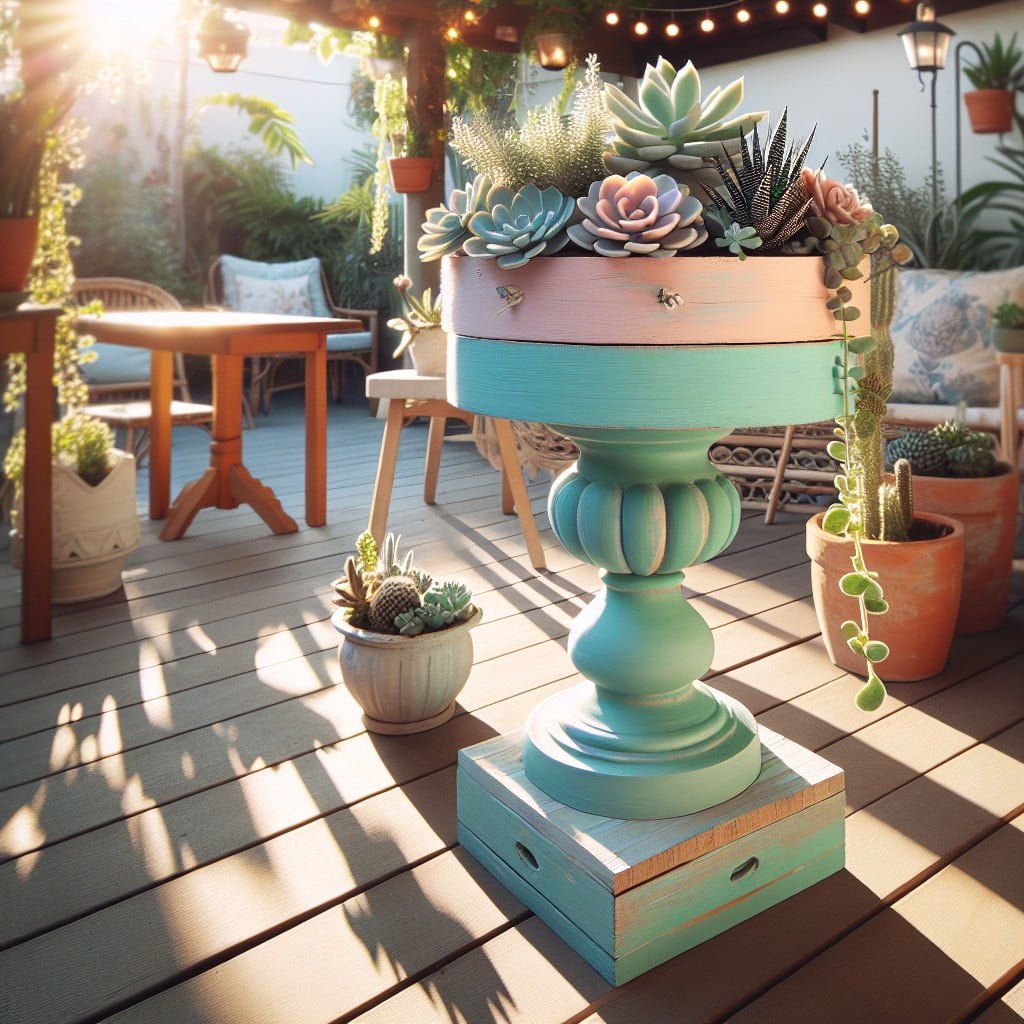
Creating a DIY Pedestal Planter requires only three items: a large planter, a smaller inverted planter to act as a pedestal, and some outdoor paint if required.
Start by choosing two planters – the larger one will hold the plants, and the smaller one will serve as the base or pedestal.
Remember, the planters don’t have to be the same style – mixing and matching can enhance eye appeal.
If you prefer a uniform look, use the same colour outdoor paint to give both planters an identical finish.
Once your paint is dry, place the smaller planter upside down, then top it with the larger planter.
Finally, add your favorite plants.
This stylish yet functional element is perfect to add height to your garden, that draws the eye upwards and makes your outdoor space appear larger.
Outdoor Carton Concrete Planter
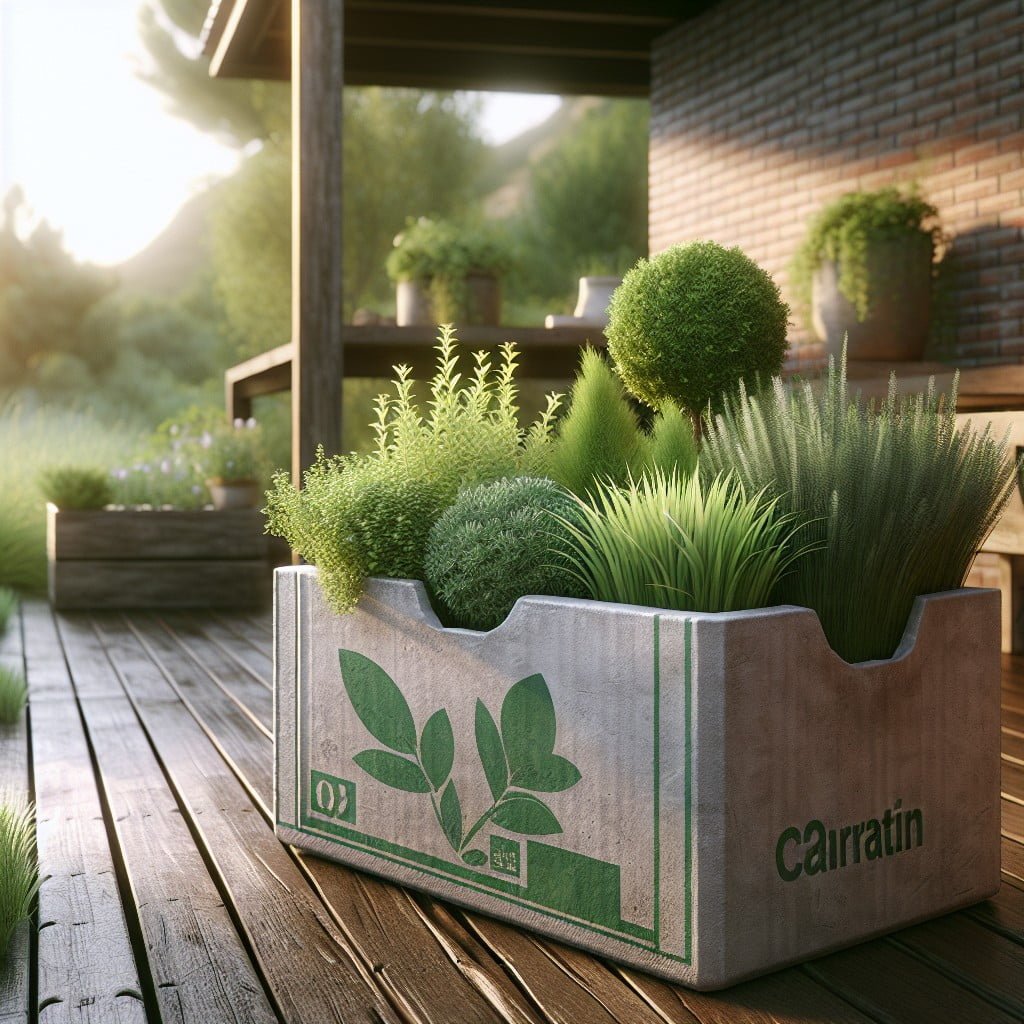
Begin by assembling your materials: a carton, quick-drying concrete mix, a large bucket for mixing, a stick, oil, and a knife.
Start by pouring the concrete mix into the bucket, adding water according to the package’s instructions. Ensure the consistency resembles thick cake batter. To avoid any concrete lumps, mix vigorously.
Next, prepare the carton. The oil serves as a release agent. Simply pour some oil into the carton and use a paper towel to generously spread it around the interior.
Pour your mixed concrete into the oiled carton. Gently tap the sides to eliminate air bubbles and evenly distribute the concrete. Let it sit for a period recommended by the concrete mix manufacturer, allowing it to harden completely.
Finally, carefully peel off the carton from the concrete. With a carton shape imprinted on your concrete, you’ll have an unexpectedly attractive and durable outdoor planter. It’s rustic, modern and very budget-friendly.
Remember, the beauty of DIY projects is that they’re open to your interpretation. Feel free to experiment with differently shaped cartons or even colored concrete to truly personalize your new planter.
Upcycled Shoe Organizer Hanging Planter
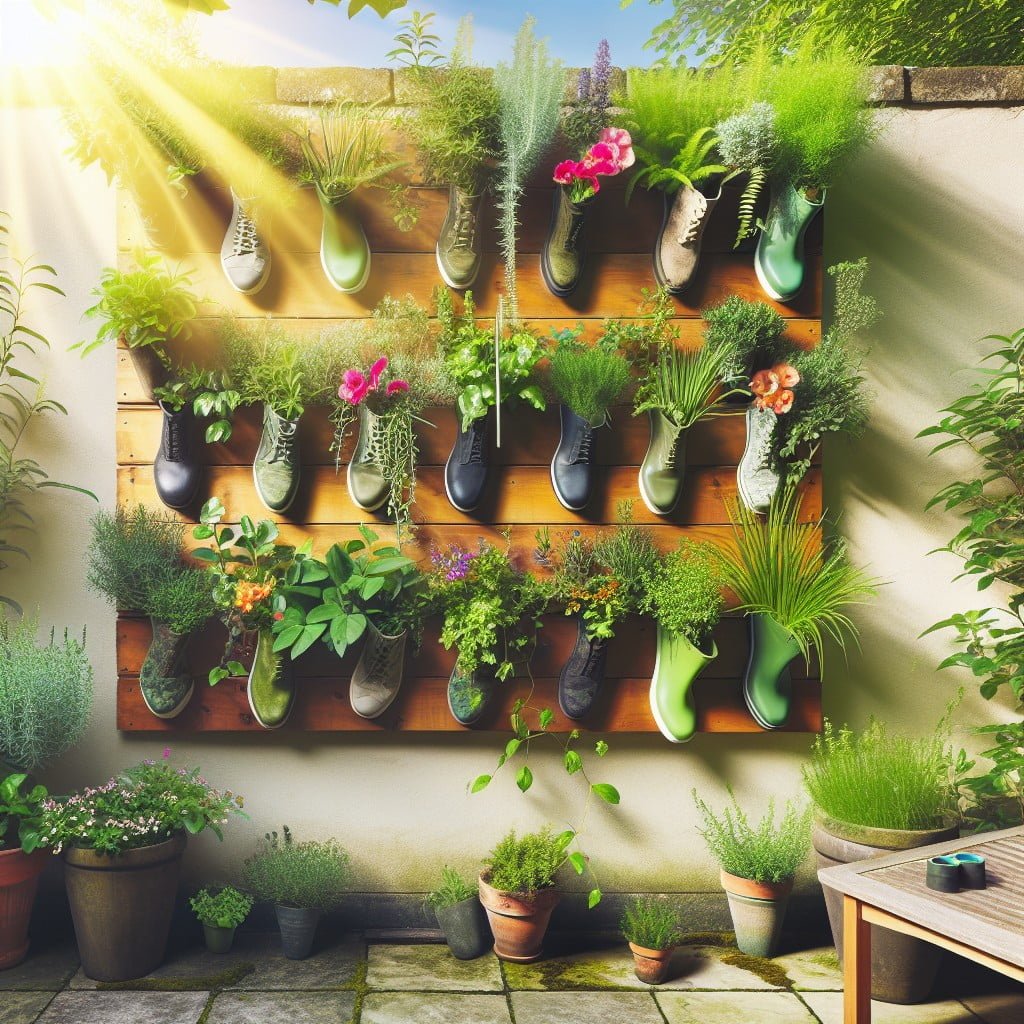
Start by selecting a strong and durable shoe organizer, preferably one made of vinyl. Ensure it has enough pockets that can hold your plant pots. Clean the shoe organizer thoroughly to remove any dust or debris that may hinder the growth of your plants. Attach it to a sturdy wall or hang it on the balcony where the plants will receive sufficient sunlight.
Choose the plant species carefully. Consider using herbs, succulents, or any small plants that do not require deep soil to grow. Add some high-quality potting soil to each pocket, ensuring it is filled to about 3/4 full. Now, manually create a hole in the middle, and place the plant seed or seedling in it, covering the roots with more soil.
Remember to maintain a regular watering schedule while respecting each plant’s needs. Furthermore, you should include some slow-release fertilizer for extra nourishment.
This method of planting not only repurposes a common household item, saving it from landfill, but also allows for gardening even in limited spaces. High-rise dwellers or those with small balconies will find it especially useful.
DIY Cinder Block Vertical Planter
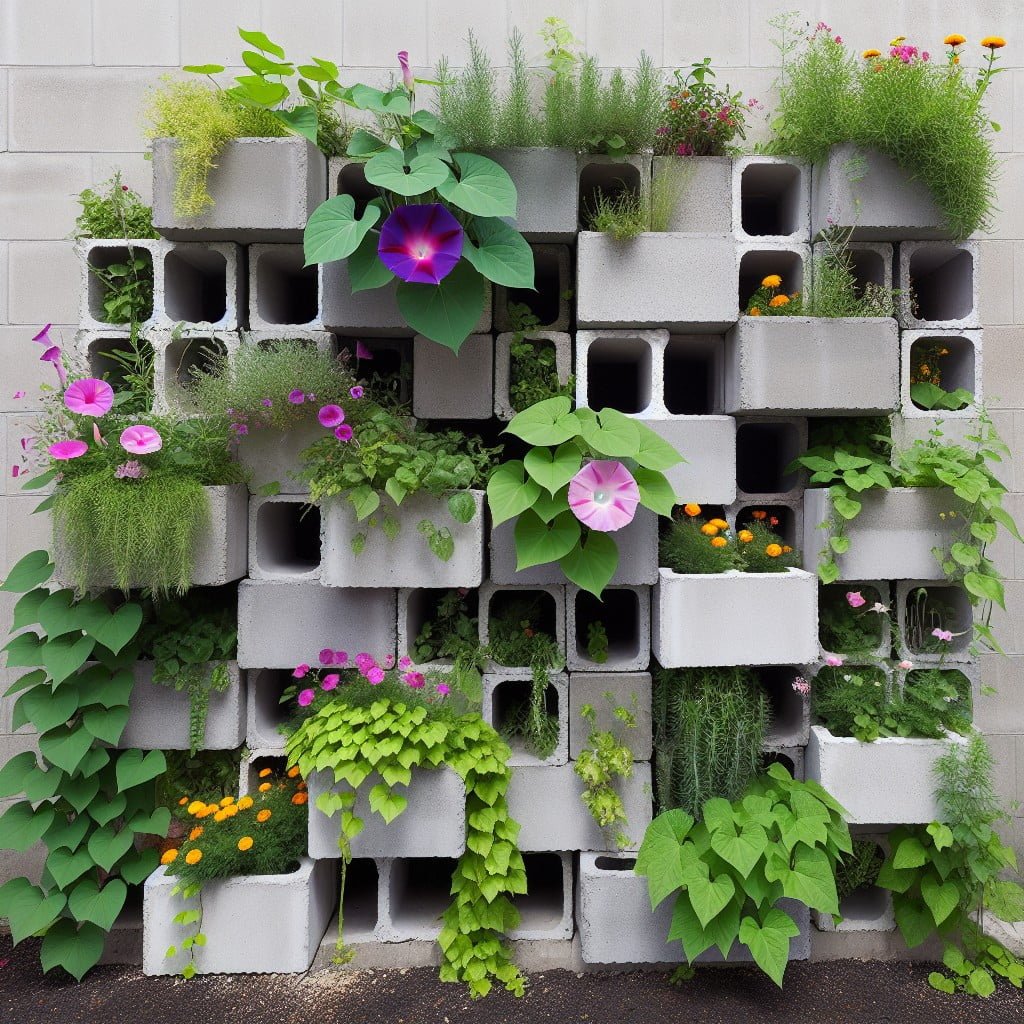
Creating this type of planter involves using cinder blocks stacked on top of each other. Here are some steps to follow:
- 1. Select a suitable location with good sunlight.
- 2. Clean the cinder blocks and ensure they’re free of dirt or debris.
- 3. Stack the cinder blocks in a stair step pattern, going as high as desired but ensuring stability.
- 4. Fill each cinder block’s hole with soil, leaving room at the top for planting.
- 5. Choose plants that will thrive in your local climate and plant them.
- 6. Water the newly planted flowers or plants, ensuring not to oversaturate the soil.
This vertical planter design conserves space and provides a unique aesthetic to your garden. It also promotes good drainage, an essential aspect for plant health. Best of all, it’s an affordable and easy project, making it a fantastic choice for those new to DIY planters.
DIY Crystal Planter
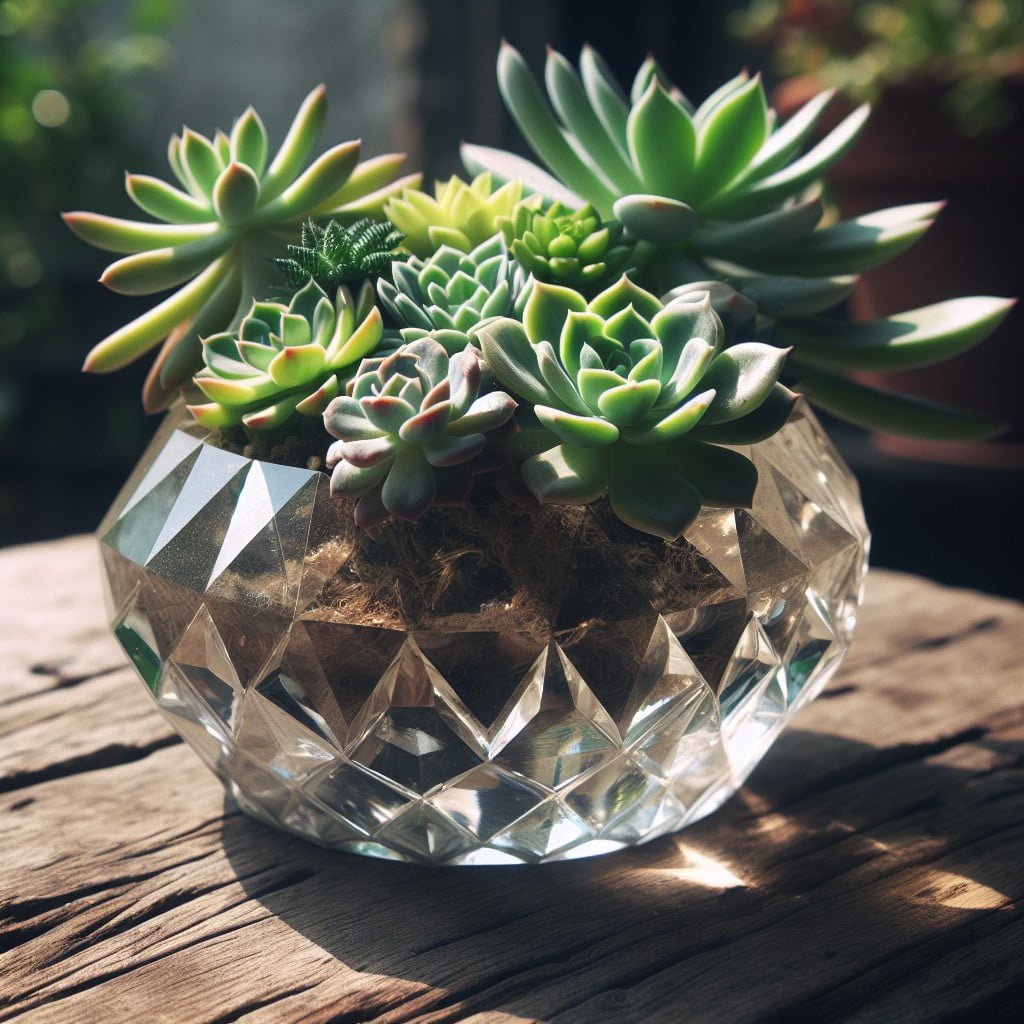
Making a DIY Crystal Planter can be an enchanting endeavor that brings a touch of nature’s magic right into your home. By integrating healing crystals with earthy plants, you can create a peace-inducing ornament.
You’ll need a variety of raw or tumbled crystals, epoxy resin, a mold in a shape of your choice, soil, and a green thumbs-up for ones’ nurturing touch.
Start by arranging your chosen crystals at the bottom of the mold, create patterns or spread randomly to later form a visually delightful base for the planter. Pour the epoxy resin to cover the crystals and allow it to cure as per the instructions on the packaging.
Keep in mind the size of your plant’s root and the epoxy layer you’ll need. Once cured, gently remove the planter from the mold. Fill with soil and carefully plant your green buddy. Water adequately, and voila! You have a mystical crystal planter of your own.
Consider placing it in a spot that gets plenty of natural sunlight, ensuring your plant, as well as the crystals, get to bathe in direct sunlight, enhancing their vitality and vibrancy. This crystal planter is likely to become a conversation starter for its raw beauty and unconventional charm. So, let’s get you started on this project and transform your spaces into an ethereal escape.
Antique Pail Flower Planter
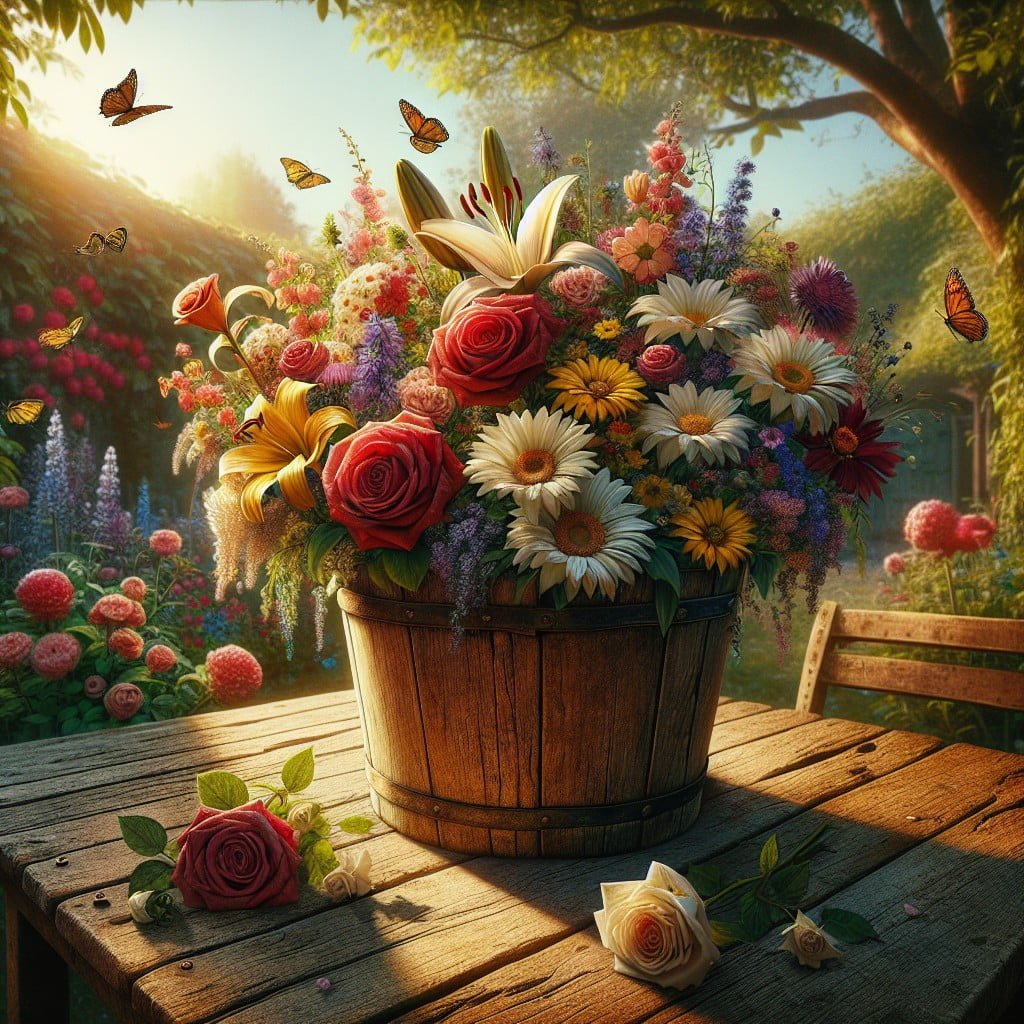
Offering an unpretentious charm, the Antique Pail Flower Planter capitalizes on the imperfect beauty of distressed metal and worn-out wood to deliver a vintage aesthetic.
Creation Process:
- a. Select an old metal or wooden pail, prioritizing those with visible wear and tear.
- b. Drill small drainage holes at the bottom if they don’t exist.
- c. Fill around one-third of the pail with pebbles or broken terra cotta pieces for improved drainage.
- d. Layer compost and potting soil on top of the pebbles until the pail is three-quarters full.
- e. Position your choice of flowers or plants in the soil, taking care to spread the roots out.
- f. Fill to the top with more potting soil, firming gently around the base of the plant.
Considerations:
- i. Seek sturdy pails – they should withstand the weight of soil, water, and plants.
- ii. If your pail is metal, be aware that it may heat up in the sun, potentially damaging plant roots.
- iii. Consider keeping a saucer or tray beneath the planter to catch excess water and protect your flooring.
This rustic and charismatic planter idea wonderfully encapsulates the idea of deriving beauty from the old and the used, far from detracting, adding character to your garden.
DIY Wine Bottle Planter
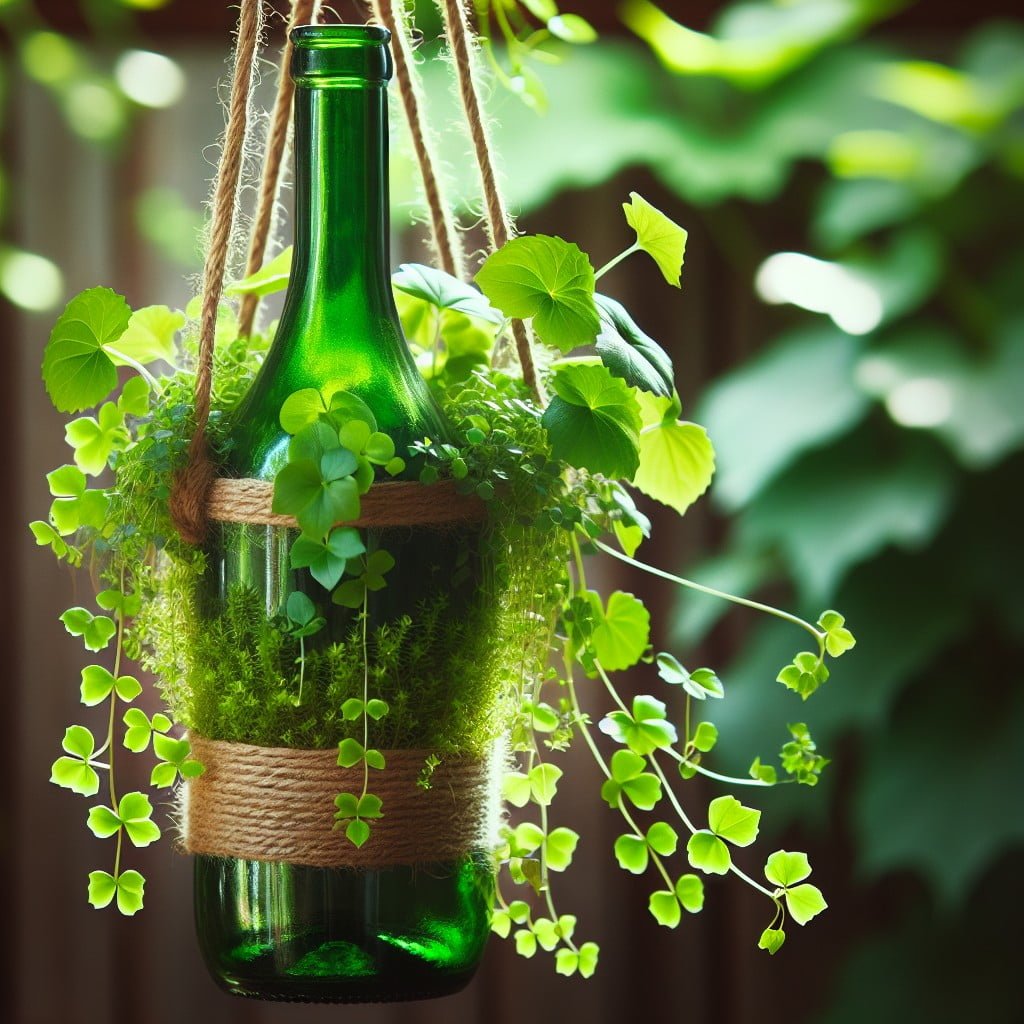
Venturing into the world of repurposing, wine bottles serve as a perfect platform for DIY planters. The results—elegant and functional items best suited for small plants like succulents, cacti, or even a small herb garden.
Here’s a simplified step-by-step process.
1. Safely cut the bottle: Using a bottle cutter, score a line around the bottle. Then apply alternating hot and cold temperatures until the glass cleanly splits.
2. Smooth out the edges: Sand the cut edge until smooth. This prevents any future injuries from sharp edges.
3. Prepare the bottle for planting: Add a layer of small pebbles at the bottom for drainage, followed by potting soil.
4. Plant your greens: Plant a small succulent or your choice of plant into the bottle. Remember to water it sparingly as these plants enjoy a dry environment.
5. Find the perfect spot: Position your planter in an area with ample sunshine but little direct sunlight.
Remember, plants change the atmosphere and uplift the vibe. Not just planters, these can truly be art pieces enhancing your home’s aesthetic appeal. Safety precautions like wearing gloves and goggles while cutting the glass bottle should never be ignored. Happy crafting!
Vintage Toolbox Plant Holder
Finding a new purpose for an old item like a vintage toolbox breathes new life into it and maximizes its use. With just a few easy steps, this repurposing project becomes a focal point in any space.
1. Firstly, ensure the toolbox is clean and free from any loose bits or dust. You may additionally choose to refresh its look with a coat of paint.
2. Opt for plants that complement the toolbox’s size. Succulents or small herbs are great options.
3. It’s possible to plant directly into the toolbox, but to prevent rust and water damage, consider using plastic trays or plant containers that fit snugly inside.
4. Fill these with good-quality potting soil, sow your plants, and voila – your vintage toolbox is now a quaint, unique planter.
5. Remember placement. Depending on what you plant, make sure the toolbox is in a location where it receives the necessary amount of sunlight.
6. Don’t forget to water the plants as needed – just like regular planters, your toolbox garden needs tender loving care too!
7. Lastly, enjoy the character and charm this vintage toolbox planter adds to your space. It’s not only an eye-catching home decoration but also a testament to your creative recycling skills.
Upcycled Denim Jeans Pocket Wall Planter
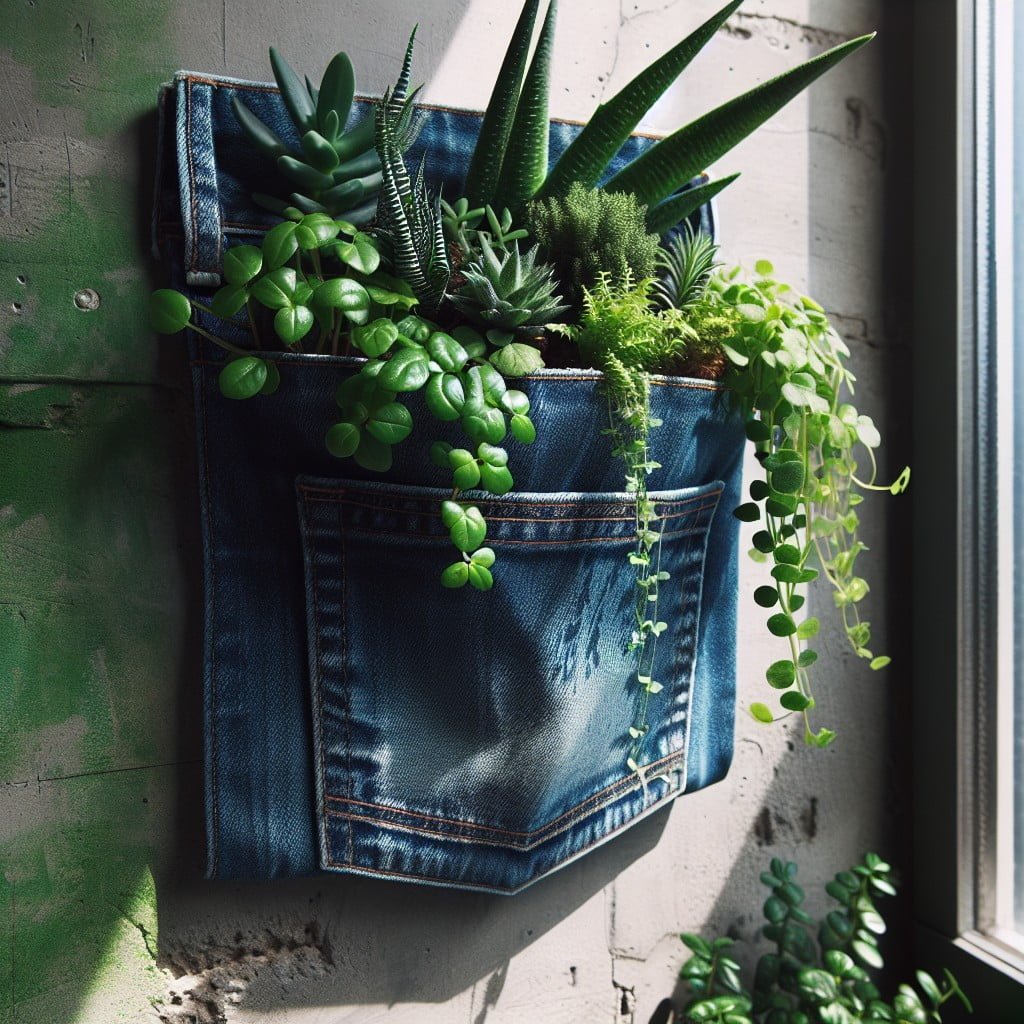
Moving on from traditional pot planters, why not transfer those old, worn-out jeans into practical, stylish decor? The back pockets serve as the perfect pouch for your smaller plants. Follow these simple steps to create your unique denim wall planter.
First, separate the back section of the jeans, leaving an inch around the pockets. Use clean cuts for neat edges. Collect as many pocket sections as you wish based on your wall space.
Next, consider the layout. Create a pattern on the wall using cut-out jeans pockets—or mix up for a dynamic display—it’s entirely up to your aesthetic.
Once you’ve decided, attach your pieces to your chosen wall. Use strong, adhesive hooks for support or sew directly onto a fabric backing if you’re planning a larger display. Remember to space them out evenly to promote plant growth.
Lastly, it’s planting time! Insert your plants directly into the pockets. Select smaller greens for best fit—succulents, herbs, or ferns. Ensure your plants get adequate water and sunlight to flourish.
This budget-friendly, eco-conscious project adds a distinctive touch to your decor while smartly utilizing household throwaways. You’ll have an entirely fresh wall-feature in no time!
DIY Hollow Log Planter
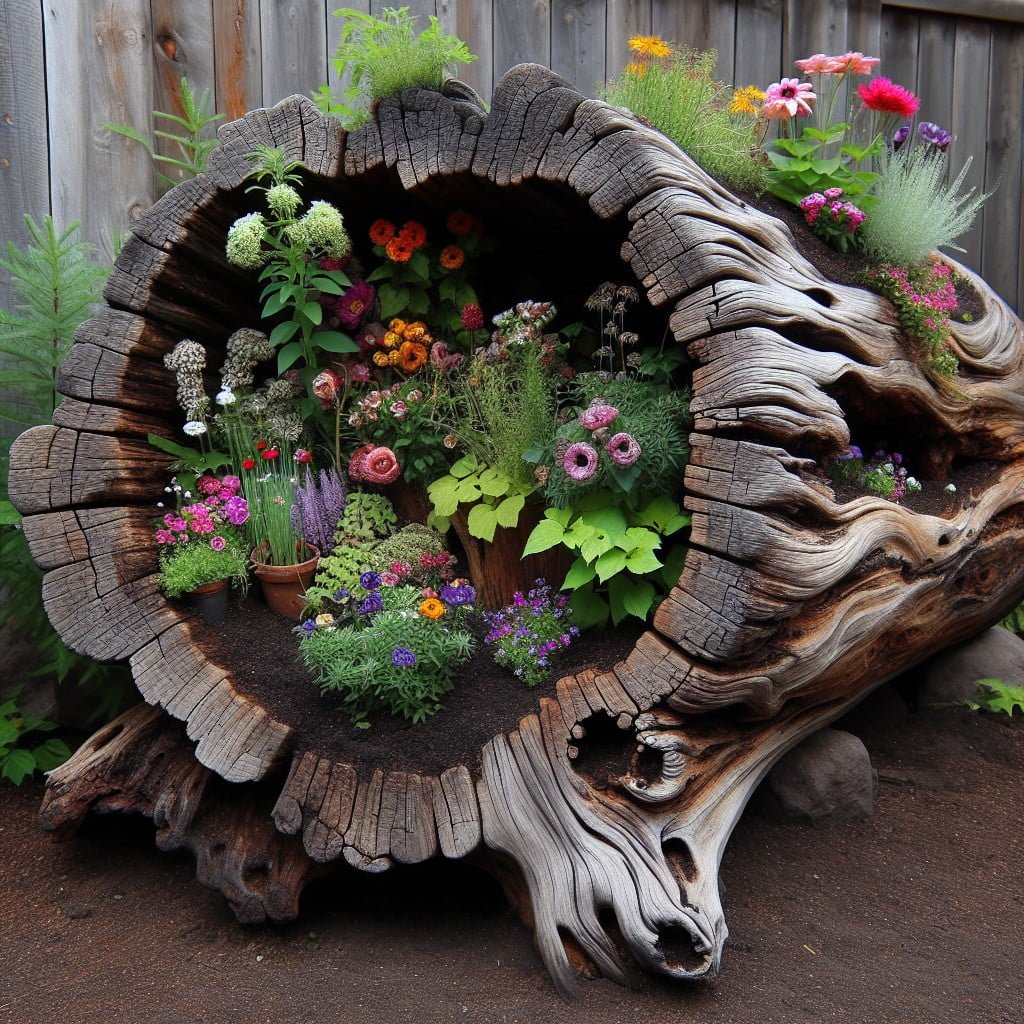
Venturing into the realm of natural planters, hollow log planters offer the warmth and authenticity of nature in your gardening space. Here’s how to go about the creation process:
1. Select an Old Log: Find a decaying log with a natural hollow or carve out an already dried log. The size depends on your preference and the plants you wish to accommodate.
2. Clean and Treat: Brush off any loose debris and treat the log against pests, if necessary. Use a modest pesticide, as you don’t want to harm the plants you’ll be insetting.
3. Drill Drainage Holes: Using a power drill, create a few holes at the bottom to ensure adequate drainage.
4. Add Soil: Fill the hollow section with nutrient-rich soil, leaving space for the plants.
5. Plant: Place your chosen plants into the log. Ideal picks would be succulents, ferns, or woodland flowers.
6. Water Moderately: After planting, give a generous dose of water. But remember; do not overwater as your plants might end up waterlogged.
This simplistic and effortlessly aesthetic project is the perfect way to incorporate a bit of woodland charm to your garden ambience.
DIY Old Car Tire Planter
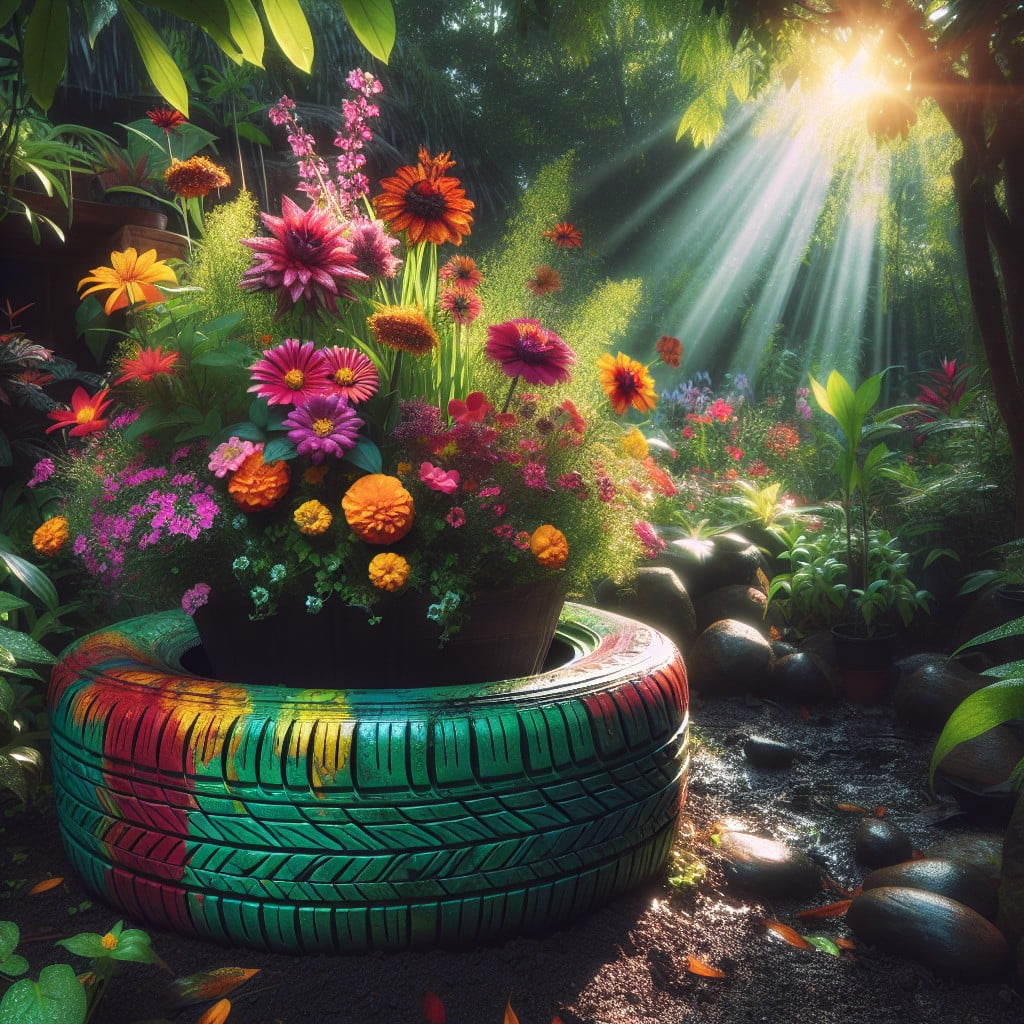
Breathing new life into an old car tire can result in a unique garden enhancement. The process involves flipping the tire inside out to create a bulbous, more visually appealing shape and to give the planter more depth for planting.
Start by thoroughly cleaning the tire to remove any dirt or loose rubber. Use a sharp utility knife to meticulously cut out the top side wall. Paint the tire in a vibrant hue of your choice, preferably an outdoor-proof paint to withstand the elements. Allow ample drying time post painting.
Once dried, flip the tire inside out. This step may require a bit of grunt work, patience, and possibly a friend’s help. The goal is to cause the tread portion to swell out, giving the planter its distinct shape.
The tire can then be filled with a good quality potting soil mix and planted with your favorite array of plants or flowers. Place this planter at a spot that gets optimal sunlight for your chosen plants.
Remember, rubber absorbs heat and can get quite hot during the day, so consider the heat tolerance of your chosen plants. The finished, vividly painted car tire planter not only becomes a focal point of your outdoor space but also serves as an excellent conversation starter.
DIY Hanging Colander Planter
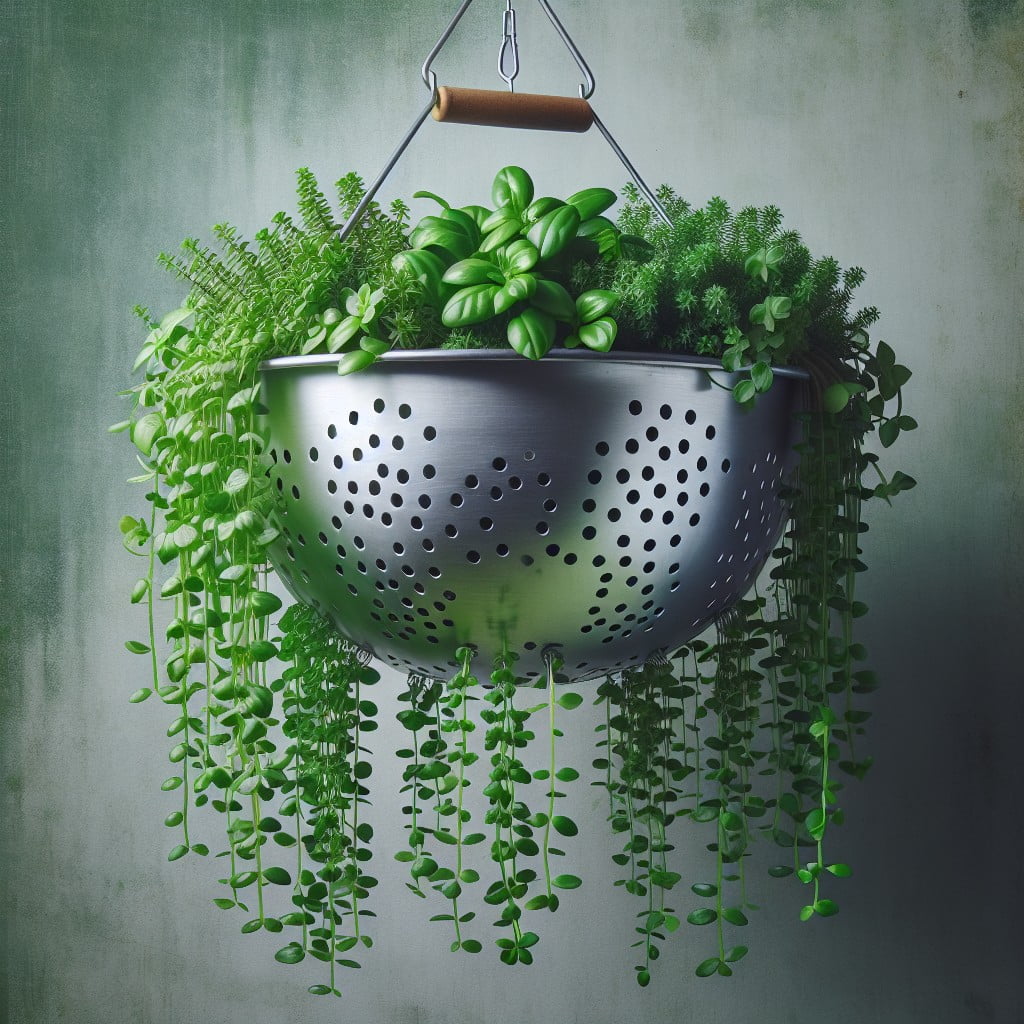
Start this creative process with a little trip to a thrift store, or even your kitchen, to find an old colander. Brightly colored and vintage pieces can provide an unexpected pop of style. Once you have your star, it’s time to gather the supporting cast: an array of hearty plants, potting soil, natural coal for drainage, and a sturdy hanging chain.
1. Prepping Your Planter: Drill a few additional holes at the bottom of the colander if needed to ensure efficient water drainage. Then, line the inside with a natural fibre like coconut or moss keeping it simple and sustainable.
2. Plant Selection: Select a combination of trailing and upright plants for an interesting visual effect. Herbs can be a great choice as they’re useful in the kitchen and suitably compact.
3. Arrangement: Start planting by filling the colander with potting soil halfway up. Situate the plants around the perimeter, leaving room in the center for trailing ones to take center stage. Once all are set, add more soil, firmly pressing it down around your leafy artists.
4. Finishing Touches: Attach a chain for hanging your creation by simply hooking it through the existing colander handles. Place it in a light-filled area and your unique, suspended garden is ready to thrive!
This DIY hanging colander planter will not only save space, but also serves as a utilitarian art piece that adds personality and rustic charm to your home. It’s a fun and functional way to recycle and celebrate your fondness for distinctive gardening.
Upcycle Old Gumboots Into Planters
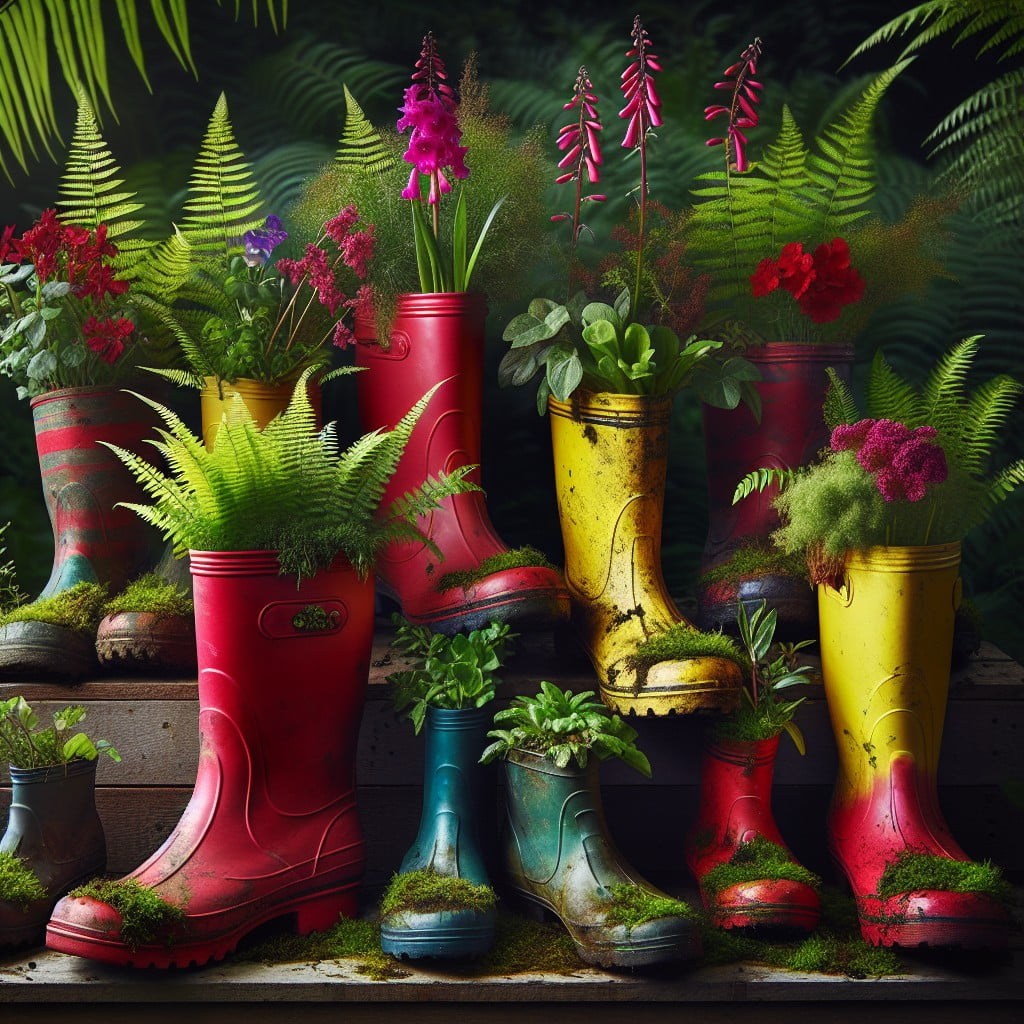
Start by drilling a few holes at the bottom of the boot, this will facilitate effective drainage. Add a layer of gravel or small stones first before filling with compost or soil, this ensures water does not stagnate within.
Once the boot is filled, plant your desired vegetation, which could be either flowers, herbs, or even succulents. Consider having a variety of boot sizes, colors, and patterns for a more visually appealing combination.
Keep them in a sunny spot and remember to check on the moisture and sun requirements of the plants you choose. Being mindful of these elements will ensure your gumboot planters thrive.
A small piece of advice: old children’s boots can serve as a whimsical addition to the traditional garden setup.
DIY Bed Frame Garden Planter
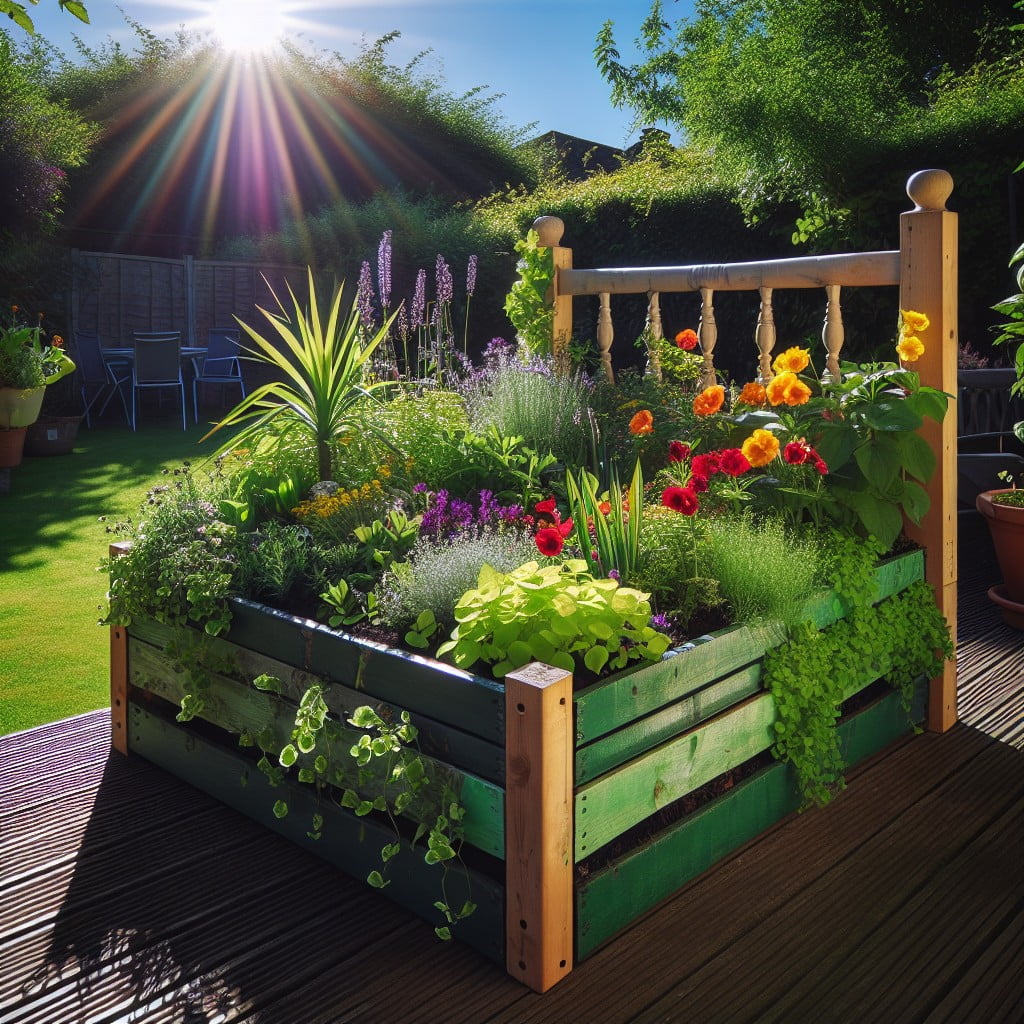
Transforming an old bed frame into a stylish garden planter ticks multiple boxes of practicality, resourcefulness, and aesthetics. Breathing new life into unused materials is a brilliant testament to sustainability and inventive design. Here’s how you can achieve it:
1. Preparation: Begin by cleaning the bed frame thoroughly. Remove all hardware that won’t be needed.
2. Frame Adjustment: Depending on your desired depth and size of the planter, adjustments might be required. This could be as simple as shortening the legs, or removing a portion of the frame’s head or footboard.
3. Attach the Base: Use a piece of plywood cut to fit as a base of your new planter. Attach it to the bed frame by drilling holes and using suitable screws for a sturdy result.
4. Weatherproofing: For outdoor usage, consider varnishing or painting the frame using weather-resistant products. This prolongs the life of your new planter.
5. Plant Selection: Decide on the type of plants that would suit the planter. Choose those that complement the frame’s size and depth. Consider positioning taller plants at the back and herbs or flowers at the forefront for a visually appealing arrangement.
6. Maintain Regular Care: After planting, schedule regular watering and consider potential pest control options if necessary.
With these steps, the once unnecessary bed frame becomes a unique garden feature allowing you to flex your creative muscles and show off your green thumb!
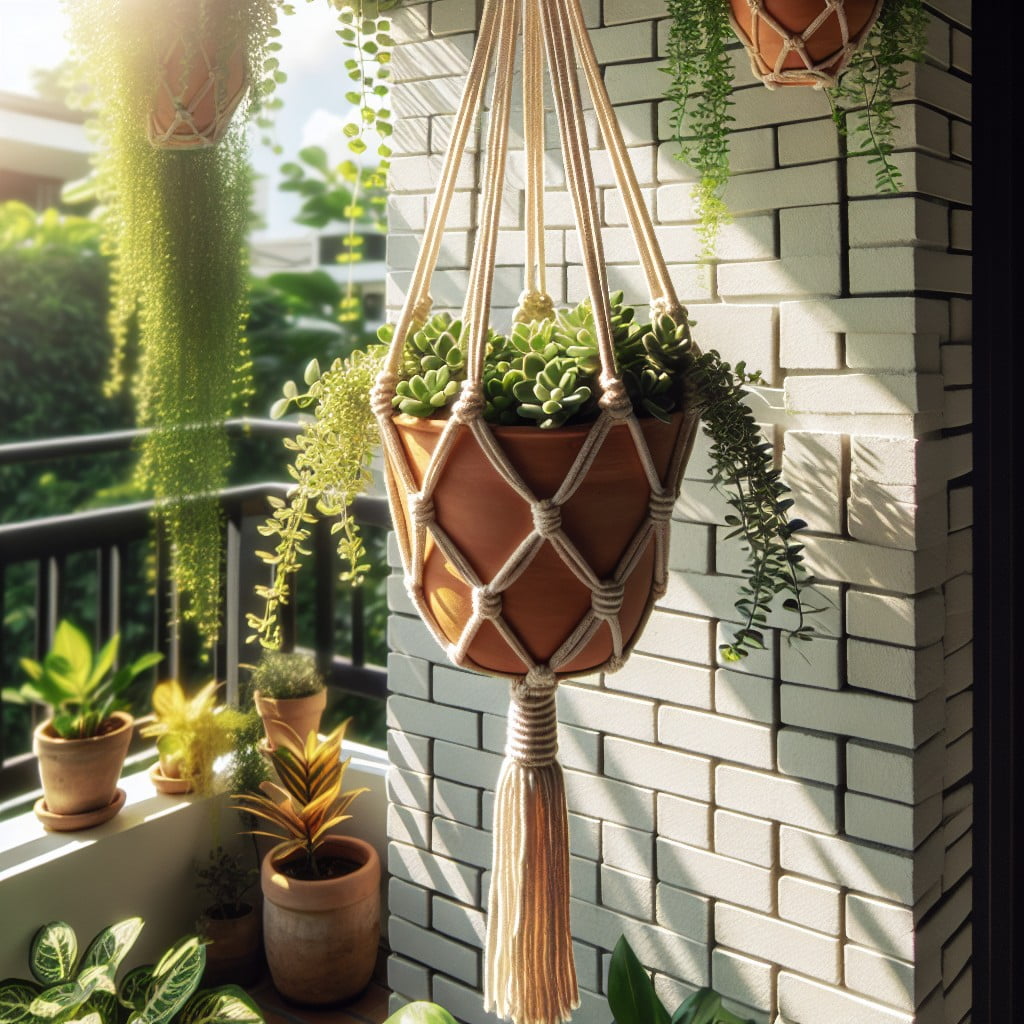
DIY Coconut Shell Hanging Planter
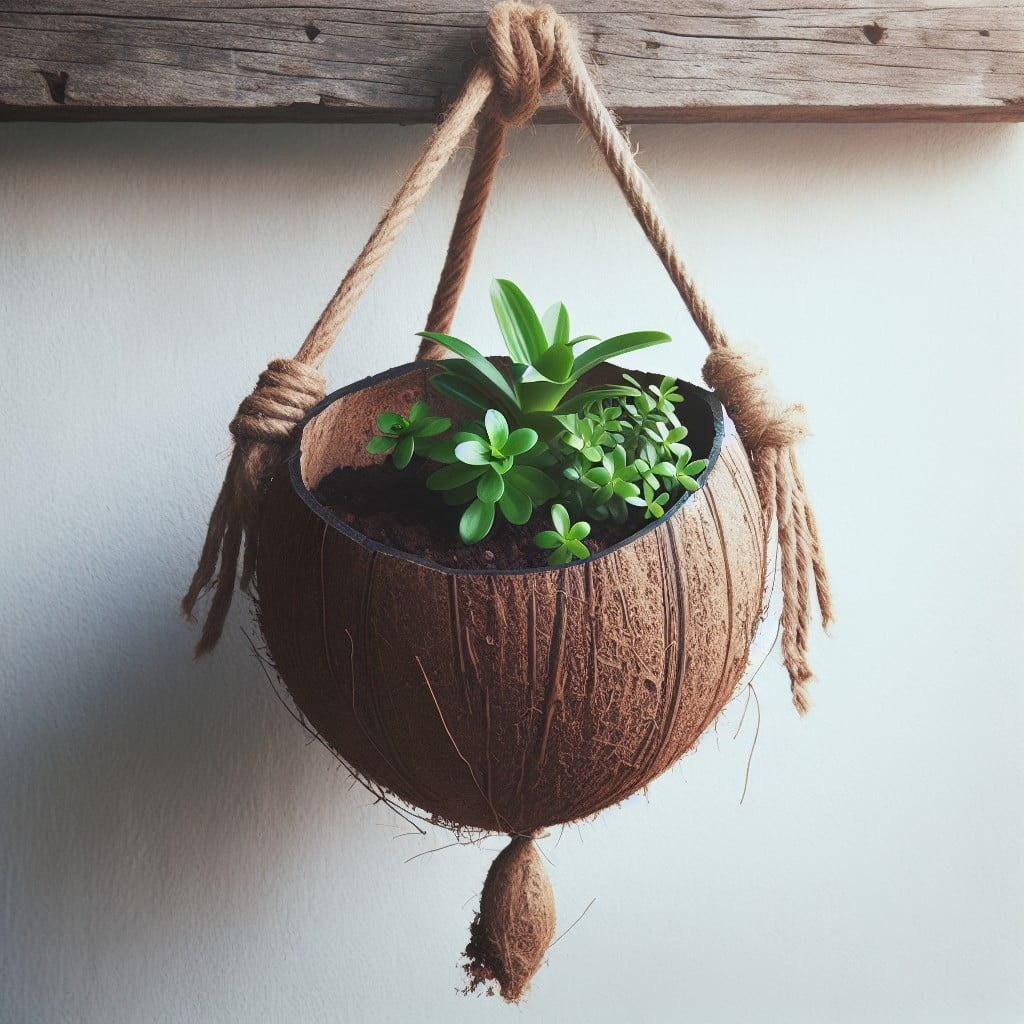
To begin creating your Coconut Shell Hanging Planter, you will first need to halve a dried coconut, preserving the shell. After removing the coconut meat, thoroughly clean the insides. Smoothen the edges of the shells using sandpaper to avoid any potential injuries.
Next, you need to drill three evenly spaced holes around the diameter of the shell. Use these holes to thread through sturdy, preferably weather-resistant string or cord lengths, attaching them at a single point above to form a hanging planter.
The plant’s choice is crucial. Opt for succulents or cacti as they require less water, or small trailing plants like ‘String of Pearls’ for a beautiful cascading effect.
Remember to add drain holes at the bottom of your coconut shell to allow excess water to escape. This is important to prevent root rot, particularly if you are using plants sensitive to over-watering.
Finally, fill your coconut shell with a suitable potting mix for your chosen plant, plant your seedling, and hang your planter in a suitable location. This is a unique, eco-friendly, and cost-effective planter sure to be a conversation starter.
DIY Bookcase Planter
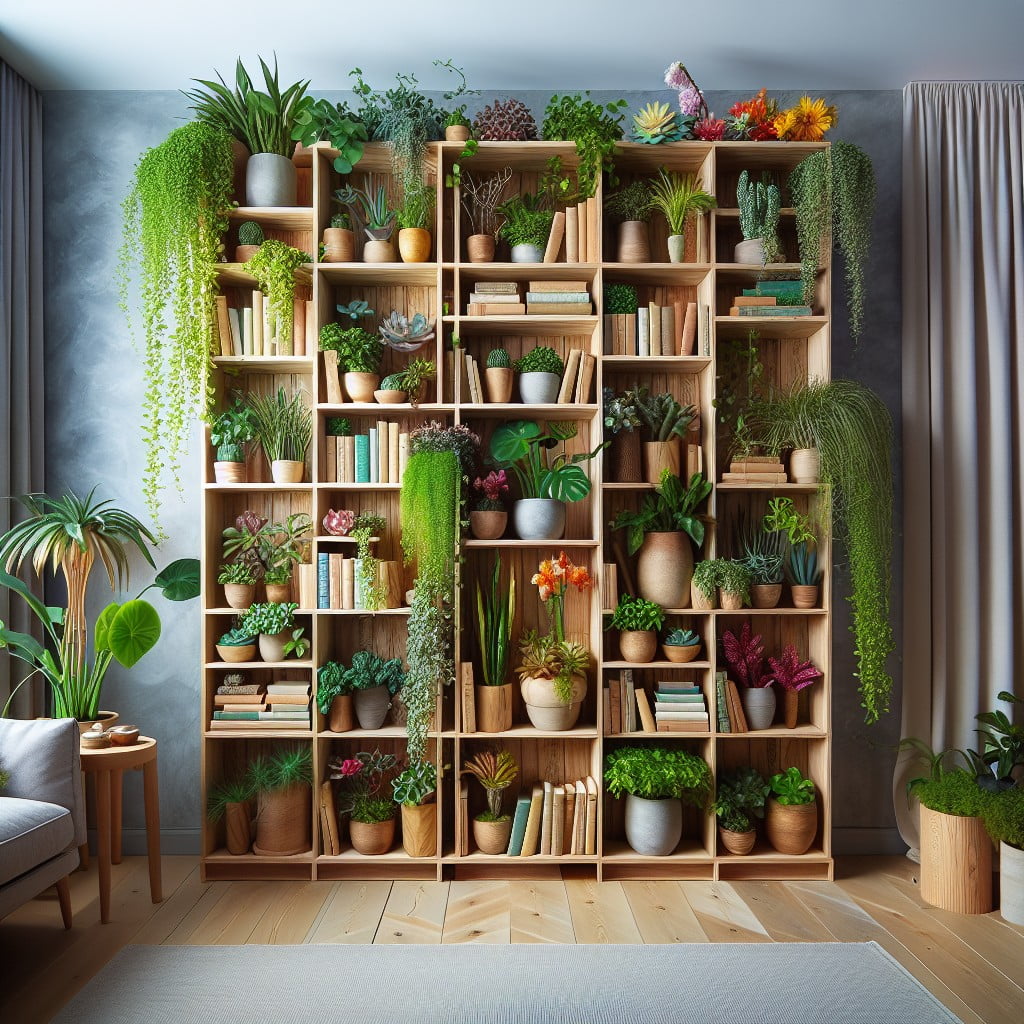
To bring this unique planter to life, start by carefully selecting a sturdy old bookcase—preference given to those with a bit of character chipped on the edges yet structurally sound. Ensure it’s tall enough to show off your green treasures, but not so tall that it dominates the room or outdoor space.
Now, to transform this piece of furniture into a verdant haven, follow these simple steps:
- 1. Clean and refurbish: Thoroughly dust off any dirt and clean the bookcase. If needed, repaint to give it a refreshed look.
- 2. Waterproofing: To prevent water damage, line the shelves with plastic sheeting, sticking it securely at the edges. For indoor use, remember to include a drip tray at the bottom for excess water.
- 3. Arrange the Plants: Display an array of plants with varying heights, colors, and textures on the different shelves. Use a mix of deroca pots, ceramic planters, and glass jars for an eclectic look.
- 4. Easy Access to Light: Place the bookcase near a source of natural light, preferably a south-facing window for indoor, and semi-shaded area for outdoors.
- 5. Regular Maintenance: Prune the plants and water them regularly. Monitor for signs of pests and diseases.
With thoughtful execution, your DIY bookcase planter will add an artistic touch to your space while showcasing a vibrant collection of your favorite flora.
DIY Handwoven Basket Mango Tree Planter
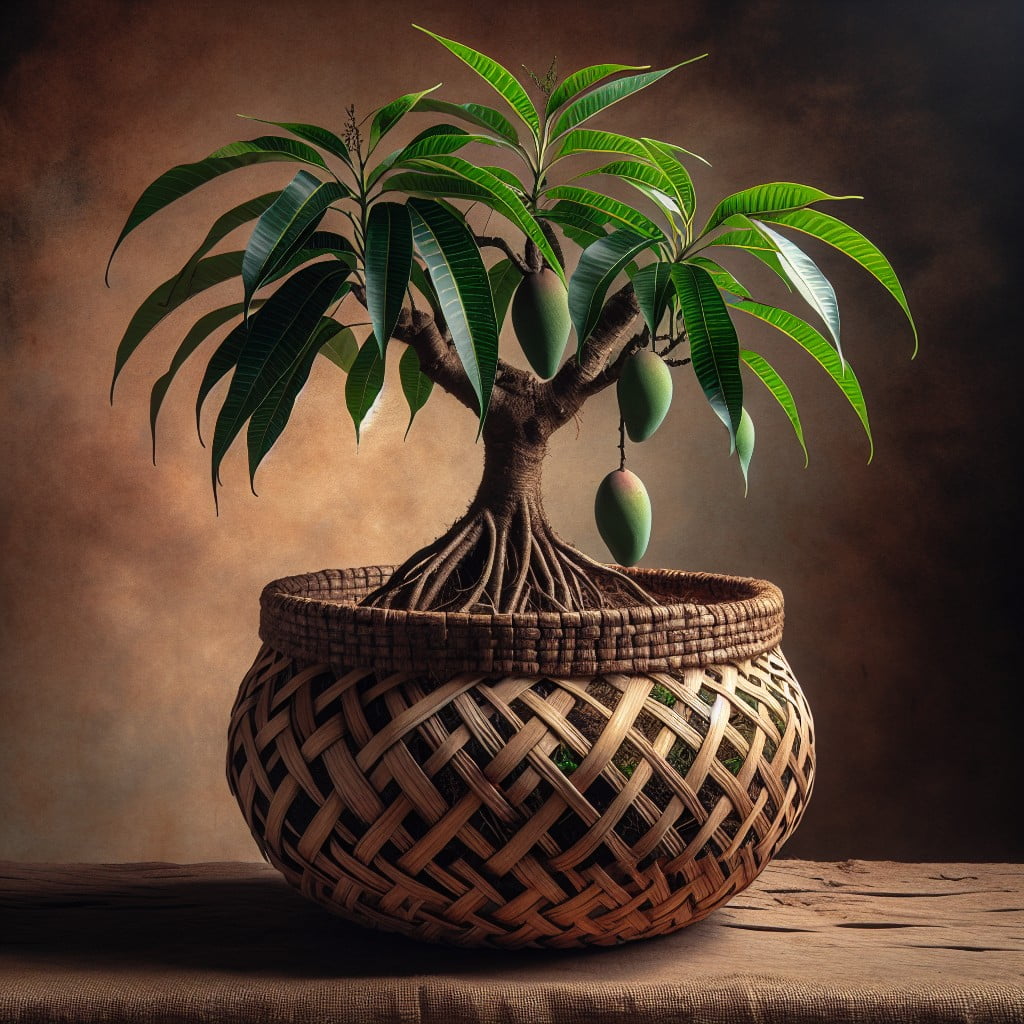
To craft the handwoven basket for your mango tree, consider the use of durable materials like rattan, sisal, or sea-grass. These materials are known for their water resistance, critical for a planter. Choose a size that allows ample room for the mango tree roots to grow, typically a basket with an 18-inch diameter.
Begin by weaving the basket, either in a round or square shape. If new to weaving, online tutorials or local workshops are excellent resources.
Ensure the base is solid and well-weaved to carry weight of the tree and soil. Line the interior with landscape fabric to prevent soil from slipping through the weaves. This fabric also allows water to drain preventing root-rot.
Plant your mango tree into the basket, adding a well-draining potting mix, not ordinary garden soil.
Position the planter in an area with sufficient sunlight as mango trees thrive under direct sunlight for six to eight hours a day. Remember, while mango trees are robust, they require protection from extremely low temperatures. As the tree grows, you may need to provide additional support by attaching the basket to a sturdy frame.
In terms of maintenance, water the plant well but allow the soil to dry out between watering. Overwatering can lead to root diseases. Follow a regular fertilization schedule for a healthy, fruitful tree.
This DIY project does not only serve a practical purpose, but it also adds an exotic, tropical touch to your space. With patience and good care, your handwoven basket mango tree planter will grow into a lovely, fruit-bearing tree.
DIY Seashell Succulent Planter
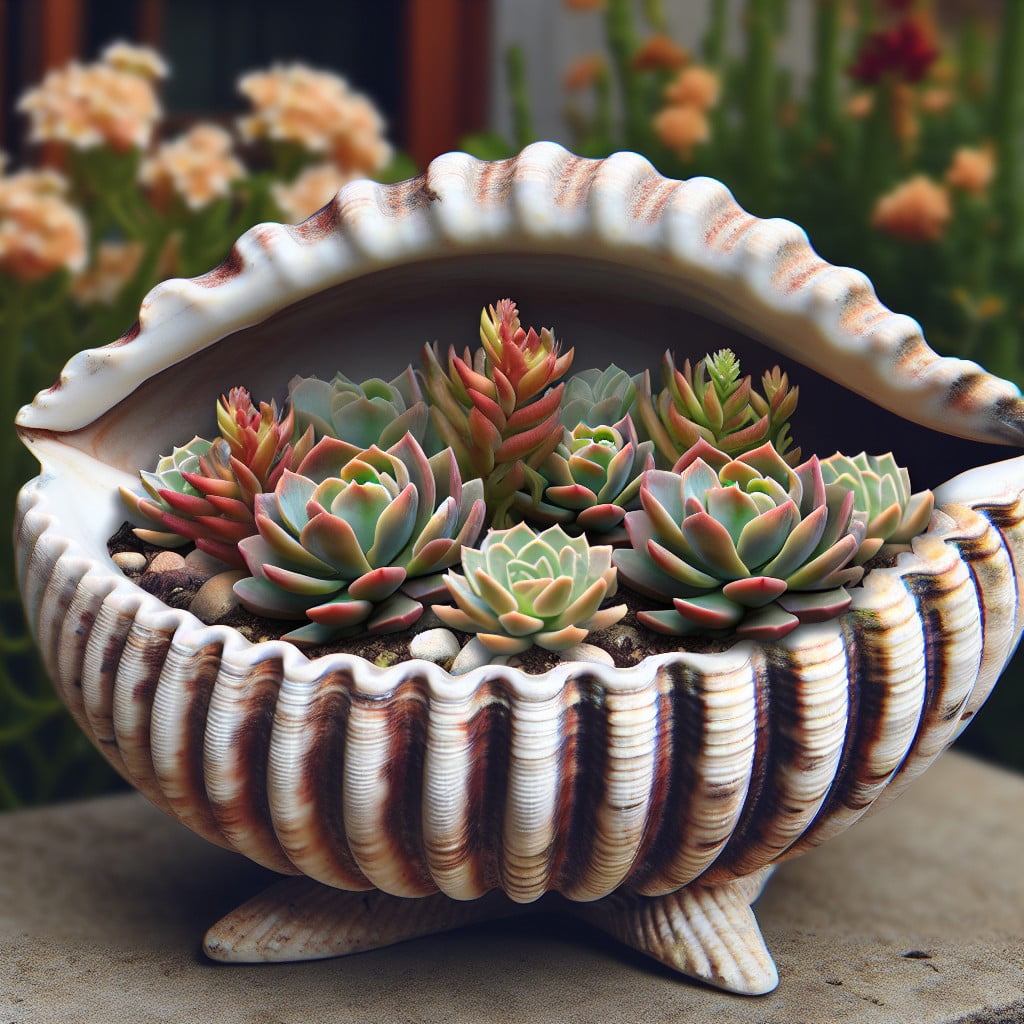
Transforming a multitude of seashells into a stunning planter is a brilliant way to infuse a beachy vibe into your space. Arraying them around a plain pot or a bowl forms the perfect vessel for succulents, known for their low-maintenance nature.
To start, gather an assortment of seashells in different shapes and sizes, a bowl, strong adhesive, and your chosen succulents.
1. Begin with a clean, dry bowl. Using the adhesive, start gluing the seashells onto the bowl, starting from the bottom up. Ensure complete coverage for a cohesive look.
2. Allow the adhesive to dry fully. This could take anywhere from a few hours to overnight depending on the type of adhesive used.
3. Once the shell-covered bowl is dry, fill it with a succulent-appropriate soil. This typically has good drainage and aeration.
4. Now, it’s time to plant your succulents. Begin with the larger ones in the center, working your way outward with the smaller species.
5. Following planting, water sparingly. Succulents need modest watering, making them the perfect fit for this planter.
Remember, your DIY seashell succulent planter also makes for a beautiful and personalised gift. Gentle creation care, space optimization and neat aesthetic appearance make it an appealing choice for decor enthusiasts.
Reclaimed Wooden Pallet Balcony Planter
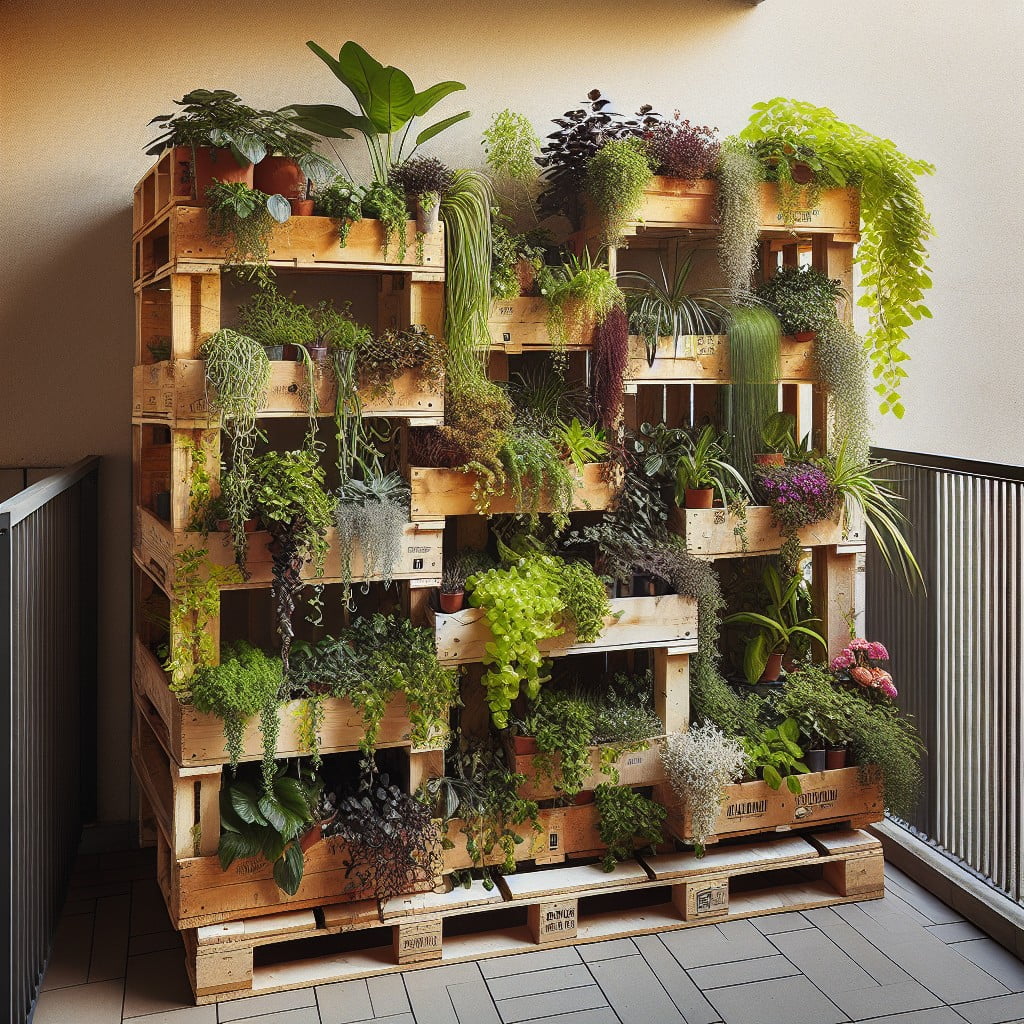
Starting this project is relatively easy as wooden pallets are not hard to source. You can often find them at recycling centers, hardware stores, or businesses that receive large shipments. Ensure to select a pallet in good condition – sturdy, free of rot, and preferably not chemically treated.
To convert the pallet into a planter, you’ll need some basic tools, including a hammer, nails, non-toxic paint (optional), and landscaping fabric. Start by reinforcing the pallet structure, focusing on the back and bottom. Following this, attach the landscape fabric to the back, sides, and bottom. This acts as a lining preventing the soil from spilling out.
Once the structure is secured, it’s time to begin planting. Lay the pallet flat and fill it with potting soil. The plants can then be placed between the slats. Choose plants that prefer good air circulation and don’t grow too tall, such as herbs, succulents, or flowering annuals.
Position your new pallet planter in a sunny spot on your balcony and ensure it is adequately secured. In doing so, you have not only created a unique planter but also added some vertical interest to your balcony space. Remember to water your plants regularly, and enjoy the fruits of your labor.
DIY Soda Can Planter
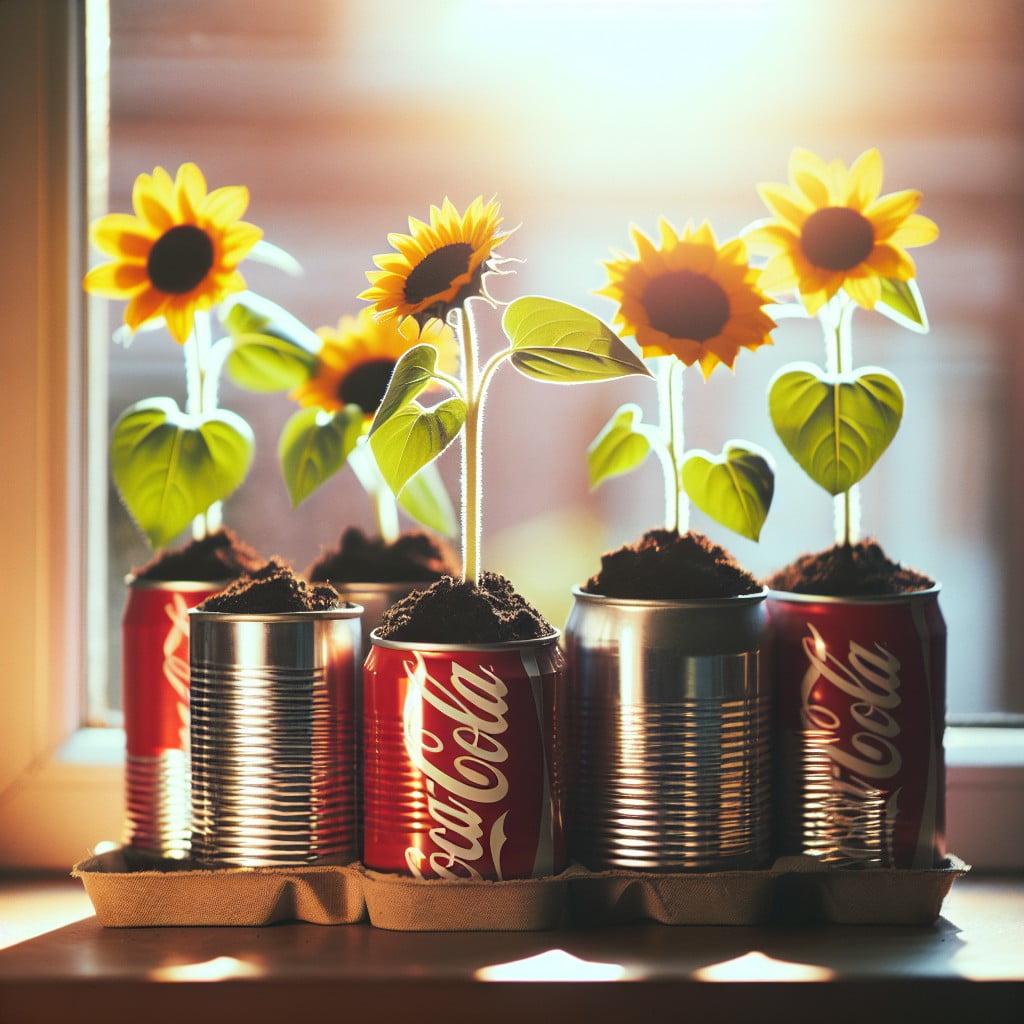
Once cleaned and dried, this everyday item can easily transform into a vibrant planter. Start by cutting off the top of the can using a box cutter. Make sure the edges are smooth to prevent accidental cuts.
To create the drainage system, punch holes at the bottom with a nail. After that, you may leave the can as is for a rustic look, or add a touch of creativity. This could be done by painting it or wrapping it in fabric or twine.
Next is to add the gravel at the bottom, this is integral for a healthy plant as it prevents the roots from sitting in water and rotting. Add the soil and plant afterwards, compact it down gently so it’s firm but not hard-pressed.
Once complete, position the can planter in an area with sufficient light exposure as suited to your plant’s need. Keep in mind, soda cans are light, so a gust of wind can blow them over making them most ideal for indoor decoration.
DIY Birdcage Flower Planter
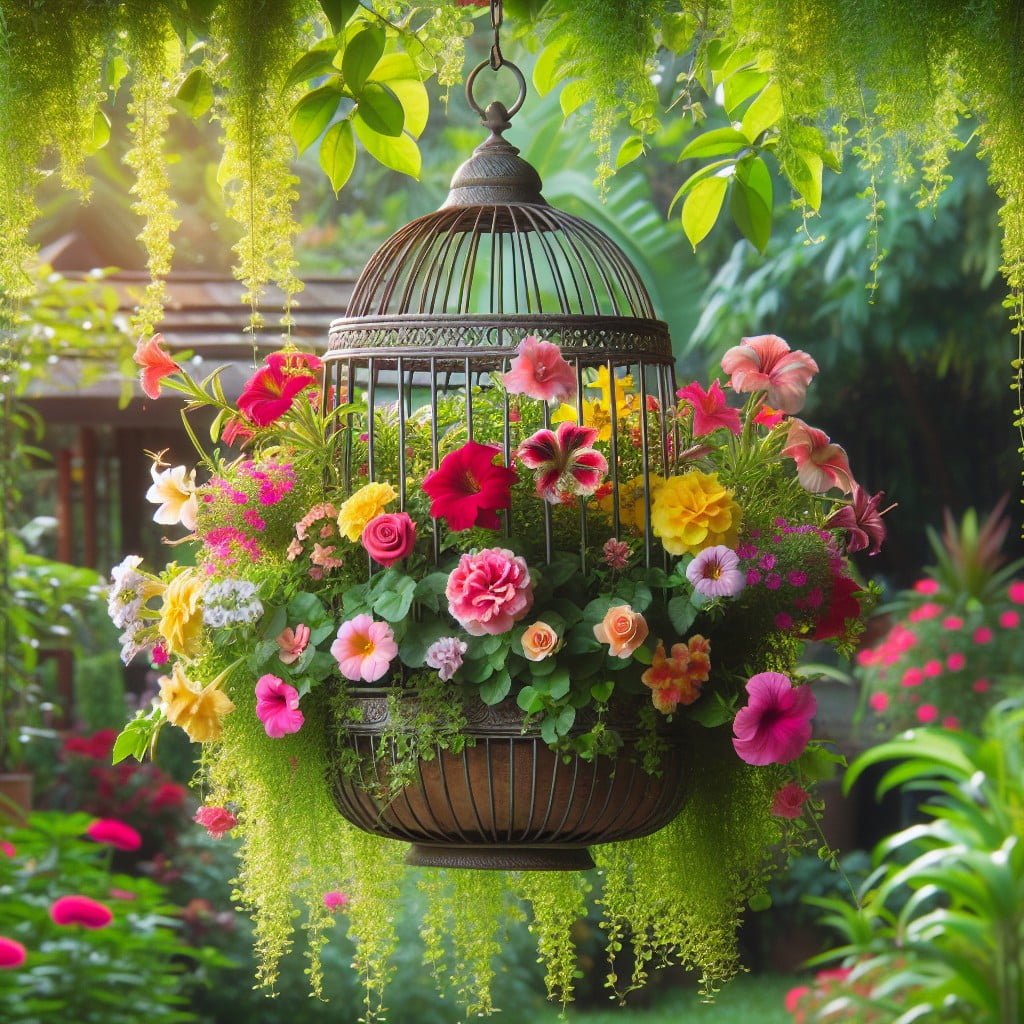
Creating this unique planter involves a few simple steps. Start with a vintage birdcage, which can often be found at thrift stores or flea markets. Ensure that the cage is clean and rust-free.
Next, line the cage bottom with some moss or a coconut liner. This forms a base, stopping soil from falling through the bars but also drainage for the water. Then, add a layer of high quality potting soil.
Your choice of plants will depend on where the birdcage will be hung. For shady areas, consider ferns or impatiens. For sunnier spots, blooming varieties like petunias or marigolds add a pop of color.
Take care with watering. The cage needs to be moist but not soaking. A misting bottle can work well for this purpose, as it prevents an overflow of water that might spill out from the base.
Lastly, hang your birdcage in a chosen space. Be it on your porch, patio, or even indoors, the result short of breath-taking. It’s a charming, creative way to display your green thumb and impress your guests. Remember, regular care maintains its beauty for the entire growing season.
DIY Space Saving Window Box Planter
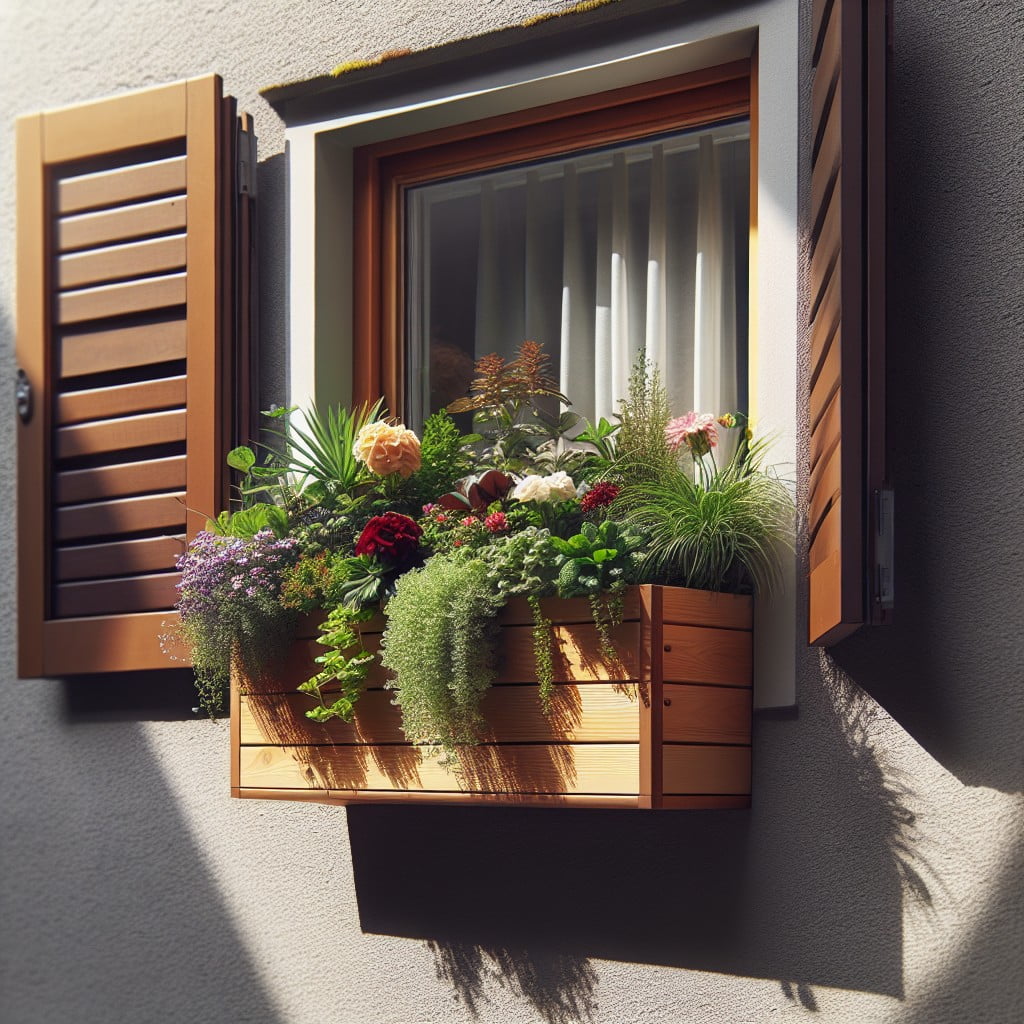
This planter design is an optimal choice for those with limited outdoor space. It attaches directly to your window, giving you a mini garden view from indoors. The following steps will guide you through constructing your own.
1. Measurement: Measure the window’s width and decide on the desired box depth and height.
2. Wood Selection: Opt for a rot-resistant wood like cedar or redwood. Avoid treated wood as it might harm your plants.
3. Box Assembly: Cut your wood to the pre-determined measurements. Assemble the box using screws and ensure to drill drainage holes at the base.
4. Mounting: Secure the box under your window with strong brackets. You may need to screw these into the exterior of your house, so ensure you have the right tools and know-how.
5. Planting: Once mounted, fill up the box with potting soil and your choice of plants. They can be herbs, succulents, or your preferred flowers.
6. Maintenance: Regular watering is crucial but avoid overwatering. Depending on the plant type, consider feeding with a proper plant fertilizer as well.
So, go forth and create your mini, ultra-convenient green space!
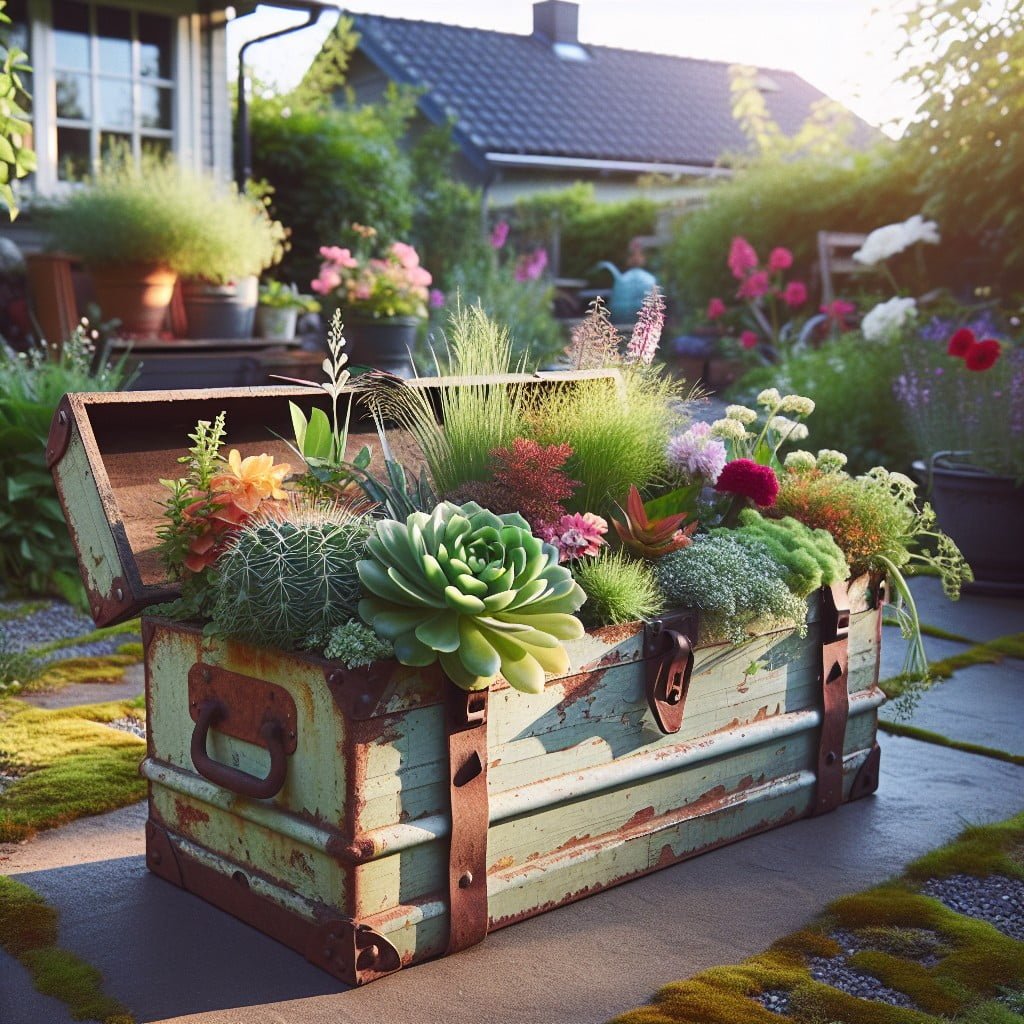
DIY Old Suitcase Planter
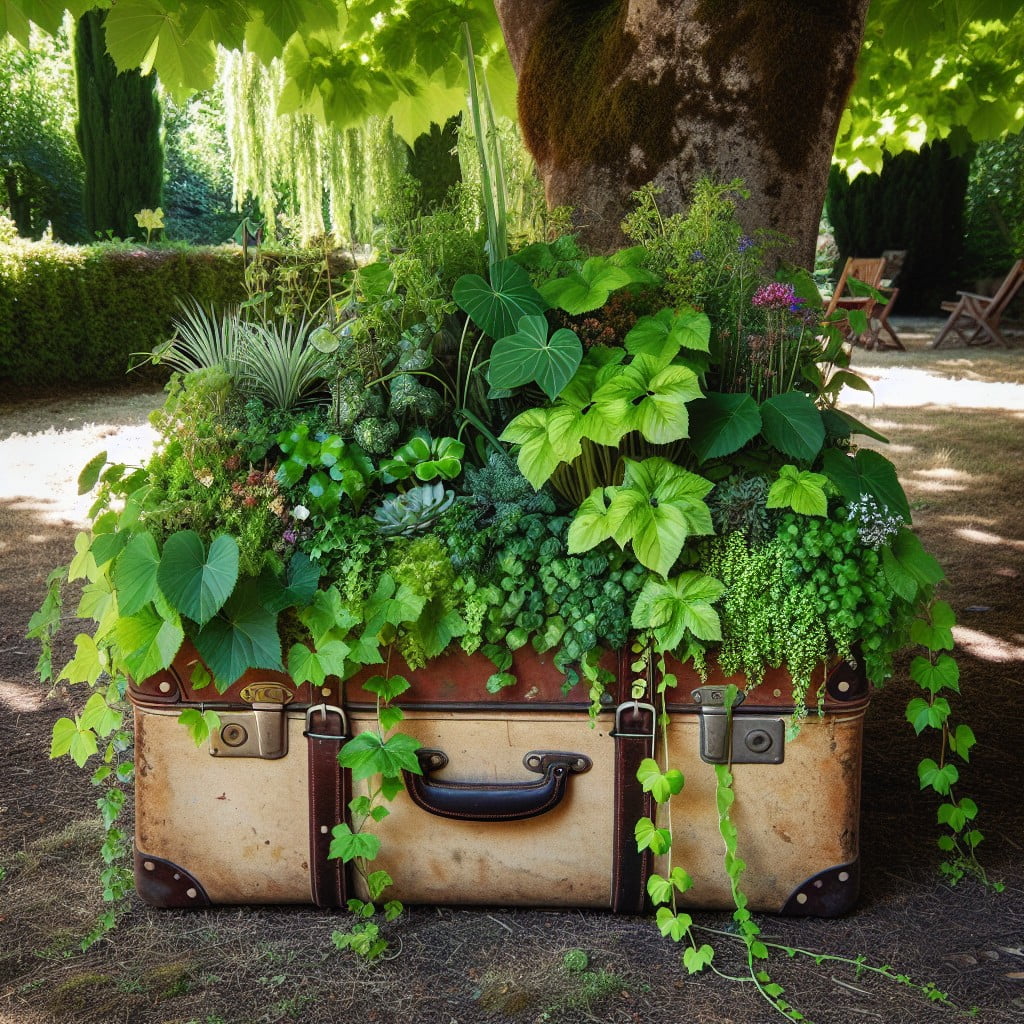
First and foremost, you need an old suitcase, preferably a hard-shell one for greater durability. Bring it out of storage, dust it off and get ready for its transformation.
1. Line the Bottom: To avoid any damage that might be caused by water, it’s smart to line the bottom of the suitcase with a heavy-duty plastic. This will act as a barrier between the soil and the suitcase material. Ensure the plastic is cut to the exact size of the suitcase to keep the overall look tidy.
2. Introduce Drainage: Plants need adequate water drainage to prevent root rot. You can either drill a few holes into the bottom and sides of your suitcase or have a layer of pebbles or broken terra cotta pieces before adding your soil.
3. Add Soil: Depending on what you’re planning on planting, fill the suitcase with appropriate soil. Do not fill the soil all the way to the top, allow some space for the plants.
4. Plant Your Favorites: Here’s where it all comes to life. Plant your chosen seeds or seedlings, and make sure they’re spaced out as per their growth requirements.
5. Monitor The Water: Unlike traditional planters, a suitcase might not have as open a drainage system. Keep monitor on the amount of water you’re giving your plants, you don’t want them sitting in excess water.
Remember, the best aspect of a DIY Old Suitcase Planter is that it is also functional and portable. You can easily move your little garden around your home, or even take it with you if you move. It’s vintage, it’s convenient and it’s eco-friendly. A triple win gardening solution!
Cinder Block Staircase Planter
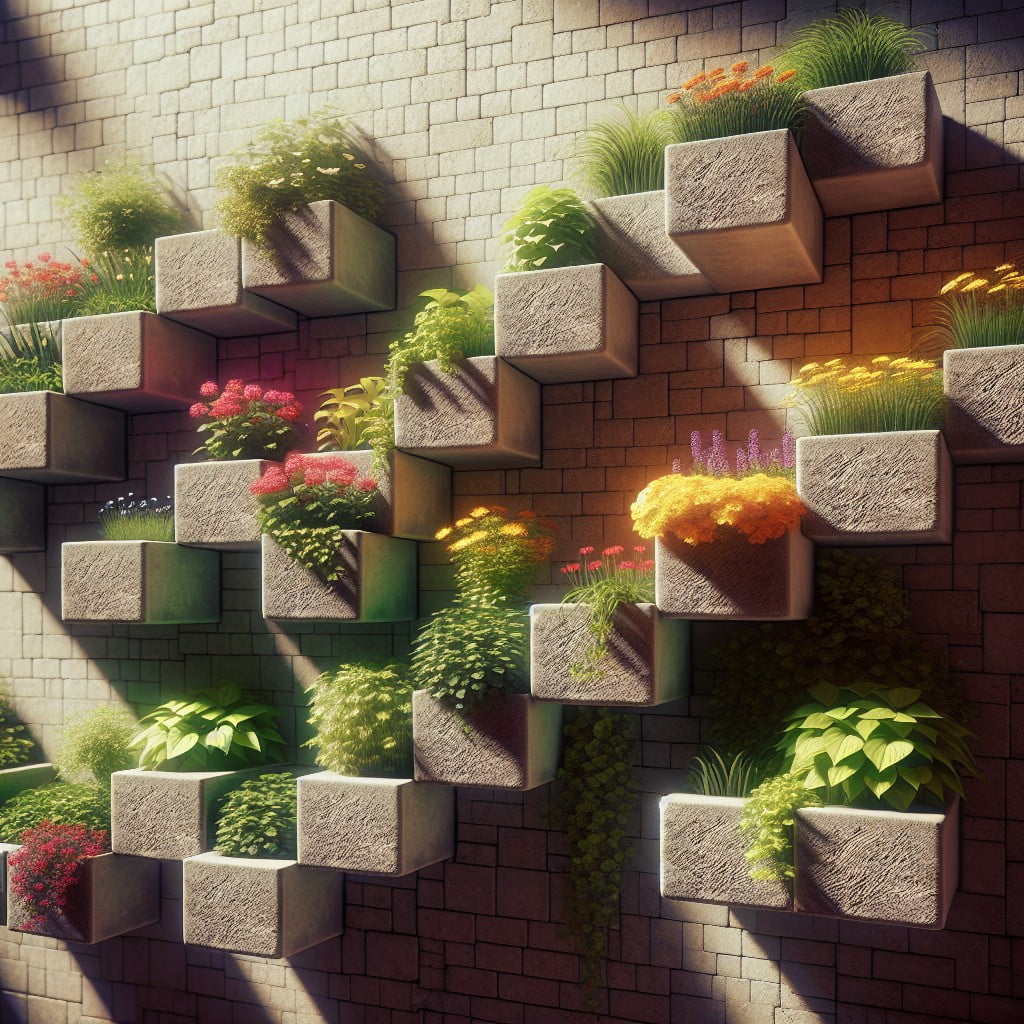
Moving down the list of ideas, now let’s explore a perfect solution for those with a set of stairs leading to the house or patio — a stunning configuration using cinder blocks! With its practical design, this project is likely to garner much appreciation from passerby.
Embarking on this DIY project involves four key considerations:
- Sorting Sizes: To accommodate varying plant sizes, using a good mix of 8″x8″x8″ and 8″x8″x16″ cinder blocks will generate a layered appeal.
- The Big Picture: Position the blocks in ascending order on each step, ensuring it forms a cohesive design when viewed from a distance.
- Securing Blocks: To resist the elements and maintain stability, consider applying a concrete adhesive between blocks.
- Plant Choices: Pick plants that’ll flourish in your particular climate and sun exposure at the stairs.
Remember, while this venture may require some elbow grease, the end result of a blooming staircase is well worth it. Who knew stairways could lead to horticultural heaven?
DIY String Garden Hanging Planter
Synonymous with innovative beauty and Japanese tradition, the technique behind a string garden hanging planter has an awe-inspiring effect that breathes life into any space.
For starters, a natural string, a sturdy hook, and a plant are the primary supplies for this craft. It’s pertinent to utilize a plant that is compatible with the indoor environment, as it forgoes the traditional pot and soil needs.
The making process begins with creating a moss ball around the roots of the plant. The roots are carefully secured in the moss ball using the natural string. Don’t fret about the moss drying out – regular misting will keep it hydrated, as well as the roots.
This craft not only spotlights creativity but aligns with an eco-conscious home decor approach. Light, space-saving, and visually appealing, string garden hanging planters fuse nature and art in a sublime manner, brightening both modern and rustic settings without consuming floor space. It’s a delightful way to keep greenery up in the air, adding dimensionality to interior decorations.
DIY Copper Pipe Succulent Planter
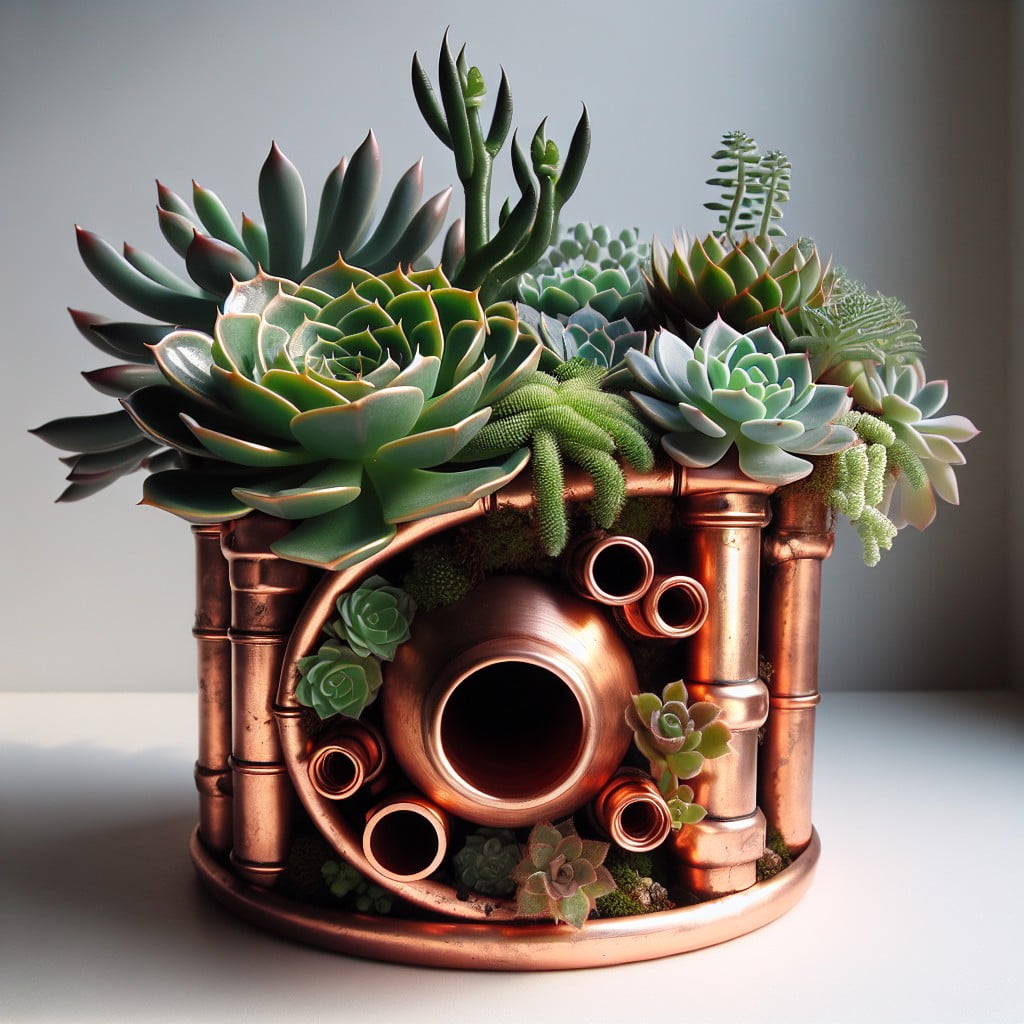
Begin crafting your masterpiece with a copper pipe of desired length. Cutting it into multiple shorter sections will give you planters of varying heights, adding interest and dimension to your display.
Buff each piece on the outside to get a luminous shine, but don’t worry about the inside – this will be filled with an appropriate succulent potting mix to provide the ideal growing condition for your plants.
Now, consider the succulents. It’s best to choose varieties that stay small to fit comfortably within the pipe. Some great options are Echeveria, Sempervivum, or Haworthia.
Remember, succulents prefer well-draining soil, so adding some perlite or coarse sand to the mix can cater to this preference.
Once you’ve filled your copper pipes with soil, create a well in the middle. Carefully introduce your succulent, encouraging the roots to spread out. Firm the potting mix around the plant, ensuring it’s secure. Lastly, don’t forget to water lightly.
These copper pipe planters not only serve as a cool, industrial-chic home for your succulents but are also quite easy to make and add a unique aesthetic to any interior space.
DIY Toilet Paper Roll Seed Starter Planter
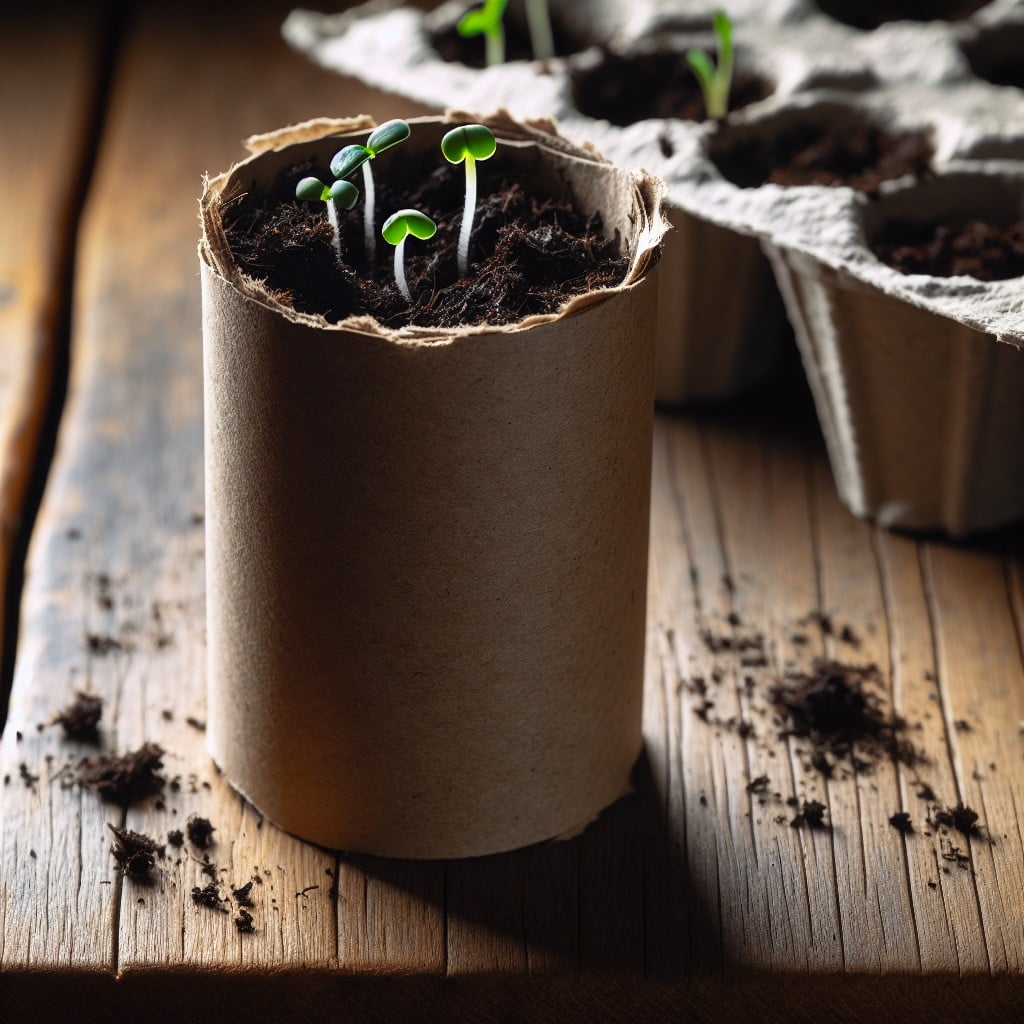
Eco-friendly and budget-friendly, seed starter planters made from toilet paper rolls are an ingenious way to kickstart your seasonal gardening.
1. Gather Supplies: Gather toilet paper rolls and prepare a seed-starting soil mix. Obtain a tray or shallow container to put the rolled tubes in once prepared.
2. Prepare the Roll: Start by making four cuts about an inch up from the base of the toilet paper roll, fold these inwards to create a base.
3. Fill with Soil Mix: Fill the prepared toilet paper tube with the seed-starting soil mix, leaving a little space on top.
4. Plant the Seeds: Plant your preferred plant or vegetable seeds into the center of the soil-filled tube.
5. Water and Wait: Water the soil lightly – enough to make it moist but not waterlogged and place the toilet paper roll seed starters on the tray in a sunny spot. In due time, the seeds will sprout.
6. Transplant: The beauty of this DIY project is that the entire roll can be planted directly into the ground as the cardboard will decompose naturally while the seedlings continue to grow.
Following this technique not only reduces waste but also offers an inexpensive yet effective solution to seed starting. Ideal for novice gardeners and experienced green thumbs alike.
DIY Juice Carton Planter Box
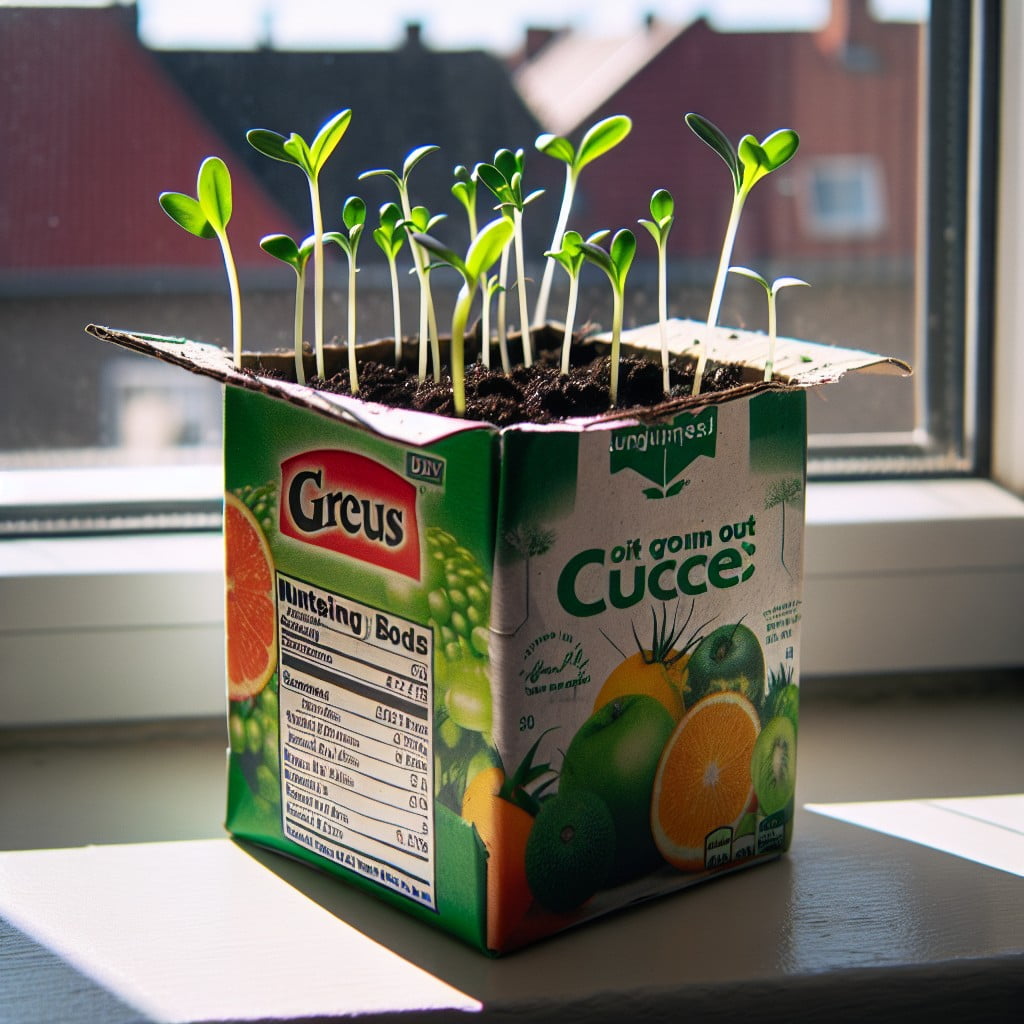
Begin by cleaning out an empty juice carton and drying it completely. Be sure to open it up from the top to clean thoroughly. Once dry, carefully cut off the top of the carton to create an open box shape. Depending on how deep you want your planter to be, cut accordingly. Remember, deeper containers are best for plants with long roots.
Now comes the delightfully fun part – painting! Use acrylic or spray paint to colour the exterior of the carton, cover every inch meticulously. You could get creative here and add unique patterns or designs; stripes, polka dots, even a artistic mural.
After your paintwork has dried, puncture a few holes at the bottom of your carton. This is an essential step as it ensures proper drainage for the plant.
For the planting process, fill the carton with potting soil about two-thirds of the way up. Then, wet the soil slightly before placing your plant or seeds in the center. Do not overload with seeds. Add more soil covering the roots or seeds, but remember to leave some space at the top for watering.
The final step is to select the perfect spot for your new planter box. Remember to consider the sunlight necessities of your chosen plant. Regular watering adhering to the needs of your plant is key to a successful homegrown DIY Juice Carton Planter. So get your green thumbs ready and let your creative flair run wild with this DIY project!
DIY Neon Concrete Block Planter
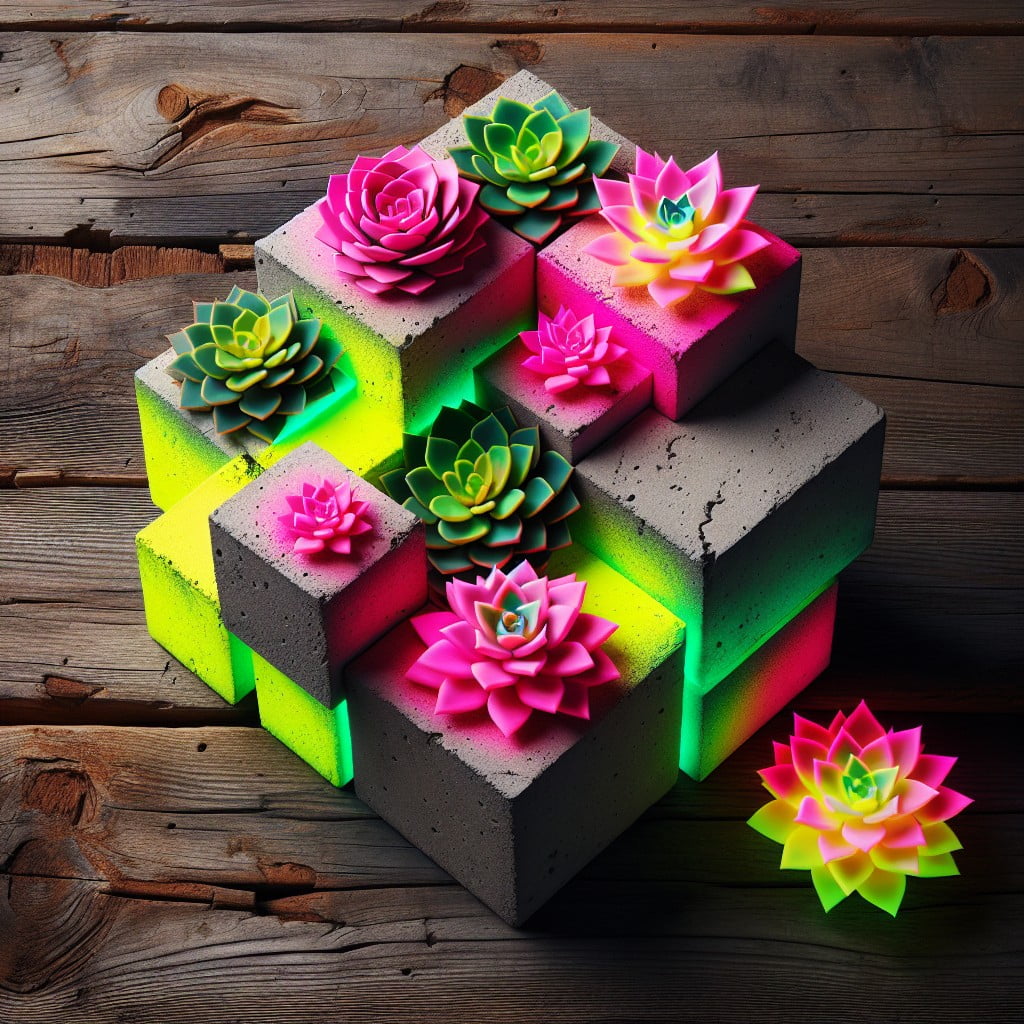
Complementing the rustic solidity of concrete with the vibrant energy of neon colors, this project combines the best of two contrary worlds. You’ll require the following materials: standard concrete mix, a set of block molds (size and shape depending on your preference), neon spray paint, and clear protective enamel spray.
First, whip up your concrete mix as per the package instructions. Carefully pour the mixture into the molds, shaking slightly to ensure smooth settling and to remove any trapped air bubbles. Allow the blocks to cure fully, preferably in a warm, dry place. This should take around 24 hours.
Once completely dry, you’re ready to apply your neon paint. Opt for bright, contrasting colors to make your planters stand out. Mask areas you want to remain concrete-colored, and apply thin, even coats of spray paint. Allow it to dry between coats to achieve a rich color depth. For the final touch, coat your blocks with clear enamel spray to seal the paint and provide a weather-resistant finish.
Safety is paramount, thus ensure to wear protective eyewear and gloves throughout the process. Moreover, use the spray paint in a well-ventilated area to avoid inhalation of fumes. Happy creating!
DIY Pearl and Seashell Covered Planter
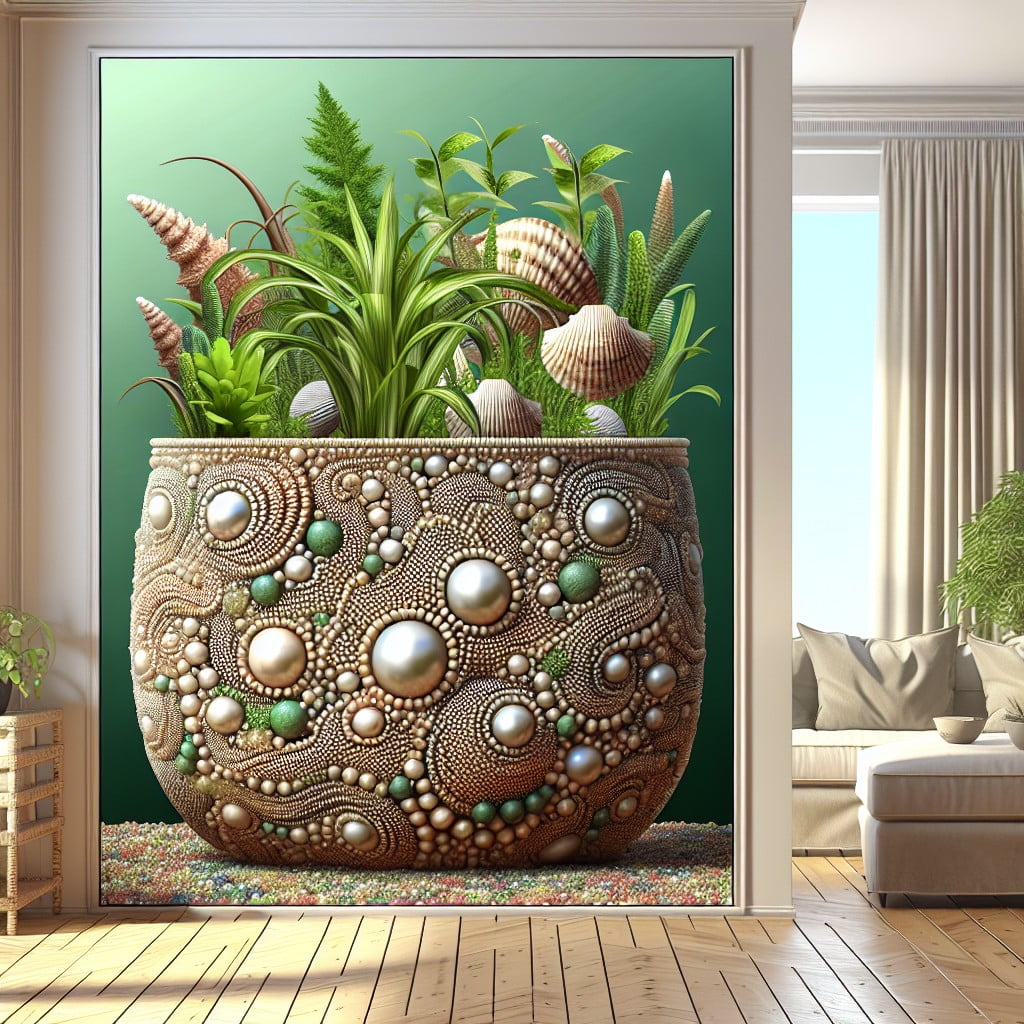
To create this marine-inspired craft, start by selecting a planter of suitable size and shape, preferably one with a wide surface area to allow ample space for adorning. Consider using a ceramic or plastic planter to ensure a good adhesive bond.
Firstly, gather your materials – a variety of seashells, pearls (either real or faux), a glue gun, and adhesive sealant. Be creative in the seashells and pearls selection. Aim for a mix of shapes, sizes, and colors for visual appeal.
Start affixing items onto the planter with your glue gun, beginning from the bottom and gradually progressing upward. It might be helpful sketching out a pattern or layout beforehand to ensure an even spread. Ensure to hold each piece firmly in place until the glue sets to optimize bonding.
Once all pieces are attached, consider applying a top coat of adhesive sealant. This enhances durability, preventing pearls or shells from dropping off over time, especially when exposed to watering or outdoor elements. Though this step is optional, it may pose beneficial for long-term preservation.
Maintenance for this planter involves regular cleaning to maintain its allure. Lightly dust off or wipe with a damp cloth, guarding against harsh scrubbing that might loosen the pearls.
This planter brings an exquisite beach vibe to your indoor space or patio, making your green friends feel more homely while serving as a striking conversation piece for your guests. Let your imagination sail and add a touch of the sea to your plant decorating game!
Ideas Elsewhere
- https://www.makingjoyandprettythings.com/18-creative-diy-planter-ideas/
- https://www.lovelyetc.com/diy-planters/
- https://www.homedit.com/top-30-planters-diy-and-recycled/
- https://www.thepioneerwoman.com/home-lifestyle/gardening/g36556911/diy-planters/
- https://www.bobvila.com/slideshow/13-creative-designs-for-easy-diy-planters-44352
- https://www.papernstitchblog.com/unique-diy-planters/
Read More Like This
 15 Funny Graduation Cap Ideas to Make Your Big Day Unforgettable
 15 Unique DIY Christmas Decorations Ideas for a Festive Home
 15 Creative Science Fair Board Ideas to Amaze Your Audience
 15 Handmade Envelope Decoration Ideas for Creative Gifting
 10 DIY Gifts for the Whiskey Lover in Your Life
Recap: