Last updated on
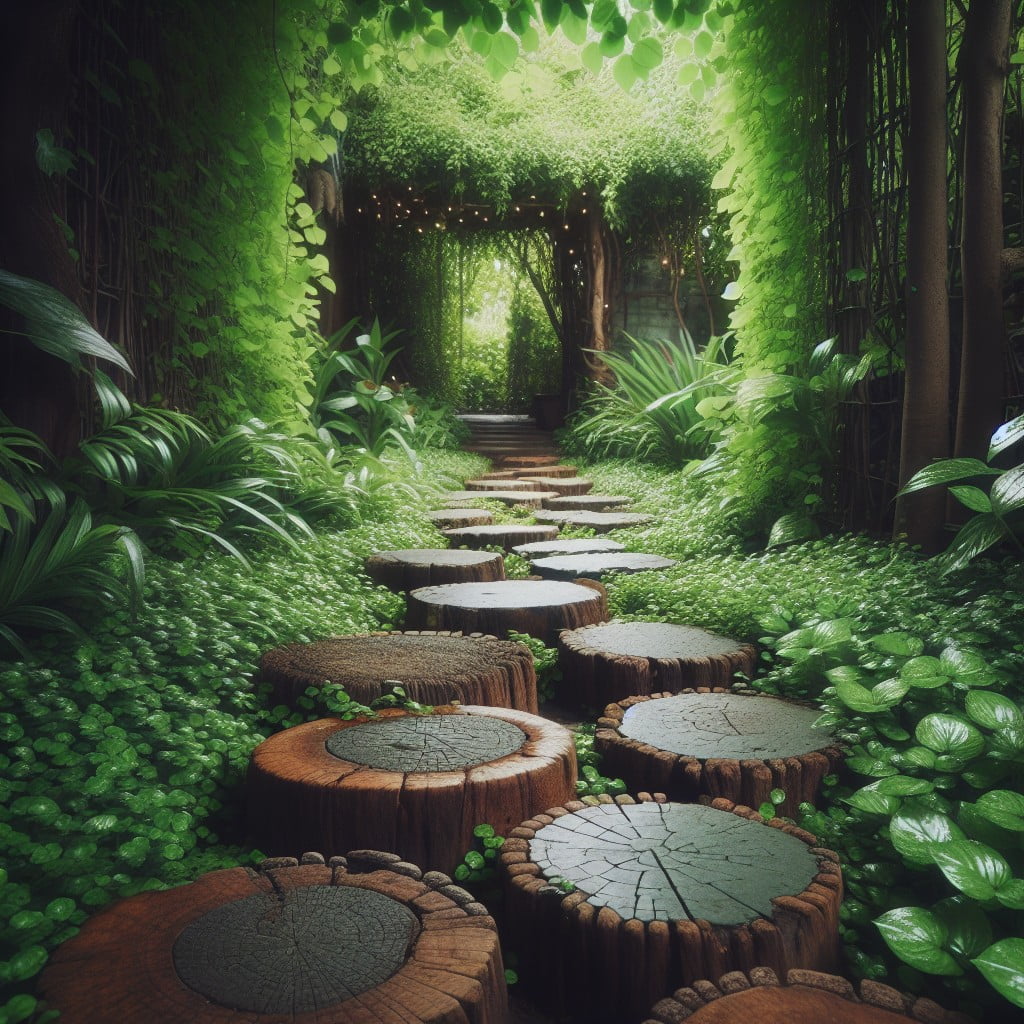
Transforming tree stumps into creative stepping stones is a must-try because it adds an earthy and whimsical touch to your home garden.
I’ve designed unique illustrations for these ideas. I hope you get inspired!
Creativity flourishes when we look at ordinary things from an extraordinary perspective. Tree stumps, often seen as mere hindrances or waste, can instead become quintessential elements of your home decor.
They can be transformed into stunning stepping stones, adding a harmonious fusion of nature and style to your yard or garden.
This article is a treasure trove of unique ideas to repurpose those sturdy old tree stumps into stepping stones.
While there’s a plethora of ideas floating around, this list is specially curated to offer a fresh, unique spin.
To ensure a comprehensive exploration, resources for some of the best existing designs will also be folded in at the end.
So, strap in for this exciting journey and prepare to stumble upon invigorating possibilities for your tree stump stepping stones.
Let’s redefine decor, one stump at a time.
Luminous Tree Stump Stepping Stones
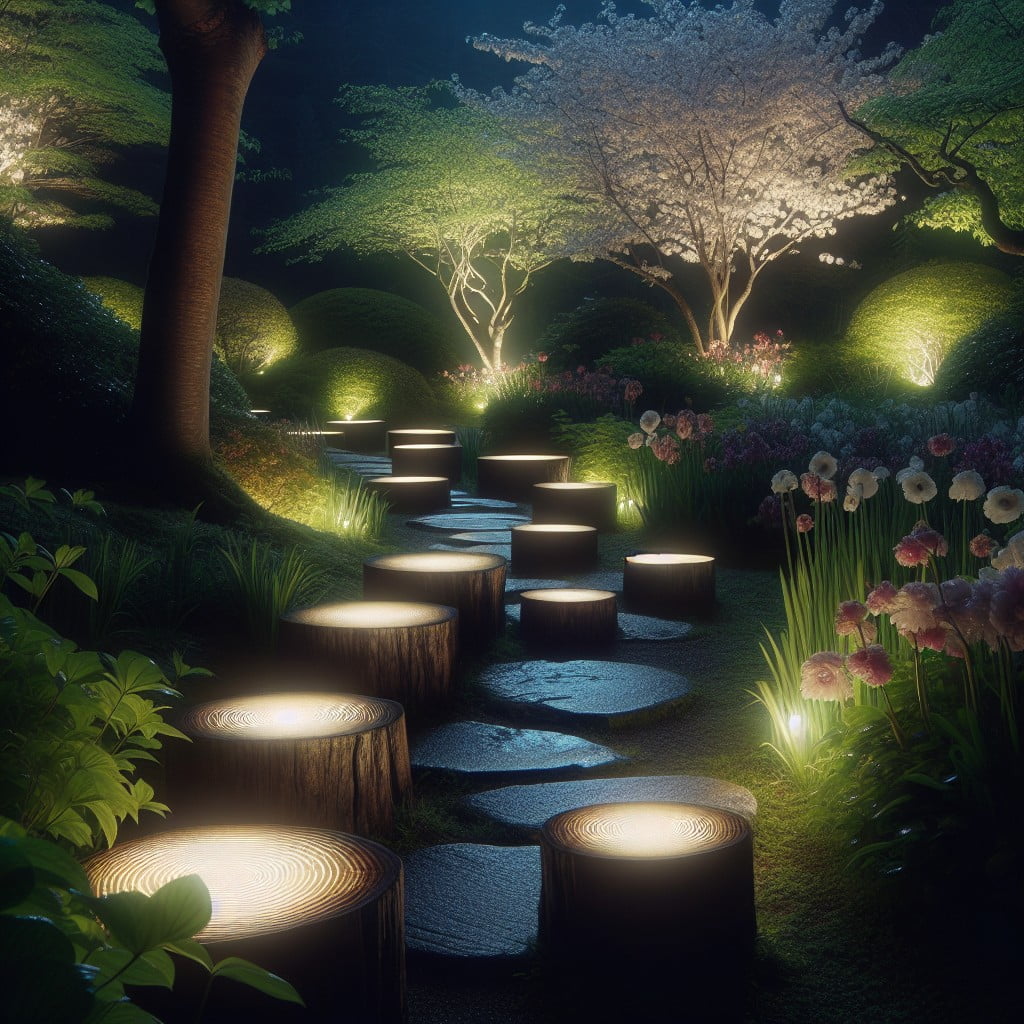
Making the pathway to your garden intriguing once the sun sets can be achieved with luminous stepping stones. Acquiring this captivating look involves incorporating glow-in-the-dark paint into your tree stump crafting process.
Follow these three easy steps:
- Clean: Ensure the surface is free from dirt or moss for the best result. A brush can be quite handy at this stage.
- Paint: Apply a coat of glow-in-the-dark paint. Keep in mind, the more coats you apply, the brighter the glow will be.
- Seal: To ensure long-lasting luminescence, consider applying a sealant. This limits chances of the paint wearing off due to weather conditions.
With this simple addition, you’ll not only have visually stunning stepping stones but also a lit path guiding you during your late evening garden walks.
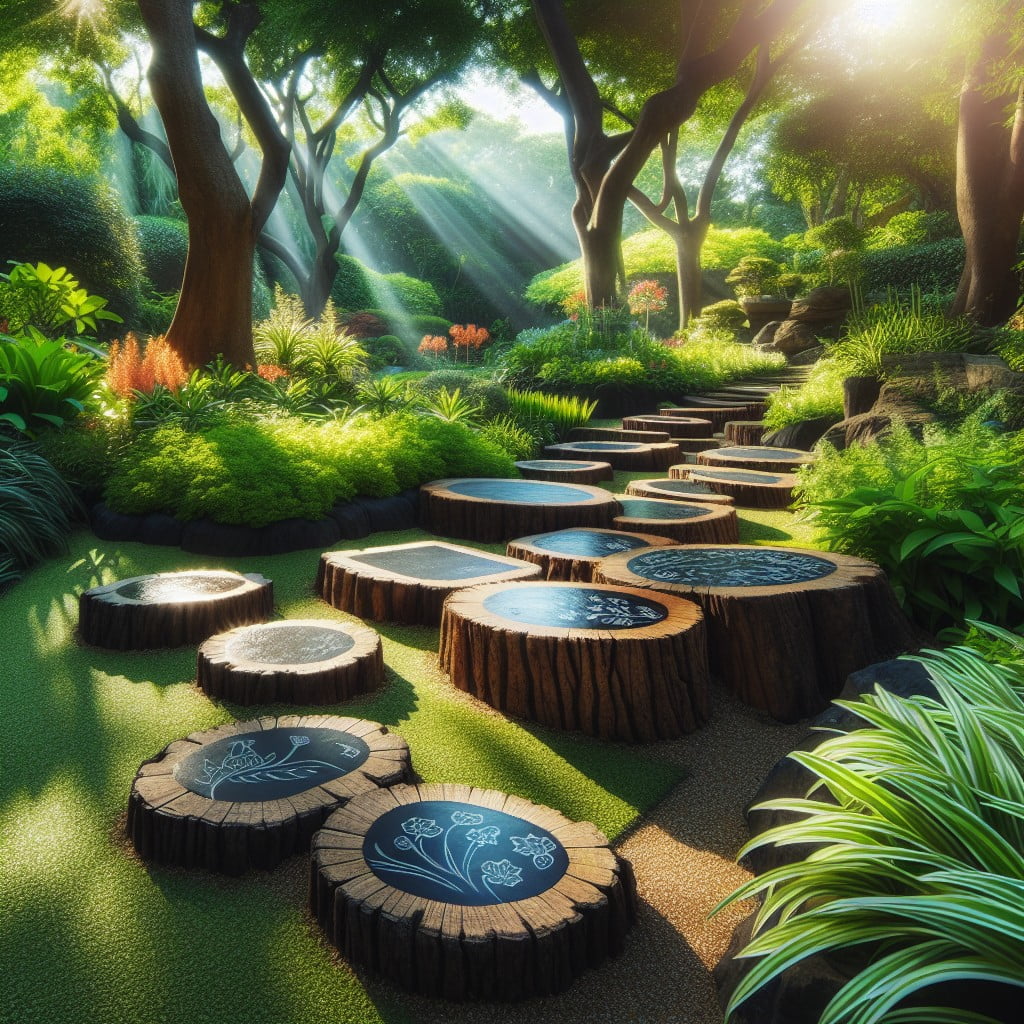
Creating a Mosaic On Tree Stump Stepping Stones
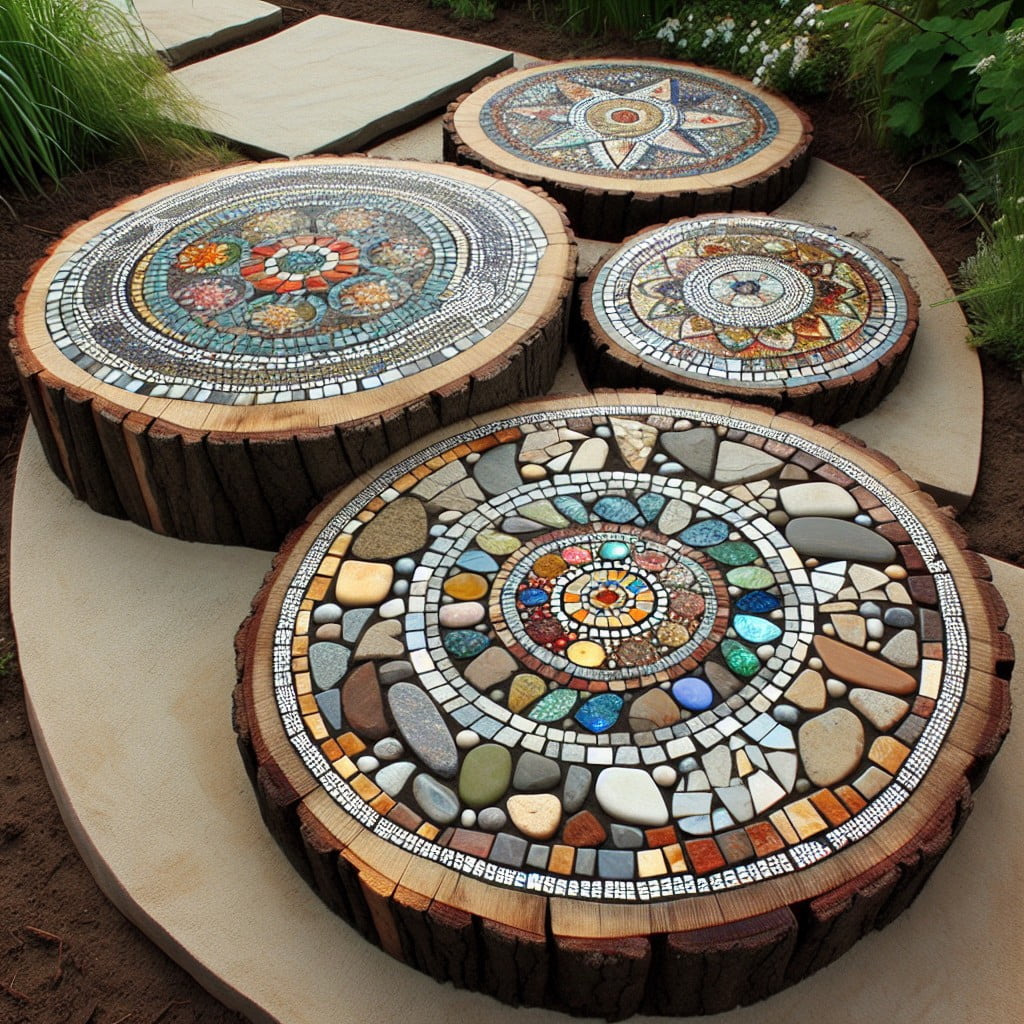
Creating an eye-catching mosaic is an excellent way to elevate the look of your tree stump stepping stones. Even without a background in art or crafting, this process is simplistic and enjoyable. Here are some points to consider:
1. Gather Materials: You will need mosaic tiles of your choice. Look for broken pieces of ceramic, speciality mosaic tiles, or even sea glass. Also, you will need a strong adhesive and grout.
2. Design Layout: Sketch your design on the face of the stump before you begin adhering the tiles. Whether you opt for a geometric pattern or a floral motif, planning ahead will ensure a satisfying outcome.
3. Apply Adhesive: Apply a strong, outdoor-friendly adhesive to the back of each tile. As you place the tiles on the stump, press firmly to secure.
4. Grout Application: Fill the gaps between the tiles with grout. Remove the excess using a spatula and let it set as per the instructions on the grout pack.
5. Seal and Protect: Apply a sealing agent to the mosaic stepping stone. This last step helps to ensure long-lasting protection from weather elements.
Creating a mosaic on your tree stump stepping stones is a great way to add a personal touch to your garden, all while repurposing leftover materials you may have around the house. The process not only beautifies your paths but also makes for a rewarding and creative pastime.
Resin-Coated Tree Stump Stepping Stones

To undertake this project, you’ll need an epoxy resin kit, available at most craft stores or online. Follow the instructions carefully, mixing the resin and hardener in the exact ratio specified. Pour the mixture onto the surface of the stump stepping stone, ensuring it covers the entire surface.
This method does more than just enhancing the stone’s appearance. A resin-coated tree stump stepping stone is protected from weather elements, increasing its longevity. The resin brings out the natural beauty of the wood grain, highlighting its unique patterns. Plus, the smooth, shiny top layer provided by the resin can make your pathway safer, preventing slips or falls.
Express your creativity by embedding decorative elements into the resin before it dries. These can include anything from colorful stones, pebbles, or even personal memorabilia like small toys or coins. Just make sure these items are waterproof and won’t deteriorate under the resin.
Remember to allow ample drying time. Epoxy resin requires 72 hours to fully cure. Plan your project around good weather days, as rain or excess humidity can interfere with the curing process. Once dry, your resin-coated stump stepping stones are ready to enhance your garden pathway.
Colorful Painted Tree Stump Stepping Stones

Livening up your landscape with vibrant colors brings a dynamic and cheerful energy to any outdoor space. Start by choosing non-toxic, weather-resistant paint, ensuring both environmental friendliness and durability.
To design your masterpiece, use templates or free-hand drawings for more organic shapes. Consider varying the paint finishes between glossy, matte, or semi-gloss for an added touch of interest.
Remember, the color palette can either complement your garden’s existing colors or bring in new contrasts. Cool blues and greens can mimic natural surroundings, while brighter hues like reds, yellows or pinks can create a lively pop.
For an added layer of longevity and protection, add a layer of sealant over the painted surface. Also, make sure to prepare the stump properly before painting – washing and sanding can create a clean, smooth canvas for your tree stump stepping stone.
Incorporating playful patterns and designs on your tree stump stepping stones will not only enhance their beauty but also stimulate visual interest and evoke a sense of creativity in your garden.
Tree Stump Stepping Stones With Bird Bath Features
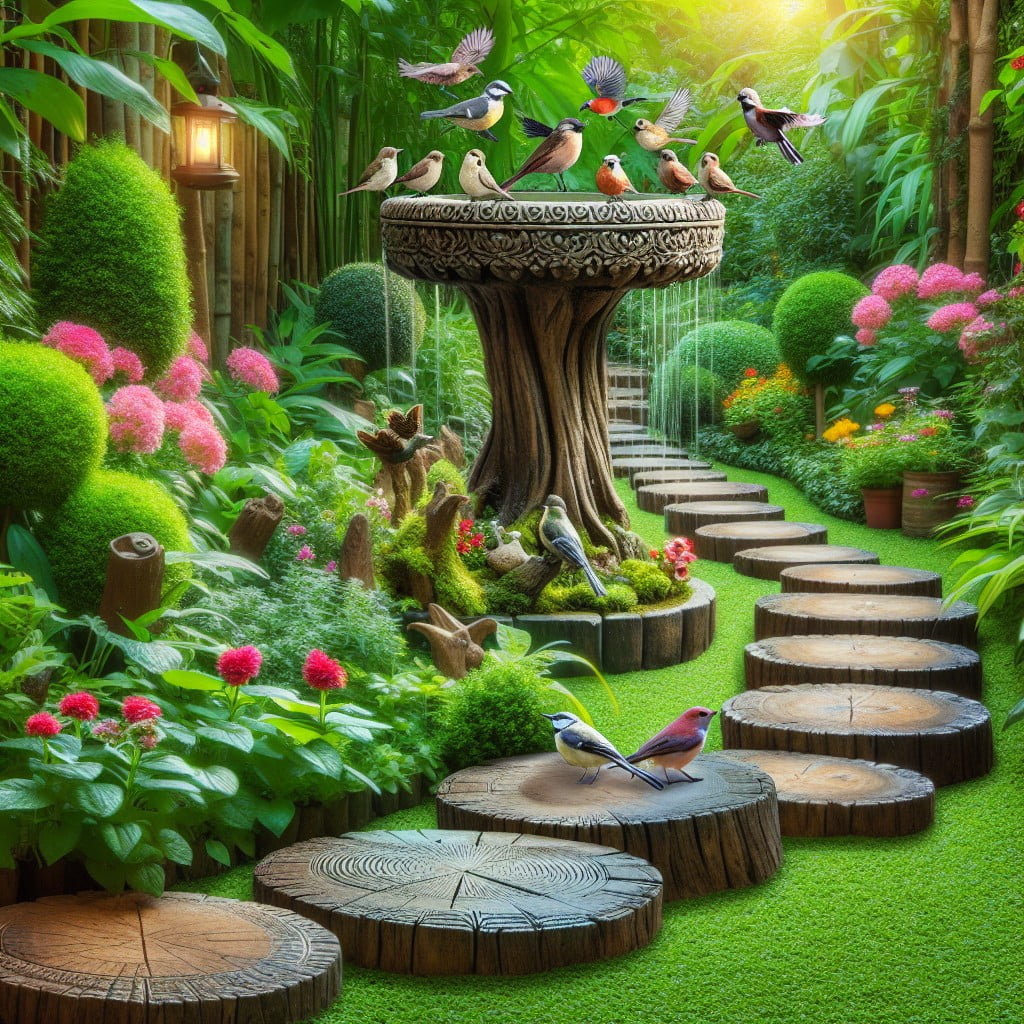
Incorporating bird bath features into your tree stump stepping stones serves a dual function: navigational path and sanctuary for feathered friends.
These eco-friendly additions can transform an ordinary backyard into a lively paradise.
Get started by hollowing out a small portion of the tree stump and sealing it to create a water-tight basin.
Finish this charming feature with a clear varnish to highlight the wood’s natural beauty or paint a captivating design.
Be mindful that the bird bath should be shallow – between 1 to 2 inches deep – to accommodate different bird species.
Regular cleaning of the water basin is essential to maintain its aesthetic and hygiene.
With your bird bath stepping stones in place, you’ll not only have a whimsical pathway, but also the joy of watching birds frolicking in your personalized outdoor space.
Glow-In-The-Dark Tree Stump Stepping Stones

Injecting a magical touch into your exterior spaces has never been easier! With this simple embellishment, your nighttime garden will come to life. Firstly, you’ll simply need a phosphorescent paint, and a paintbrush, of course.
1. Select the stumps: Choose the ones that are best placed in your yard. Visibility is key for a mesmerizing effect.
2. Proper Preparation: Ensure the surface area is clean and dry before applying any product.
3. Apply the Paint: With your phosphorescent paint, begin to trace the grain of the wood. This will help to maintain a naturalistic aesthetic despite the nighttime glow.
4. Adequate drying time: This step is often overlooked, but it is crucial to achieve the desired effect. Follow the manufacturer’s guidance regarding drying times.
Wait for the sun to set, your garden will transform into a mystical space of whimsy and wonder. Ideal for those summer evening soirees or for adding a playful touch to a child’s garden!
Marine-themed Tree Stump Stepping Stones
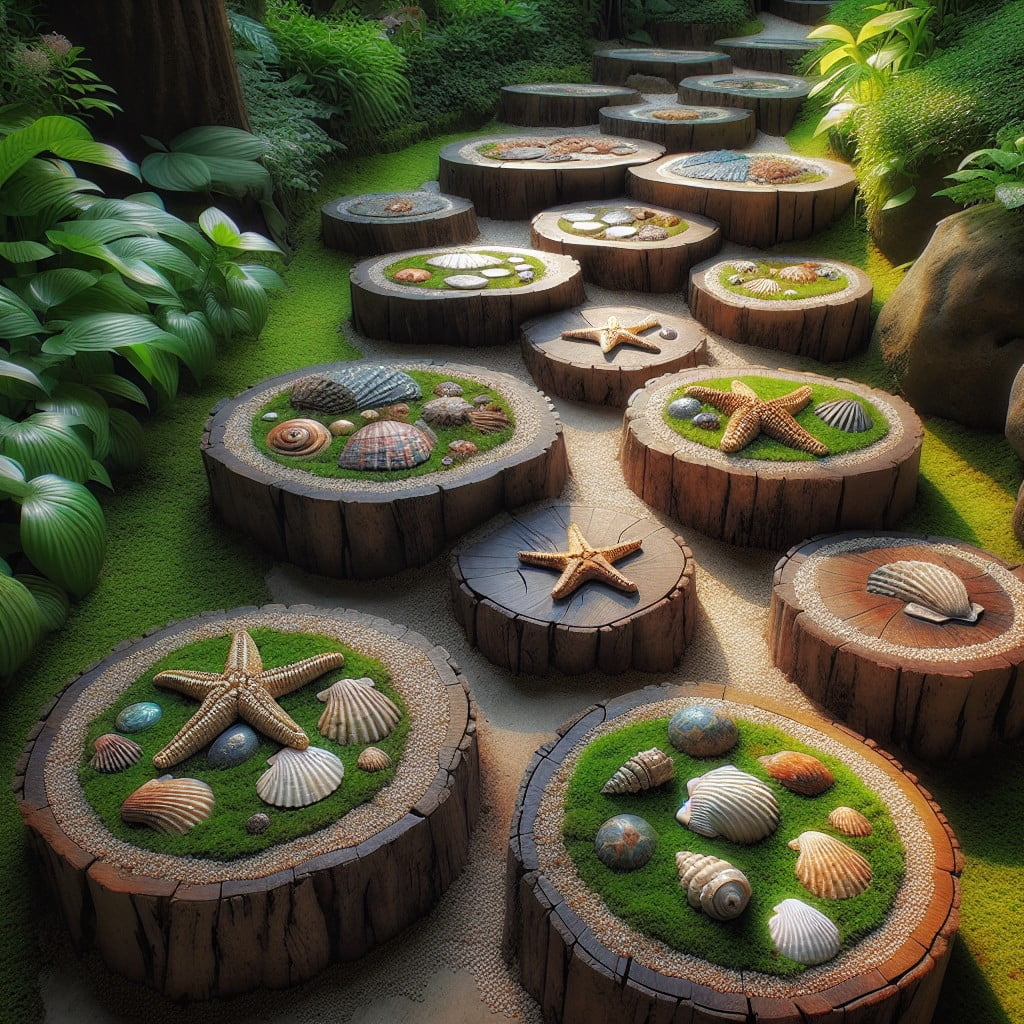
Embracing a nautical theme for your tree stump stepping stones can add a unique touch to your outdoor space. Here’s how you can incorporate a marine theme:
- Paint or Stencil: Use colors simulating the sea, like various shades of blue and green. Employ stencils to paint marine life such as seahorses, starfish, or shells.
- Incorporate Seashells: Collect different sizes of seashells to embed into the top of each stump. This also adds a tactile element to your stepping stones.
- Use Glass or Tiles: Blue or sea-green glass pieces or tiles mimic the hues of the ocean, making unique and eye-catching stepping stones.
- Rope Borders: A rope border around the edge of the stump can provide a nautical feel and even add extra grip.
Remember, a clear sealant will help preserve the designs and provide longevity to your marine-themed stepping stones.
Tree Stump Stepping Stones With Inlaid Seashells
Harnessing the natural beauty of sea elements, inlaid seashell design adds an unexpected nautical flair to your garden pathways. This approach combines the rustic appeal of tree stumps with the serene allure of the sea, creating a unique harmony between land and ocean.
To achieve this design, one might adopt the following steps:
- 1. Gather a selection of seashells, preferably with different sizes, shapes and colors to create a lively, diverse pattern.
- 2. Using a clear, waterproof adhesive, attach the seashells into the stump’s surface. Consider a spiral pattern, star shape or random design, depending on the desired visual.
- 3. Once the adhesive is dry, seal the shells and stump with a layer of clear, weatherproof sealant. This step not only protects the seashells from harsh weather but also adds a polished shine.
- 4. Install the stepping stones in your chosen area, ensuring they are stable and safe to step on.
Incorporating seashells into tree stump stepping stones not only highlights a creative reuse of materials but also ignites sea-tinged memories every time you stroll through your garden.
Zen Garden Tree Stump Stepping Stones

Paying homage to the tranquil aesthetics of Japanese Zen gardens, these stepping stones offer a harmonious balance to your yard. Begin by clean cutting your tree stumps, smoothly in order to emphasize the minimalism that Zen gardens are known for.
Next, you’ll want to line them up in a way that carefully navigates through your garden. Remember, the path should promote mindful walking, with each step taken deliberately and with respect towards your environment.
Consider placing sand or fine gravel around the stumps, which can be raked into serene patterns reminiscent of traditional Zen gardens. The contrasts between the solid wood of the stumps and the mutable sand helps brighten your path.
In addition, you could install minimalistic sculptures or bonsai trees nearby which can further enhance the Zen atmosphere. A balance of shapes – the organic circles of the stumps, the square or rectangular shape of sand and the intricate shapes of the sculptures can create an atmosphere of peace and tranquility.
Strategic use of plants should not be forgotten. Zen gardens lack flamboyant blooms, instead, they favor modestly hued, texturally varied plants which bring about a sense of calm. Ferns, moss, and peaceful pine trees will make a harmonious addition.
Keep in mind that each element added should have a purpose and should be placed thoughtfully to project serenity and simplicity, the essence of a true Zen garden.
Carved Initial Tree Stump Stepping Stones
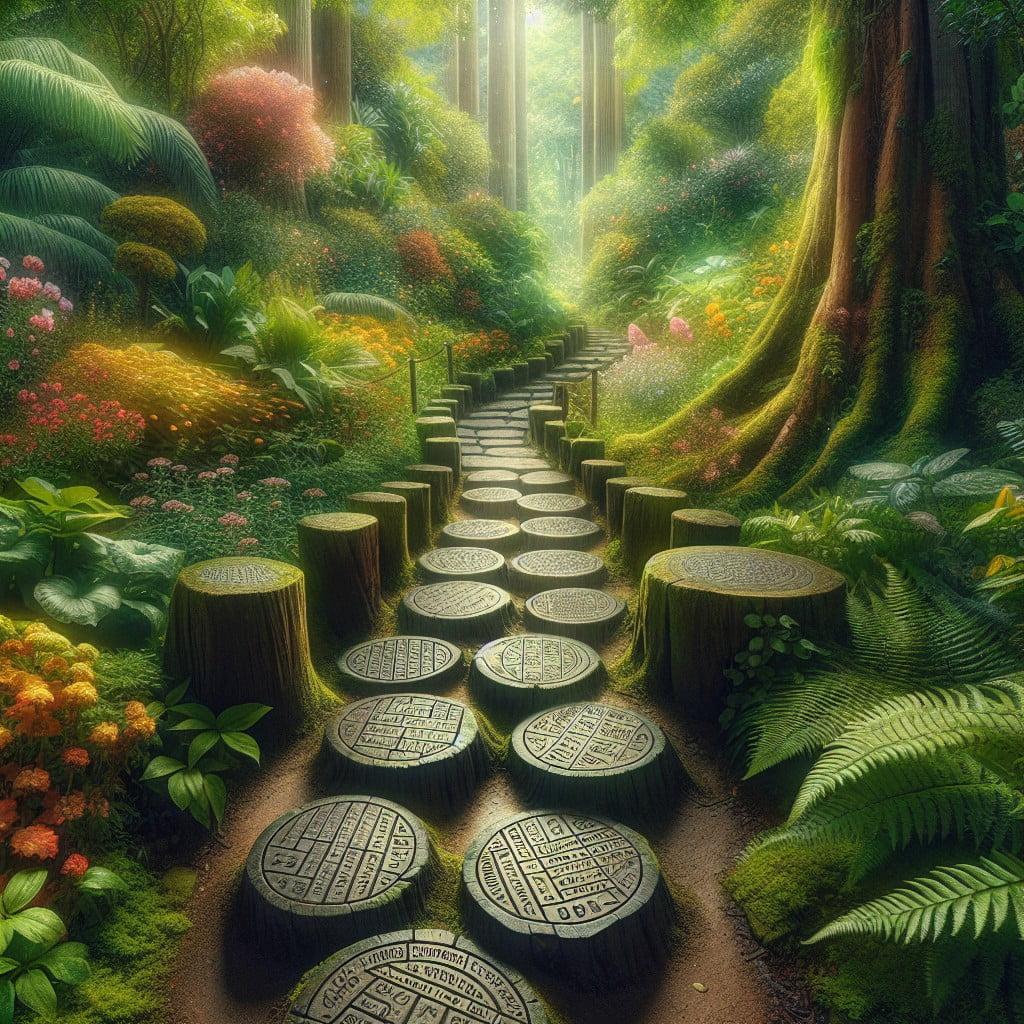
Carving initials into your stepping stones offers a touch of personality. This design is great for families or couples, serving as a constant reminder of your bond.
Here are a few points to consider:
- 1. Choose a stump: Select a stump with a surface large enough for your design. Ensure it’s flat and smooth for easier carving.
- 2. Picking the style of Letters: Typically, block letters are easiest for beginners. More experienced carvers may opt for cursive or elaborate designs.
- 3. Tools: A simple chisel and mallet will suffice for this project, but power tools like a Dremel can expedite the process.
- 4. Sealing: Once your initials have been carved, it’s imperative to seal the wood. This prevents weather-related damage and keeps the design sharp and visible.
- 5. Position: Place these stepping stones strategically around your garden. From the entrance pathway to around the patio, they will capture attention and incite comments from visitors.
Remember, the goal is for these stepping stones to be functional and stable. Carving should not compromise their integrity. With a little patience, you can turn a simple tree stump into a personalized stepping stone.
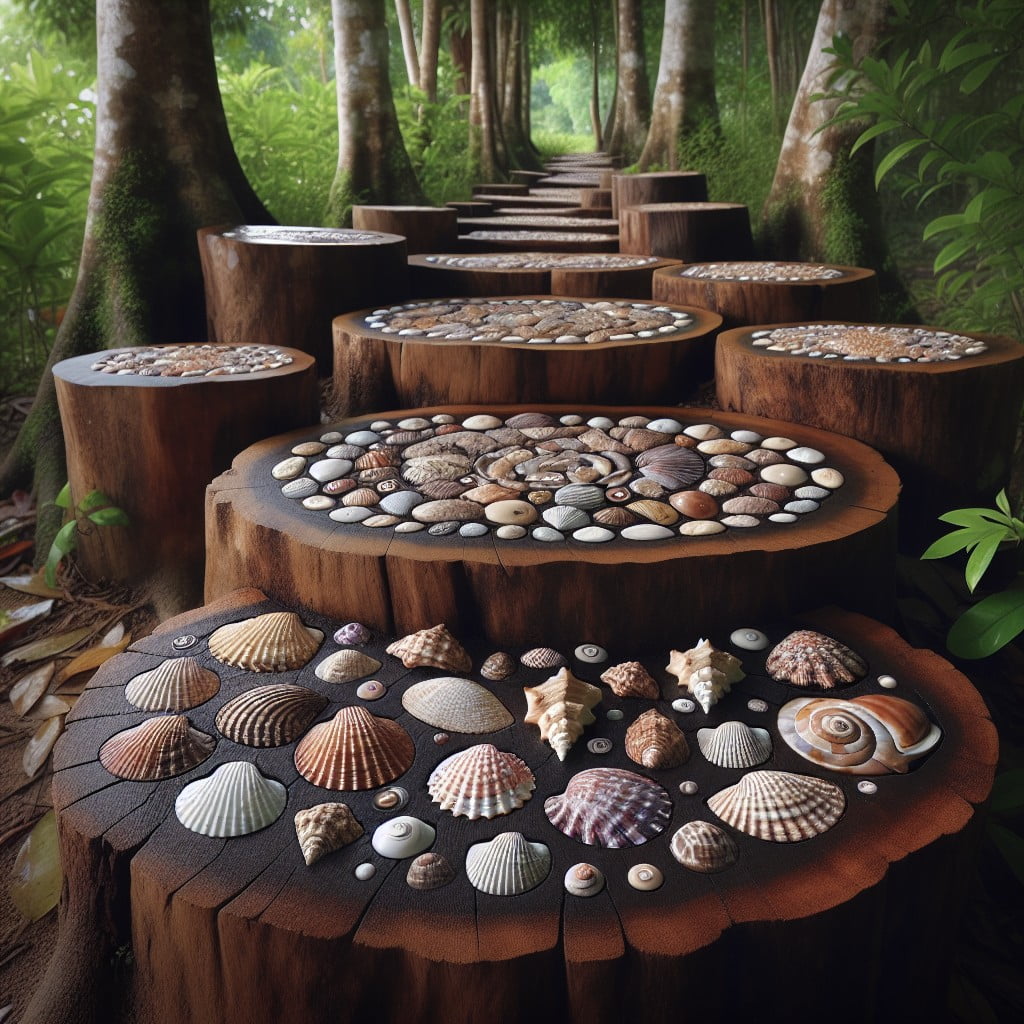
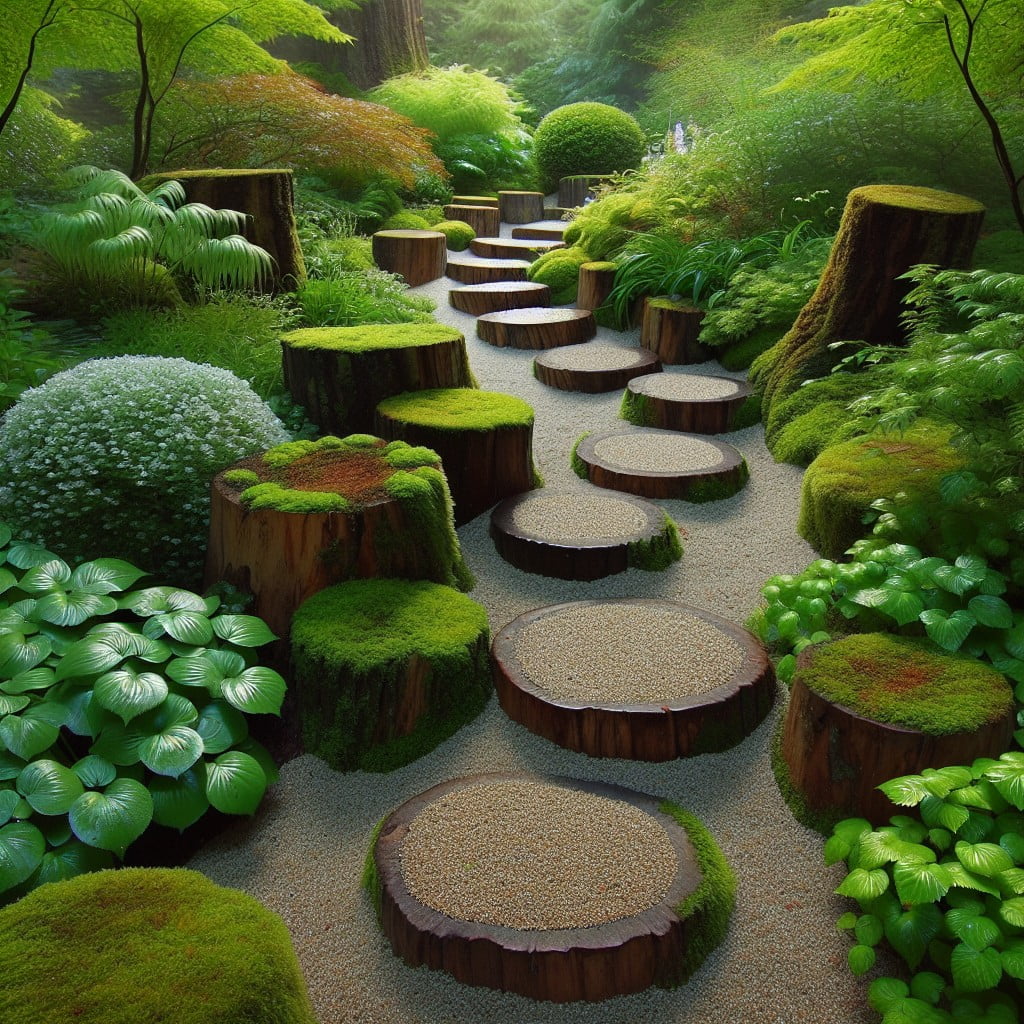
Tree Stump Stepping Stones With Pebble Surrounding
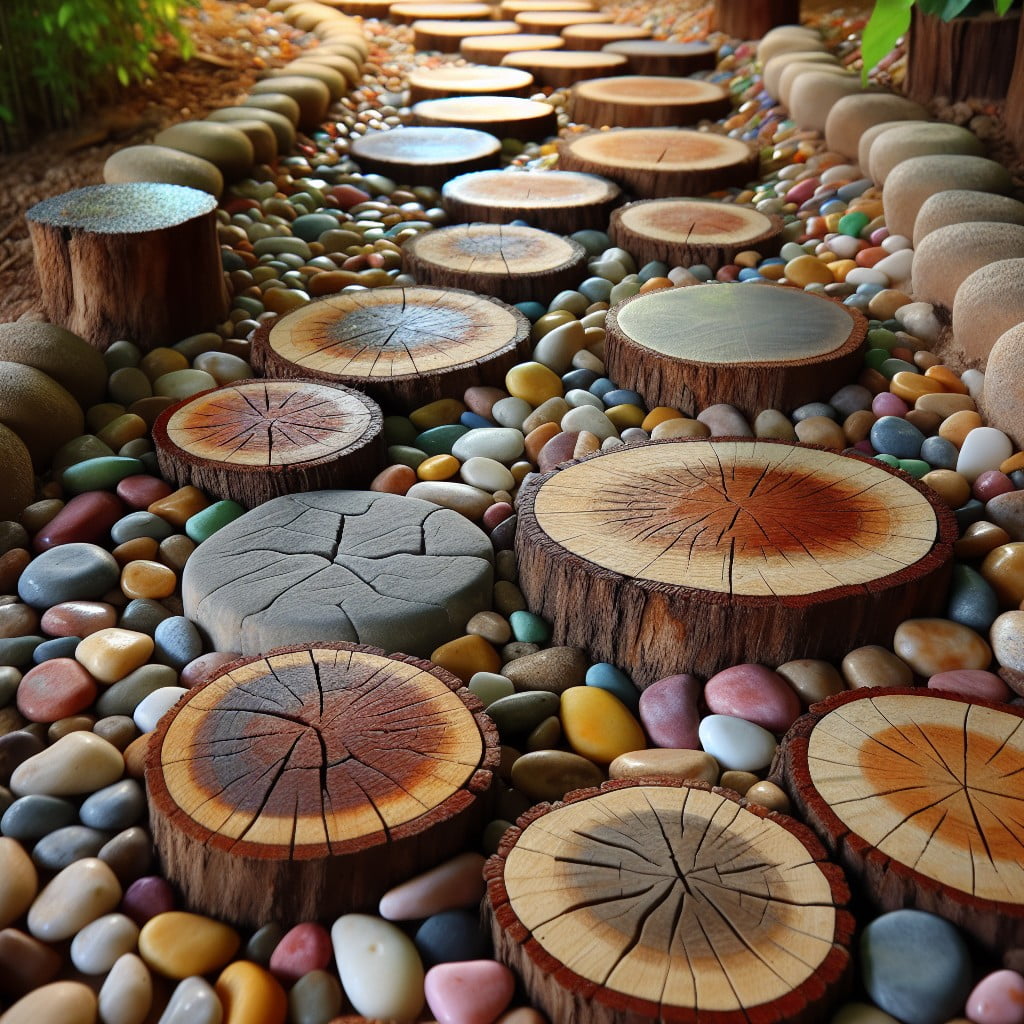
Surrounding your stepping stones with pebbles can enhance the overall appearance significantly, creating a quaint, charming pathway. This design blends well with various garden layouts, adding an extra touch of aesthetics.
1. Choose the Right Pebbles: Matching the pebble colors to your garden’s scheme creates a cohesive outlook. Opt for smooth textured stones which are comfortable to walk on.
2. Prepare the Area: Ensure the area around each stump is level and free from debris.
3. Install a Weed Barrier: A weed barrier under the pebbles prevents unwanted vegetation growth.
4. Place the Pebbles: Begin by pouring the pebbles around the stump with a layer about two inches thick. Complement the natural color of the tree stump rather than overwhelming it.
5. Maintenance: Regular raking of the pebble area helps prevent leaves and dirt from spoiling the pristine look.
This style introduces an element of rustic charm and is a great way to camouflage aging tree stumps or celebrate the beauty of gnarled, old tree stumps. It presents an artful arrangement that’s both functional and visually appealing, creating an engaging focal point in your green space.
Solar Light Embedded Tree Stump Stepping Stones
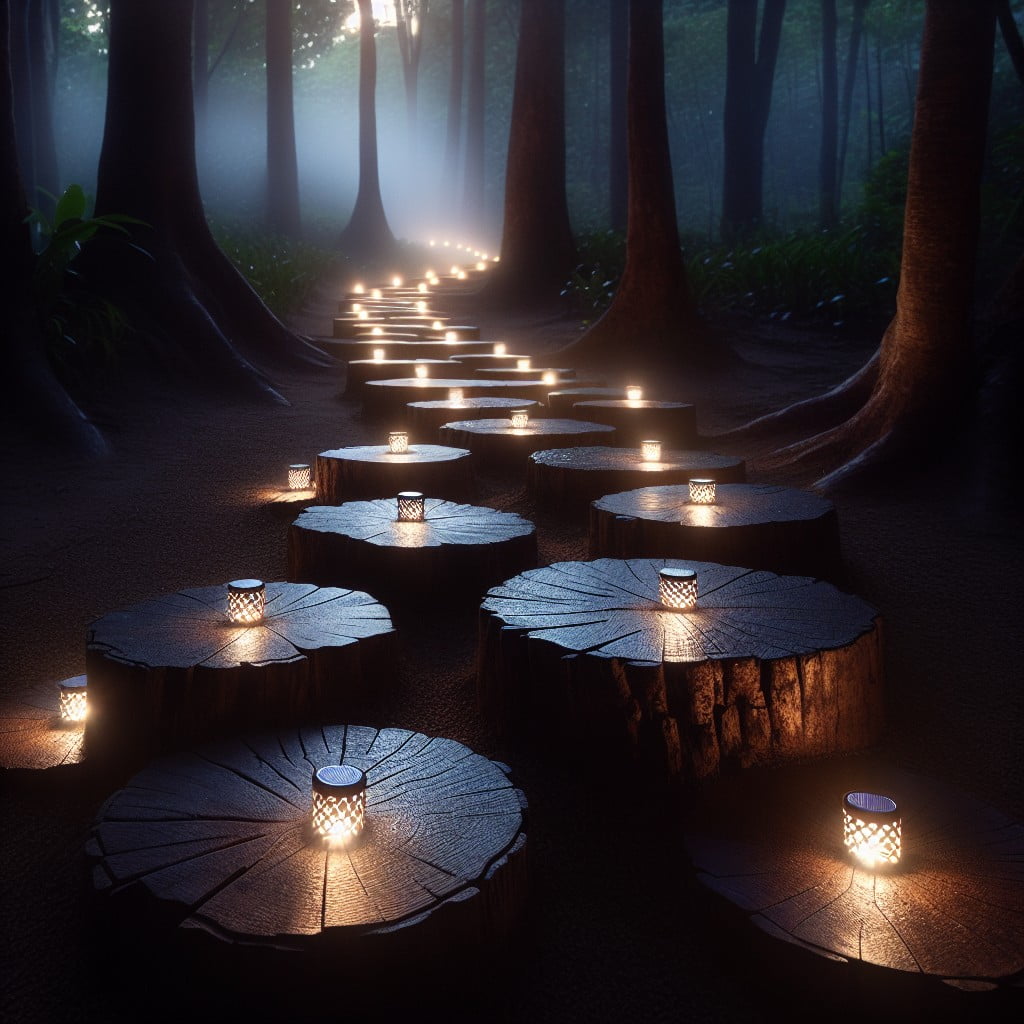
Embedding solar lights into your tree stump stepping stones adds a practical and aesthetically pleasing touch to your garden. This feature ensures safe navigation after sunset, adding to the ambience with a gentle, inviting glow. The concept revolves around incorporating light fixtures directly into the stump, which charge during the day and emanate light in the darker hours.
Here are some key points about creating this feature:
- Select solar lights: Choose compact, durable, waterproof outdoor solar lights for this project.
- Carve the Stump: Make a hole in the stump that accurately fits the solar light. It should sit flush against the surface.
- Install the Solar Light: Securely place the solar light into the hole. Use waterproof sealant to ensure it doesn’t dislodge over time or during bad weather.
- Position Correctly: Make sure your stepping stones are positioned to receive plenty of sun during the day to charge the solar lights effectively.
- Maintenance: Clean the solar panels regularly to remove dirt or leaves to capture sunlight optimally.
With these steps, your garden path will not only be unique but also illuminated while being environmentally friendly and energy-efficient.
Moss-Covered Tree Stump Stepping Stones
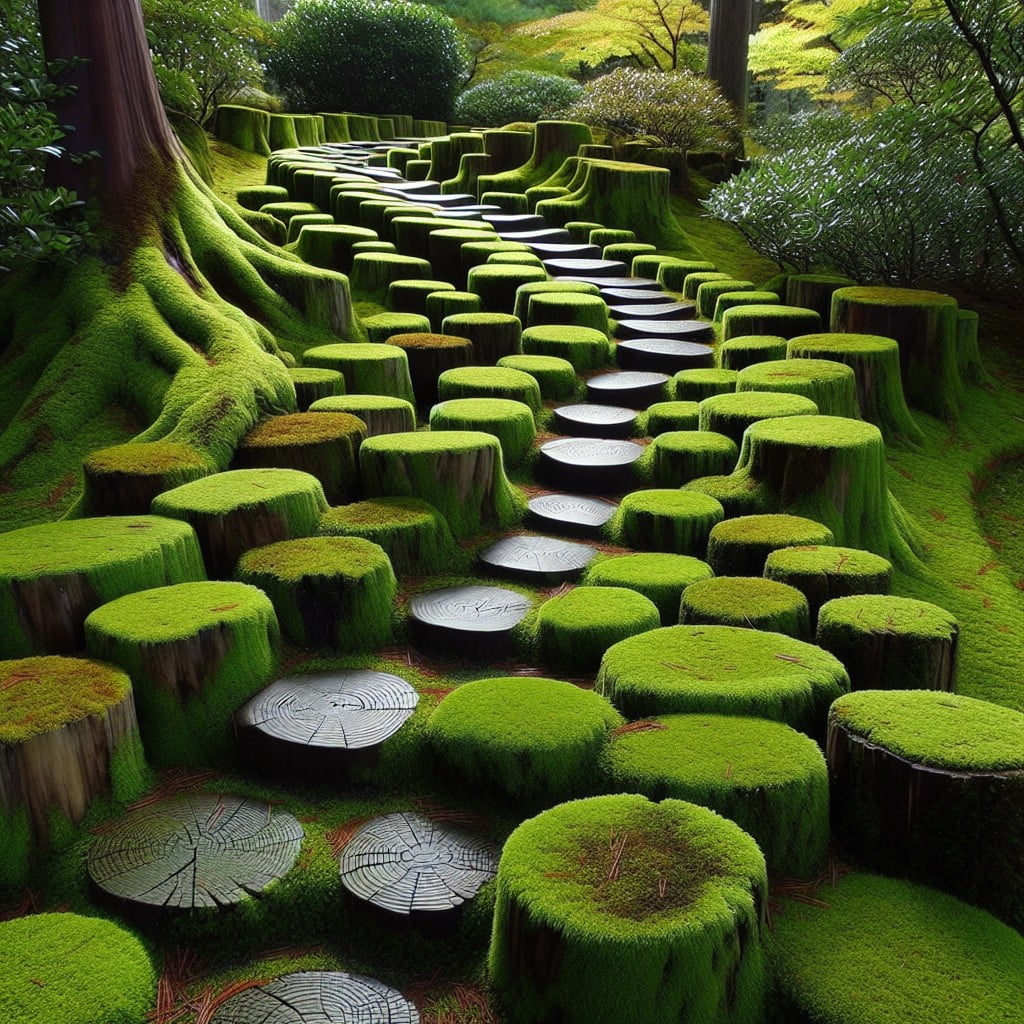
To achieve an environmental and fairytale-inspired look, opt for moss-covered stepping stones. They integrate seamlessly into lush gardens providing a naturally aged and earthen appearance.
Here’s how to implement it:
- Choose stumps: Select tree stumps of a suitable size. They should be steady and flat enough for safe stepping.
- Prepare moss: Purchase moss from a nursery, or use moss located naturally in your yard. Make sure it’s healthy and vibrant.
- Apply moss: Fasten the moss onto the stump surface using organic glue. Some opt for a buttermilk-moss mixture, which can stick to the stump surface while also nourishing the moss.
- Care for moss: The key to lush moss is consistent watering, especially in the initial weeks. Always keep the moss moist but not saturated.
- Placement: Position the moss-covered stepping stones in partial to full shade, as moss grows best in these conditions.
Eventually, the moss naturally grows over the stump surface, creating an enchanting stepping stone that feels like stepping directly onto nature’s carpet. Keep in mind, moss-covered stepping stones are ideal for low-traffic areas, as excessive stepping can damage the moss bed.
Kids’ Artwork Tree Stump Stepping Stones
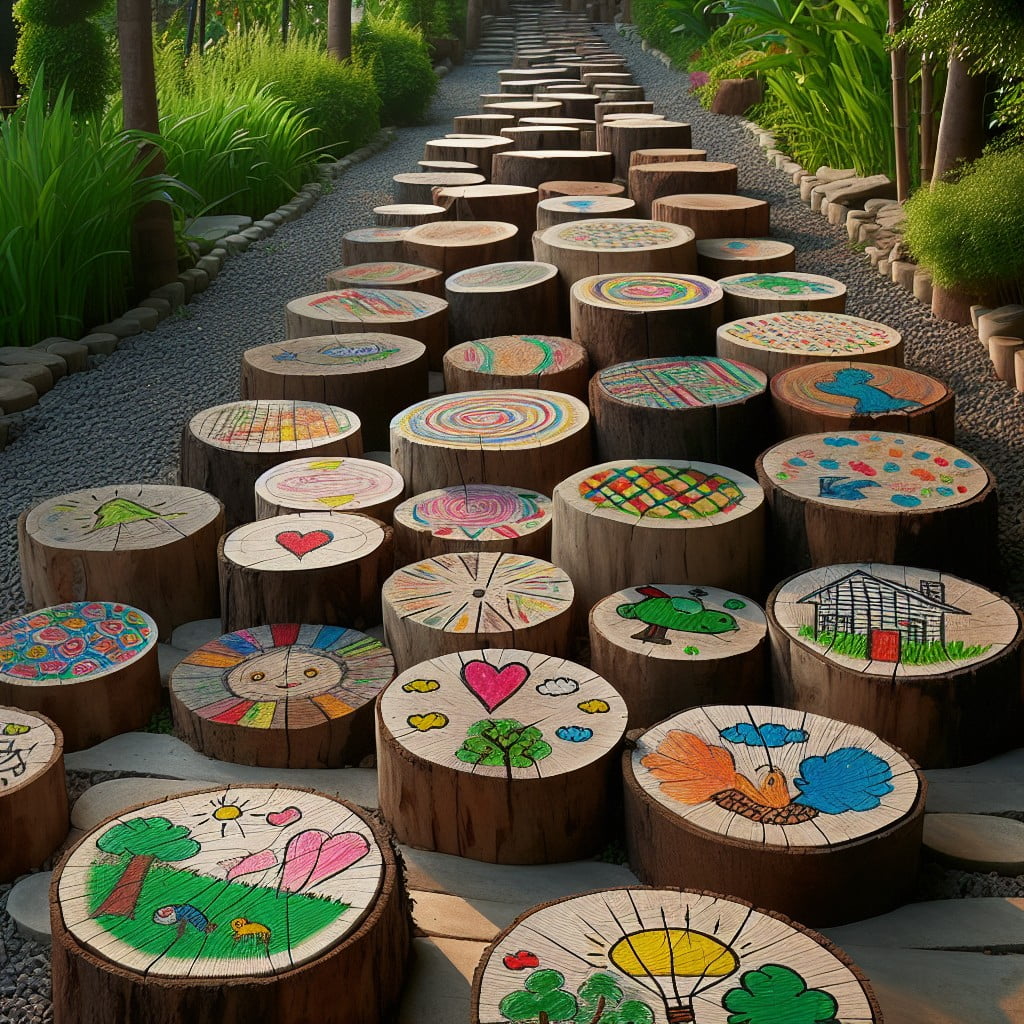
Encouraging the little ones to participate in the stepping stone creation not only sparks creativity but also instills ownership of the home garden. Here are some ways to incorporate children’s artwork into stepping stones:
- Make use of safe, washable paints or markers for children to doodle directly onto the tree stumps.
- Try embedding artwork made on waterproof material into the stump and seal with a clear, weather-resistant varnish.
- Consider carving your child’s design into the stump for a long-lasting effect.
- You could even create a ’tile effect’ using children’s small painted tiles, placed and glued tightly side by side on the stump surface.
Remeber to always supervise children during this activity to ensure their safety and the success of the project. Tools used for this project should be age appropriate. The artwork added helps bring warmth, personality, and a playful spirit into your outdoor space.
Sand-Filled Tree Stump Stepping Stones
Infusing a bit of beach atmosphere into your garden can be easily achieved through this approach. Begin by hollowing out the center of your tree stump. This creates the perfect nook to be filled with sand.
1. Choosing the Right Sand: Soft, silken beach sand is ideal for this project, bringing authenticity and a dynamic visual texture.
2. Filling the Stump: Pour your selected sand into the hollowed-out area, creating a compact layer for stability, yet leaving it malleable for additional decorative elements.
3. Decoration: Consider adding beach treasures such as seashells, pebbles, or small pieces of driftwood, creating a mini beachscape on the stump.
4. Maintenance: To prevent the sand from washing away, apply a protective coating or rim around the outside of the stump. This way, the sand-filled stepping stone will last longer, even in inclement weather.
5. Additional Touches: Dress up surrounding areas with coastal plants or grasses to reinforce the beach theme throughout the garden.
By combining elements of nature, this sand-filled tree stump stepping stone becomes not just a path, but a unique piece of outdoor decor.
Vintage Tree Stump Stepping Stones
Keeping the rustic charm intact, this idea is perfect for those who appreciate antiques and old-world allure. Here’s what you need to know to create your own:
1. Choose stumps with aged or weathered looks: The characteristic features from years of weathering add to the vintage aesthetic greatly.
2. Embellish with vintage-inspired elements: Items such as rusty garden tools, old coins, aged doorknobs can be effectively used as adornments.
3. Incorporate Historical Symbols: Historical symbols, such as Celtic knots or petroglyph designs, add a beautiful and classic touch.
4. Use Distressed Paint: A coating of off-white, cream, or pale pastel paint applied unevenly can instantly give your stump a timeworn appeal.
5. Plant Vintage Blooms: Surround the stepping stones with old-fashioned flowers like roses, irises or peonies.
Remember, imperfections on the stump add character and enhance the vintage feel, so don’t stress over making everything look perfect. Let nature and history play their role.
Tree Stump Stepping Stones With Miniature Stories
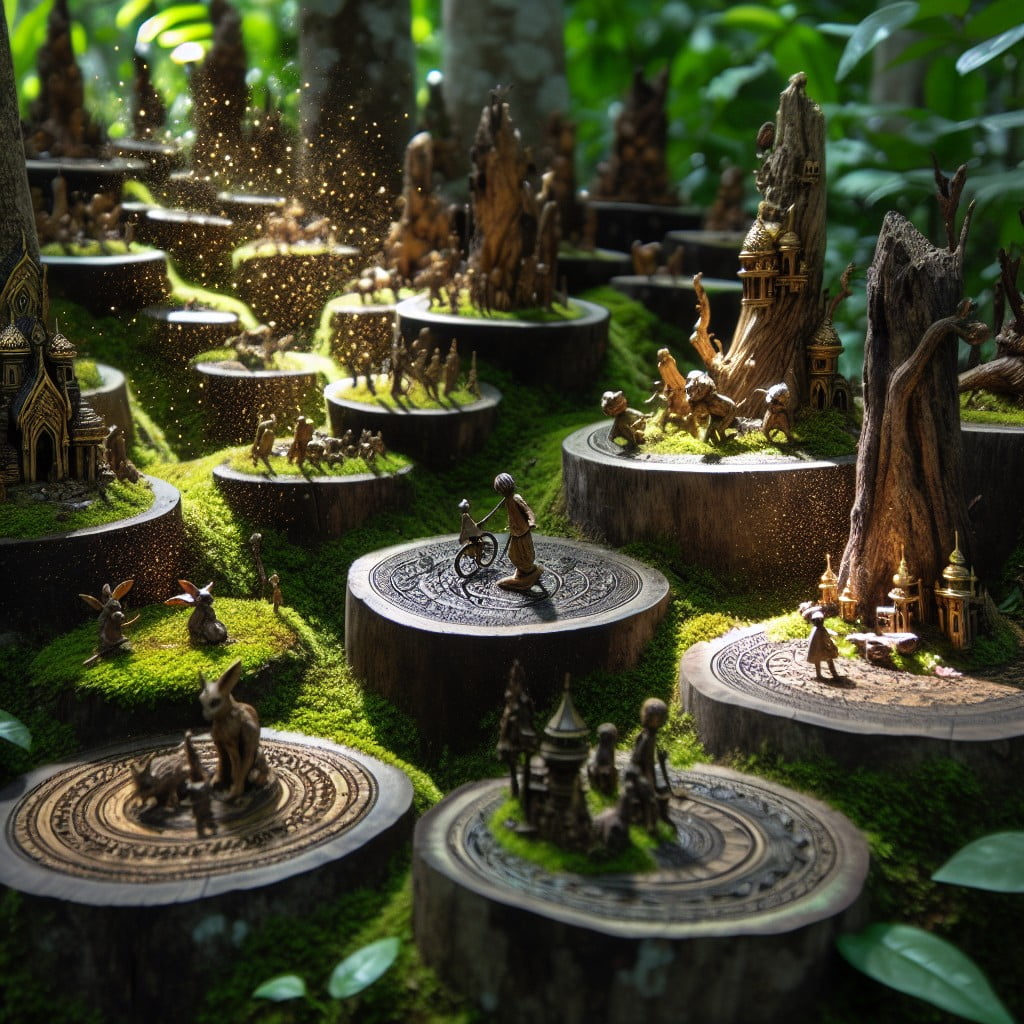
In creating stepping stones with miniature stories, it’s essential to bring a touch of personalization into your outdoor environment. This creative concept is about embedding small decorative items to tell a tale or depict a scene within the tree stump.
Select Items: Choose miniature figures or objects that are resistant to weather conditions. Look for small garden gnomes, fairy figures, or toy animals.
Curate Story: Arrange the chosen items in a sequence that narrates a story. Is it a gnome going fishing, or is a fairy squatting under a mushroom to take shelter from the rain?
Secure Items: Use strong adhesive to secure the items onto the stump, maintaining enough distance between them for a stepping stone pathway.
Seal the Stump: Lastly, be sure to apply a sealant to protect the miniatures and prolong the stepping stone’s durability. This adds a layer of protection to your miniature scene against the elements.
Remember, this project allows you to indulge your creativity and bring whimsy to your garden with your unique miniature story.
Chalkboard Painted Tree Stump Stepping Stones
Outfitting the stumps with chalkboard paint can introduce an interactive, educational, and fun element to your garden path. Children can engage with nature while playing tic-tac-toe or scribbling down their own little masterpieces. The adults aren’t left out too; you can jot down to-do lists, jot down your favorite inspirational quotes or simply use them as guides for plant varieties.
Here’s what you need to make this idea come to life:
- High-quality outdoor chalkboard paint
- Paintbrushes or roll-on applicators
- Cleaner and sandpaper for stump preparation
- Chalk for drawing
Start by thoroughly cleaning the stump surface and sand it smooth to ensure the paint adheres properly. Apply the chalkboard paint following the manufacturer’s directions. Once it’s dry, your interactive stepping stones are ready for expressions. Remember to cover them if you’re expecting rain, as chalk can wash away.
With chalkboard painted tree stump stepping stones, there are endless possibilities for creativity and garden path entertainment.
Tree Stump Stepping Stones With Herb Planters
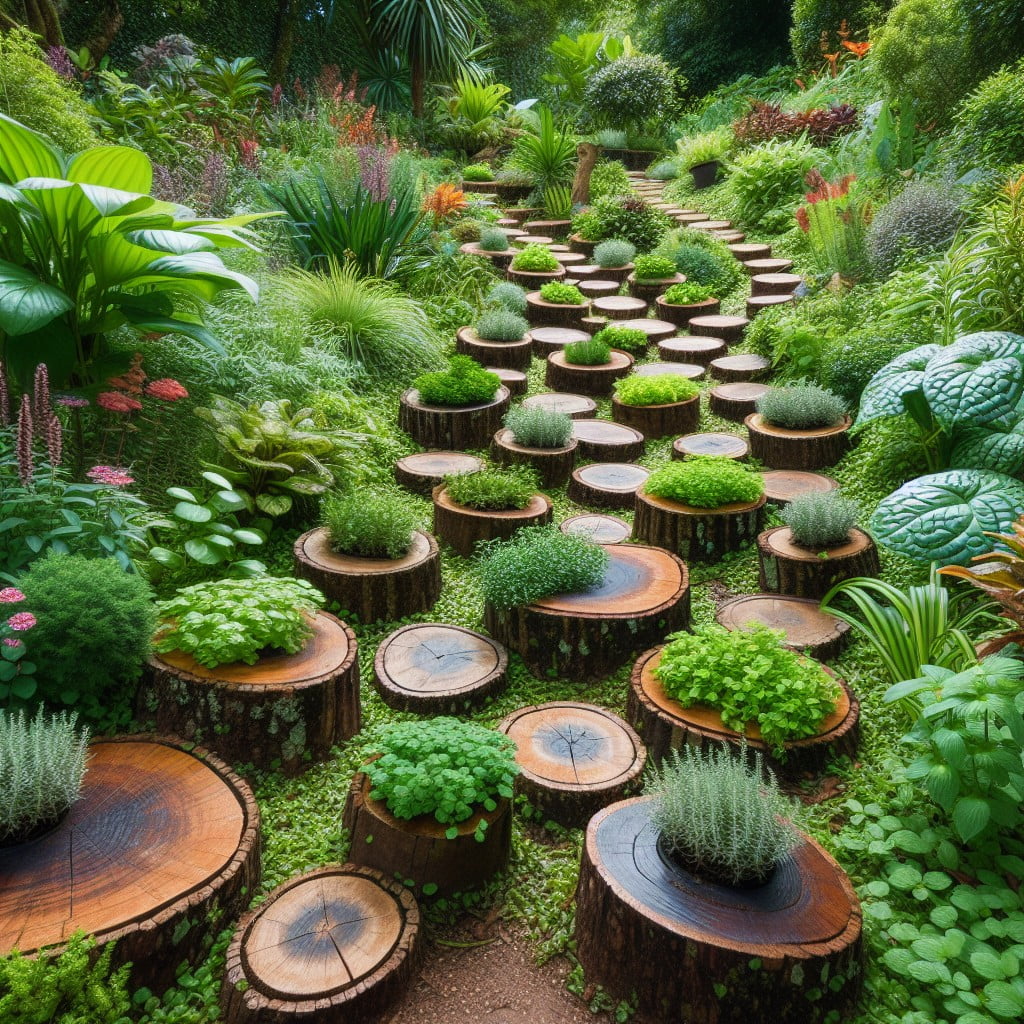
Shaping tree stumps into planters adds a new dimension of functionality and beauty to your garden pathway. Here’s how to make it happen:
1. Hollowing: This process involves carving a deep recess into the stump, which will serve as the planter. Proper drainage is critical, so make sure to drill one or more holes in the bottom of your recess.
2. Plant Selection: Choose herbs that thrive in your local climate and soil conditions. Examples are rosemary, thyme, and sage which are not just delightful; they’re hardy, too, perfect for your stump planters.
3. Planting: Place a small amount of gravel at the bottom for extra drainage and then fill the hollowed stump with potting soil, before planting your chosen herbs.
4. Maintenance: Regular watering and occasional pruning will keep your herb planters healthy and beautiful. Consider location, sunlight, and access for easy picking when cooking.
With their striking visual appeal and practical use, these delightful mini-herb gardens not only enhance the ambience of your outdoor setting but also provide fresh ingredients right at your doorstep. Picking your own herbs during cooking not only feels incredibly satisfying but also enhances the flavors in your dishes.
Tree Stump Stepping Stones With Pet Prints
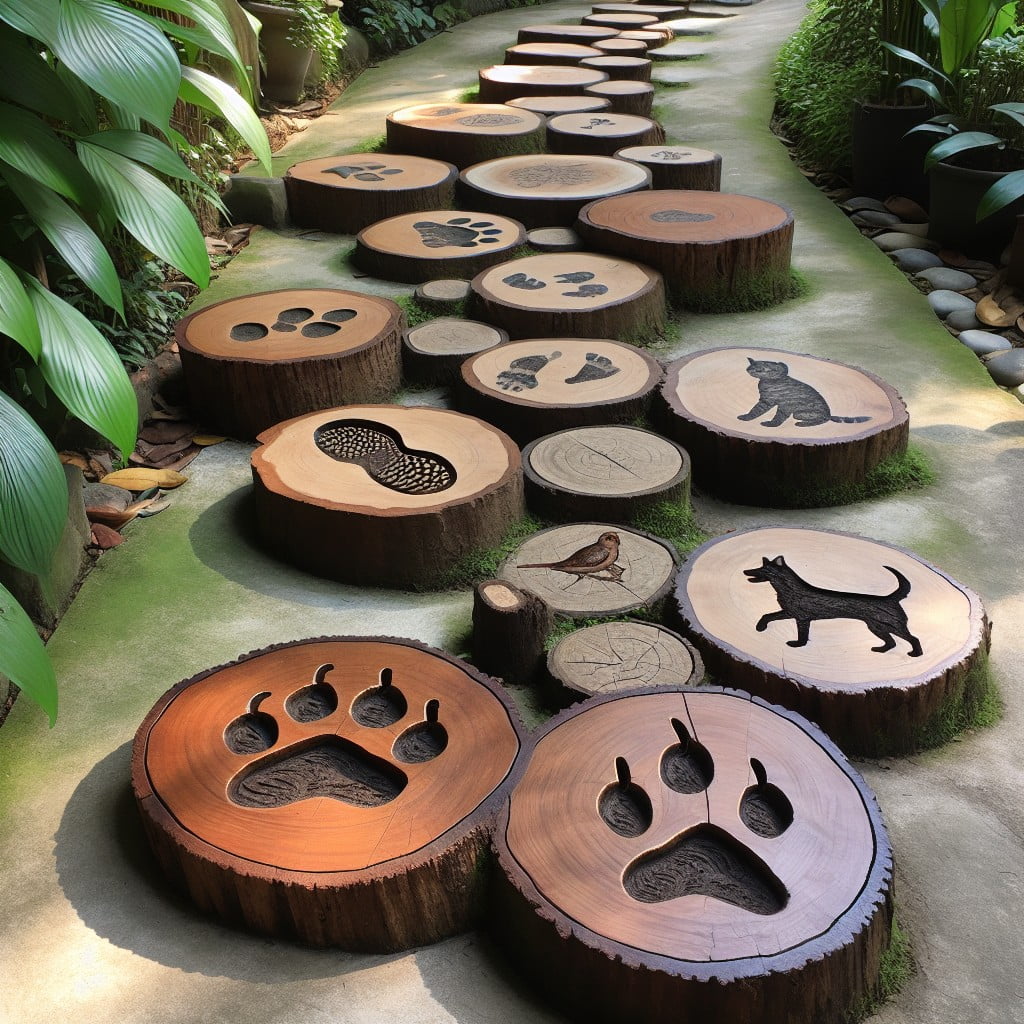
Featuring your beloved pet’s prints on stepping stones not only personalizes your garden but also captures precious memories. Here’s how to go about it:
1. Select a freshly cut tree stump: Ensure it is flat and wide enough to accommodate your pet’s paw or footprints.
2. Prepare safe ink: It’s crucial to use pet-friendly ink. Non-toxic, washable varieties are recommended.
3. Make the imprint: Gently press your pet’s paw or foot in the ink, then onto the stump. Make sure to clean your pet’s paw afterward.
4. Seal it: After the ink dries, seal the print with a clear, weatherproof sealant.
Resulting in a pet-centric, personally cherished garden pathway. Besides beauty, these stepping stones serve as perpetual mementos of your furry friends.
Ideas Elsewhere
- https://tinyhandstidyhome.com/tree-stump-stepping-stones/
- https://www.angi.com/articles/tree-stump-ideas-your-yard.htm
- https://www.shrubhub.com/blog/diy-stepping-stones-ideas-to-try-in-your-yard.php
- https://www.techo-bloc.com/shop/stepping-stones
- https://www.gardeningetc.com/design/tree-stump-ideas
Read More Like This
 15 Funny Graduation Cap Ideas to Make Your Big Day Unforgettable
 15 Unique DIY Christmas Decorations Ideas for a Festive Home
 15 Creative Science Fair Board Ideas to Amaze Your Audience
 15 Handmade Envelope Decoration Ideas for Creative Gifting
 10 DIY Gifts for the Whiskey Lover in Your Life
Recap: