Last updated on
Unleash your creative spirit with these Memorial Day drawing ideas because they offer a unique opportunity to pay tribute while tapping into your artistic side.

I’ve designed unique illustrations for these ideas. I hope you get inspired!
As Memorial Day approaches, one might start feeling that familiar flutter of creativity surfacing. There’s an abundance of drawing ideas circling the internet. However, this article aspires to offer a selection of fresh, unique ideas that bring new perspectives to the table.
Worry not if you’re fond of time-honored ideas, as resources towards the best of them will be linked at the end of the article. Let these new and unique ideas spur your creative spirit into crafting a memorable Memorial Day drawing.
Sit back, relax, grab your sketchpad, and let’s jump right in!
How to Draw the Statue of Liberty and Coloring Page
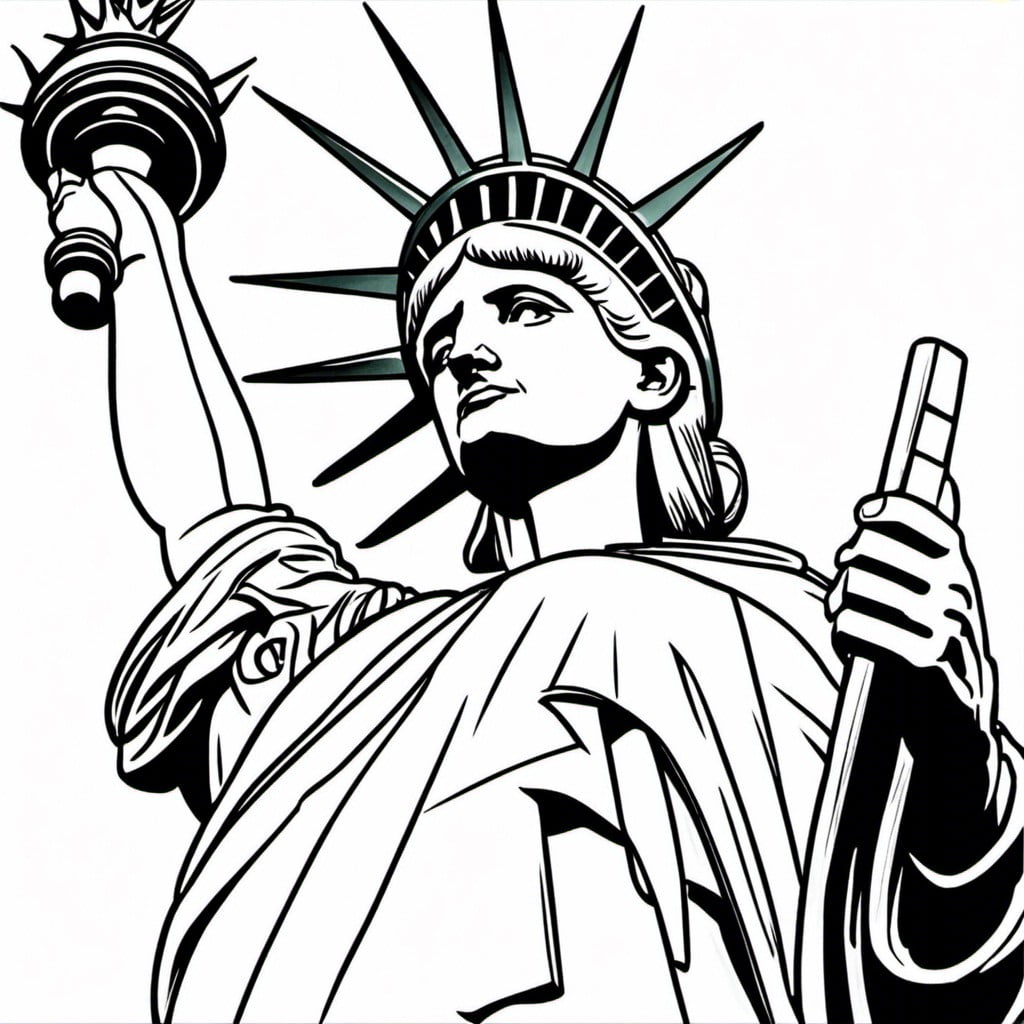
Follow this step-by-step procedure to accurately portray this iconic American symbol. Start with the base, either a square or rectangle slightly angled to mimic the pedestal. Carefully draw the base of the statue, which is composed of numerous horizontal layers. Follow with the statue’s robe, making sure to add folds for verisimilitude. Sketch the arm holding the torch high in the air with the flame at its top. Her left arm should be clutched at her side, holding a tablet. Remember, Lady Liberty’s face requires delicate features, and her crown should contain seven prominent spikes.
After completing the drawing, opt for colored pencils, watercolors, or crayons for the coloring page. Dominantly, use mint green to color the body of the statue, providing an imitation of its copper-green patina. Torch inside should be yellow, depicting fire, while the sky surrounding it could be colored in accordance to the time of day you want to illustrate.
Drawing and coloring the Statue of Liberty, beyond being a creative exercise, helps to reaffirm its globally recognized symbol of freedom and democracy. Enjoy this creative process, and remember that art is about expressing your individuality, there’s no wrong way to color your page.
Easy How to Draw a Military Helmet Tutorial and Helmet Coloring Page
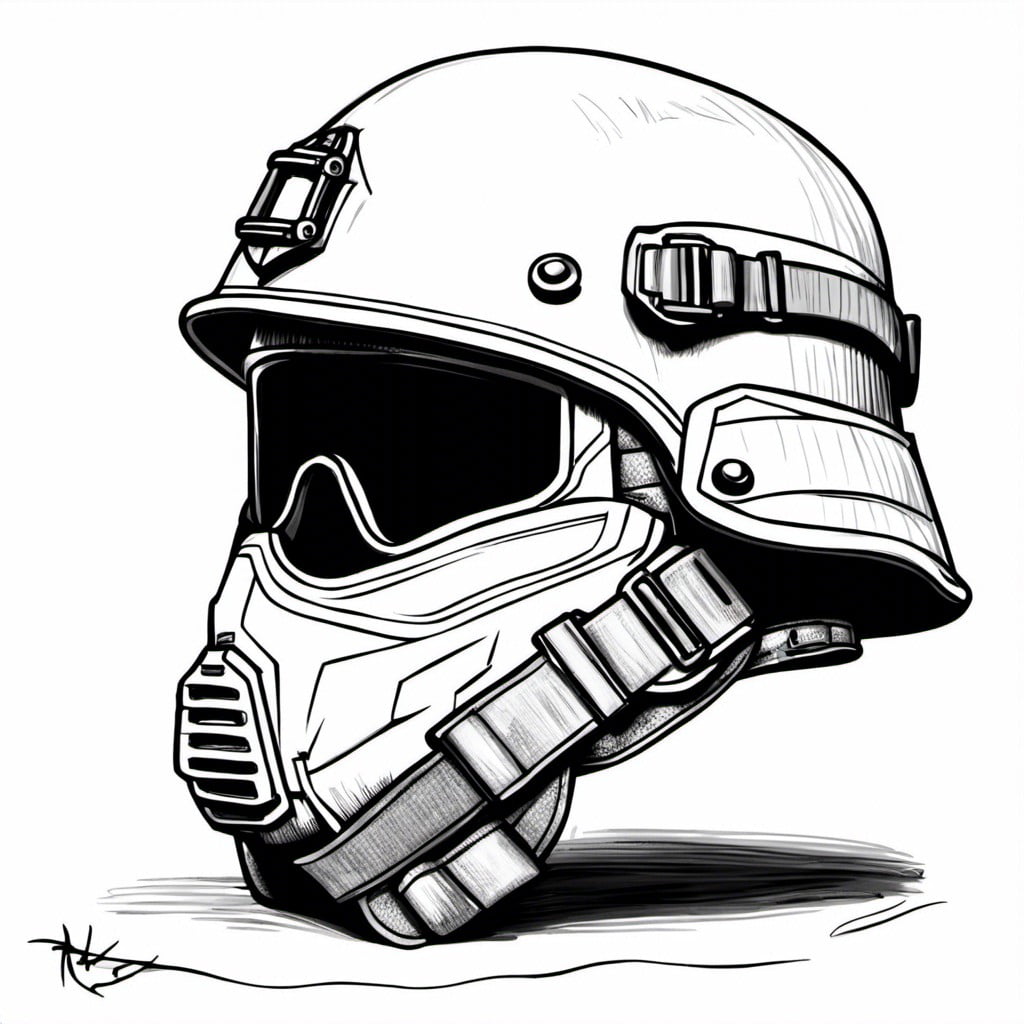
Start by sketching the outline for the military helmet, ensuring the crown is appropriately rounded to resemble a standard service piece. Incorporate the brim of the helmet, angling it slightly forward for an authentic look. The ear covers on each side should align with the bottom of the headgear. Include dimension with a thick tuft of padding inside the helmet.
Next, incorporate the chin strap. This essential element should swoop down from the ear covers, cross below the helmet’s front, and return to the other side. The strap aids in securing the headpiece during strenuous activity.
Finally, to breathe more realism into the sketch, add a few wear and tear marks, some scuff details, textures, and shadows to provide the helmet with a battle-worn look. Take precious care with the shading, employing hatching or cross-hatching techniques to capture the 3-D nature of the helmet.
Creating the coloring page isn’t as daunting as it might seem. Begin by outlining the helmet with clear bold lines. Inside, use lighter lines to draw important features like the interior padding and any scuff marks. It’s essential to leave enough blank spaces on the coloring page, allowing individuals to personalize the helmet with their shades. Don’t overcrowd the page with details; let creativity flourish within the boundaries.
Remember, the objective is to enjoy the process while paying homage to our brave military personnel, so allow room for creativity and fun in this project.
How to Draw a Bald Eagle and Coloring Page
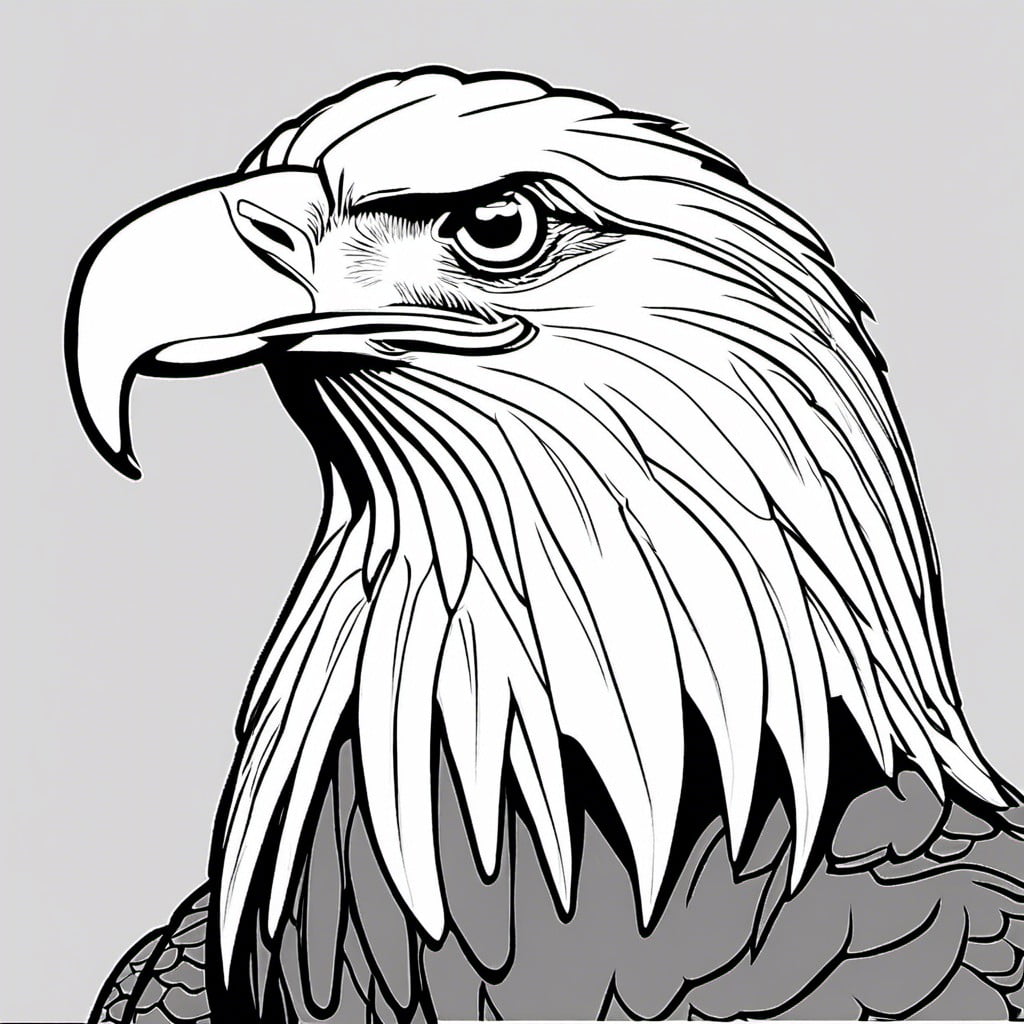
Start by sketching a large circle for the body and a smaller one for the head, joined by a swooping line for the neck. Inside the head circle, add a smaller circle for the eye, a triangular shape for the beak, and line around the back for the eagle’s distinctive hooked silhouette. Trace down from the body circle to define the wings, extending two long, finger-like feathers at the ends for realism. Beneath, sketch lightly the legs terminating in sharp talons.
Finally, the tail feathers should span out like a fan from the bottom of the body circle. Once the sketch is complete, you can refine it, emphasizing the bird’s distinctive feathers, its strikingly sharp beak, and fierce gaze.
Now, the coloring part: American bald eagles have a very specific color pattern. The head and tail feathers are white, the body and wings dark brown. The beak and talons are yellow, and the eye contains a yellow iris and a black pupil. Remember, when coloring, the direction of your strokes should follow the feather layout to mimic the eagle’s texture. Do this, and your bald eagle comes to life!
Perfecting the eagle drawing might take a few tries. The more you practice, the better your final product will be. Incorporate this image into your Memorial Day art to symbolize strength, freedom, and the American spirit.
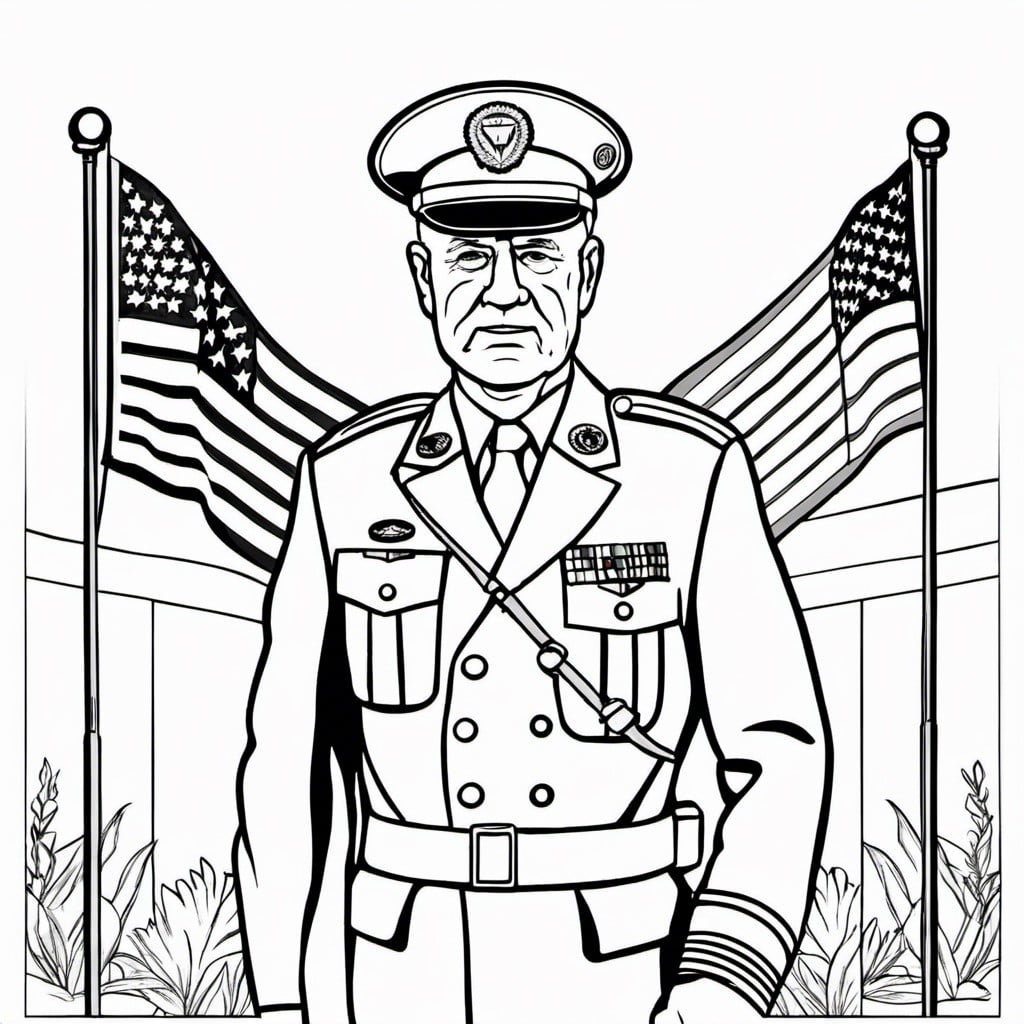
Easy How to Draw a Soldier Saluting Tutorial and Solider Coloring Page
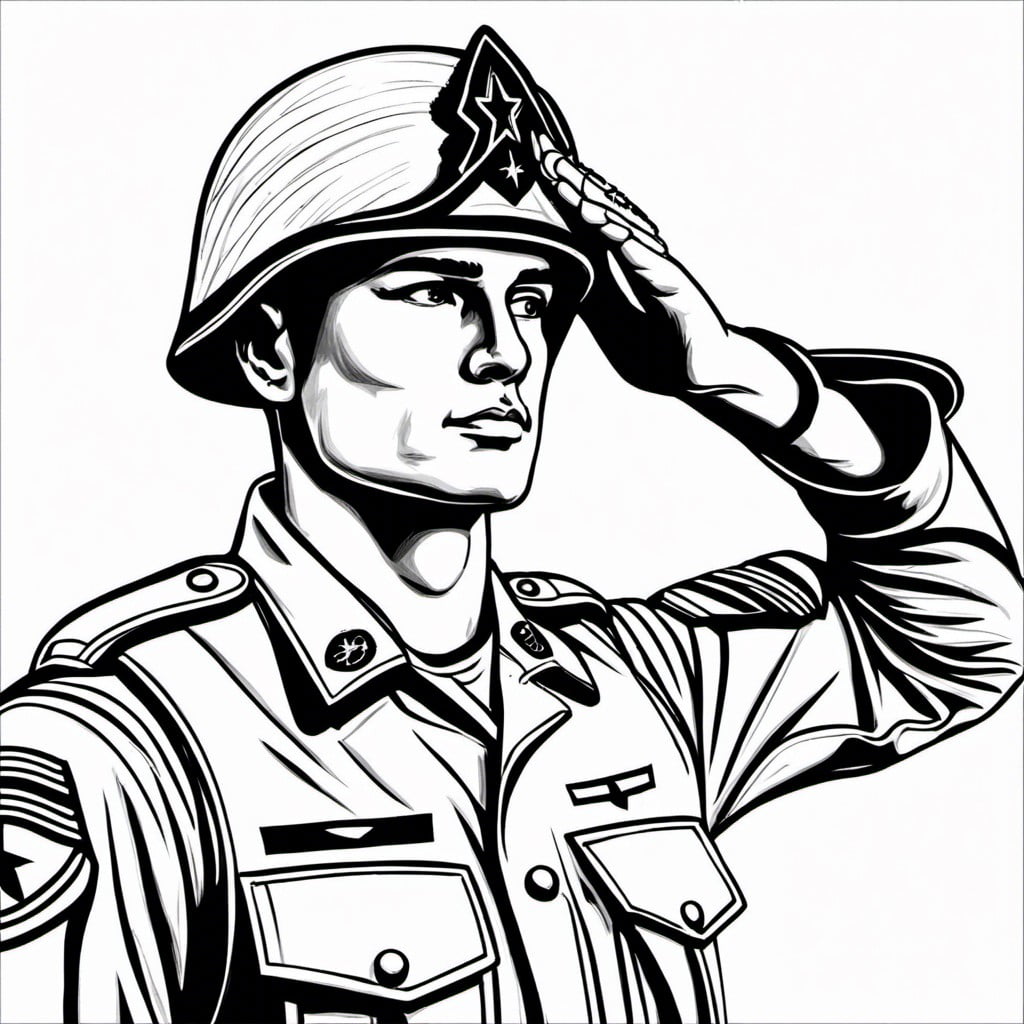
Start with a simple upright oval for the soldier’s head, detailing the face features later. Add a horizontal line where the eyes and ears will sit, and a vertical one for the nose and mouth alignment. The helmet shell curves over the head and slightly down the back. Add line details for the chin strap and the emblem on the front.
For the body, draw two rectangles; a bigger one for the torso and a smaller at the bottom for the hip area. Use straight lines for the arms. The right one is bent, hand up to the temple in a saluting gesture. Add cylindrical shapes for the legs. Keep in mind the soldier’s stance; legs are shoulder-width apart, right foot slightly ahead.
Finally, flesh out details like the uniform, boots, and badges, remembering these vary depending on the army branch. Add shadows and folds to the clothes. Now, with the drawing complete, it’s time for the coloring page.
Use a shady green for the uniform and dull black or brown for the boots. The skin tone depends on the soldier’s ethnicity. Keep the shades light initially; you can always add depth layer by layer. Color in the background as desired, a blue sky or an army camp setting, perhaps. Use this picture as a tribute to someone in the service, or a fun art project for Memorial Day. Enjoy!
How to Draw a Fireworks Display Tutorial and Fireworks Coloring Page
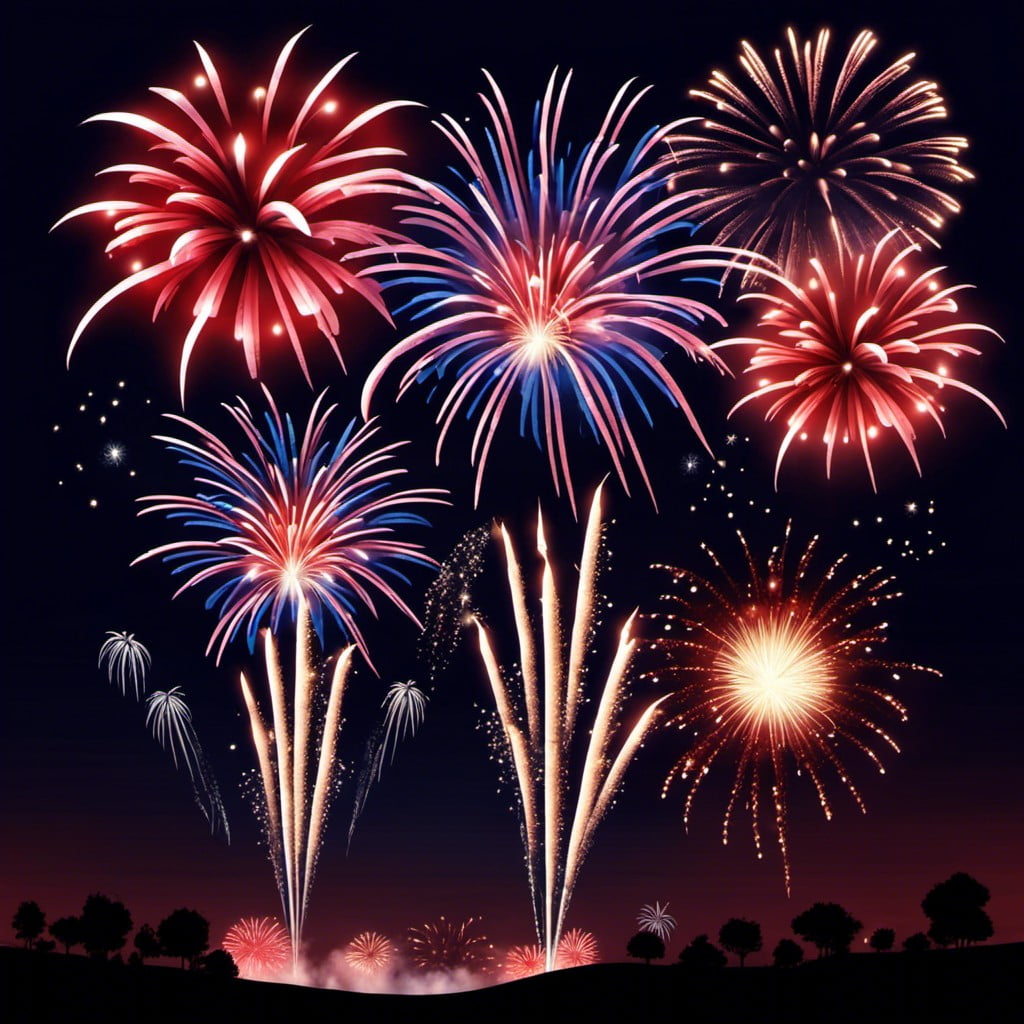
Start with a blank sheet and a choice of your favorite drawing tools. Begin with a series of dots to outline the explosions of the fireworks. Each dot will act as a guiding point for the ‘burst’ of your firework.
Next, draw lines extending from the dots, varying lengths to give the illusion of depth and realism. Think of these lines as pathways for the light to scatter. Remember, fireworks are not uniform; they explode in all directions.
On to coloring, utilize bright colors – reds, yellows, blues, or even whites; fireworks are brilliant light sources against the night sky. Color the lines you’ve drawn in multiple hues for a vibrant display.
The background is what makes your fireworks pop. A dark blue or black will mimic the night sky. Don’t forget to add a horizon, perhaps a skyline silhouette, to anchor the scene.
Finally, add some sparkly effects with a white pencil or gel pen. Dots, star shapes, or even tiny lines will give the ripple and glitter inevitable in fireworks.
Remember, the goal isn’t perfection but the celebration of the vibrant and fleeting beauty of fireworks. Practice makes perfect; don’t hesitate to draw multiple versions, experimenting with colors and designs.
Easy How to Draw Graves of Soldiers and Coloring Page
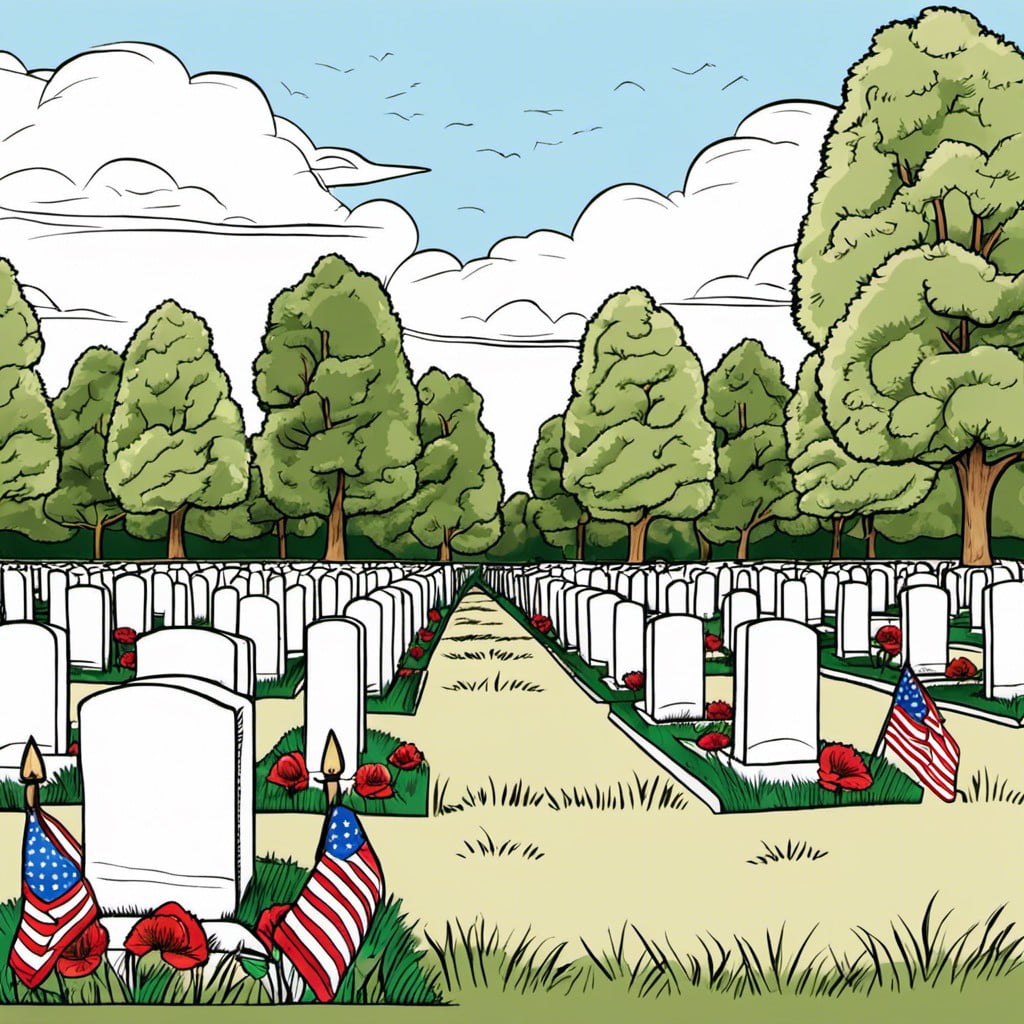
Begin your sketch with a simple perspective line. This helps to create an orderly layout, representing the rows of grave markers typically seen in military cemeteries.
In creating the graves of fallen soldiers, pay attention to their customary shape – a rounded top and slightly narrow base. Add depth to your drawing by layering the graves; those in the foreground should be larger and detailed, and decrease in size as they recede into the background.
Introduce some natural elements like grass or small flowers around the grave markers for a touch of realism. An American flag neatly planted next to each should signify who the graves belong to.
Finally, opt for somber, soft colors when bringing your image to life. Neutrals like whites, grays, and blacks for the graves work well, complemented by nature’s greens and the flag’s red, white, and blue.
Remember, your drawing is not merely an exercise in perspective, but more importantly, an expression of respect and remembrance for the men and women who gave their lives for their country.
Easy How to Draw a Memorial Wreath Tutorial and Wreath Coloring Page
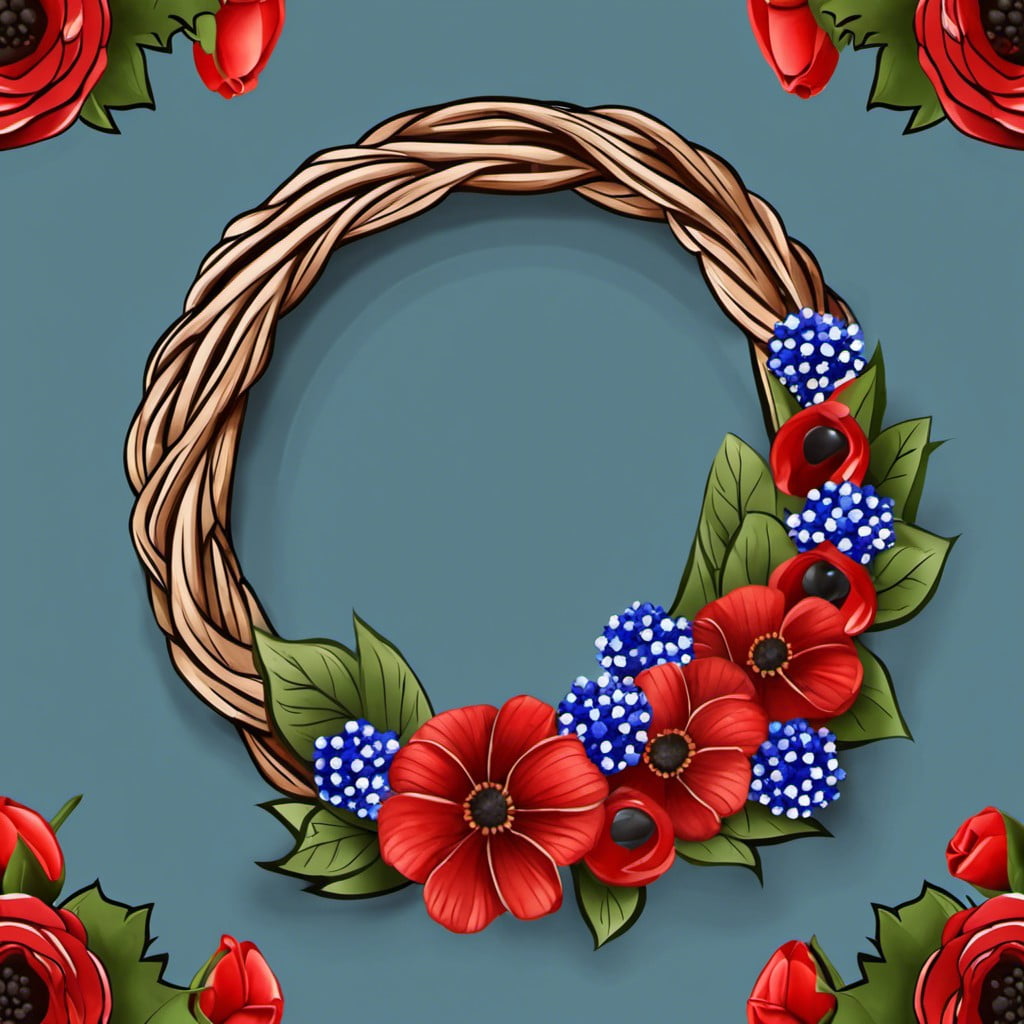
Firstly, choose drawing materials; pencils are great for subtle shadings, while markers or colored pencils can produce vibrant hues. Sketch lightly initially to outline the circular shape of the wreath. The size and thickness of the wreath can be adjusted to preference. Remember, perfect circles aren’t necessary as nature tends to be asymmetrical.
Next, decide on the arrangement of leaves and flowers. These could be uniform around the entire circumference or grouped at sections. Sketch their outlines lightly. Common flowers for memorial wreaths include roses, poppies, and lilies, while leaves often take forms of laurels or olive branches.
Then, add depth to the drawing by shading. Observe the light source and shade accordingly – darker where shadows fall and lighter where light hits. The texture of leaves and petals can also be imitated through shading.
Finally, add colors. Use different shades of green for leaves to give the wreath a lifelike appearance. Select flower colors based on their usual hue or preferred color scheme. Add highlights and shadows to enhance the 3D effect.
For the coloring page, offer an outlined wreath with enough detail to guide the colorist but also open spaces for them to add their personal touch. Ensure good contrast between lines for clarity. Instead, strokes indicating the texture and direction of growth can be included to guide shading.
Remember, drawing should be a relaxing process. Do not be deterred by minor mistakes; rather, embrace them as unique features of your artwork. Happy sketching!
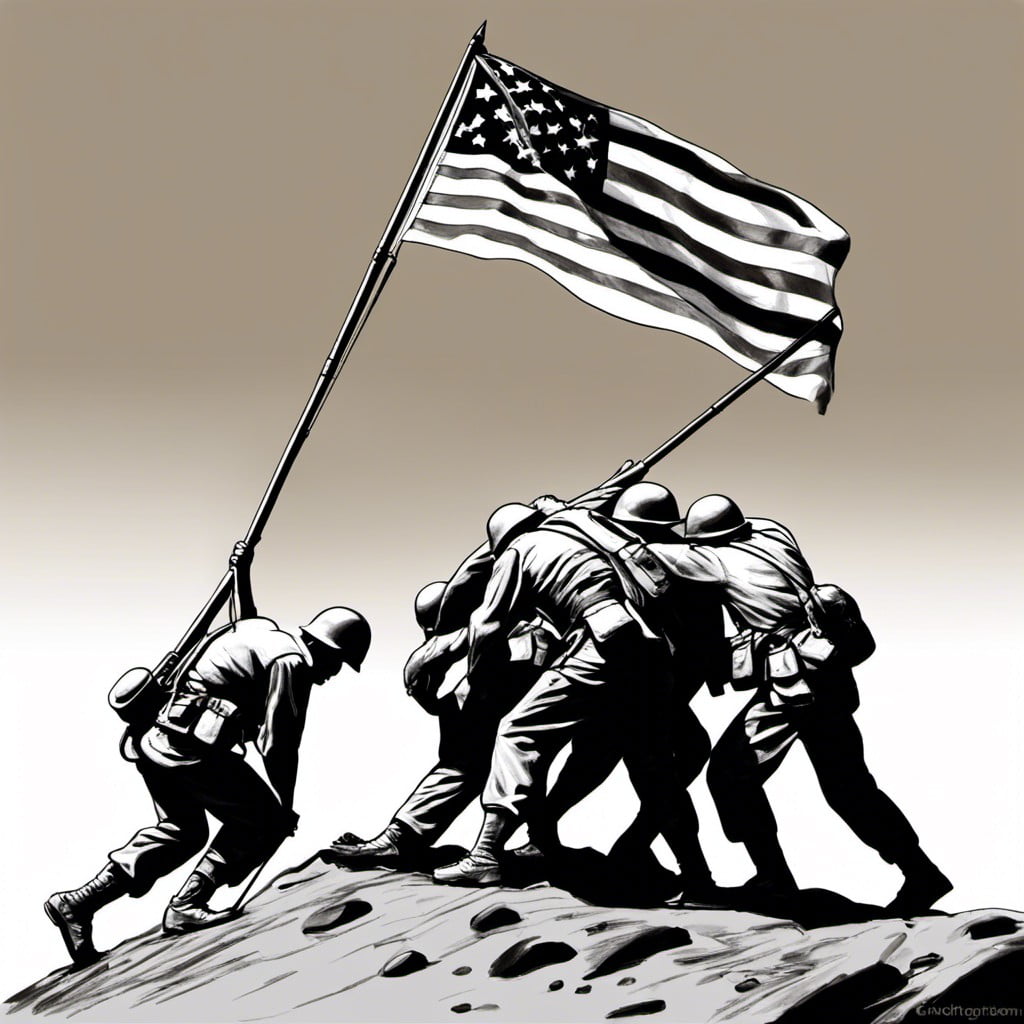
Drawing the Iwo Jima Memorial and Coloring Page
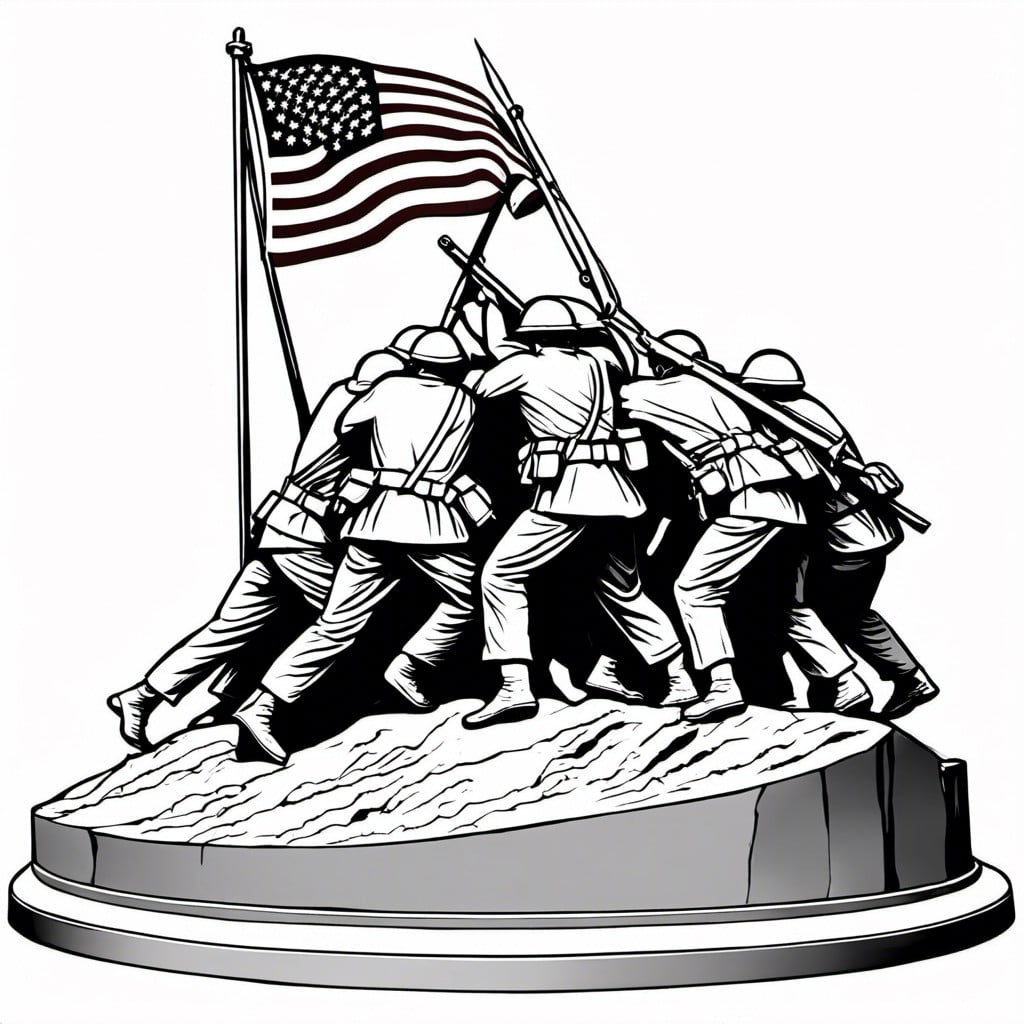
Before initiating the sketching process, familiarize yourself with the iconic picture, paying meticulous attention to the specific details such as proportions, positioning, and clothing folds. Let’s break down the process into easily manageable parts:
1. Begin with five rough figure sketches in dynamic action poses, serving as a base for the soldiers.
2. Draft the flagpole’s position, ensuring it’s appropriately angled.
3. Sketch the details of the soldiers’ uniforms and helmets, including wrinkles and folds.
4. Draw the hands tightly grasping the flagpole at different heights, showing concerted effort.
5. Depict their strained faces to illustrate their determination.
6. Outline the rocky terrain beneath their feet, giving the drawing a sense of location.
7. Finalize with solid lines, remaining truthful to the original image.
8. Finish by shading or coloring your drawing; use different shades of gray for the soldiers and a mix of red, white, and blue for the flag.
Remember, artistry lies in capturing the emotion and heroism of that fateful day. Use your creativity to make the image speak to the viewer about the bravery and unity of those soldiers.
How to Draw Memorial Day Parade Scene and Coloring Page
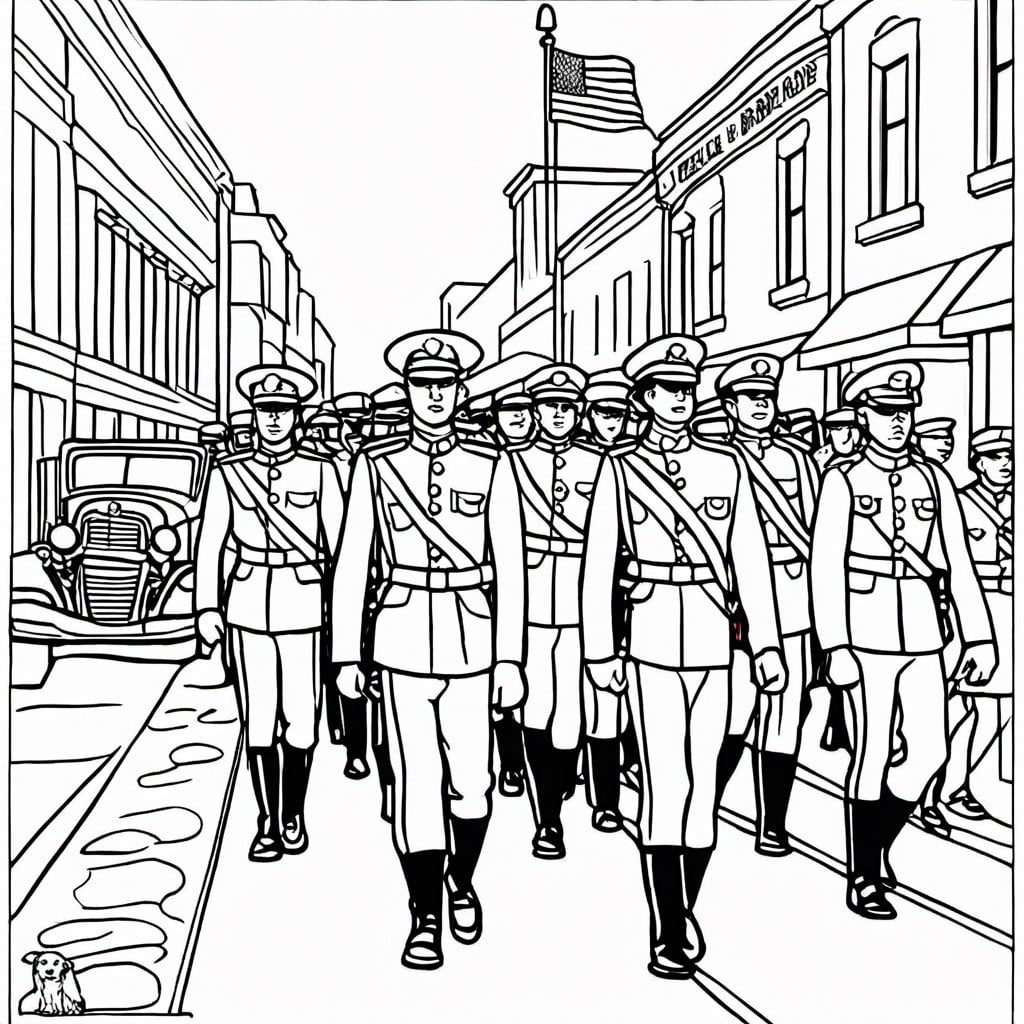
Gather your drawing tools; a pencil, eraser, colors, and a blank sheet. Begin with the crowd in the backdrop, sketch small vague figures, hold the detailing, merely capture the essence of a crowd.
Now for the parade itself. Draw different military branches, by hinting at unique uniforms, marching synchronously. Include a marching band, sketch tubas, drums, and uniformed musicians.
No parade is complete without the grand American flag, make it the focal point, with stars and stripes fluttering in the foreground. The environment is next, create a vibrant ambiance to emote joy, sketch bunting and banners along the street.
Now, turn the scene into a coloring page, erase unnecessary lines, enhance the prominent ones. You’re prepared for coloring. Use a mix of subtle shades for the crowd, vibrant red, white, and blue for the flag, uniforms in olive, navy, and black depending on the branch.
A cheerful sunny day can be brought to life with clear blue skies and bright sun. This is your parade scene, encapsulated in a simple drawing and coloring page.
Draw a Soldier and Family and Coloring Page

To capture this scene accurately, remember the importance of emotions. The facial expressions and postures of the soldier and family members can evoke a profound sense of gratitude and respect.
1. Start with rough outlines: for the soldier, uniform details are key, whereas for family members—casual outfits will be sufficient.
2. Detail the faces: a happy, welcoming feel for the family contrasted with a proud, stern look of the soldier can make a difference.
3. Finalize your drawing: add the surroundings, fill in details, and smoothen lines.
4. Color: use bright, warm colors for the family to express warmth and happiness; use more muted, serious tones for the soldier to depict the disciplined life of military service.
Remember, extra attention to the details will bring your drawing to life and create a realistic depiction of a soldier’s homecoming.
Easy How to Draw a Cannon Tutorial and Cannon Coloring Page
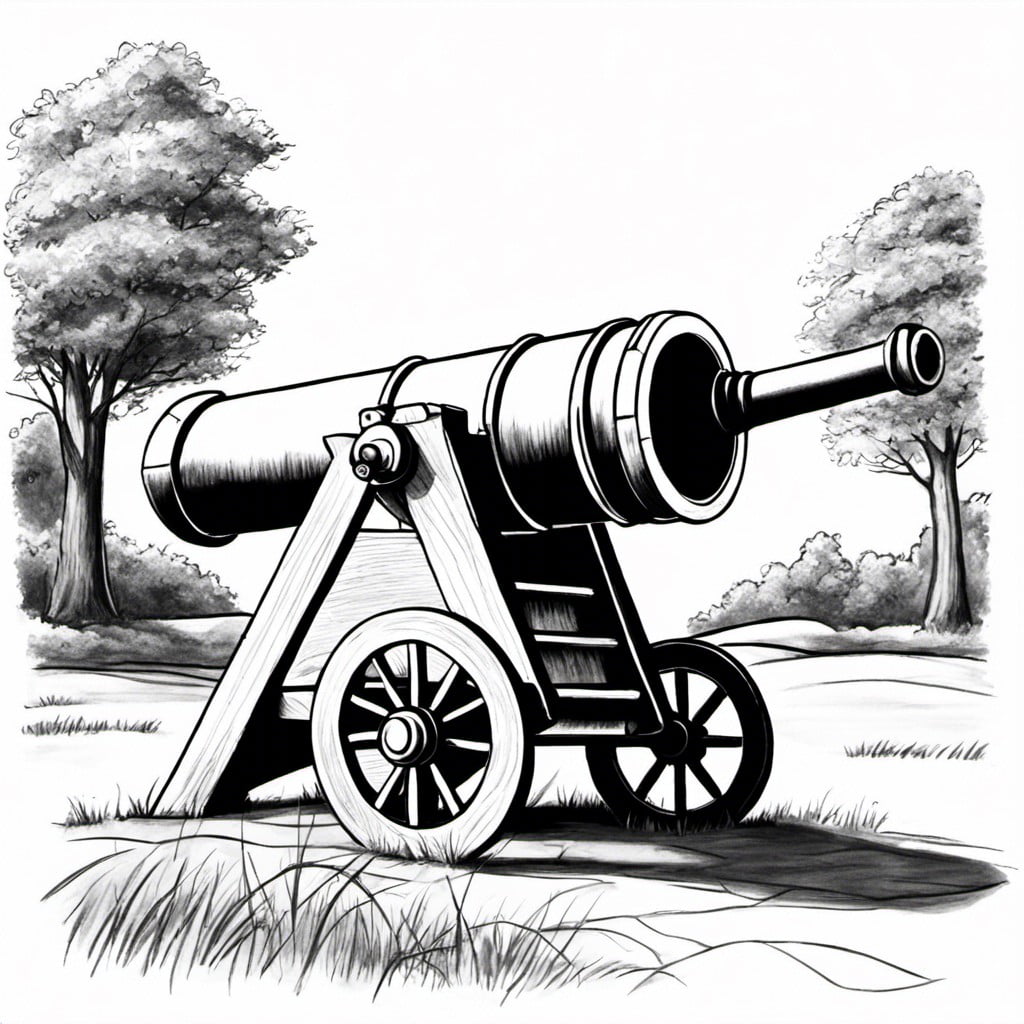
Begin with a simple oval for the cannon’s body and a small rectangle indicating the base. Follow by drawing yet another rectangle for a front view. Do not fret about perfect shapes at this point, the focus is rough outlining.
Now, start shaping the cannon more precisely. Add wheels to its base with two circles, fill the interior with spokes. Sketch out a tapered trapezoid for the cannon’s mouth, adding depth and perspective.
Let’s move to details now. Frame the mouth of the cannon with a double line, remember to keep the lines parallel. Connect the body and wheelbase with detailed reinforcements, think metal bands or bolts to add realism.
Now comes the inking. Go over all your lines with a fine-tipped pen, ensuring your fine details aren’t lost. Once dry, erase your initial pencil marks.
Coloring time! Opt for metallic hues for the cannon itself, think shades of grey and black to add dimension. The wheels can sport a contrasting shade of brown to depict wood. Finally, emphasize shadows and lighting to give your cannon depth and dimension.
Now you have a thoroughly detailed, realistic cannon! This drawing can be a great addition to any Memorial Day-themed artworks, symbolizing the past battles and the bravery of the soldiers.
How to Draw a Navy Ship and Coloring Page

Begin the drawing with a simple hull shape, a trapezoid works best for this. Sketch a rounded rectangle atop the hull for the main deck. Atop the deck, a variety of rectangles and squares serve as the ship’s structures, focusing on well-known features like the tower structure, funnels, radars, and gun mounts. Draw a series of lines for masts and booms to complete the basic structure.
Working on the details enhances the ship’s realism. Use vertical and horizontal lines to highlight the plating on the ship’s hull and deck. Emphasize the windows on the tower structure. Pay attention to the shape and number of gun mounts depending on the ship.
Coloring brings the navy ship to life. Choose a mix of grays, with subtle variations to indicate light and shadow. Use blues and whites for windows and radars. Add small touches of red, yellow or orange for hazard areas and navigation lights.
For the coloring page, ensure that the lines separating different areas of the ship are outlined clearly and boldly. This will make it easier for the users to color, fostering creativity while learning about the structure of a navy ship.
Easy How to Draw a Medal of Honor and Coloring Page
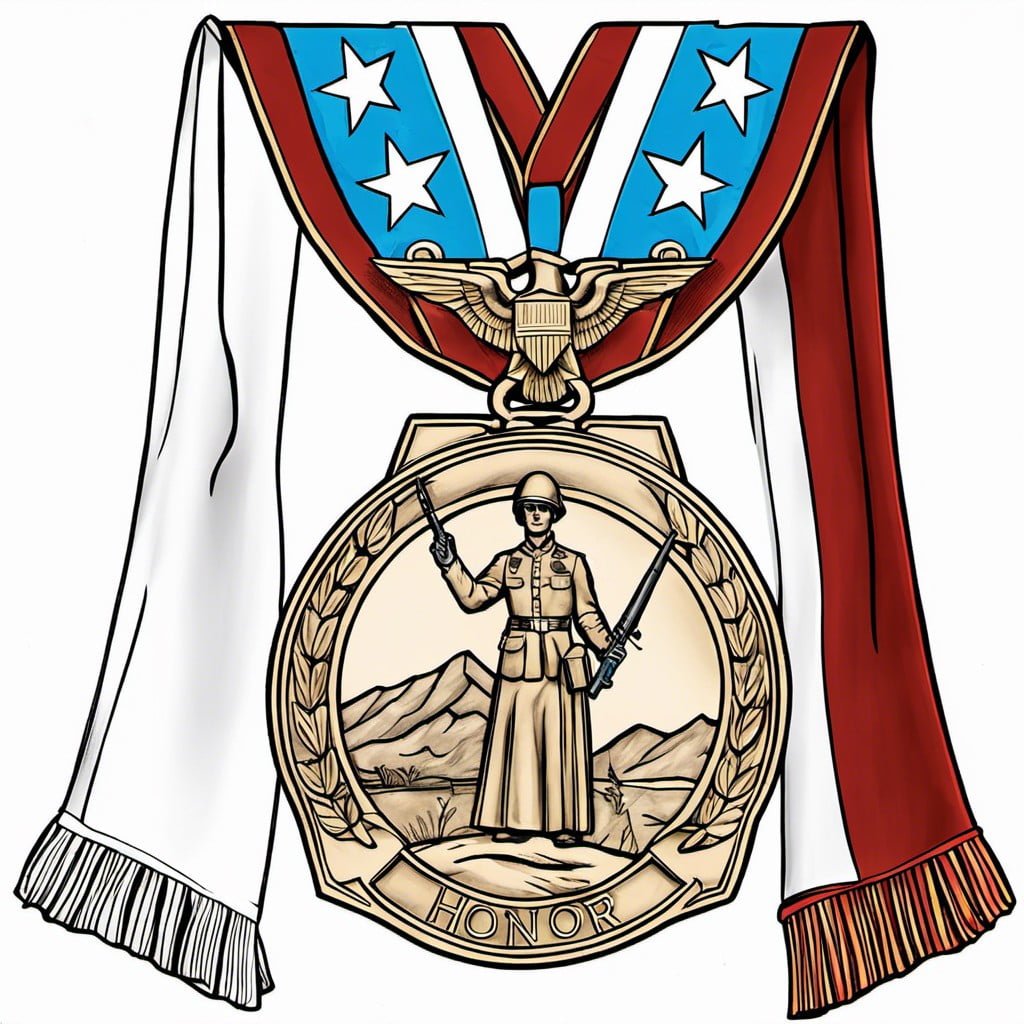
Start with a simple oval shape for the medal and a ribbon shape attached above it. Add details such as star, laurel wreath or an eagle, depending on the Medal of Honor design you’re drawing – each element signifies a different aspect of bravery and valor.
Don’t forget to include the perfectly symmetrical stripes for the ribbon using the bold colors of light blue and white to capture its iconic image. Use thin lines initially for the detailing and accents, then switch to darker ones to finalize your drawing.
Now, let’s color – use bright gold for the medal, light blue for the ribbon and white for the stripes. Add shadows for depth. All these steps incorporated in the drawing not only boosts creativity but pays tribute to the esteemed honor awarded to our heroes.
- Start with a simple oval shape for the medal and a ribbon shape at the top.
- Add important details such as a star, a laurel wreath or an eagle.
- Include perfectly symmetrical stripes to the ribbon.
- Use thin lines first for detailing, switch to darker ones for the final drawing.
- Coloring: bright gold for the medal, light blue for the ribbon, white for the stripes.
- Add shadows for depth.
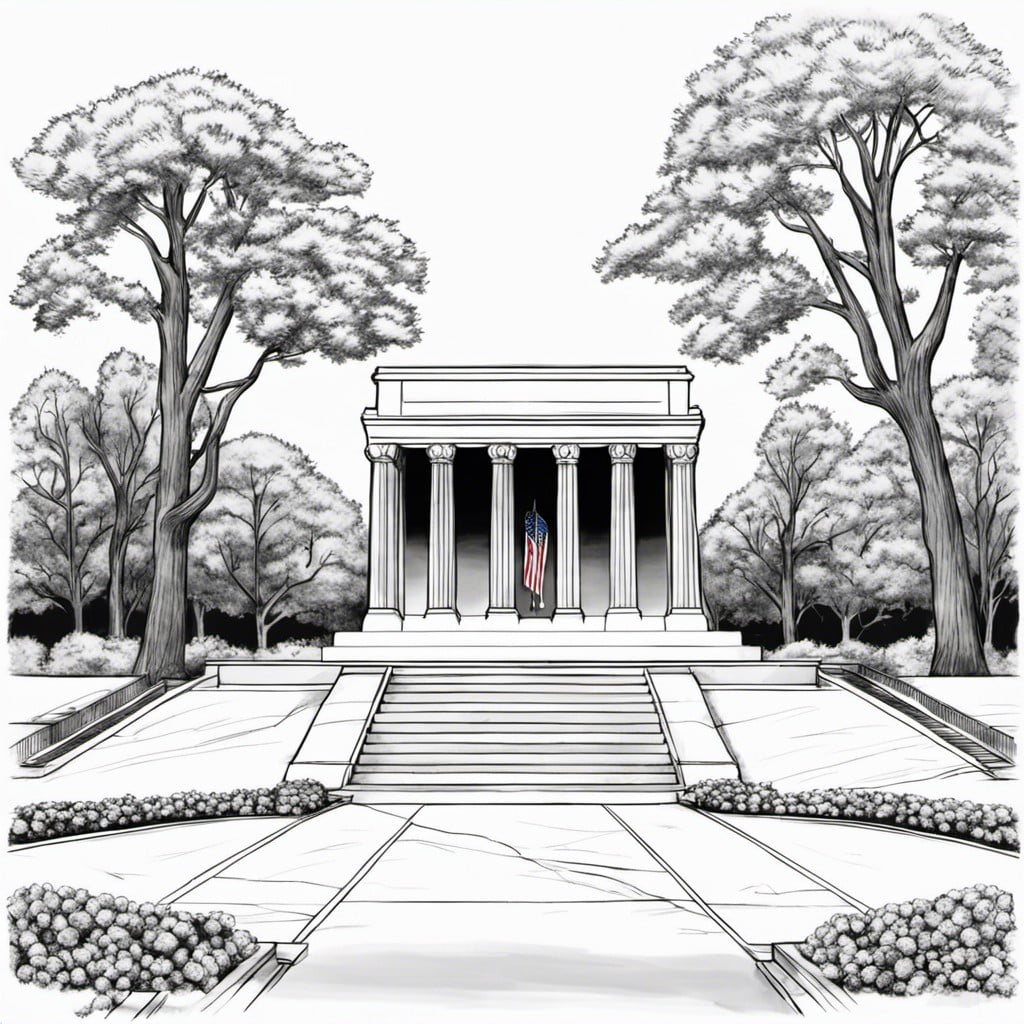
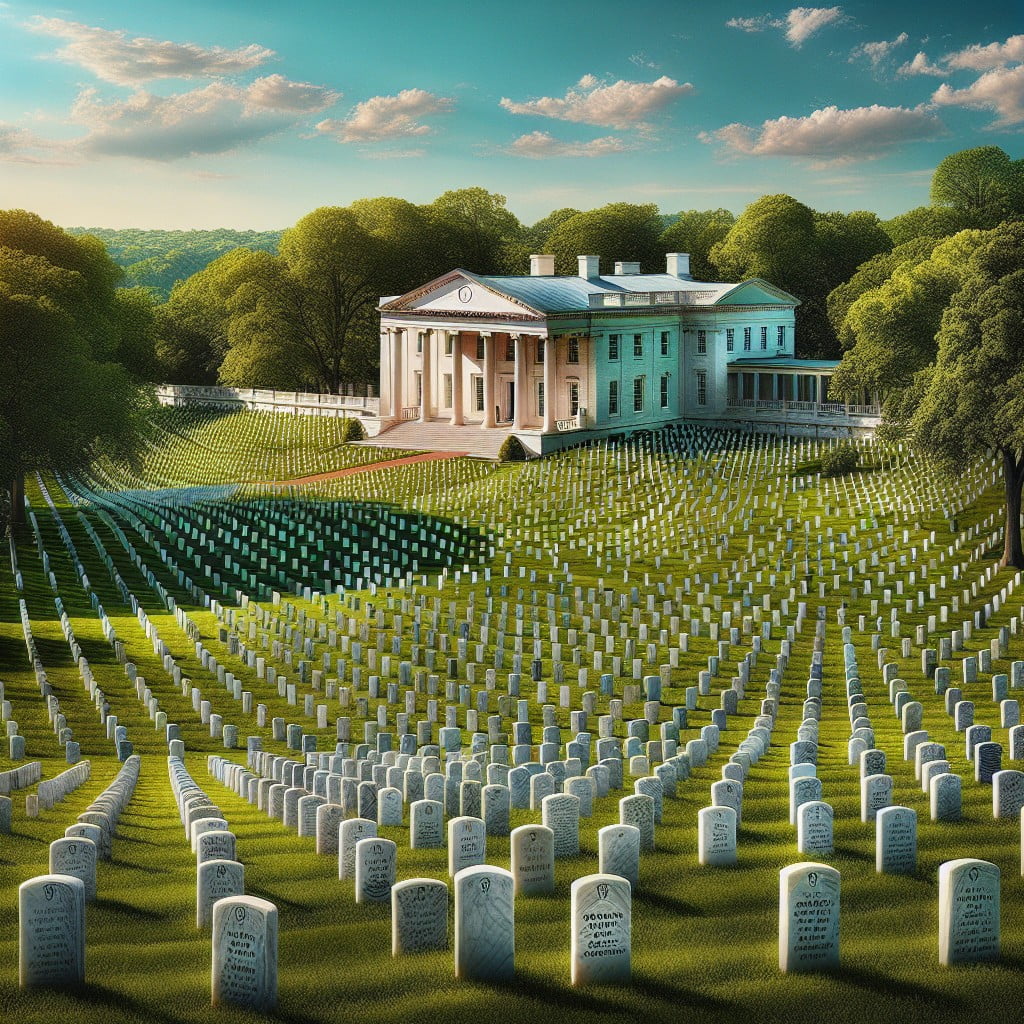
How to Draw Arlington National Cemetery and Coloring Page
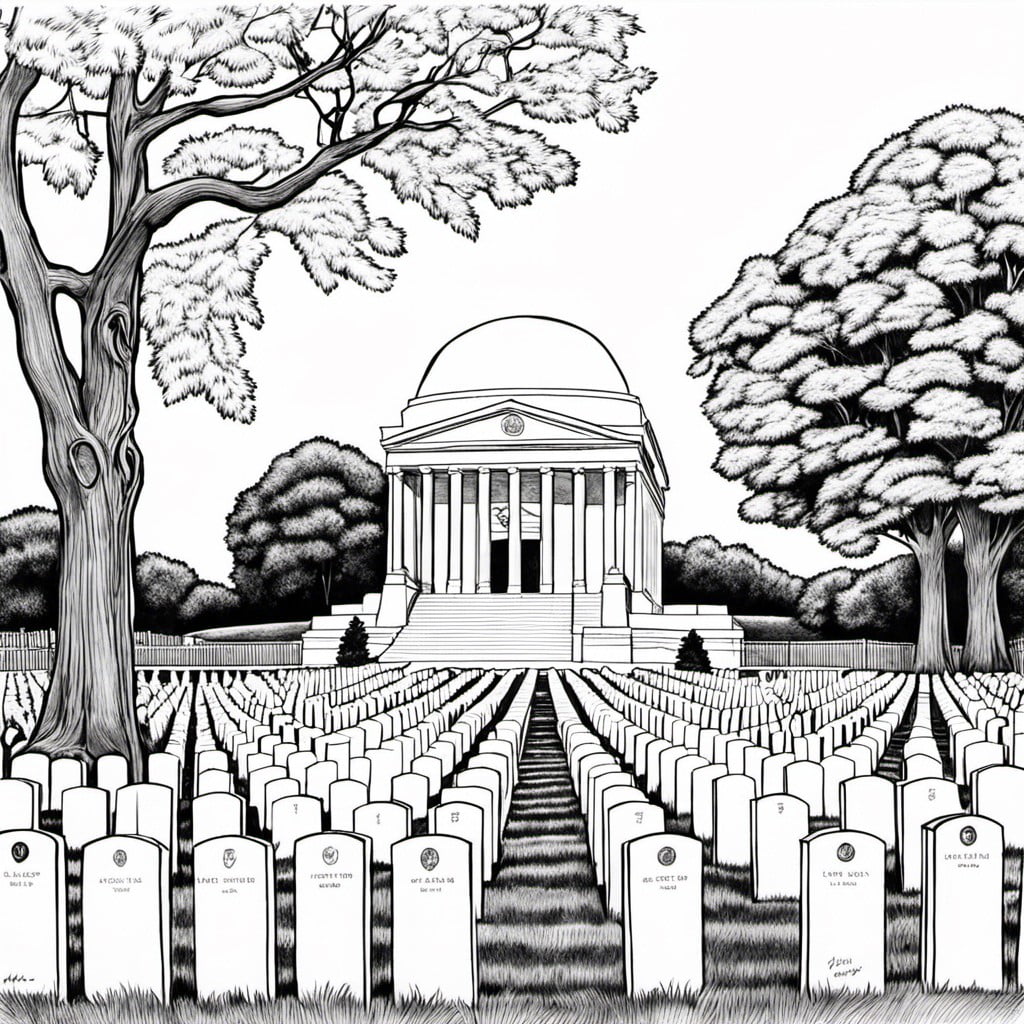
Prepare a crisp, clean sheet of paper. Start with sketching in the main features – a straight horizon for the seemingly endless rows of grave marks, backdrop of the Memorial Amphitheater, and a majestic tree for balance.
1. Draw several rows of identical, vertical rectangles for the graves. One trick to creating depth is making the graves decrease in size as they recede towards the horizon.
2. Sketch the Memorial Amphitheater located in the middle of the cemetery. Use simple geometric shapes, such as a half circle for the dome and rectangles for the building. Include the three flagpoles out front.
3. Add a large tree to the right or left of the amphitheater, reaching up beyond the top of the building. This can be drawn using a combination of cylindrical shapes for the trunk and ovals for the leafy parts. The intense presence of the tree adds an emotional element.
4. Now comes the detail work. Sharpen your pencil and go back over your lines. Add names to the headstones. Draw the details of the amphitheater, such as the columns and windows.
5. To color, start by first deciding on a time of day or weather condition for the scene. If it’s a sunny day, color the sky a light blue and the grass a bright green. For sunset, use a warm palette of oranges and purples. If it’s gloomy, use darker and cooler shades of blue and grey.
Remember, drawing should be fun. Relax and enjoy the process! If things don’t look quite right on the first try, don’t be disheartened. Practice makes perfect.
How to Draw the Tomb of the Unknown Soldier and Coloring Page
In embodying the nobility of this iconic sculpture, begin by sketching a simple box shape for the monument. Gradually, add more details like the three pillars and panels. Make sure to include the figure of the Honor Guard in front, emphasizing the uniform and rifle’s details. Build layers and depth by using shading techniques for a more realistic look.
To make the scene complete, outline faint imagery of Arlington cemetery in the backdrop by simply dotting rows of crosses. This is to represent the countless soldiers laid to rest.
For the coloring process, use varying tones of gray to create the marble’s texture on the monument. The Honor Guard’s uniform is typically dark blue almost black with white gloves and a black hat. For the cemetery backdrop, use a light green for the lawn and stark white crosses to illustrate the graves.
Inject your own artistic style and influence into your creation. The most important aspect of this drawing is to symbolize respect and tribute payed to the unknown soldiers who sacrificed for our freedoms.
Remember, practice is key. Don’t be discouraged if your first attempt doesn’t turn out as expected. Keep sketching, keep coloring – your skills will improve over time!
Easy How to Draw the Liberty Bell Tutorial and Bell Coloring Page
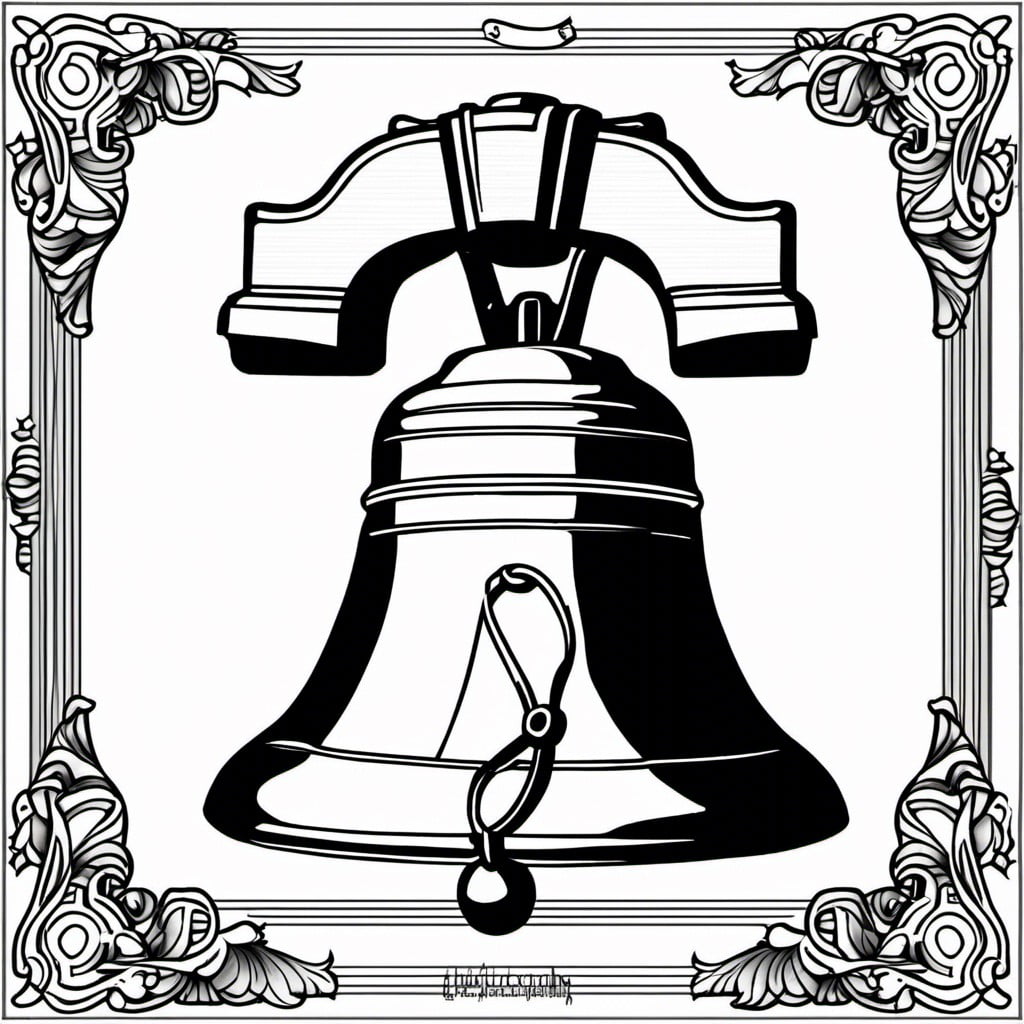
First, start by lightly sketching an elongated oval shape, this forms the main body of the bell. The upper portion of the bell constitutes a smaller circle and another slightly larger one – creating the curvature – these should both be attached to the top of the initial oval shape. Below this, draw two curving lines creating the lip of the bell. Reinforce these sketched lines once you’re happy with the general form.
Next, let’s add details to infuse character into our bell. Draw a small horizontal oval inside the bell for the yoke hole. From the ends of this oval, two vertical lines should extend upwards forming the yoke itself. Connect these lines at the top with a rounded rectangle form – this creates the stock of the Bell.
Lastly, ensure to capture the famous crack in the Liberty Bell. Starting from the lip of the bell, draw a jagged line extending upwards and curving towards the left, stopping about halfway up.
When you finish with your drawing, you can start to color. The Liberty Bell is primarily bronze, with aging giving it a bluish-green patina in some areas. Use brown for the bell, interspersed with patches of blue-green, to mimic this effect.
Remember, the beauty of drawing lies in the individual interpretation. Your Liberty Bell doesn’t have to be a perfect replica. As you work on your sketch, indulge the freedom that art the world of art provides. Have fun and enjoy the process!
Tutorial On Drawing the Raising of the Flag At Iwo Jima and Coloring Page
Ensure you have a solid understanding of the reference image depicting the iconic moment at Iwo Jima before you start. The key to drawing this scene effectively is capturing the drive and unity of the soldiers. Six soldiers are in the scene – ensure each one is individually detailed but also works as part of the cohesive moment.
1. Start with rough shapes. Outline each soldier, plant their feet strongly on the raised ground, and emphasize the straining upward motion as they work together on the flagpole.
2. Add body detail next. Roughly sketch the clothing, helmets, and faces of each soldier. The wind direction is crucial in this scene; let it dictate the flow of the garments.
3. Pay attention to the hands while drawing them. Each one needs to be realistically interacting with the flagpole.
4. The flag itself is the crowning glory of this picture. Draw it somewhat billowing, as though caught in a strong updraft.
5. Add ground detail last. It should be rough and rocky, suggesting the harsh battle environment.
6. Move onto color. Choose a muted palette for the soldiers and ground, to better allow the vibrant colors of the American flag to stand out.
Follow your heart, and let artistry guide your hand when working on this monumental task.
Easy Step-by-Step Drawing of Soldiers In Battle and Coloring Page
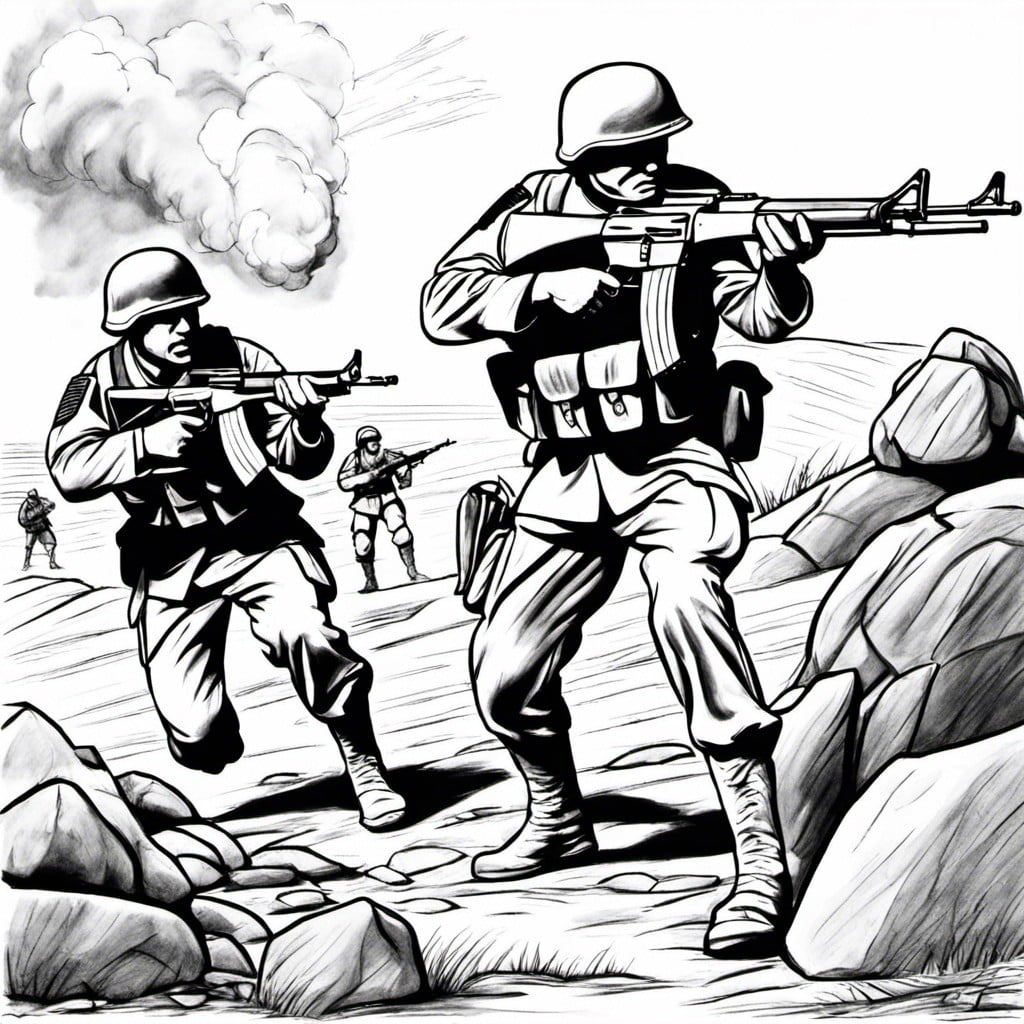
Using simple geometric shapes, you can represent soldiers in a dynamic battle scene. First, have oval shapes for heads, rectangles for bodies, and long thin rectangles for arms and legs. Second, sketch lightly to form shapes, which also helps in positioning your figures, remembering that battle scenes involve a lot of motion. Third, once you’re satisfied with your drawing’s movement, draw weapons in your soldiers’ hands. Finally, complete your sketch by adding details such as the uniforms, facial expressions, and equipment. Remember to consider the perspective, light, and shadow details too for a realistic image.
For the coloring page, outline your drawing with a fine liner to enhance visibility. The use of green, brown, and grays will capture the military theme effectively. If parts are confusing, use a lighter color and shade darker later.
Remember, patience plays a key role in perfecting this art. It’s a matter of practice, dedication, and continuously honing your drawing skills!
How to Draw a Saluting Veteran and Coloring Page
Beginning with a simple outline, sketch the basic form of the figure. Elementarily, the body of a saluting veteran can be broken down into geometrical forms such as rectangles for torso and limbs, oval for the head.
Focus on the detail of the hand salute, where the right-hand fingertips touch the brim of the hat or temple if bareheaded, thumb and fingers are extended and together, the palm is slightly inward towards the face. Achieve this correctness in the salute.
Keep complication out by drawing a simple shading of the uniform. Typical garb can consist of a jacket, trousers, and boots. Add medals or awards for an authentic look.
Finally, design your coloring page by outlining your detailed drawing in dark, bold lines, removing any guideline sketches. Leave plenty of space and ensure that small details are large enough to be colored in.
Experiment with colors, the uniform typically leans toward blues or greens, medals often gleam gold or silver. The hat can be a darker shade of the uniform color. If desired, add an appropriate background like a flag or memorial setting.
Remember, each drawing improves dexterity and familiarity with the saluting veteran figure. The coloring page, apart from being recreational, reinforces the drawn details and the artist’s familiarity with color schemes. Practice spawns artistry.
Step-by-Step Drawing of the Pentagon Memorial and Coloring Page
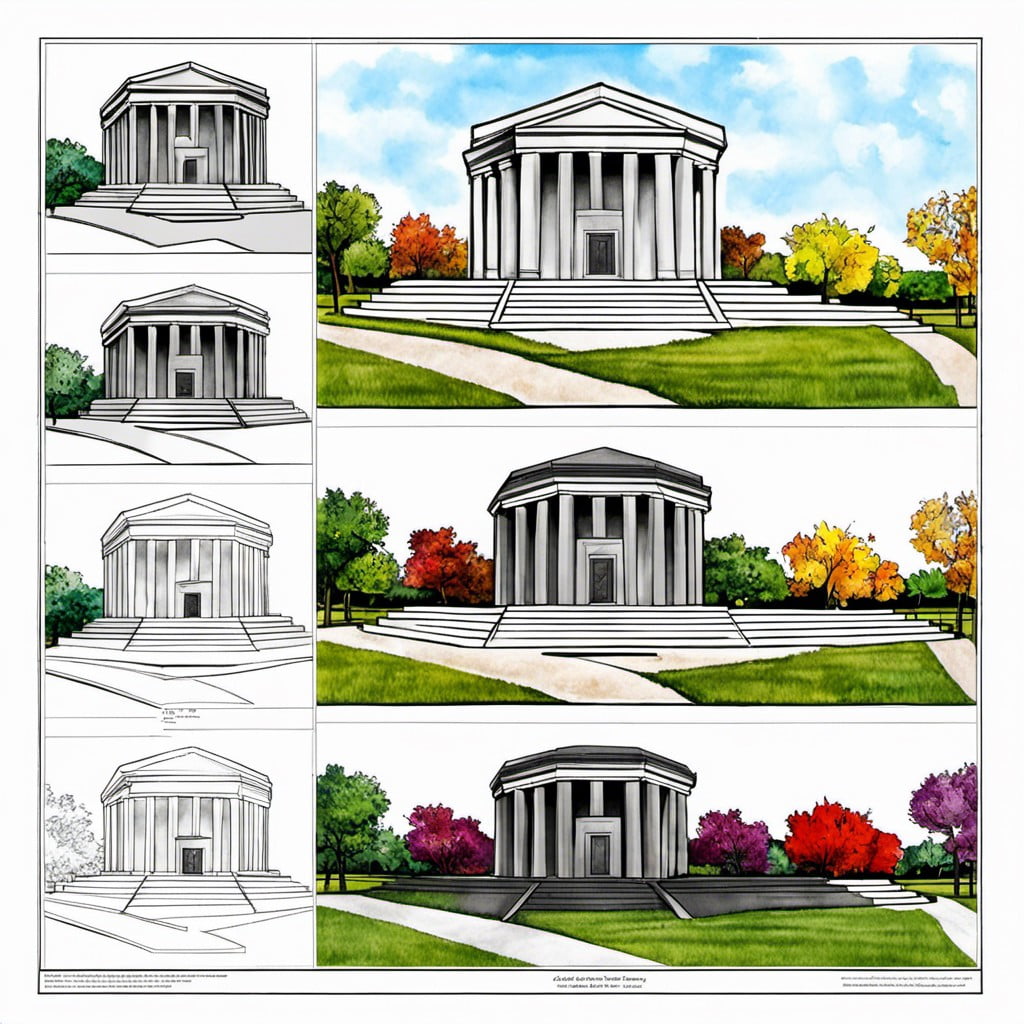
The Pentagon Memorial, located in Arlington, Virginia, is an outdoor park constructed in memory of the 184 individuals who lost their lives in the Pentagon and on American Airlines Flight 77 during the September 11 attacks.
1. Begin by sketching the rough outline of the Pentagon building. Draw a five-sided polygon – this forms the framework of our picture.
2. Keeping in mind the scale, draw 184 individual memorial units, organized as a timeline of the victims’ ages. Each unit is represented by a bench, which forms the essential design.
3. Next, show the age lines within the Memorial units. They denote the location of each bench and this forms a detailed map of 184 units.
4. Mark each of the hijacked flights’ path, adding more significance to the illustration.
5. Finally, add textures and shadows to make the drawing more realistic.
6. After completion, consider using colors to make your artwork more vibrant. Grey for the building, brown for memorial benches, and green for vegetation surrounding the monument.
This process may seem intricate but with patience, you’ll be rewarded with a significant piece of art.
Ideas Elsewhere
- https://artprojectsforkids.org/category/view-by-theme/holiday/memorial-day/
- https://artwithjennyk.com/project/memorial-day/
- https://hessunacademy.com/memorial-day-drawing-and-writing-prompts/
Liked reading this? Here’s more:

Recap: