Last updated on
Creating memorable art pieces becomes easier when understanding the emotional importance they carry, because each stroke to the canvas echoes a precious memory that lasts a lifetime.
I’ve designed unique illustrations for these ideas. I hope you get inspired!
The art of memorial drawing encompasses a creative spectrum confluent with heartwarming sentiments. True, you’ll find a plethora of idea reservoirs online, often rendered over and over again. While recognizing the beauty in these established concepts, this article aims to break new ground.
We will provide resources for these widely applauded ideas later, but let’s step divergently into a unique perspective. We aim to present fresh, extraordinary sketches that tread on rarely explored artistic terrains intending to amplify the special charm memorial drawings hold.
So, let’s together plunge into this world of innovative designs and discover how these fresh drawing ideas inspire new memories and pay tribute to old ones.
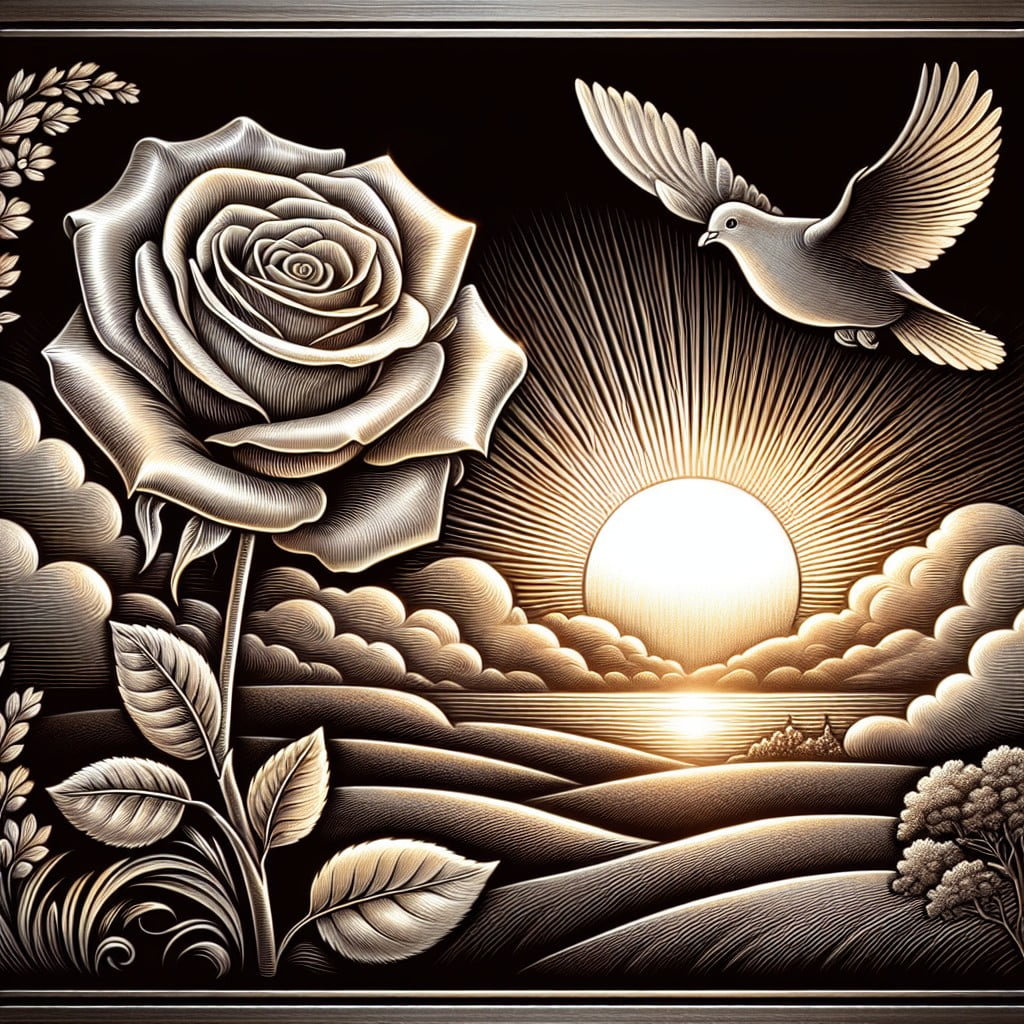
How to Draw a Dove of Peace and Coloring Page

Begin with a basic outline, sketching a circle for the body and a smaller circle for the head. Join these with curved lines to form the neck. Lightly outline the wings using gentle arcs, and don’t forget the tail feathers, represented by longer, slender shapes at the bottom.
The dove’s facial features come next. The eye is a small circle with a shaded pupil, placed midway down the head. Just above the eye, sketch a curved line for the eyebrow. The beak, starting from the eye, is two lines meeting in a point.
For detailing, draw the feathers lightly, use directional strokes for a realistic appearance. The wings have larger feathers at the tips and smaller ones towards the body. Within the smaller circle for the head, sketch an olive branch, arching towards the beak.
Finally, erase any unnecessary lines. Your dove is now ready to be filled in with color. Using soft shades of white and gray gives the dove a serene look, symbolizing peace. Using color pencils allows for good blending and gives a gentle appearance on paper.
Remember, practice is key when drawing. Each attempt will bring you closer to the perfect representation of a Dove of Peace.
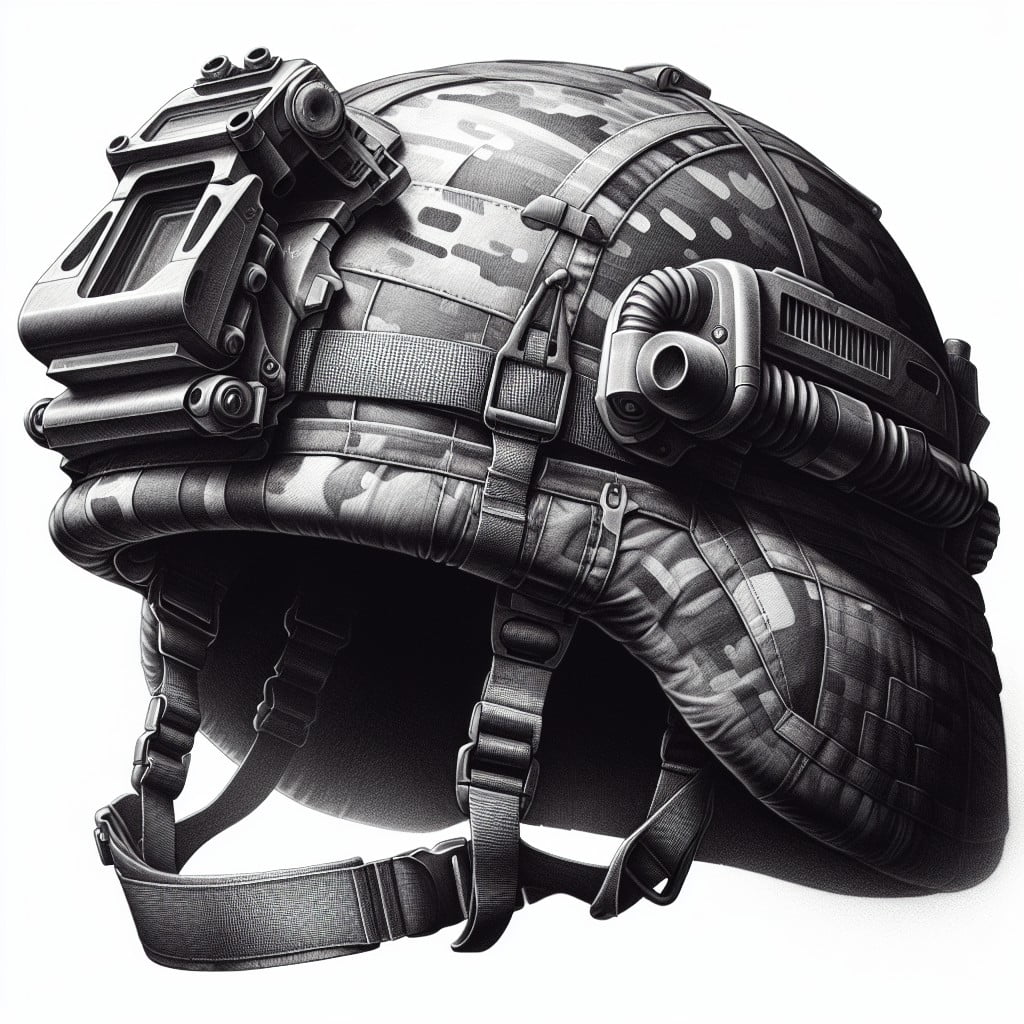
Sketching a Military Helmet Tutorial
Let’s dive right into the details:
1. Start with the Basics: Begin with simple geometric shapes. For a military helmet, use an oval as your base shape. Also, identify the light source and plan the shading accordingly.
2. Create Depth and Texture: Add depth by drawing a brim and pronounced lines depicting the helmet’s structure. Adding contoured lines helps give the texture of hard, rigid material.
3. Highlights and Shadows: Lightly shade the parts farther from the light to create an illusion of depth. Use white or very light pencil strokes for highlighting.
4. Details: Draw small rivets, chin straps, and camouflage patterns, if any. These features make your helmet realistic and personalized.
5. Refinements: Step back and view the work. Tweak any inconsistencies, smoothen out lines or adjust proportions. This is the stage for making your final touch-ups.
6. Final Shading: Once satisfied with the structure and details, complete your work by adding final shades and shadows to emulate a three-dimensional form.
Incorporate these stages into your sketching routine to enhance your drawing accuracy and proficiency. Practice is key. Start with these steps, then add your own unique elements to make the sketch your own. Practice different perspectives and shading techniques to create unique, personalized military helmets. Each drawing is a step towards mastering this skill. Happy drawing!
Step By Step Guide to Draw a Veteran Salute

Delving into the process of crafting the veteran salute, begin with a basic head outline, marking the position of the eyes and the direction of salute. It’s essential to attend to details like the angle of the hand touching the forehead to reflect the authenticity of military etiquette.
Next, focus on sketching the uniform, paying special attention to elements such as the shoulder patches, ribbons, or medals. These will add to the authenticity and honor of your depiction. Remember, each component should be proportional and accurately positioned to provide a realistic feel.
Emphasize lines and shapes that define the salute posture like the arm’s angle and the erect stance. The facial features should express honor and dignity, a vital aspect of the drawing. A light source determination is crucial too. It determines where to place the light, medium, and dark shades to give the drawing depth and dimensions.
Summing up, remember to go slow, make careful observations, and practice. Drawing is a skill that improves over time. Enjoy the process and take pride in your homage through art.
Easy Feather Drawing Tutorial and Coloring Page
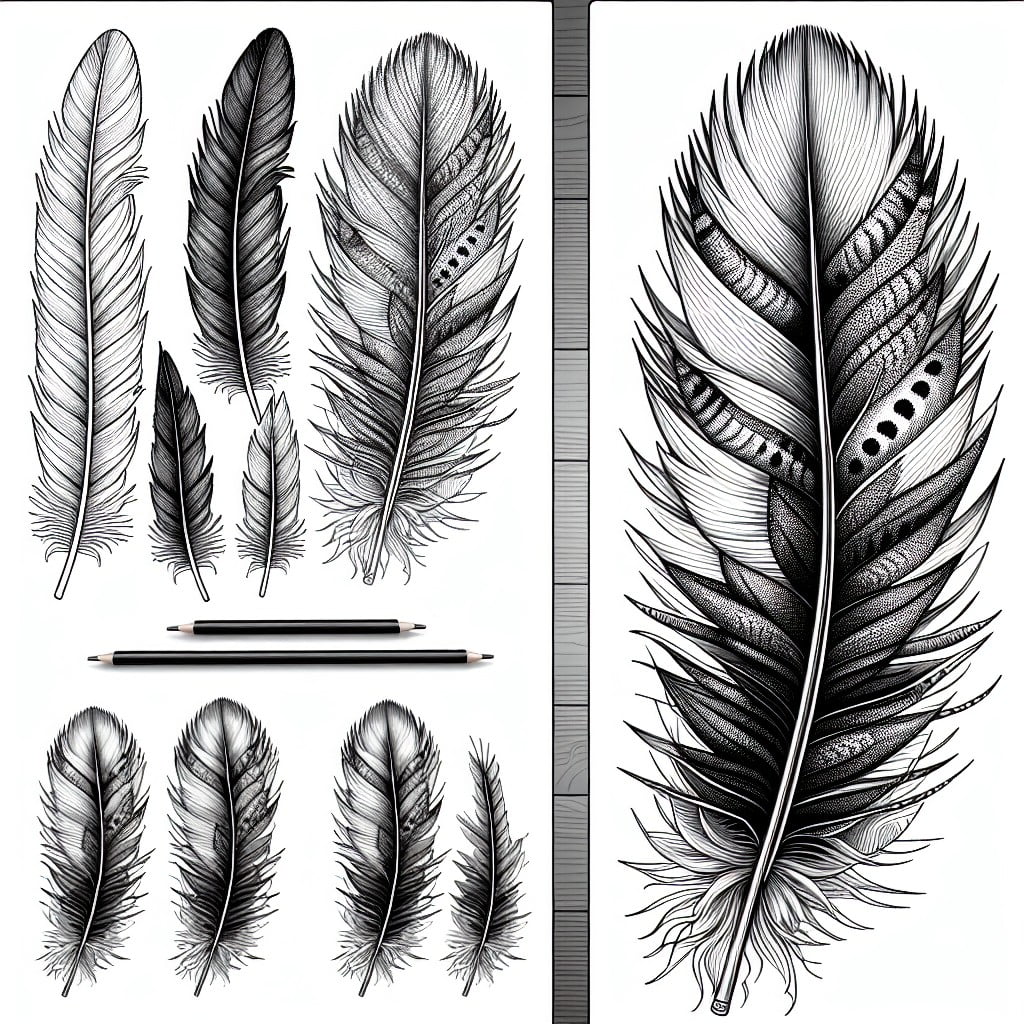
Let’s dive right into this touchingly symbolic tutorial. Feathers can symbolize many things, most commonly associated with the spiritual realm or used to memorialize a lost loved one. They represent freedom, courage, and the soul’s journey.
1. Start with Basic Shapes: Begin by drawing a long, slender oval, which serves as the feather’s spine and helps guide the figure’s overall shape.
2. Add Feather’s Contours: Use your light sketch as a guide to create the feather’s “fluff”. Draw curved lines extending from the spine, joining them at the top in a pointy tip.
3. Detailing: Create a texture on the contour with hatched lines that mimic the feather’s natural pattern. Always ensure your lines smoothly blend with the feather’s shape.
4. Create Feather’s Shaft: Draw two parallel lines in the center of the feather, representing the shaft. This can be thickened or thinned based on your preference.
5. Coloring: Adding colors brings life to your artwork. Opt for colors symbolic to you. If the feather symbolizes someone, you might want to use their favorite color.
With your feather drawn and ready to explore its colors, this versatile memorial motif can now hold a special place in your heart. Be it an emblem of free spirit or hope in memorializing your loved ones.
Creating an Eternal Flame Art Piece
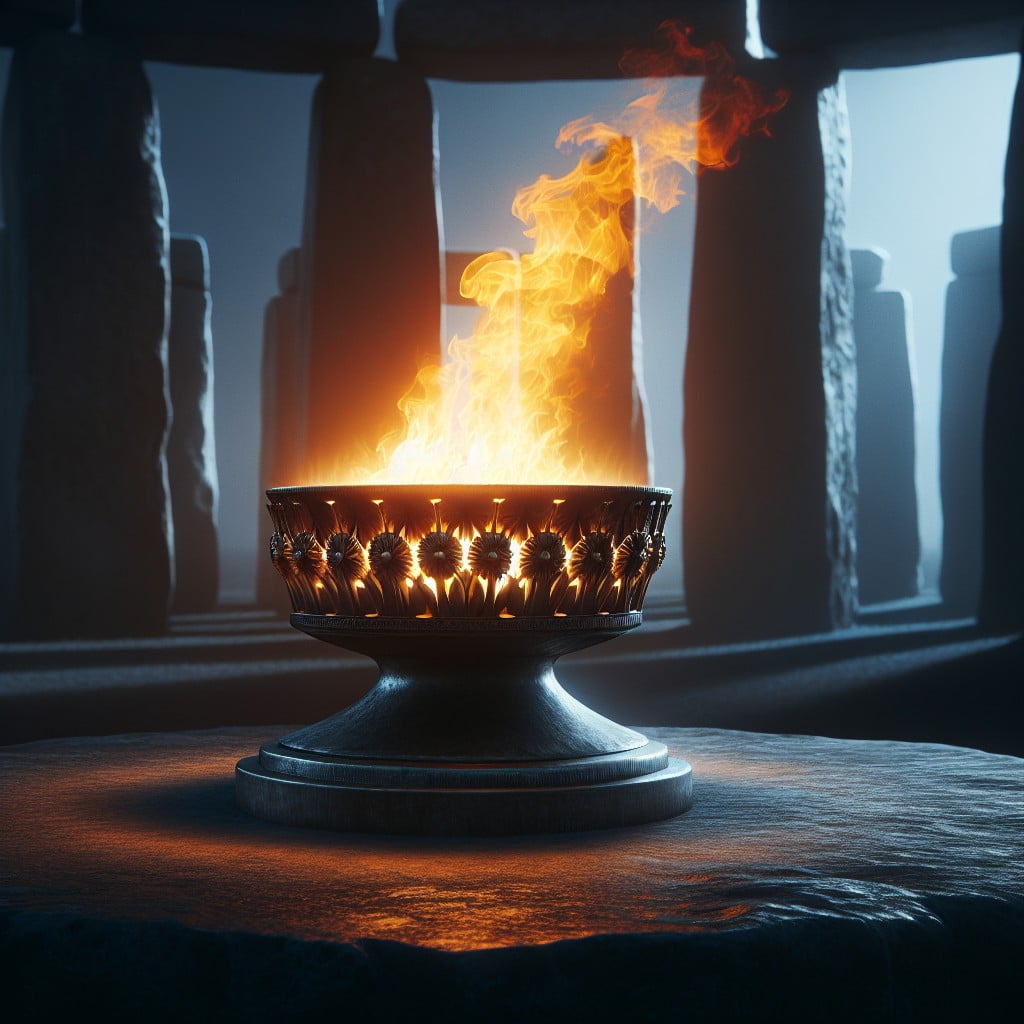
Developing this emblem of remembrance and honor begins with careful selection of materials. Consider using colored pencils or pastels to capture the vibrant, warm hues of the flame. Start with a simple base drawing a triangle for the flame shape. Layer colors, beginning with darker shades of red and orange at the bottom, transitioning towards lighter yellows and whites at the tip.
For the pillar, use gradients of gray and white for a marble look or go for a more rustic charm using variations of brown for a wooden base. The flickering light is key: depict this by using a subtle smudging technique around the flame perimeter to create an ethereal glow.
Include backdrop detail to enhance the solemn mood; perhaps a dusk or dawn setting. Use subdued, complementary colors to keep the focus on the flame itself.
When drawing an eternal flame, it’s not just about technique, but also about symbolism. It represents undying memory, a beacon of hope, constantly reminding us of the sacrifice made by others. This emotional depth should be reflected in your artwork.
Guided Tutorial On Sketching the Tomb of the Unknown Soldier
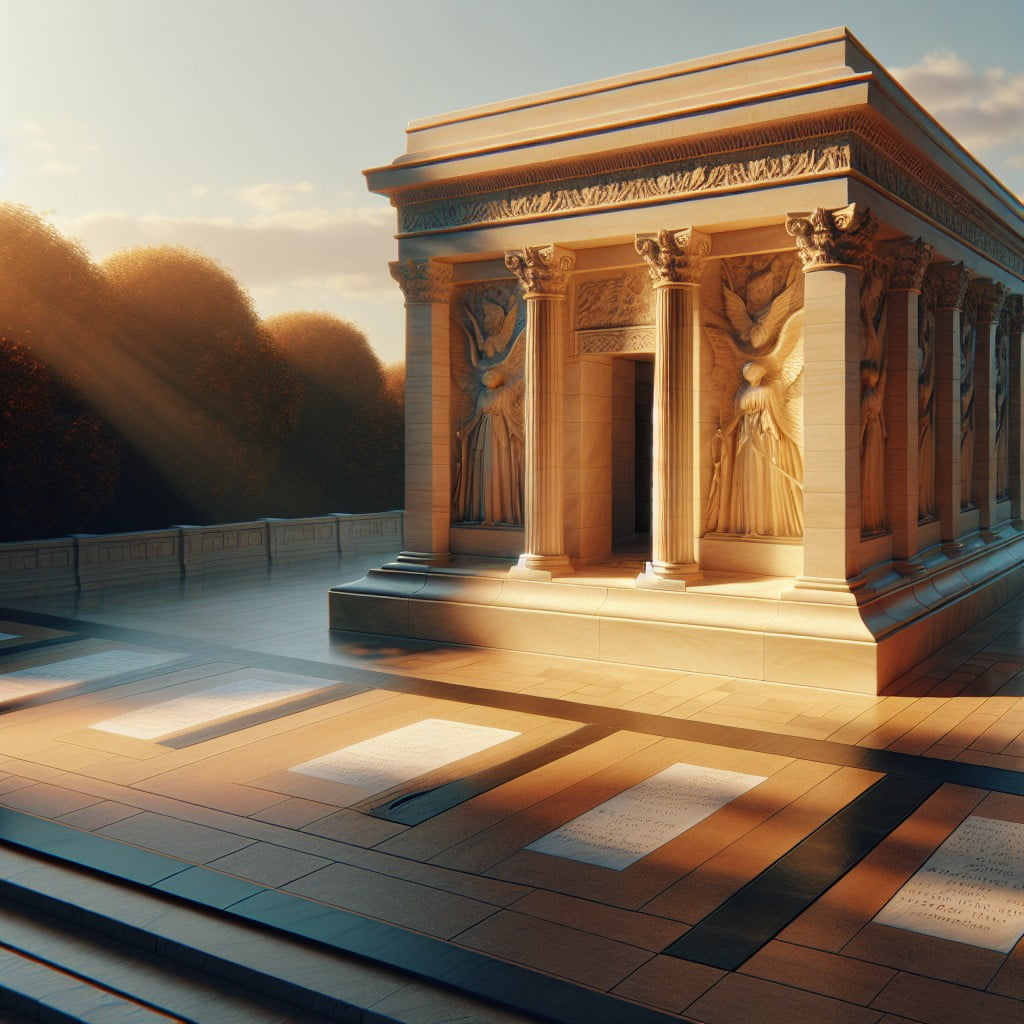
To begin, you’ll need a good pencil and sketch paper. Let’s dive into the technical details of the process.
1. Start with the Grave Marker: To depict the monument’s grandeur, establish the monument’s base as the center point. The grave marker, draped with a flag, requires intricate shading to capture the fabric’s nuanced folds.
2. Focus on the Guard: Add the Tomb Guard set slightly to the right. Pay attention to the uniform’s detail and posture to convey respect and solemnity.
3. Incorporate the Mat: Include the rubber mat on which the guard paces. This element not only adds depth to your drawing, but also signifies the constant vigil.
4. Background Details: Sketch the steps and pillars of the memorial amphitheater in the background, using lighter strokes to exhibit the distance.
5. Final Details: Lastly, detail the honorary wreath and the inscribed words ‘Here Rests In Honored Glory An American Soldier Known But To God’.
Remember, attention to details and patience pays off in producing an emotionally captivating piece. Happy sketching!
Drawing a Personalized Memorial Plaque Tutorial
To kick-off the process, concentrate on the shape. A rectangular or oval plaque is a common choice. Keep the edges smooth and consistent. It’s often helpful to use a ruler or a curved object as a guide.
Next, apply perspective. Imagine the plaque is fastened to a wall and sketch the shape accordingly. A slight tilt and the use of connecting diagonal lines can aid in creating this illusion. Don’t forget to shade the areas that will naturally be in shadow.
Now, focus on personalization. Will you add a name, a special quote, or perhaps an etched design? Use an eraser to create an inscription, ensuring letters or numbers are evenly spaced and aligned. Be creative; the inscription can be a favorite saying, a commemorative date, or even a small pictorial representation.
Finally, consider the use of texture. You might want to imitate the look of polished brass, worn stone, or antiqued wood. Different shading techniques like hatching, cross-hatching or stippling can create the illusion of these surfaces.
Remember, patience and practice always lead to improvement. Don’t be too critical of your work. Each sketch is a learning opportunity.
Guide to Drawing a Collection of Medals and Decorations

To begin, keep in mind that medals and decorations vary greatly in shape, size, color, and details. The essence of drawing them lies in these unique elements.
1. Observe closely: Maintain a strong attention to detail with each medal or decoration, be it grooves, ribbons or insignias.
2. Rough Sketch: A pencil-drafted line drawing can provide the initial structure. Including smaller shapes helps in breaking down complex insignias.
3. Shading: Use varying tones to capture the metallic surfaces. Remember darker shades for deeper areas, lighter ones for raised portions.
4. Color: After shading, employ paints, colored pencils, or markers to breathe life into your collection.
5. Patience: Some decorations have intricate designs, requiring neater lines and careful rendition.
6. Practice: Repetition aids perfection. Over time, speeding up the process while maintaining accuracy is attainable.
With these key focus points, the depiction of the collection’s depth and authenticity in your drawing increases greatly.
How to Draw an American Soldier Silhouette Tutorial

First, start by drawing the basic outline. Create a straight vertical line to denote the soldier’s stand, then map out a head, body, arms, and legs with simple shapes like ovals and rectangles.
Next, flesh out the sketch, referring to references if needed. Focus on the unique silhouette of a military uniform, such as the helmet shape, the broad shoulders, and the straight back posture.
Then, add in extra details such as the weapon. Keep the weapon’s design simple, and ensure the soldier’s grip on it is accurate.
Finalize your sketch by thickening the outline to emphasize the silhouette. Use these contours to shape the form and define the silhouette. Erase your helping shapes and any unnecessary lines.
Lastly, fill in your silhouette with a uniform color, typically black or grey scale, to maintain the silhouette effect. Use lighter shades for areas you want to subtly highlight, like the rim of the helmet or boots.
Throughout the process, remember to keep refining your drawing to ensure the silhouette remains recognizable. Each detail should contribute to the overall image of an American soldier. Follow this method, and you will skillfully illustrate a distinct and respectful tribute to these brave heroes.
Remember art is subjective, so it’s okay for your sketch to adapt as you go. The end goal is for you to produce a piece of work that resonates with you and adequately pays homage to American soldiers in your unique style.
Step By Step Guide to Sketching Hero’s Boots

Start with identifying the various parts of a boot; the toe, the tongue and the upper, among others. Use soft pencil strokes to roughly sketch out the boot’s structure. This initial sketch serves as blueprint for your final drawing.
Next, focus attention on the details. Military boots often have distinctive features like thick outsoles and reinforced toes. Add another layer to your sketch, further defining these characteristics. It’s these details that provide a sense of authenticity and realism to your drawing.
Now, play with shades and shadows. Create depth by blending dark and light areas, mirroring the way light naturally falls on boots. Remember, the topmost portions are usually lighter, while the areas under creases are darker.
Don’t forget the unique wear and tear these boots might exhibit. Scratches, scuffs, and creases – these all tell the story of the hero who wore them. Be creative, but keep it authentic. The goal is not just to draw a pair of boots, but to reflect the journey of the hero who wore them.
Lastly, invest some time in refining the sketch. Gradually increase the contrast, emphasize the finer details and soften any areas that seem too harsh. Perfection lies in the finishing touches.
Remember, practice makes perfect. Don’t be disheartened if your first attempt isn’t perfect. Each endeavour is a step closer to developing a true masterpiece that pays a fitting tribute to our heroes.
Personalized Dog Tag Art Tutorial
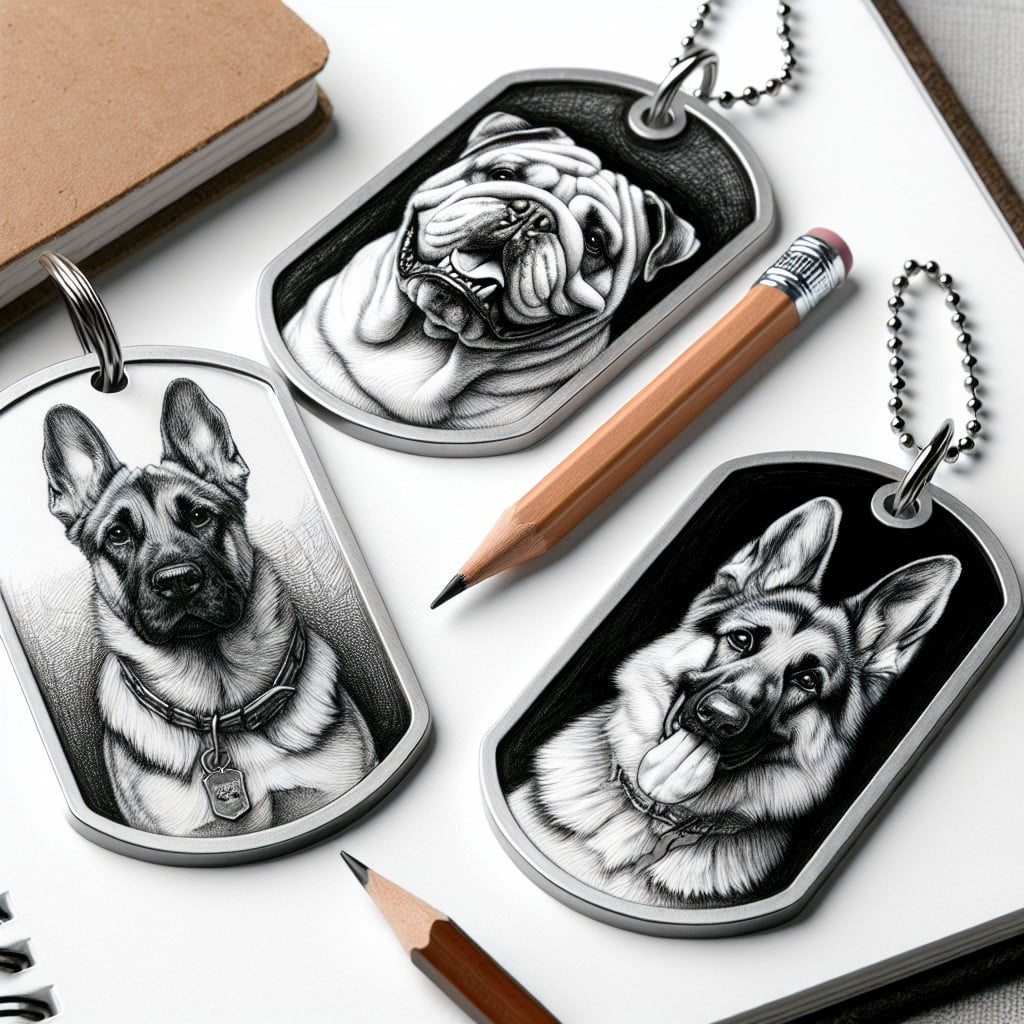
Dive into creating a fitting tribute to your military family members or friends with this piece. You’ll need a reference photo of the official military dog tags for your specific branch of service to start.
1. Begin with a simple, toned down background to make sure your tags stand out.
2. From there, give shape to the rectangular dog tags using straight lines, with a thin horizontal oval on the top for insertion of the neck chain.
3. Next, accurately add details such as the soldier’s name, serial number, blood type, and religious preference, or alternatively, a personal message or date.
4. Consider adding realistic elements like rust or wear for a vintage look, or keep the tags shiny and new.
5. The neck chain, typically made up of small bead-like structures, deserves special attention. Practice drawing these until you can render them with ease.
6. Finally, adding lights and shadows can help make the tags appear three dimensional.
Remember, this artwork can be both a creative exercise and a touching commemoration of someone who’s served. Every stroke of your pencil is a recognition of their sacrifices. Keep this in mind as you sketch the contours and inscriptions on the dog tags.
Drawing Choir of Angels Memorial Concept

Angels symbolize peace, protection, and comfort, making them ideal for a memorial concept in artistry. Let’s delve into how you can encapsively portray this theme.
1. Theme Connection: Always remember, each angel you create should represent a meaningful connection to the memorial, whether a personal trait, accomplishment, or shared experience.
2. Depiction of Angels: Options range from traditional human-like figures with halos and wings to more abstract lines and shapes that give an angelic impressionism. Consider also incorporating iconography, such as a harp or an olive branch, as an identifier.
3. Numbers and Positioning: A choir generally represents harmonious unity. So a group of angels or their placement should convey this. Arrange them in a way that effectively and tastefully represents mutual consolation or shared celebration.
4. Background Elements: Make use of clouds, light, or even music notes to set the scene for the choir without overshadowing your main subject.
5. Colors: Light tones and pastels often work best for angelic themes, although touches of gold or silver can also add a fitting touch of majesty and grace.
Keep these pointers in mind to design a balanced and moving memorial artwork that provides comfort and resonates with the viewers.
Easy How to Draw a Military Rifle With Helmet Tutorial

Moving forward with the sketch, it’s important to focus on the detail and shape of the rifle, maintaining the right proportionality to preserve realism. You’ll start by modeling the lengthy barreled body before dosing in the trigger and holder contours. Ensure the magazine is detailed, highlighting its angled position for a more dynamic look.
Now for the helmet, strategically placed atop the rifle, keep its round shape in mind. Start with a simple oval structure, then contour the helmet’s sides to give it depth and a three-dimensional feel. Don’t forget the inner side markings indicating its metallic nature.
During the process, embrace the symbol of valor and sacrifice it represents. This will foster a deeper connection with your art piece and reflect in the final result. Remain patient and consistent throughout your drawing journey, paying special attention to these minute details for a more realistic and emotionally compelling piece.
Sketching the Memorial Day Parade Tutorial
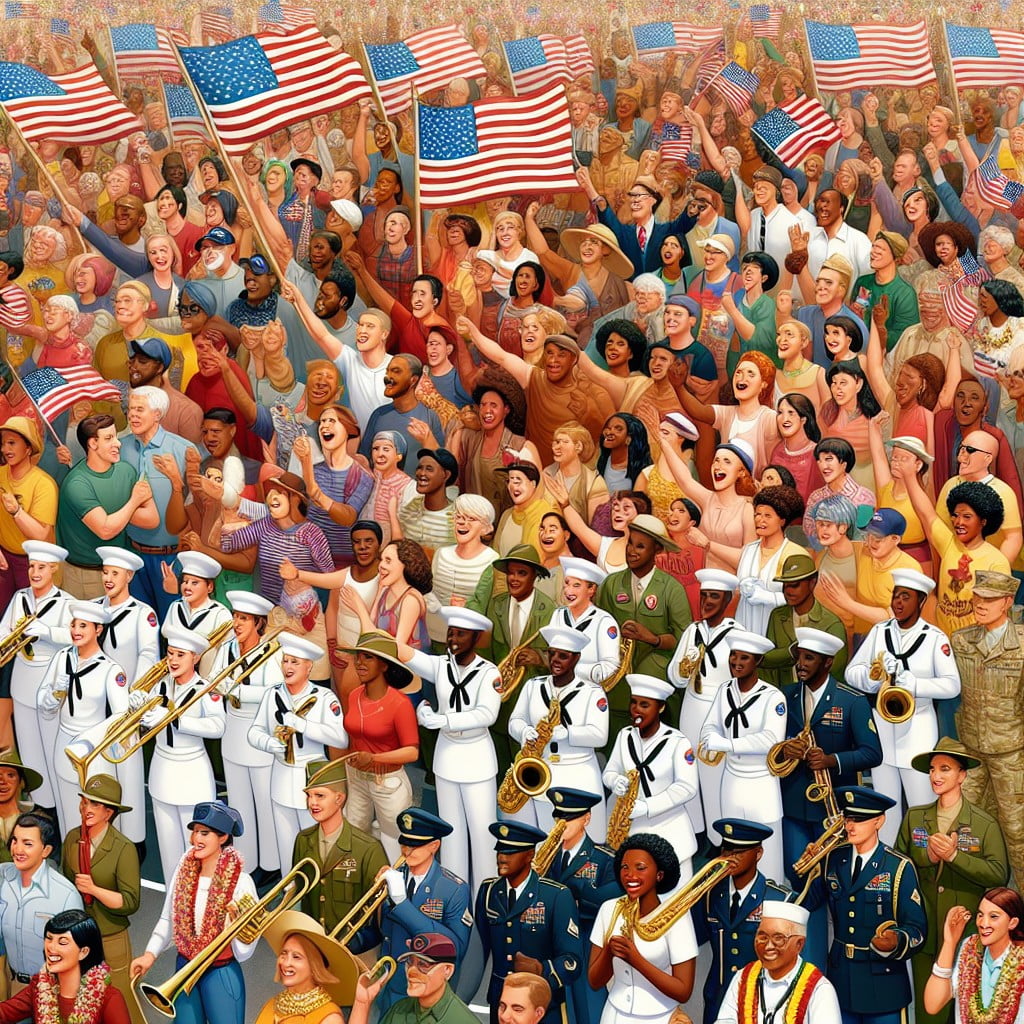
To capture the lively essence of a parade, start with lightly sketching a receiving line or crowd, placing people at different heights for a realistic perspective. Moving on, draw a marching band in the middle ground of your artwork. Capture individuals with their instruments, varying poses for naturalness. Color guards, floats, and veterans could be the next elements to add. Incorporate waving flags, service banners, or a symbolic balloon release to elevate the festive and emotional atmosphere.
Remember, perspectives are crucial, especially in crowd scenes. Choose a vanishing point to ensure consistent perspectives. For buildings and street scenes, begin with basic shapes and add details gradually. To achieve depth, objects further back should be lighter and less detailed.
Finally, practice details like facial expressions and clothing folds. They are small but significant features that can make your drawing come alive. Textures like the shine of brass instruments and flapping flags lend authenticity to the art piece. Just a few strokes can callback a meaningful event etched in the viewer’s memory.
Remember, drawing is not about perfection but capturing the essence and evoking the emotion. Don’t forget to soak in the moment while you’re sketching.
Guided Drawing of a Military Tank
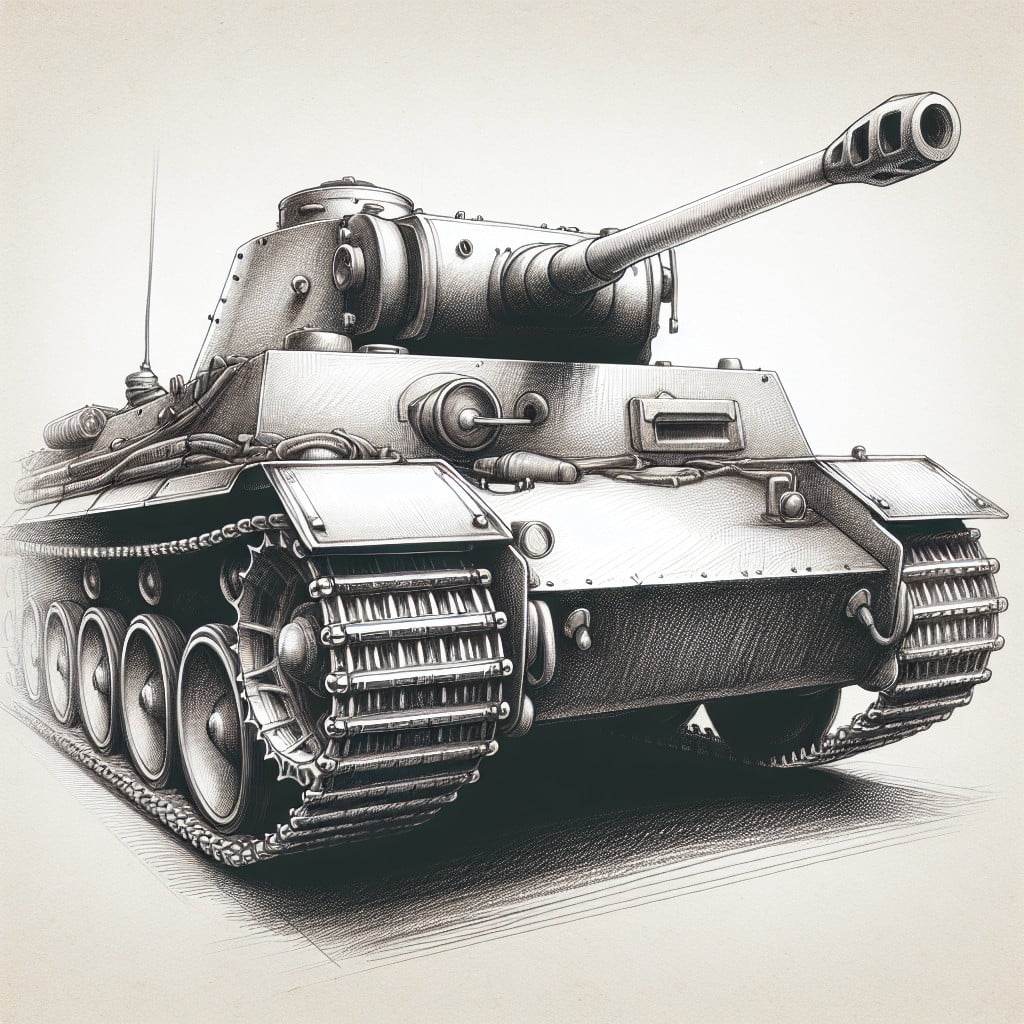
To initiate the tank art piece, begin with the basic shapes: a large oval for the body and two elongated rectangles for tracks. Break down complex structures into simpler forms; the turret, for example, can start as a circle with a rectangle for the gun.
Remember, angles are crucial for realism. The tracks aren’t flat but angled relative to the ground. Visualize the tank in three dimensions and show the rounded nature of tracks with differing line lengths.
Incorporate real-world details: the hatch, the array of wheels under the tracks, and accurately depicted suspension system. Add texture; rough, weathered surfaces to capture the rugged appeal. Understand light and shadows, giving depth to your drawing such as darker lines on one side to simulate sunlight on tank’s metal surface.
Lastly, remember, patience is a virtue in art. While it might not come perfect the first time, continuous practice and observation aid in capturing the tank’s essence and details better.
Creating a Drawn Collage of Important Memorabilia
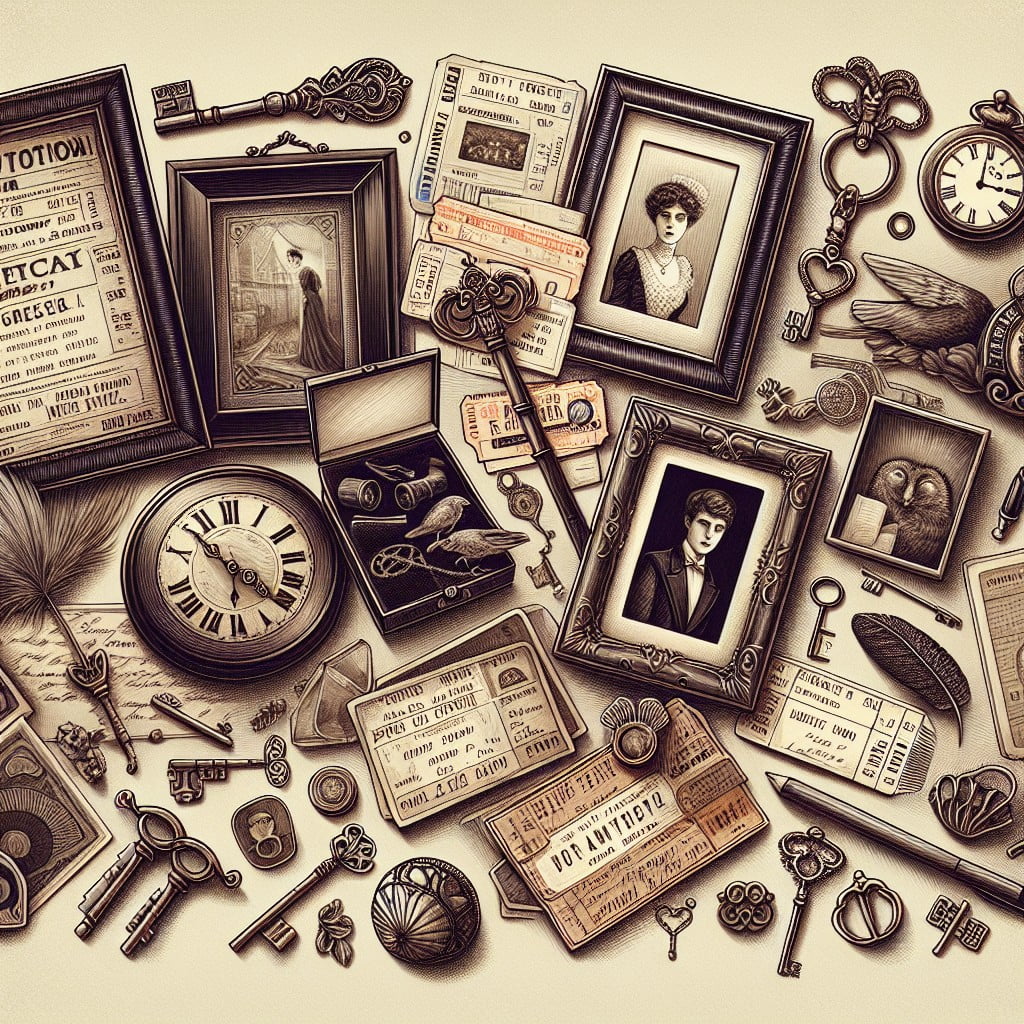
Start by identifying which pieces of memorabilia emanate a significant emotional response. The more personal they are to you, the more powerful your artwork will ultimately be. Items can range from old letters, photos, pieces of uniform, medals or even a memento from a visited memorial site.
Once selected, make rough sketches of each item on a separate piece of paper. Consider varied perspectives and angles to offer more visual interest to your collage.
When you’re satisfied with your sketches, it’s time to organize them into a collage. Use a larger sheet of paper for this. Arrange the sketched items, bearing in mind the balance and composition. Items of greater significance can be positioned centrally, or made larger, to highlight their importance.
The final step involves carefully penciling in your sketches onto the collage base. Here, precision is key to manage the intricate details of the memorabilia. The result is your personal, emotion-infused memorial art piece.
Remember to sprinkle in your creativity throughout the process. This isn’t just about drawing, but creating an emotional expression with respect to your memorabilia.
How to Draw Taps Being Played On a Bugle
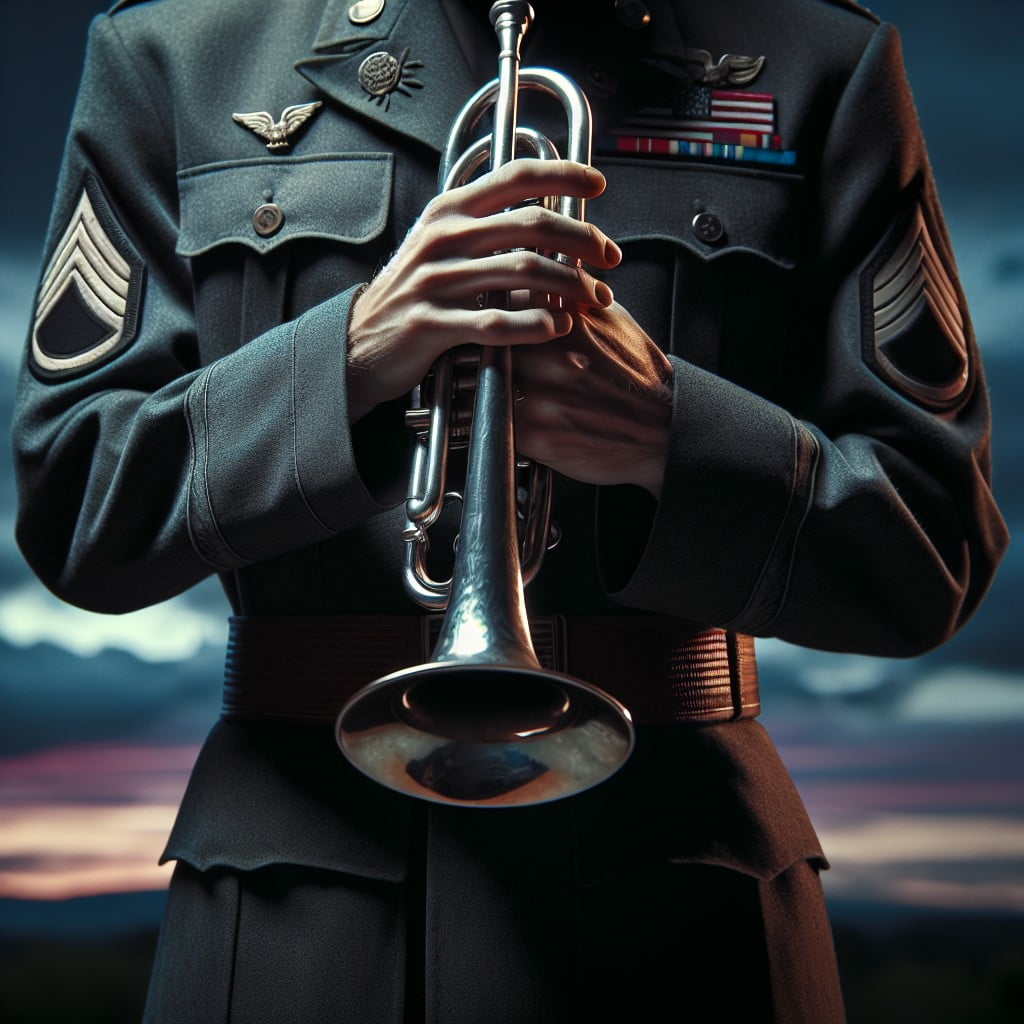
Diving right into the heart of the tutorial, firstly, set your focus on capturing the bugler’s posture. Specific attention should be devoted to detailing the hands, as these are critical in displaying the act of playing taps. Pay close attention to details like the precise finger positioning on the instrument.
Next, work on sketching the bugle; its unique shape and fine details – like the flared bell at the end, the coiled tubing and mouthpiece – bring out authenticity. Do not overlook the importance of illustrating the glossy metallic texture to infuse a degree of realism into the sketch.
Following this, it would be beneficial to bring the environment into play: the tradition has it that taps are often played at sunset, so it could add depth to the illustration if you can weave in elements of a setting sun, such as a vibrant sky or creeping shadows.
While documenting a solemn event, expressing emotion in your art is essential. The emotion of the bugler, their lowered head and closed eyes can convey respect and grief. Try to capture these subtle hints of emotion in your sketch.
Finally, to further enhance the realism of the scene, consider adding small yet critical elements such as sheet music or a hat placed at the feet of the player, which may be a common sight during memorial events.
Remember, this illustration isn’t just about technique and accuracy but about storytelling and evoking emotion. This is not merely a drawing tutorial but an exercise in empathy, reflection, and remembrance.
Drawing a Poppy Wreath Tutorial
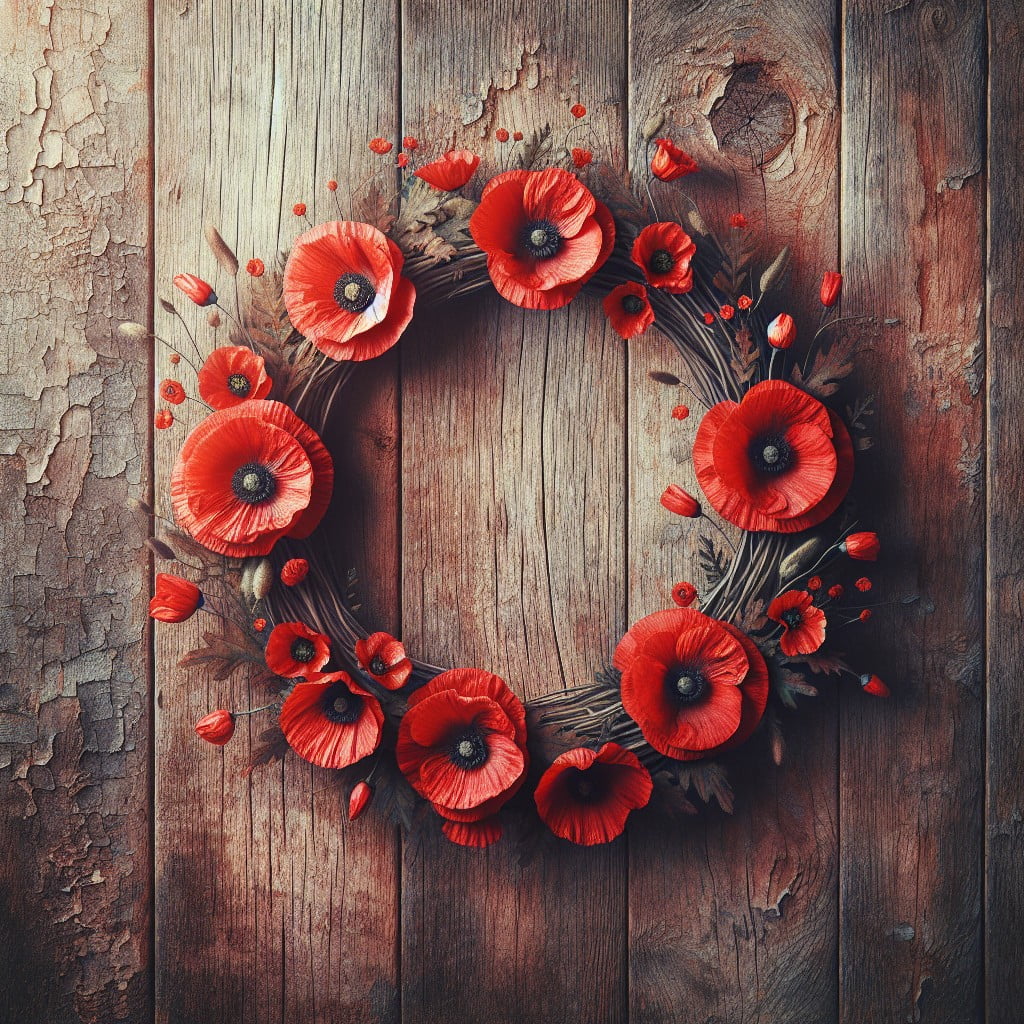
To create a poignant symbol of remembrance, try your hand at sketching a poppy wreath. It is a deeply significant emblem linked with memorial events worldwide, particularly recognized in military commemorations.
1. Begin with a basic circle – this will act as a guide for the overall shape of your wreath.
2. Divide the circle into quadrants to evenly distribute the flowers throughout.
3. Starting in one quadrant, carefully sketch a cluster of three to five poppies. Remember, poppies have four to six petals that are slightly irregular in shape to give it a more natural look.
4. Continue filling in each quadrant with clusters of poppies, overlapping them slightly to create depth and volume.
5. Subscribe shades to the poppies using light and dark tonal variations for an added 3D effect.
6. Detailing is key – add delicate lines from the center of each blossom to the petals’ tips, conveying a sense of intricate veining.
7. Also, embody the stems; intertwine them to reflect the unity of the wreath.
8. Lastly, for the background, consider a simple shadow under the wreath, making it appear more realistic.
This is a delicate project that offers an opportunity to reflect and pay respects while getting lost in the tranquility that drawing provides. Keep in mind, there’s no ‘right’ way to create this piece. Your poppy wreath drawing should be individually expressive and representative of your unique style and tribute.
How to Sketch a Veteran’s Hand Holding an American Flag
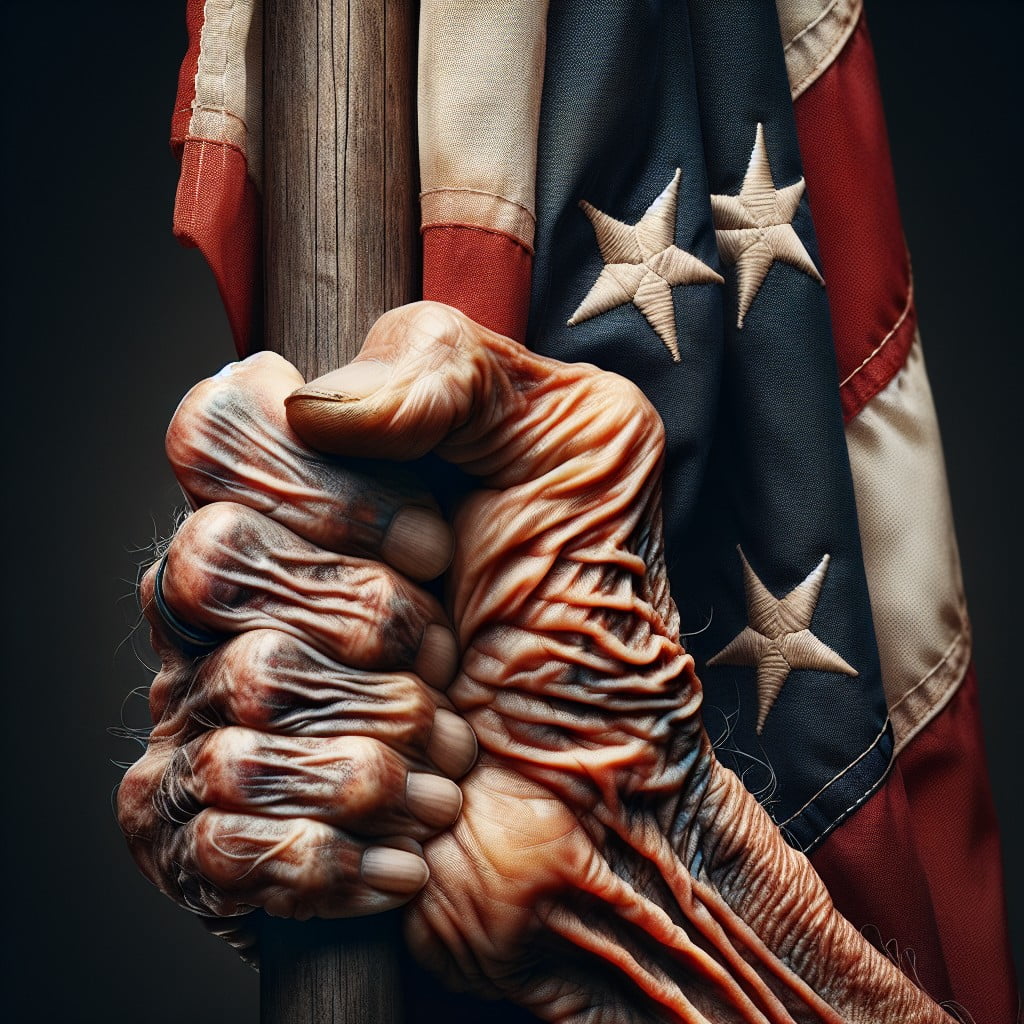
Once you’ve nailed the basic proportions, move on to sketching the outline of the veteran’s palm and fingers. Envision the hand as being slightly clenched, holding onto the flag. The thumb will be tucked under the fingers, securely griping the flag. Remember, the aim is to illustrate strength and resolve, which can be achieved by emphasizing the visible veins and wrinkles on the hand.
The flag should be sketched fluttering, to depict movement and symbolize liberty. Focus on capturing the details of its stripes and stars, which bring out the patriotism in this poignant piece. Don’t fret if the flag isn’t perfect; it’s all about capturing the essence.
Expose the artistic expression in the portrayal of emotion through the hand’s grasp and the flag’s flow. Use soft pencil strokes to create an array of shades and texture in your drawing. Go darker in the areas of shadow and lighter in areas exposed to light. Gradually build up these tones to achieve a feeling of depth and dimension.
Finally, don’t forget to add personal details. This could be a unique ring on the veteran’s finger or personalized scratches and folds on the flag. It’s these precise details that breathe life into your drawing and make it truly your own.
Step By Step Guide On Drawing Arlington National Cemetery
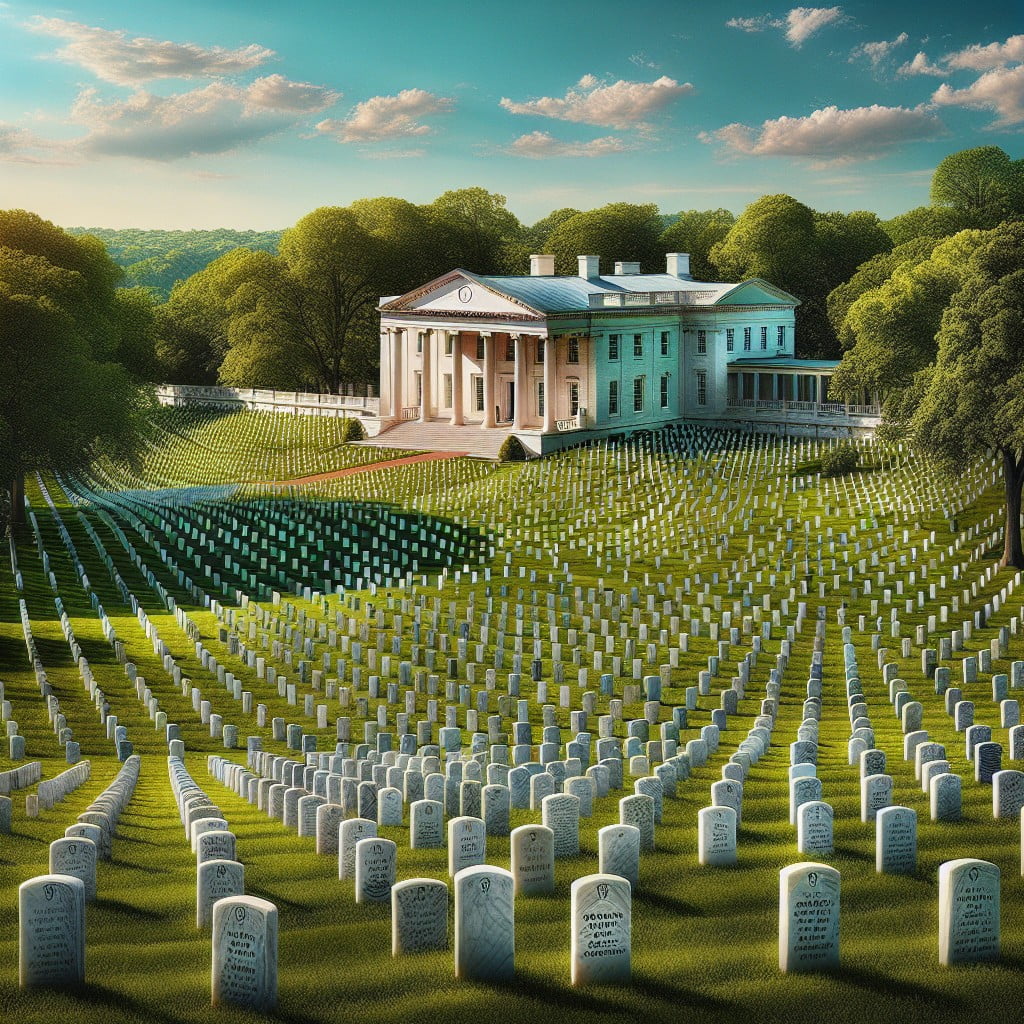
Delving into the task, you’ll need to start by lightly sketching an array of gravestones on a hilly landscape. Ensure the stones vary in size and shape for a more realistic portrayal. Focus on proportion and space to reflect the depth of the scene.
Next, add the eternal flame monument, burning brightly as the centerpiece. Its detail should be intricate for emphasis. As well, remember to include the Arlington House overlooking the cemetery in your background.
Highlight the rows of gravestones fading into the distance, suggesting the multitude of braves resting there. This vanishing point approach provides depth to your image.
In considering the serene atmosphere of the site, sketch in some solemn oak trees here and there. They afford the cemetery a remarkable backdrop. A path winding among gravestones brings an element of direction.
Use soft and somber shading to convey the quiet, respectful ambiance of the cemetery. Work the color contrasts carefully to ensure a peaceful yet impactful image.
Finally, details like birds in the sky, a lowered flag, or faintly drawn figures in the distance add life. A special note to adding weathering on monuments and gravestones, it indicates the pass of time.
Remember, the goal is to stir emotion, paying tribute to brave hearts lying herein.
Ideas Elsewhere
- https://artprojectsforkids.org/category/view-by-theme/holiday/memorial-day/
- https://rfhr.com/creative-memorial-ideas/
- https://www.tulipcremation.com/articles/tulip-expert-guides/end-of-life-planning/memorial-art-guide.html
Read More Like This
 15 Funny Graduation Cap Ideas to Make Your Big Day Unforgettable
 15 Unique DIY Christmas Decorations Ideas for a Festive Home
 15 Creative Science Fair Board Ideas to Amaze Your Audience
 15 Handmade Envelope Decoration Ideas for Creative Gifting
 10 DIY Gifts for the Whiskey Lover in Your Life
Recap: