Last updated on
Explore memories wall art ideas because they effortlessly turn those precious moments into stunning displays, setting a unique and personal touch to your home.
I’ve designed unique illustrations for these ideas. I hope you get inspired!
Step into a world of artistry and personal expression, as this article uncovers innovative memories wall art design ideas.
While plenty of popular motifs flood the internet, this piece aims to break new ground.
Yes, treasured classic ideas will receive their well-deserved thumbs-up, and a list of resources to access them will sit comfortably at the end of this read.
But the paramount aim here? To dive headfirst into a pool of fresh inspiration, revealing unique designs from previously unexplored angles.
Prepare to unearth a new batch of delightfully creative ideas ripe for the picking.
Graffiti-Style Family Portraits
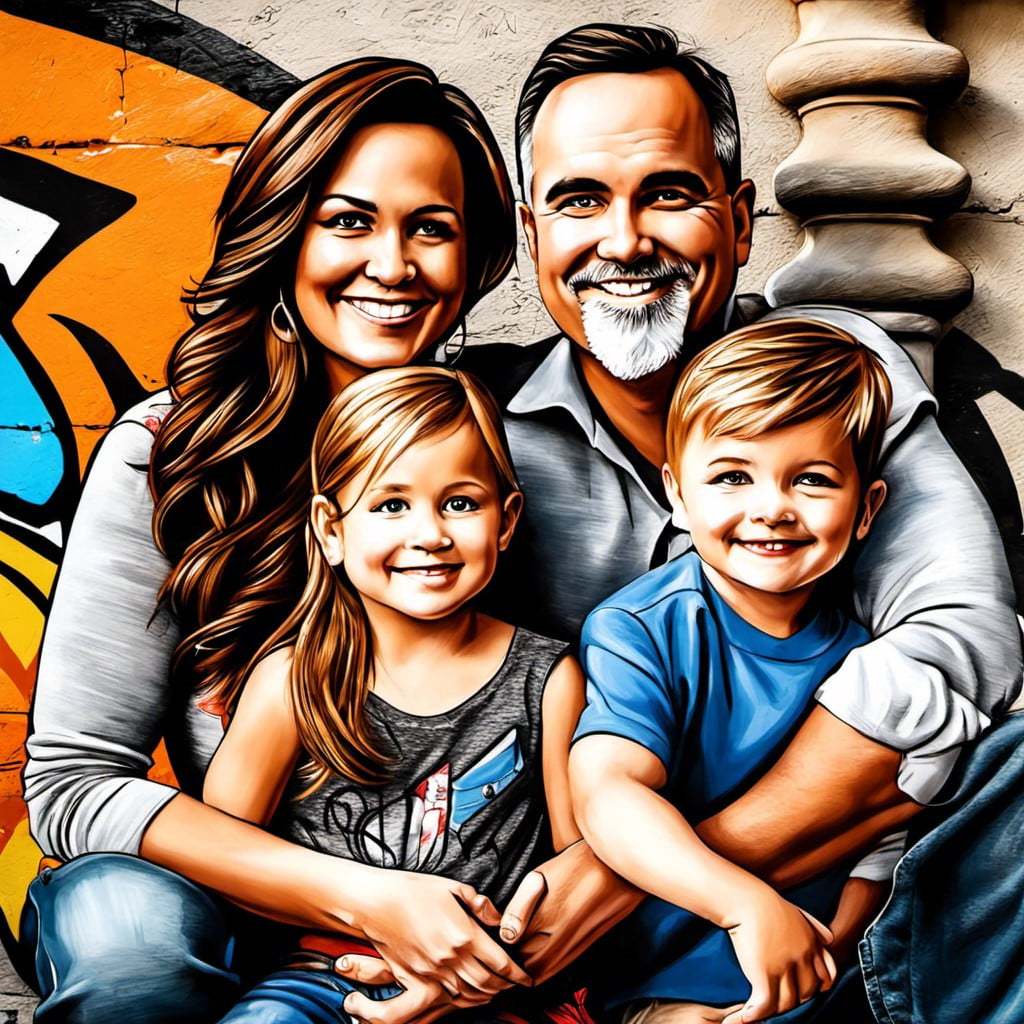
Creating a wall art reminiscent of street art aesthetics can evoke an exciting, fun-loving feel to your space.
Render lifelike or whimsically styled faces of your family members in bold, vibrant hues, capturing distinguishing facial features for an authentic touch.
Use spray paints or wall-friendly acrylics to ensure an urban, edgy look without damaging your walls.
Consider hiring a local artist for a professional touch or unleash your inner artist if you’re feeling adventurous.
This approach is especially captivating in contemporary or industrial style interiors, adding a personalized twist and a pop of color to your surroundings.
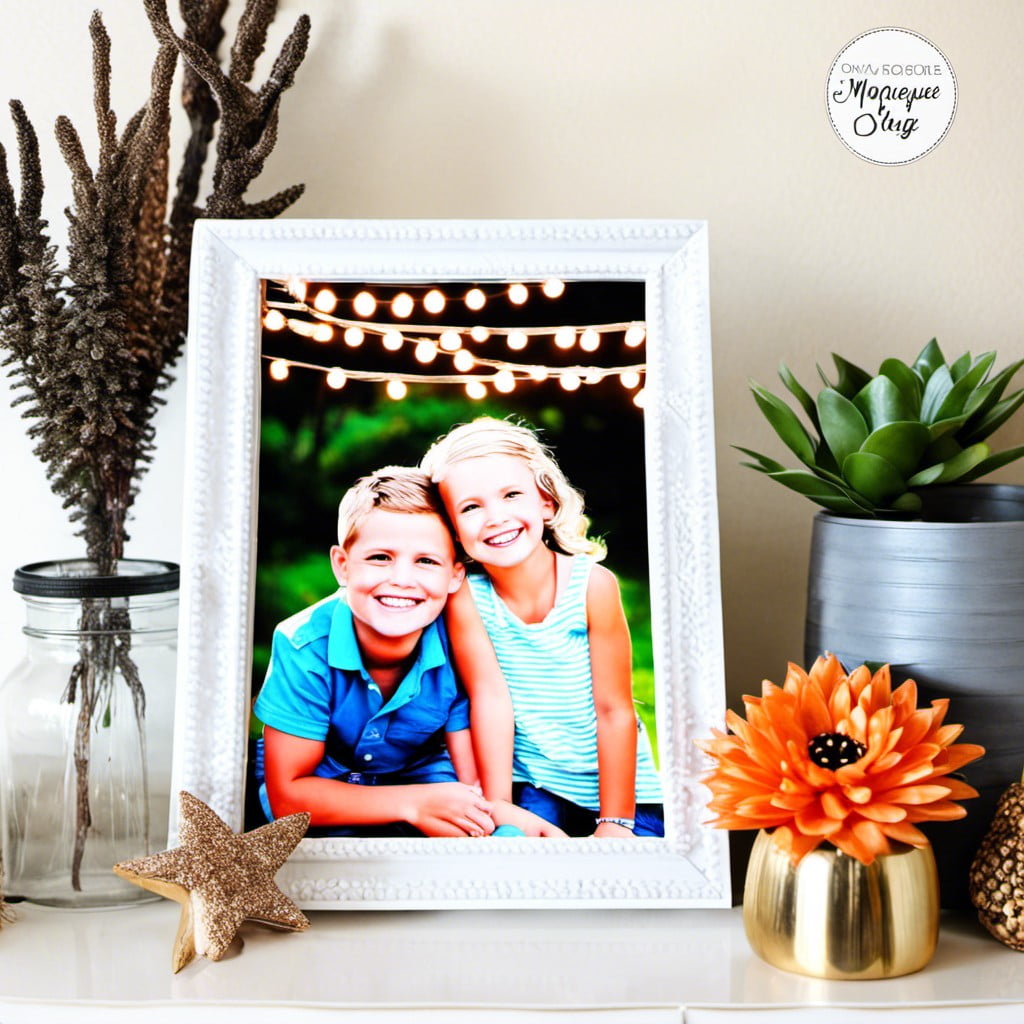
Repurposed Antique Frame

To deliver a sense of nostalgia with a stylish twist, consider utilizing an old frame. This provides an excellent way to pay homage to your ancestry by housing a family heirloom or an age-old photograph.
Bear in mind, the beauty of this idea lies not only in the photo but also the frame itself – find a piece with a rich history or a unique design that speaks to you. You may choose to keep its original finish to sustain the charm of bygone eras or give it a paint update to match the aesthetics of your current décor.
Remember, if the frame has intricate carvings, consider placing it against a plain backdrop for a dramatic contrast. Additionally, you can experiment with groupings of frames in varying styles and sizes. This can result in an eclectic display that still holds a coherent visual interest.
Finally, if the content inside is delicate or valuable, consider adding a layer of glass for protection without compromising the view.
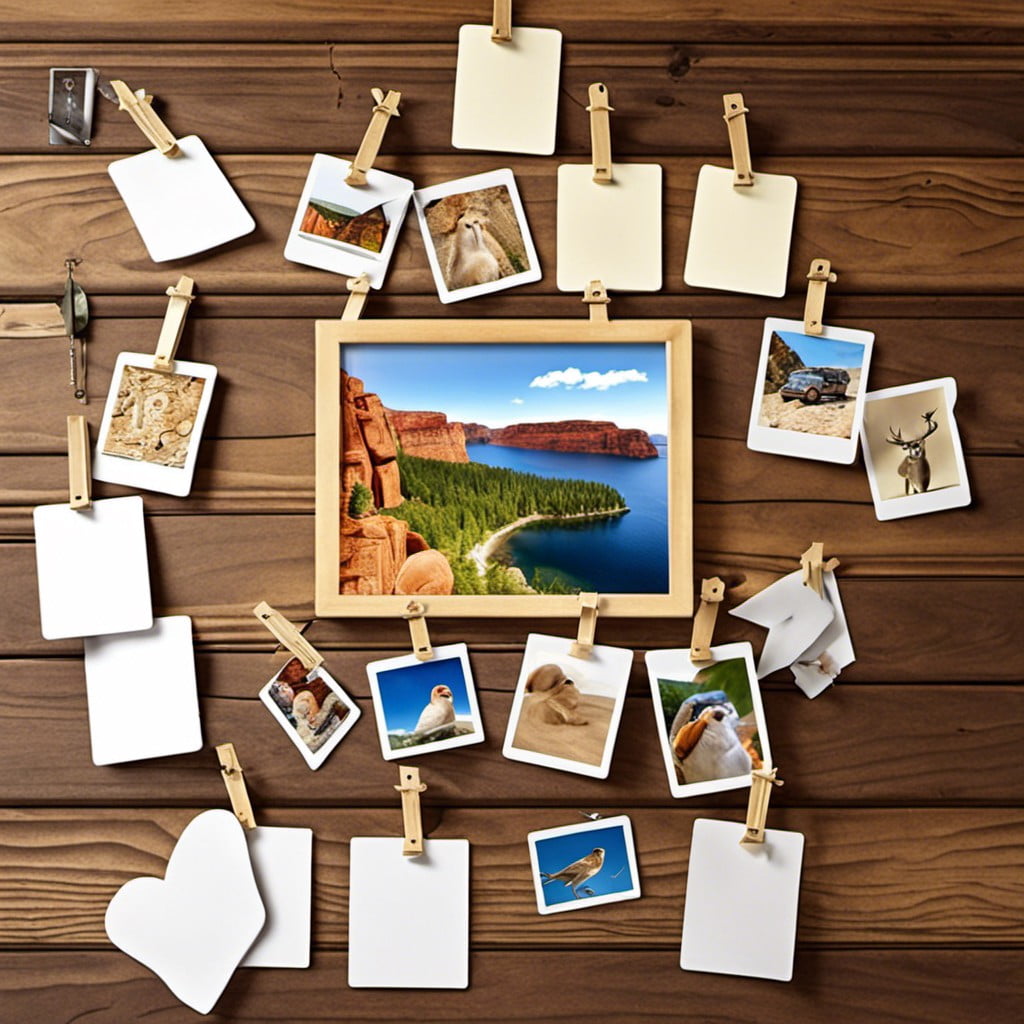
Minimalist Geometric Photo Layout
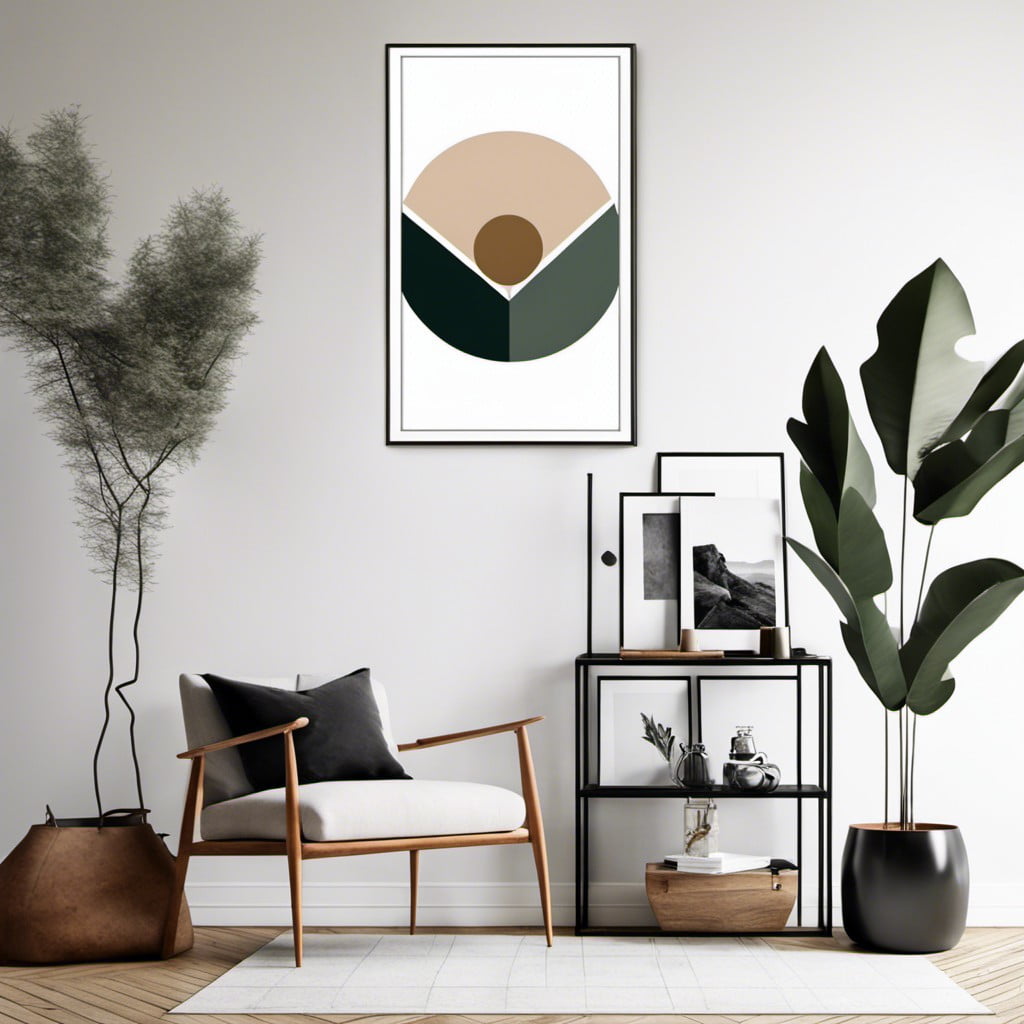
Infusing geometry into your photo display gives it a minimalist yet striking appeal. Here’s how the concept works:
1. Select Photos: Choose your most cherished memories, ensuring they are high-quality images. This will better the aesthetics.
2. Plan Layout: Think about how you want to arrange the pictures, whether in a circular, square, or triangular pattern.
3. Geometric Frames: You can resourcefully use geometric frames to add structure. These come in a variety of shapes such as hexagons, triangles or rectangles.
4. Play With Sizes: Scale is key. Make smaller prints of some images and larger ones of others to create depth.
5. Mix & Match: While black-and-white lends a timeless appeal, mixing in a few colored photos can add flair.
6. Hang Equally: Keep spacing equal when hanging pictures to maintain balance.
This approach merges simplicity with sophistication, subtly showcasing your memories in an artistically curated arrangement. Remember, the idea is to create a clean, uncluttered display, using geometry to guide the viewer’s eyes across your memory-filled masterpiece.
Vintage Postcard Display
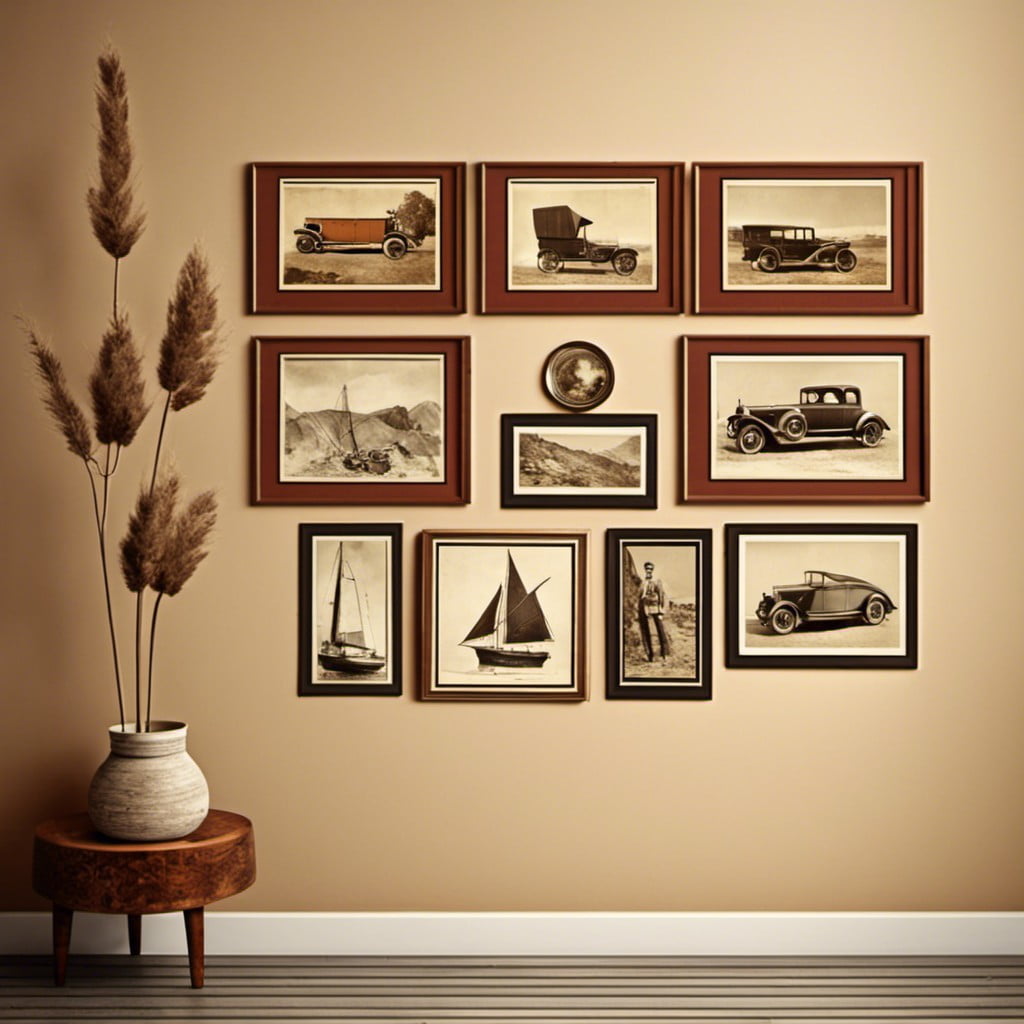
Having unearthed that assortment of vintage postcards, don’t let them gather dust in some unseen corner. Use them as unique memory wall art, each postcard beckoning with a story waiting to be told.
1. Create a pleasing grid arrangement, selecting postcards of a similar color scheme or theme for an artistic impact.
2. Antique wooden frames add an authentic edge, providing an unintruding boundary and enhancing the vintage aesthetic.
3. If adding personal touches, consider writing your memories associated with the image on the postcards, turning each into a mini time capsule.
4. For a layered look, overlap postcards of different shapes and sizes, using the differing dimensions for added depth and complexity.
5. Alternatively, affix postcards on a length of twine in a whimsical, cascading format, perfect for narrower wall spaces.
Embrace versatility and imagination; a vintage postcard display can be much more than just a wall of old cards. It’s a captivating dialogue with the past, filled with narratives that intertwine the personal and historical.
Memory-Triggering Aromatherapy Art
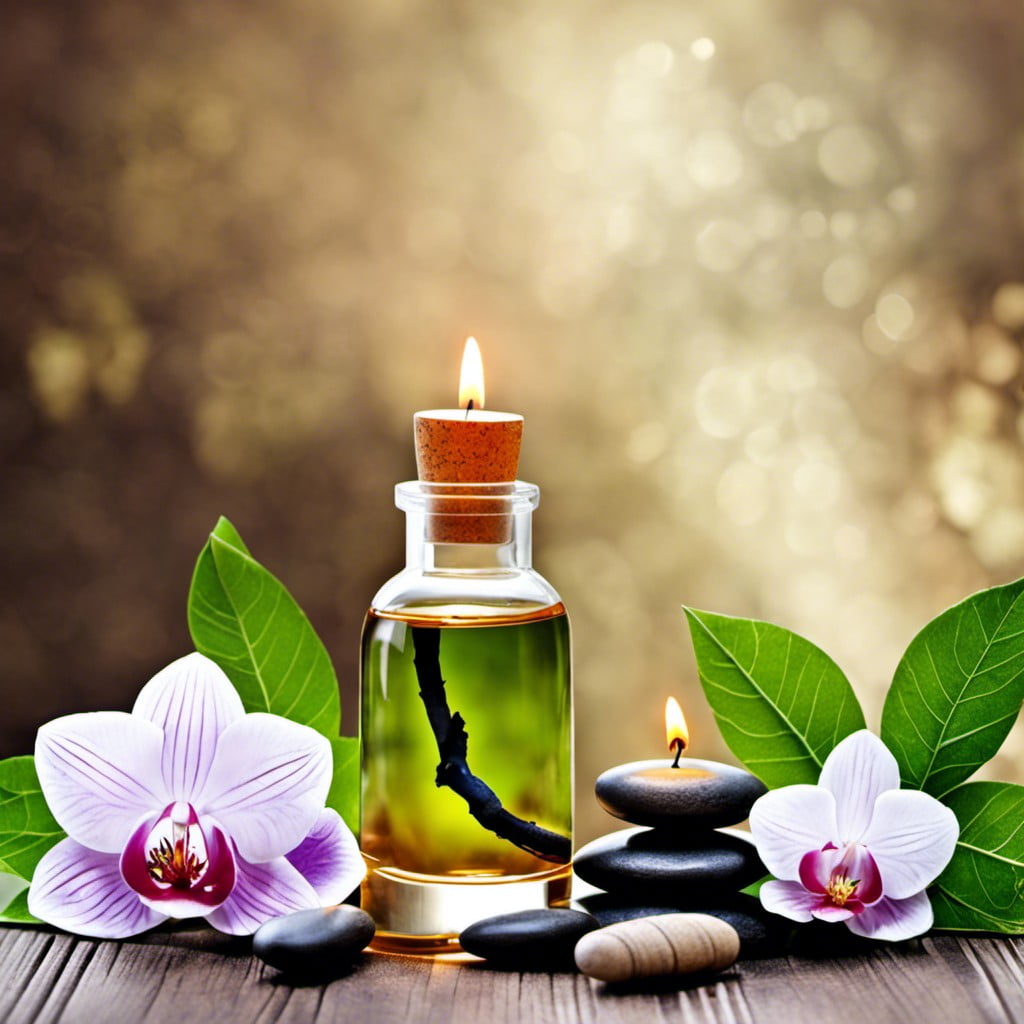
Think of scents that whisk you away to a cherished destination or a beloved period in your life; that’s the idea behind this concept.
Here is how it works:
1. Identify Smell Associations: Pinpoint fragrances that tie in to significant moments. From the aroma of old books signifying your college dormitory, to the characteristic scent of pine trees representing family camping trips, find scents that encapsulate your treasured memories.
2. Incorporate in Wall Art: Utilize essential oil diffusers skillfully designed as wall art pieces. These could range from ceramic plaques diffusing your fragrance to sophisticatedly mounted bottle holders.
3. Instill Visual Elements: Strengthen your memory link by pairing the scent with a related photograph or artifact. This could be a bookshelf print for the former student or a nature scene for the outdoors lover.
Using this innovative idea, bring your special memories to life, appeal to multiple senses at once, and create an emotionally vibrant space in your home.
Glass Jar Memory Capsules
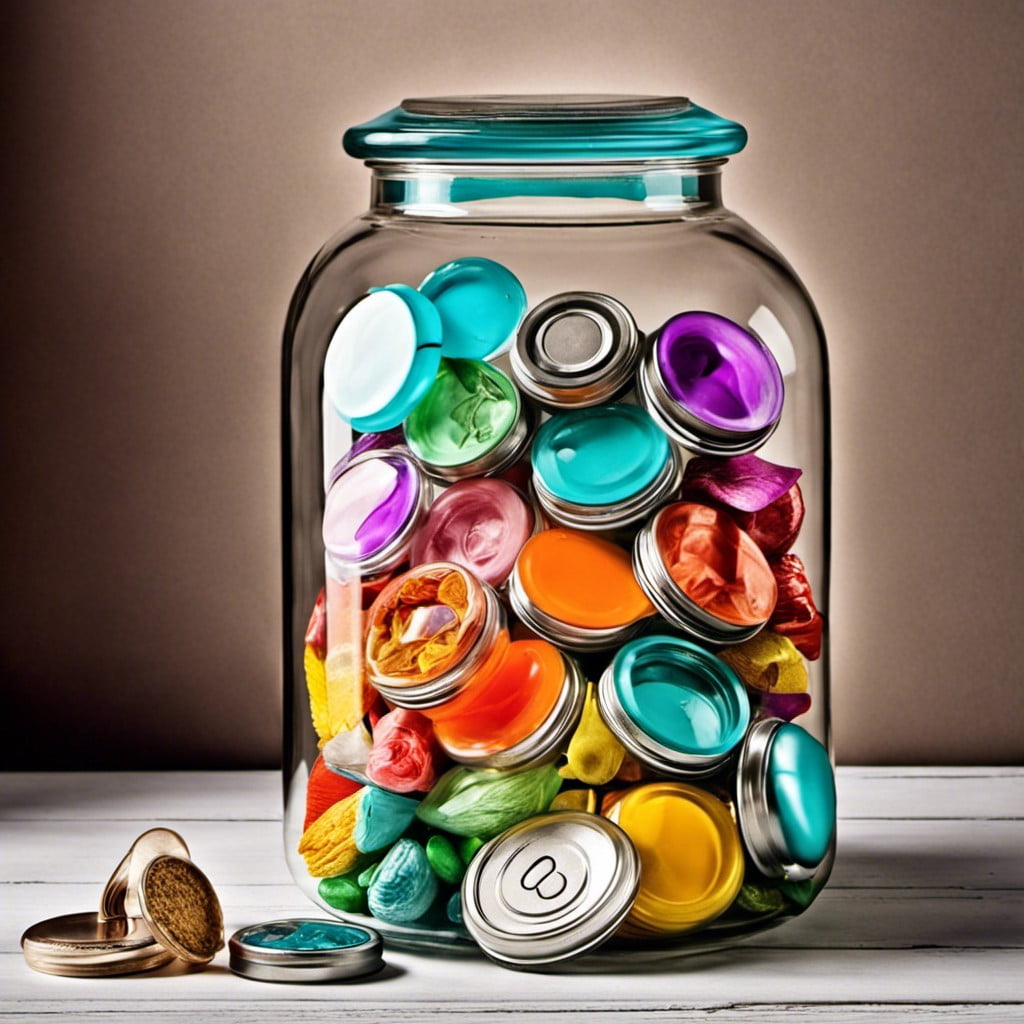
To create these charming keepsakes, you’ll need some clear glass jars of various sizes. These can be found at local thrift stores or online. Inside each jar, place items that are reminiscent of a particular moment, trip, or period in your life. For instance, sand and shells from a beach vacation, ticket stubs from a rock concert, or petals from your wedding bouquet.
Photos can also be included to add a more personal touch. Small, clear labels can be applied to the bottom or side of the jar, detailing the date or event for future reference.
Arrange these memory capsules on floating shelves or in a designated cabinet. The transparent containers allow for a visual feast of memorabilia that take you on a journey down memory lane. This three dimensional wall art not only adds visual interest but also serves as a conversation starter when entertaining guests.
Interactive Memory Board
An interactive memory board is the ultimate fun and engaging way to display cherished moments. Primarily, it gives you the freedom to switch up your display whenever you want, creating a dynamic and evolving work of art.
Here are few pointers to keep in mind while creating your interactive memory board:
- 1. Personalize: Tailor it around your interests or significant milestones to evoke feelings of joy and nostalgia.
- 2. Mix and Match: Incorporate pictures with other items such as concert tickets, postcards, or birthday cards for a visually appealing eclectic mix.
- 3. Keep it Seasonal: Switch up your displays according to seasons or festivities. It keeps the board fresh and exciting.
- 4. Encourage Participation: Allow visiting friends or family to add their mementos or messages. It adds a whole new personal touch to the board.
- 5. Use Corkboard or Magnetic Boards: Easy to modify, these boards allow for effortless rearrangement.
Carving out a corner for shared memories not only adds personality to your interiors but also involves you in an engaging and refreshing creative project.
Polaroid String Lights
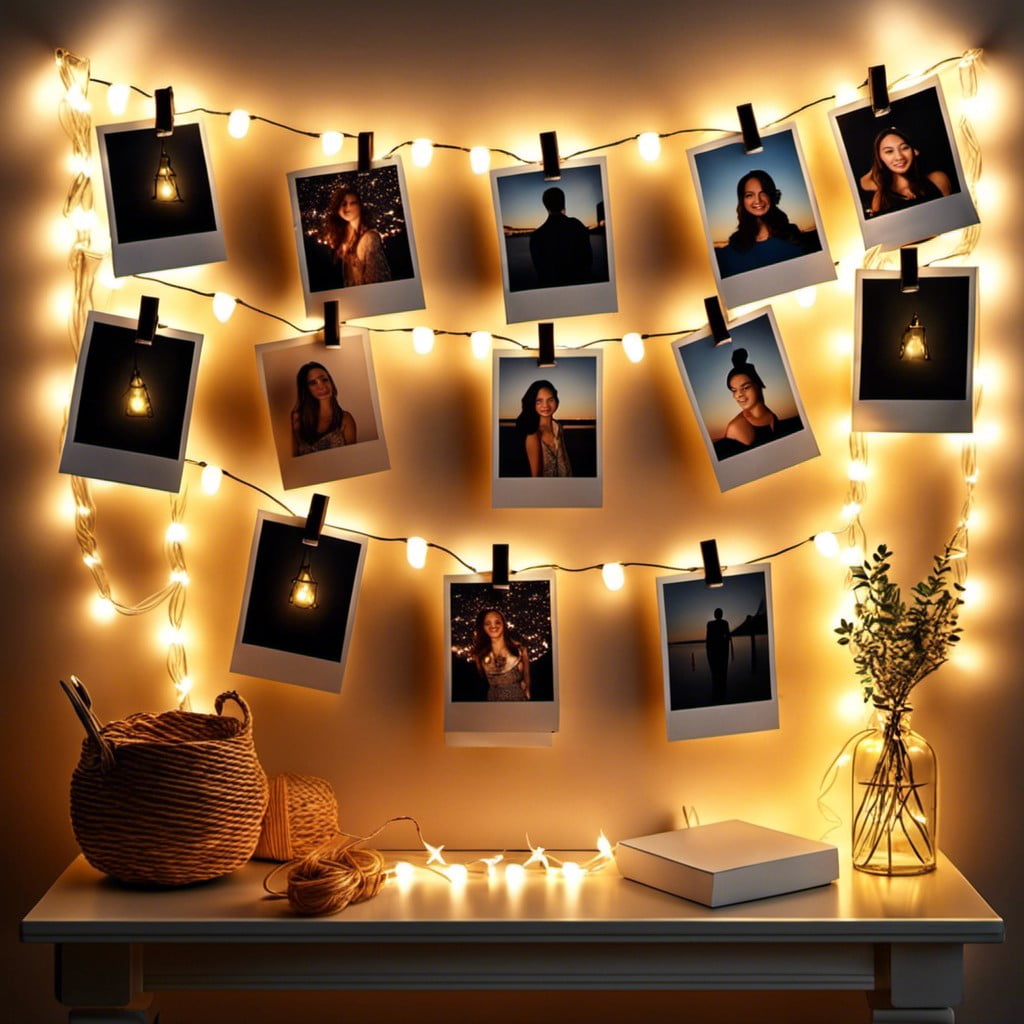
This eye-catching setup is not just an exceptional piece of decor; it brings a nostalgic touch to any room. Lit or not, your retro-styled Polaroids will shine. A series of neatly hung, clear, tiny bulbs illuminate each photo and make the memories shine even brighter.
To implement this, choose your favorite snapshots, ones that make you smile each time you see them. Second, identify an appropriate area: a vacant wall, staircase, or even around the window. Finally, secure your pictures into position, ensuring each photo is visible and well-aligned with the string lights.
Remember, you can always adjust the arrangement seasonally, or whenever you feel like refreshing the atmosphere with new memories. High-quality string lights are recommended for a long-lasting and beautiful display, while wooden pegs or small clips work perfectly to attach your photos. Enjoy this luminous trip down memory lane in your home.
Landscape Photos Window Pane
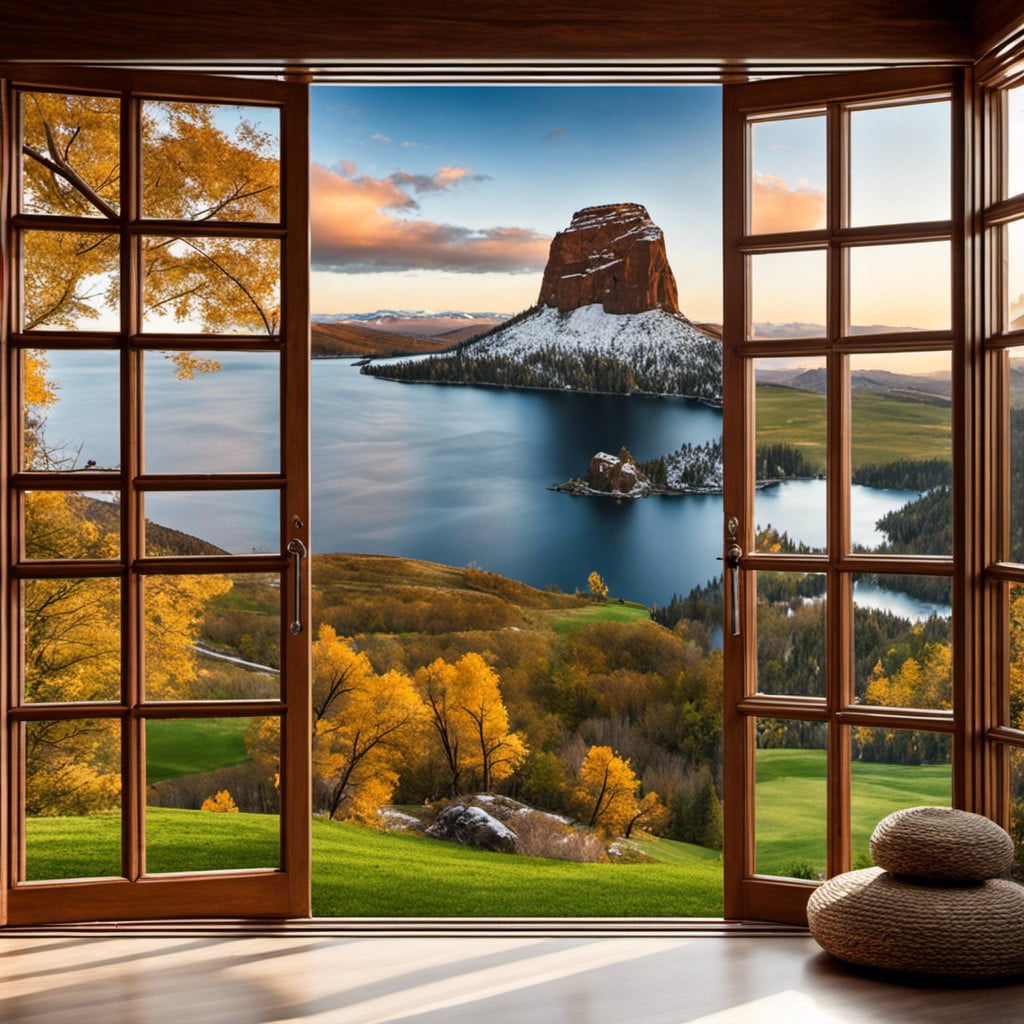
Finding an old or antique window pane presents an opportunity for a unique wall art idea. Fill each glass section with a different landscape photo – maybe snaps from your favorite holidays or from locations that hold a special meaning. Not only it’s visually appealing, it’s like having a window to your cherished memories!
Here are some steps to make it happen:
- 1. Clean the window pane thoroughly.
- 2. Measure the glass sections to know the photo sizes you need.
- 3. Choose and print your favorite landscape images.
- 4. Attach your photos behind the window panes using photo corners or double-sided tape.
- 5. Secure the photos with a backing, if preferred.
- 6. Hang your new memory-filled window pane art on your desired space.
Transform your humble window pane into a timeline of landscapes you hold dear. It’s a charming, visual narration of your life journey that brings warmth and a personal touch to your home decor!
Wooden Pallet Collage
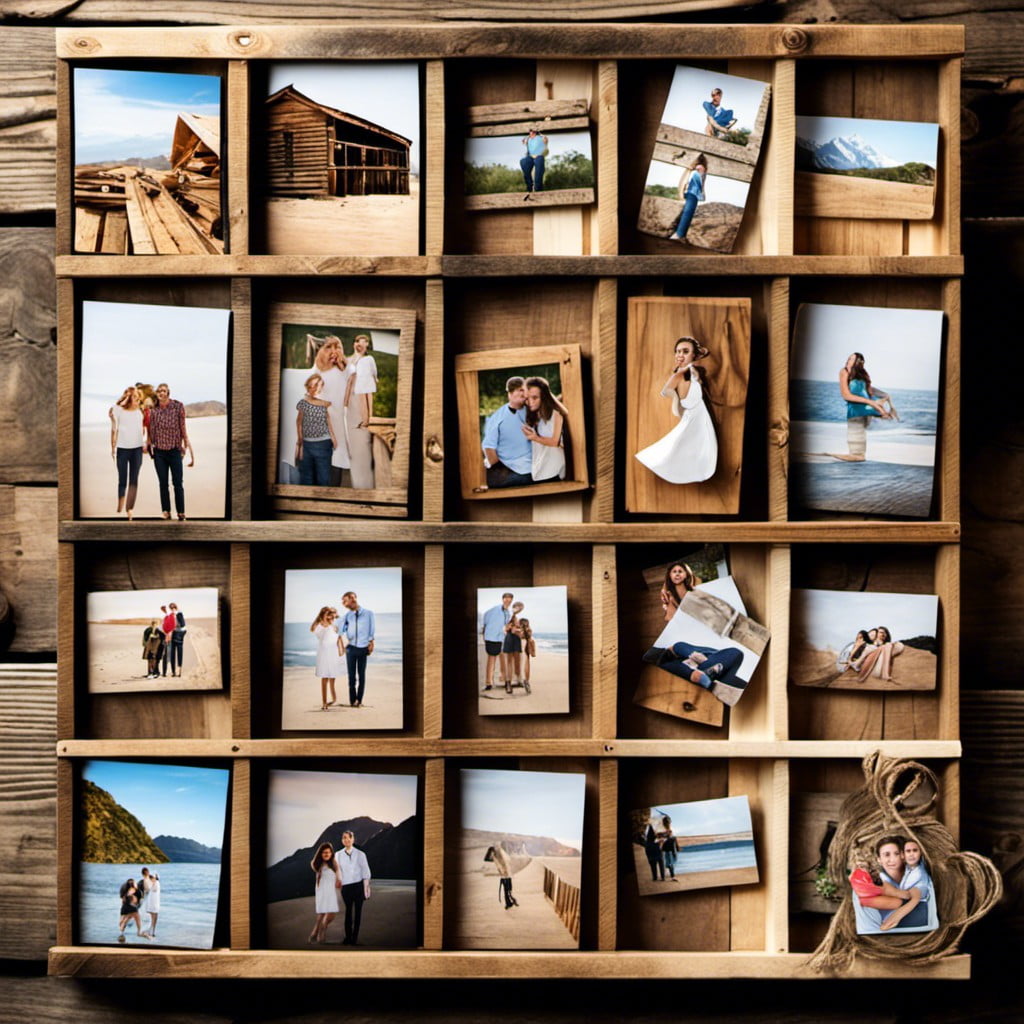
Leveraging an old wooden pallet’s rustic charm as a backdrop for your cherished photographs instantly elevates your collection to an art exhibit. This set-up is as practical as it is striking; the wood’s sturdy nature supports a variety of frame weights and sizes.
To make your own collage, select pictures that narrate your favorite tales. Mix in pieces of decorative fabric, prints or postcards to break the monotony. Arrange them until you find a layout you love.
Choose a section or the full expanse of pallet depending upon your photo quantity. Adhere your items either directly onto the wood or onto clipboards first for easy rearrangement. Paint or varnish the pallet for color continuity with your room. Remember, the beauty of this project is in its flexibility to evolve as you create new memories.
Life Timeline Photo Display
Creating this visually appealing display begins with sifting through photos sorted by various life stages. Gather pictures from childhood, adolescence, early adulthood to present – the more, the merrier.
Next, a sizeable plain wall should serve as the canvas while photos are arranged chronologically to depict a journey through time. Picture sizes can be manipulated to underscore significant life events.
This concept extends beyond simple photo display, as it doubles down as a conversation starter. Guests can effortlessly traverse your life’s journey captured in pictures. Frames are optional, keeping the base layout simple allowing for personalization with captioned date, event markers, or even small souvenirs from different life stages.
The beauty of this idea lies in its versatility – whether it’s a living room space, a quiet study corner, or a child’s room; a life timeline photo display can be unique yet tastefully designed to mirror one’s life journey.
Silhouette Cut-out Family Tree

Adding a personal touch to the traditional concept of a family tree, silhouette cut-outs take on a modern and stylish approach. In three simple steps, this unique wall art comes to life:
1. Create individual silhouettes of every family member: This begins by taking side-profile photos and tracing the outline to achieve each person’s distinct silhouette.
2. Size and cut out silhouettes: Depending on the final display size, resize the silhouettes and cut them out on black cardstock or paper.
3. Arrange and frame: Arrange the cutouts in a tree-like structure. Begin with the oldest generation at the root and work upwards until the youngest members top the tree. Once satisfied, secure the design in a frame before hanging it up.
This customized art piece breathes life into the familiar genealogical display, creating a chic, conversational masterpiece that stands as a testament to familial bonds.
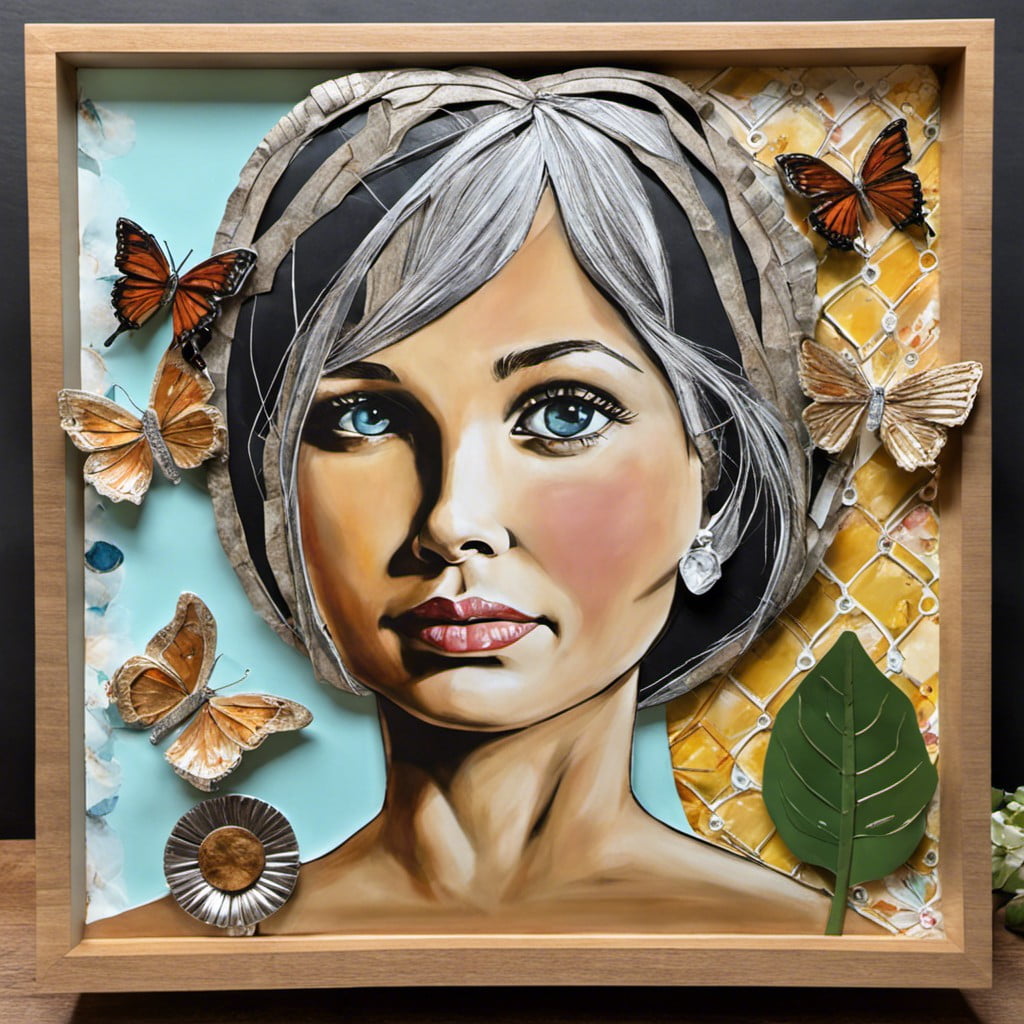
Hand-drawn Sketches Display
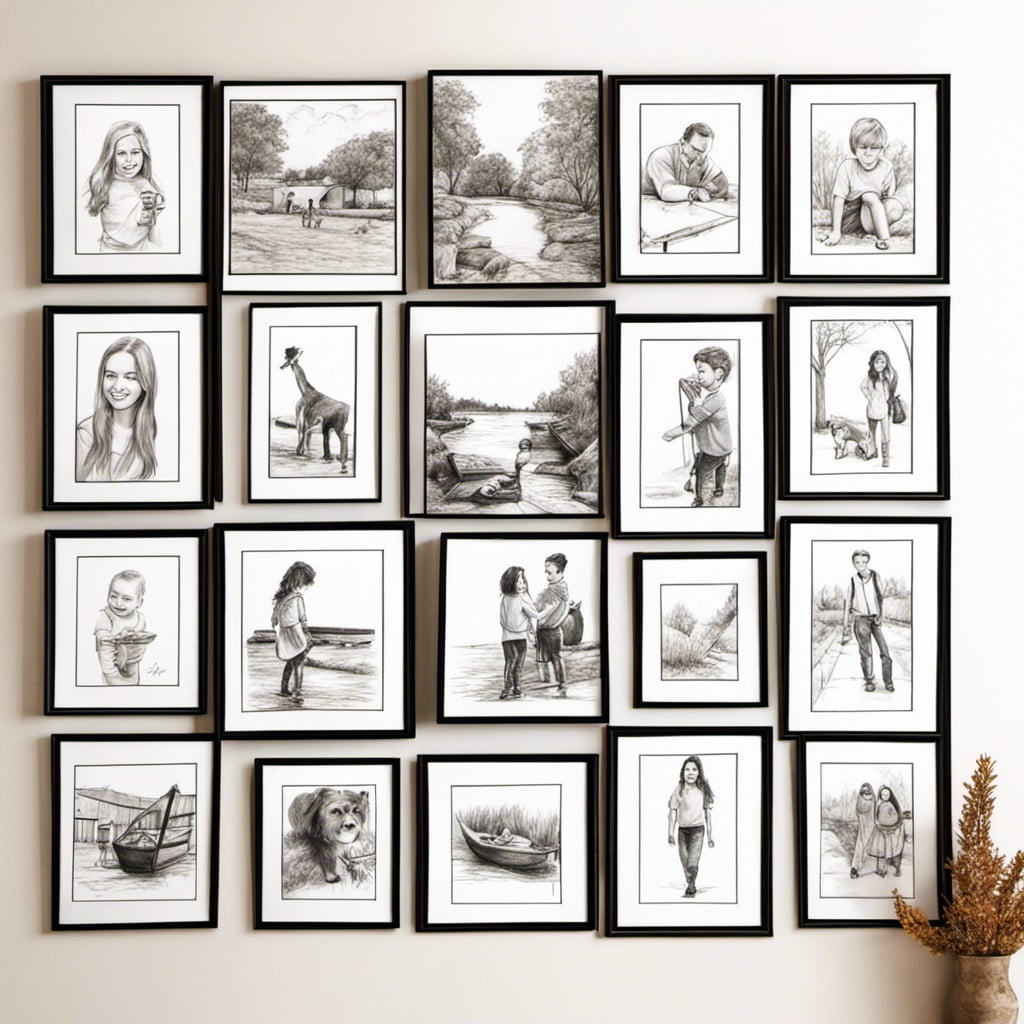
One of the charming methods to present memories is through personalized artwork. For a dash of uniqueness, swap typical framed photos with hand-drawn sketches. These could be sketches of family members, cherished pets, or even memorable places. Surround them with smaller sketches of elements connected to the subject—like a cherished toy or a favorite flower—to make the portrayal richer.
There are three key steps to creating your hand-drawn sketches display:
- Choose Your Pictures: Start by handpicking the photographs that hold sentimental value or capture heartwarming moments. Consider images that denote important milestones or shared experiences.
- Create or Commission Sketches: If you’re artistically inclined, sketch these photographs yourself, lending a personal touch to your wall art. If not, commission an artist to do so. Remember, perfection is not the aim here; it’s the memory that counts.
- Curate the Display: Mix and match sketches of varying sizes and contrasts. For a cohesive look, maintain consistent framing styles and colors.
This artistic reflection of personal history is an alluring conversation starter and adds a vivacious element to home décor.
Balloon-shaped Photo Bunch
Creating this unique decoration involves arranging your treasured photos into the shape of a balloon bunch on your wall. Here are a few simple steps:
1. Choose photos with personal significance. These could be family portraits, snapshots from memorable events or places, or any other image that holds special meaning to you.
2. You’ll need a large blue poster board that will act as the “sky” background. Size it proportionately to your pictures.
3. Decide on the arrangement. The photos should form the shape of a balloon bunch, each photo acting as an individual “balloon”. Larger photos could be situated at the bottom to mimic closer balloons and smaller ones toward the top.
4. Attach the photos onto the poster board. Be precise with their placement for the best visual results.
5. Finally, draw, paint, or use thin strips of black paper to create strings connected to each photo, converging at a single point. Your images will appear as attached balloons floating in the sky.
Remember, perfect alignment isn’t the goal. It’s the overall balloon bunch effect you’re looking to achieve, along with the charming personal touch each photo adds. By capturing memories in this creative and dynamic design, a balloon-shaped photo bunch can bring a fresh, sentimental flair to your wall.
Travel Map With Photos
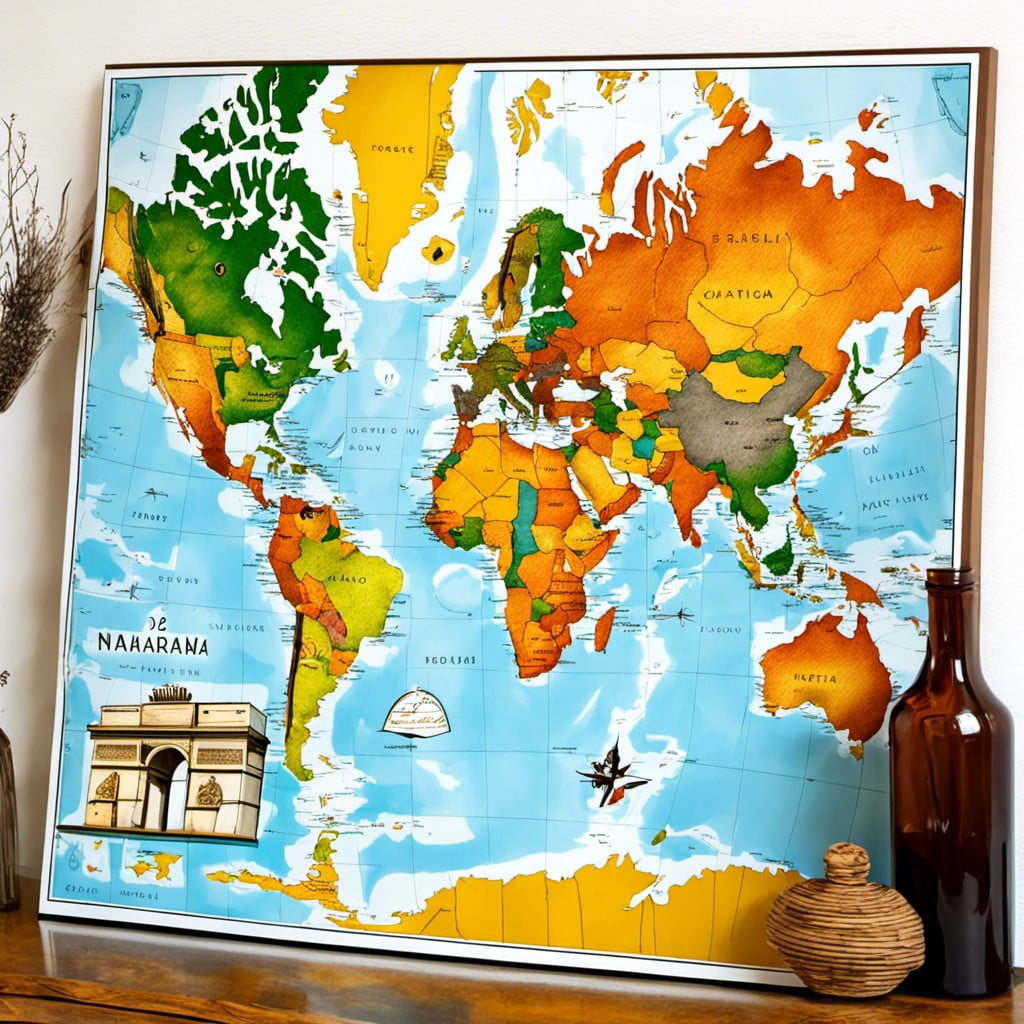
Creating this infographic of your adventures not only presents an aesthetic appeal but also sparks intrigue and conversations. Firstly, select a map style reflecting your home decor.
The concept revolves around the visual representation of destinations conquered, so invest in quality prints of your travel photos. Placement of these photos is as crucial as the photos themselves. Pinning each one to corresponding destinations on the map establishes a geographical correlation.
Highlighting locations with muted colors or using color-coded pins can distinguish between already visited and future destinations. This visual differentiation fosters anticipation and excitement.
Remember, simple frames offer a clean look while overlaying a clear glass surface enables the addition of annotations or scribbling experiences. This interactive component adds a lively touch while revealing personal journeys to your guests. Scale, positioning, and balancing the elements within the composition require attention to ensure a visually-pleasing output.
This aesthetic memoir instills a sense of accomplishment and unleashes your globetrotting spirit. It’s an impeccable demonstration of cherished wanderlust experiences quietly adding personality to your space.
Mixed Media Memories Mural
To create this unique piece, you’ll utilize an assortment of materials such as photos, trinkets, and perhaps even snippets of handwritten letters or postcards. You could start with a canvas or a wooden pallet, painting or staining it as you see fit.
Next, select the memories you’d like to incorporate. This could range from black and white family photos, dried flowers from a significant event, concert tickets, to a seashell from a memorable beach trip.
Using adhesive, arrange and secure the mementos onto the board in an eye-catching manner. You’re encouraged to layer items, creating a raised, textured effect that gives the mural depth and interest.
The key to success is to focus on cohesiveness. Select items that share a color scheme, theme, or sentiment. This ensures your mural has a structured look, rather than seeming cluttered.
Remember, the process should be fun and personal. You’re crafting a snapshot of your journey through life to be displayed proudly in your home.
Vinyl Record Photo Frames
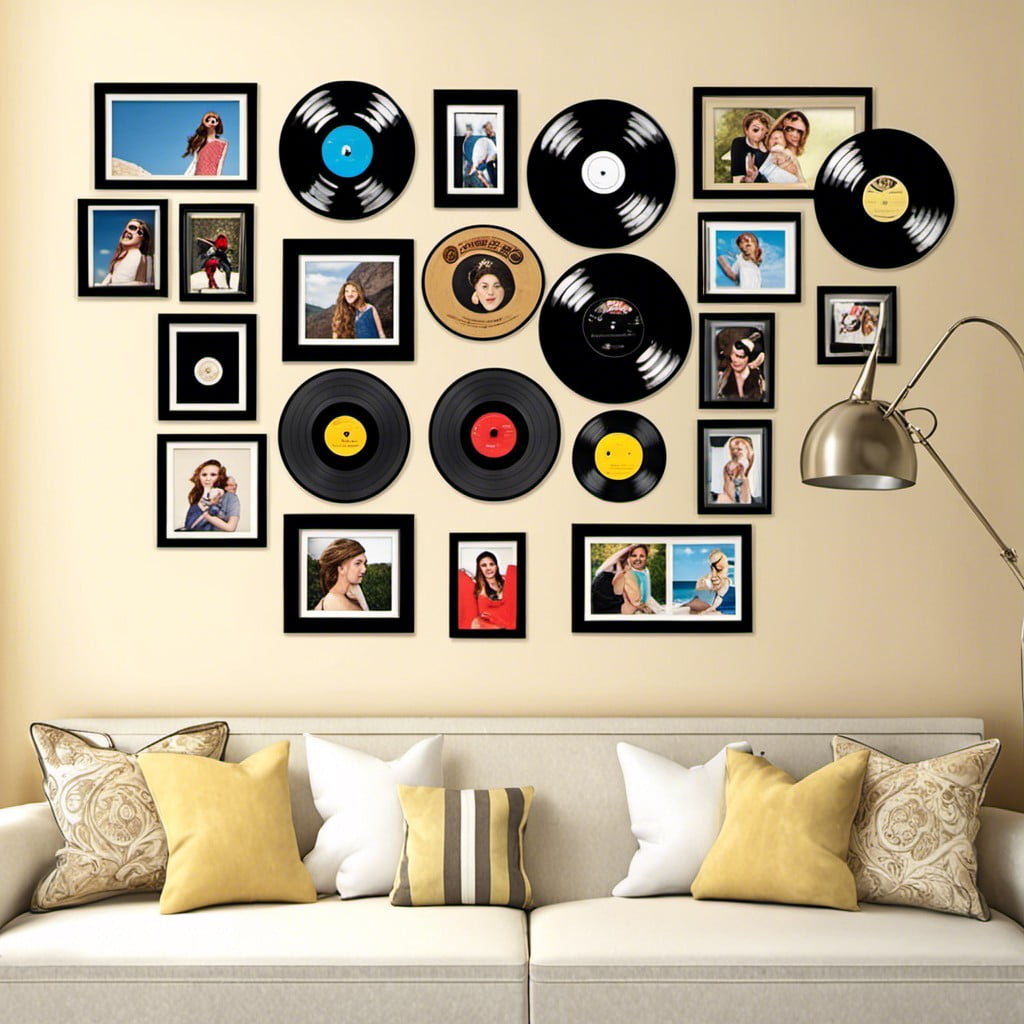
Incorporating beloved photos into a gallery of vinyl records creates a striking nostalgic display. Perfect for music lovers or fans of vintage elements, this concept adds charm and personality to any room.
Follow these steps to craft your own unique wall piece:
- Choose a set of records – single artists, various artists, or albums to create a theme.
- Secure a high-quality photo – the record label portion usually measures 4 inches, so a photo of the same size would fit perfectly.
- Adhere the photo onto the record label using a non-damaging adhesive – it’s essential to avoid damaging the album.
- Lastly, arrange your vinyl on the wall in a pattern that complements your space, considering balance and visual appeal.
By merging visual and auditory memories, you can create a talking point among guests while recalling fond moments whenever you gaze at your new focal point.
Comic Strip Photo Arrangement
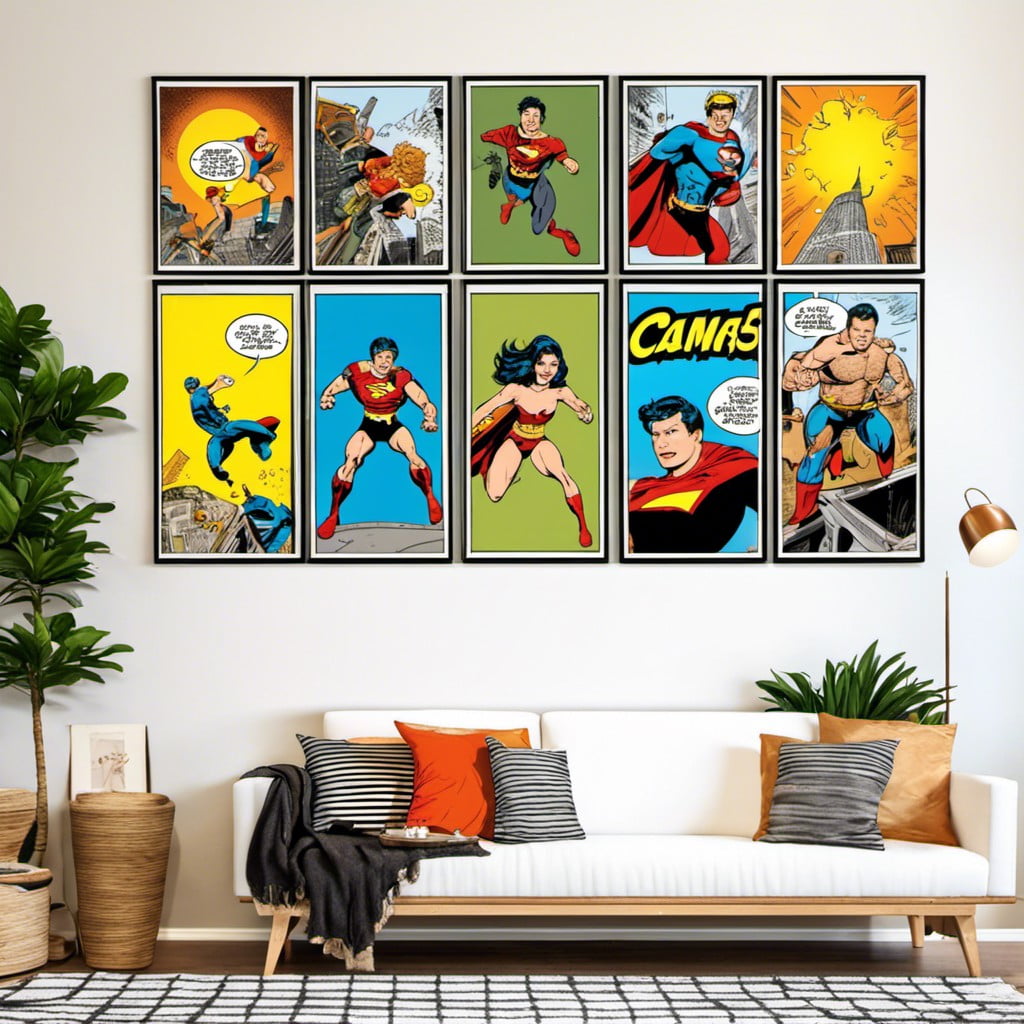
This innovative arrangement provides an entertaining twist to classic photo displays, captivating eyes with its unique layout. Featuring your cherished moments as sequential panels tells a captivating story, reminiscent of newspaper comic strips.
To create this display:
- Select your photos: Choose a sequence of images that portrays a time, event, or tells a story from beginning to end.
- Choose your frames: Identify or purchase picture frames that align in their widths — a crucial consideration for your comic strip look. Uniform black frames often provide a sleek, professional feel.
- Crop and Resize: Be sure to standardize the dimensions of the photos to provide uniformity, reminiscent of actual comic strip panels.
- Arrange and hang: Lay your frames out on the floor before mounting them on the wall. This helps visualize the final appearance and makes adjustments easy.
Remember, the key to this theme is telling a story visually through a sequence of events. It’s fun, it’s engaging, and it breathes life into your memories.
DIY Photo Marquee Sign
Creating your own marquee sign requires basic materials including string lights, plywood, a printed photo, and a stencil of your choice for the photo outline.
Begin by outlining the selected stencil on the plywood, then cut the shape using a jigsaw. Sand the edges for a neat finish.
Next, print your favorite photo to fit the plywood and adhere the same on the cutout. Ensure it is securely mounted to avoid peeling off.
The fun part comes in when installing the string lights. Drill holes evenly spaced around the edge of your plywood design and insert bulbs into each opening. Ensure all lights are working, then secure the lighting set-up at the back using adhesive or small brackets.
Remember, safety is key while trying this out: always be cautious when handling hardware tools and the electrical component.
This DIY marquee sign is a fun and unique way to relive your favorite moments and add a personalized touch to your space.
Woven Photo Tapestry
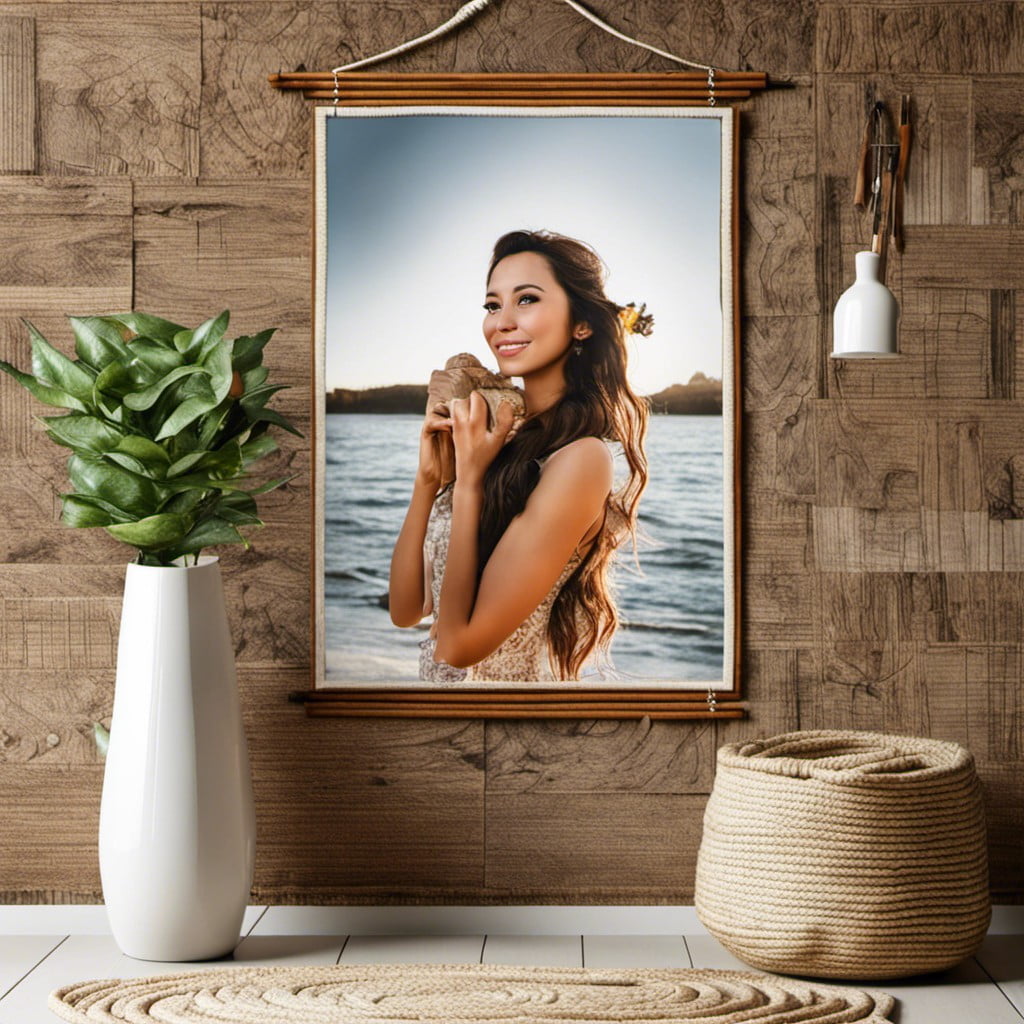
For this unique display, select photos with emotional value and have them transformed into a tapestry. You can use a single image or stitch together several smaller pictures for a multi-image design. The woven element adds a warm, textural component to the decor and the large-scale format of a tapestry means it can be a real focal point in the room.
You’ll need to pick high-quality photos for the best result as the woven structure can affect the sharpness of the image. You can also play around with color, sticking to the original hues or transforming them to monochromatic or sepia for a different effect. This project is an opportunity to showcase personal style, so don’t be afraid to experiment.
Look for professional services that specialize in textile printing to ensure best results. They’ll advise on the optimal fabric to use and may provide a digital mockup to approve before proceeding to weave.
Remember, a strong hanging mechanism will be needed due to the tapestry’s weight and size, consulting a professional installer might be a good idea. To preserve the tapestry, consider avoiding direct sunlight and humid areas. It can add a personal and evocative interest to a serene bedroom or a lively living area.
Imagine the surprise and delight of visitors as they learn that the beautiful tapestry adorning your wall is composed of your cherished memories.
Ideas Elsewhere
- https://www.walldecorplusmore.com/memory_sympathy_decals/
- https://www.potterybarn.com/tips-and-ideas/how-to-create-a-memory-wall/
- https://www.goodprints.com/photo-wall-display-ideas/
Read More Like This
 15 Homecoming Decoration Ideas to Elevate Your Celebration
 15 Christmas Cake Decorating Ideas to Sweeten Your Holidays
 15 Outdoor Party Tent Decorating Ideas for a Magical Celebration
 15 Ideas for Welcome Home Decorations
 15 Cheap Table Decoration Ideas to Elevate Any Gathering
Recap: