Last updated on
Exploring rock display ideas becomes a thrilling adventure because creative approaches can transform ordinary collections into extraordinary exhibits.
I’ve designed unique illustrations for these ideas. I hope you get inspired!
Delving into the world of rock displays can be a riveting multi-dimensional journey, particularly when innovative ideas are tossed into the mix. Web searches turn up troves of familiar suggestions, each with its own charm. Rest assured, the top of these well-established arrange ideas will be coupled with valuable resources for your convenience towards the article’s conclusion.
However, the intention here is not to just offer a rehash of what’s already amply available. Instead, we aim to rejuvenate your imagination, presenting fresh and unique ideas to display your cherished rock collection. By juxtaposing different perspectives, relying on trend-monitoring, and exploiting the potential of underrated methods, we have curated a list that should intrigue even the most seasoned rock collectors. We hope this list serves as a pool of inspiration and injects an intriguing twist to your display efforts.
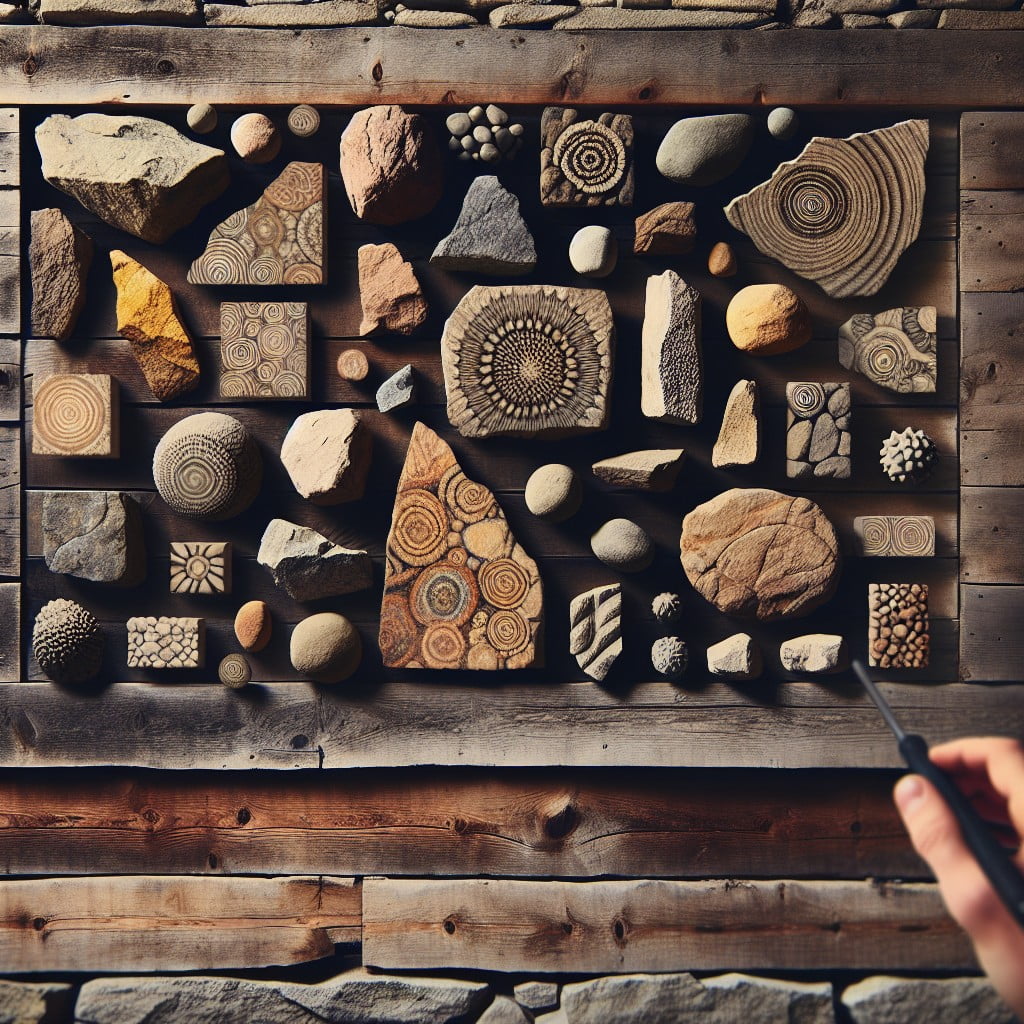
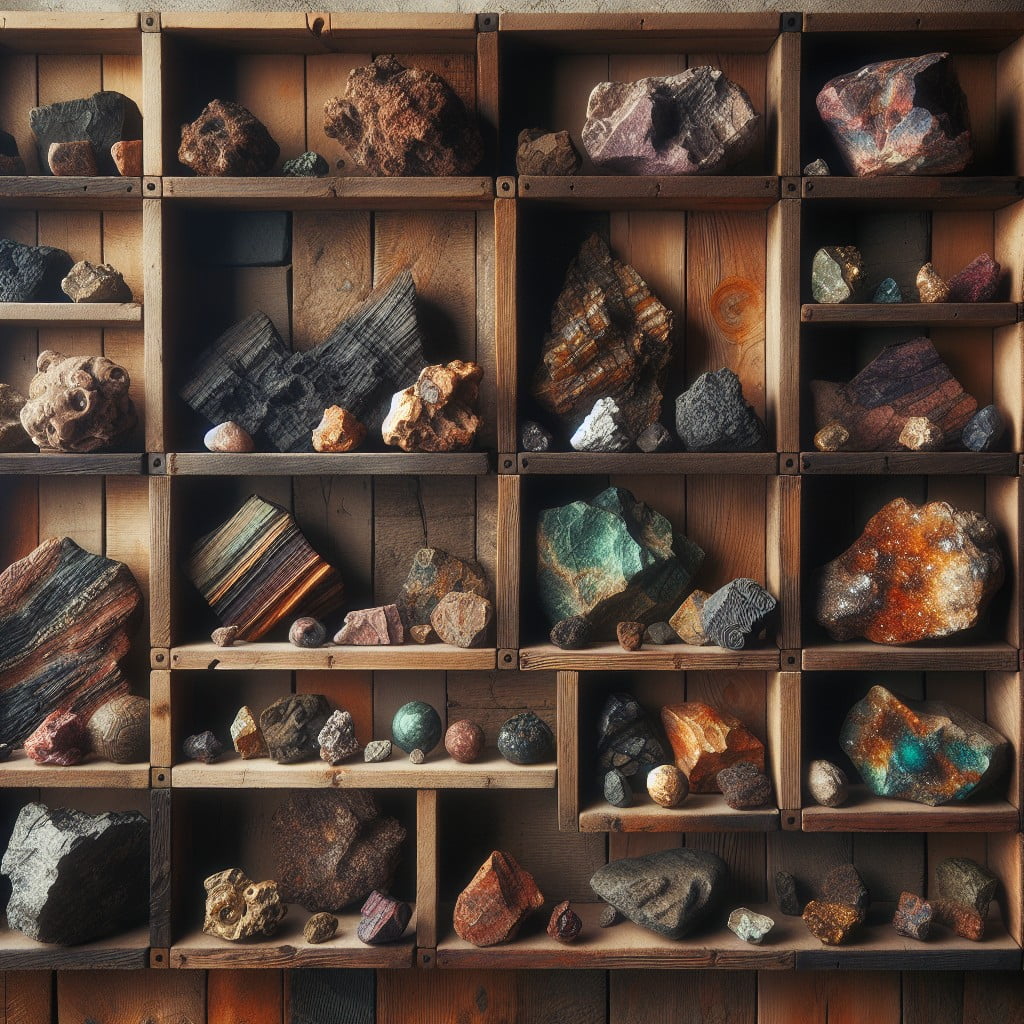
Shadow Box Displays for Rocks and Minerals
Creating a shadow box showcase allows for a blend of aesthetic appeal and protection for your treasured rock and mineral collection. The deep frames of shadow boxes accommodate various sizes of specimens, making them ideal for presenting both small, delicate minerals and larger, more robust rocks.
Here’s how to maximize their potential:
- Use a felt, velvet, or plain cloth background to contrast and highlight the natural colors and textures of the pieces.
- Arrange your specimens by type, color, or region to tell a visual story or to create an organized display.
- Secure each rock or mineral with discreet mounting putty or clear plastic holders to ensure stability and prevent damage.
- Include labels next to each item detailing its name, origin, or any fascinating fact, enhancing the educational aspect of the display.
- Consider the use of UV-protected glass to shield sensitive specimens from sunlight while preserving their vivid colors.
- Mount the shadow box on a wall away from direct sunlight and high traffic areas to prevent accidental damage and maintain the integrity of the display.
Shadow boxes provide a three-dimensional canvas that not only showcases your collection but also turns it into a conversational piece of home décor.
Rotating Display Stand for Gemstones

A rotating display stand elevates the presentation of gemstones, allowing for a 360-degree view that showcases their beauty from every angle. Such stands often feature a mirrored surface which enhances the stones’ sparkle as they turn. These displays are typically battery-operated or USB-powered, emphasizing the gemstones’ color and clarity through continuous movement.
They are ideal for collectors eager to exhibit prized pieces or sellers wanting to attract attention to specific items in a retail setting. The slow rotation also draws the eye, encouraging a deeper appreciation of each stone’s unique qualities. Lightweight and portable, these stands can be easily incorporated into personal display cases, trade shows, or craft fairs.
Stackable Rock Display Boxes
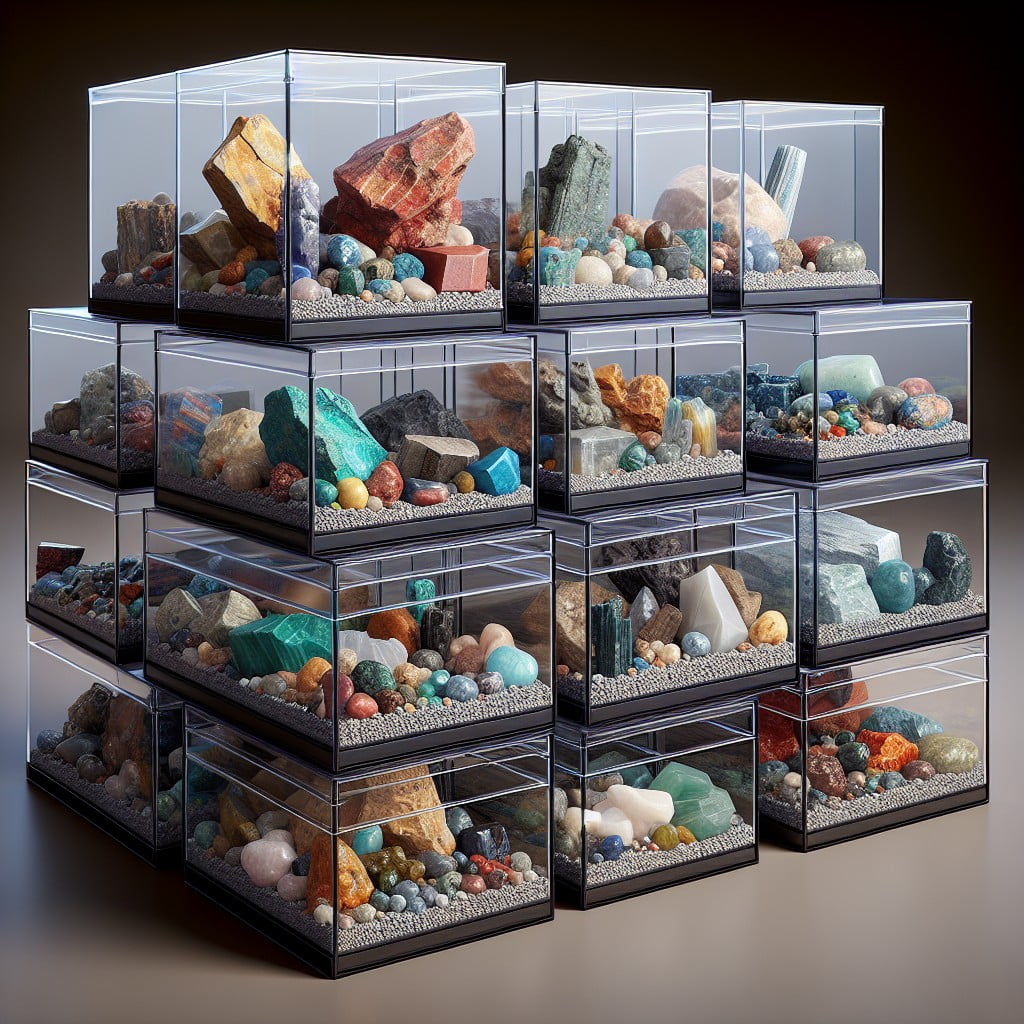
Maximizing space while showcasing a collection is key, and stackable display boxes offer a versatile solution. These compact units can be layered vertically, allowing collectors to create a personalized tower of treasures.
- Modular Design: Each box functions like a building block, easily aligning with others for a stable and secure fit.
- Visibility: With clear walls, each specimen inside remains visible from multiple angles, enhancing the visual appeal without the need to handle the contents.
- Accessibility: Individual boxes can be detached without disrupting the entire arrangement, providing easy access to any specific item in the collection.
- Customization: Some models feature adjustable compartments, allowing for the accommodation of rocks and minerals of varying sizes within the same box.
- Protection: Apart from their aesthetic function, these boxes protect delicate specimens from dust and minimize the risk of accidental drops or scratches.
By incorporating stackable display boxes, enthusiasts can efficiently organize and expand their collection in a clean, modern fashion.
Glass Dome Displays for Rocks
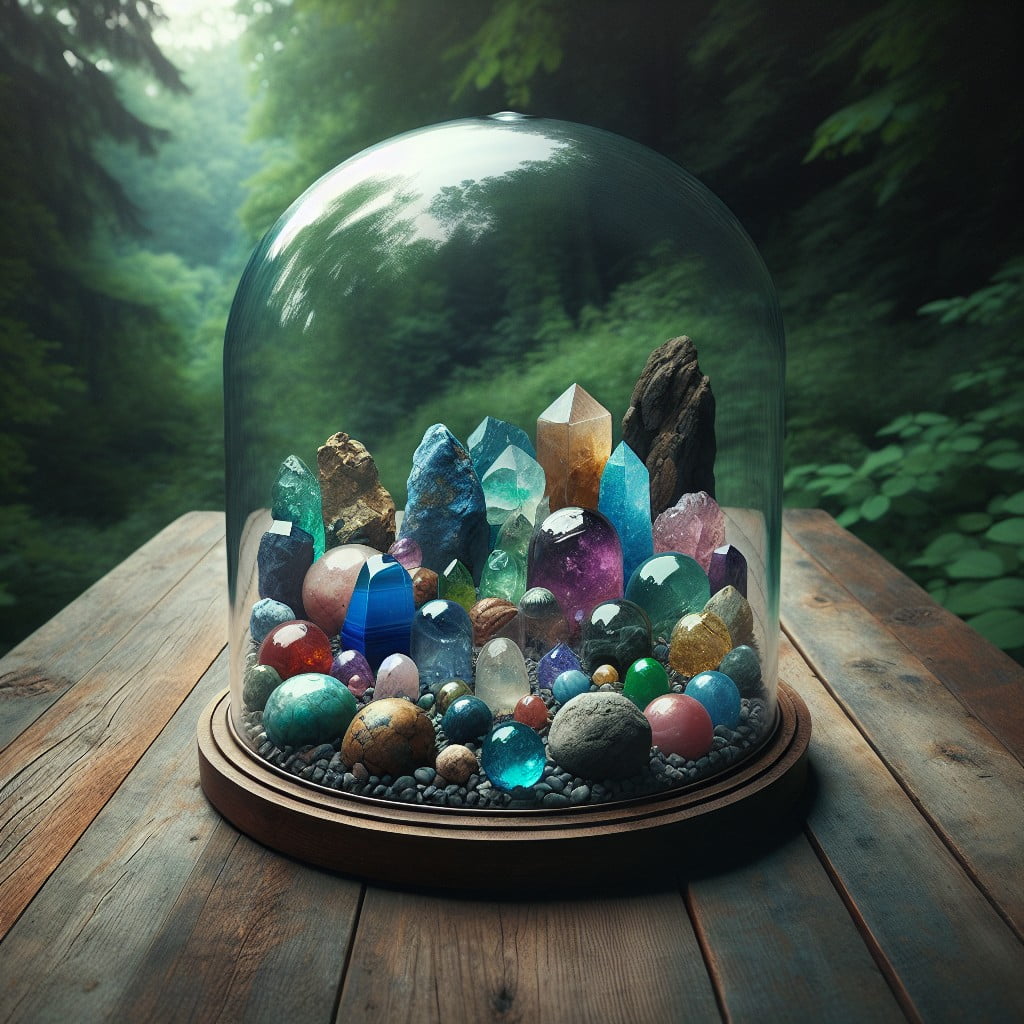
Glass domes offer a unique way to showcase your rock collection while protecting it from dust and handling. The clear glass allows for 360-degree visibility, presenting the fine details of each specimen.
Here’s how to make the most of this display method:
- Choose a size-appropriate dome for your rock or mineral. Ensure it sits on a stable base to avoid tipping over.
- Pair with a contrasting background or base to make your rock’s colors and textures stand out. A dark velvet or a natural wood base can enhance the visual appeal.
- Use a small stand or pedestal inside the dome to elevate smaller specimens and give the display a dynamic look.
- For a more dramatic effect, incorporate accent lighting above or below to highlight the unique features of your rocks.
- Carefully arrange multiple rocks inside a larger dome, allowing for enough space between each piece to appreciate their individual characteristics.
Remember, simplicity is key; let the natural beauty of your collection speak for itself under the elegant curve of a glass dome.
Rock Wall Art
Transforming a bland wall into a statement piece is simple with the application of rock wall art. Select an assortment of rocks varying in color, size, and texture to create a dynamic visual effect. Attach these rocks securely to a wooden panel or directly onto the wall in a design that reflects your personal style or a specific theme, such as a landscape or abstract pattern.
Consider the following tips for a successful rock wall art installation:
- Use a suitable adhesive: Choose a strong adhesive, such as epoxy or construction glue, that is appropriate for the weight of the rocks and the wall surface.
- Plan your design: Before attaching any rocks, lay out your design on the floor to visualize the final outcome and make any necessary adjustments.
- Balance your composition: Distribute large and small stones evenly to avoid visual clutter and ensure aesthetic appeal.
- Incorporate a variety of rocks: Combine rough with polished stones or mix colors to add depth and interest.
- Install proper support: If creating a large installation, ensure your chosen wall can support the weight and consider mounting a plywood backer for added stability.
With a thoughtful approach to the selection and placement of stones, rock wall art can provide a unique and tactile element to your décor, turning an ordinary space into a gallery of natural beauty.
Transparent Acrylic Cubes for Individual Rocks

Crafted for clarity and durability, these cubes are ideal for showcasing each unique rock’s attributes without the distraction of visible storage material. The simplicity of the acrylic design puts the focus entirely on the specimen inside, inviting closer inspection.
Collectors can also easily label each cube with the rock’s name, origin, and other details, aiding in both organization and education.
These protective cases stack neatly for efficient use of space, seamlessly integrating into any room’s decor. Additionally, they safeguard delicate samples from dust and handling, preserving the natural beauty and integrity of each rock.
Cactus Pot Mineral Display
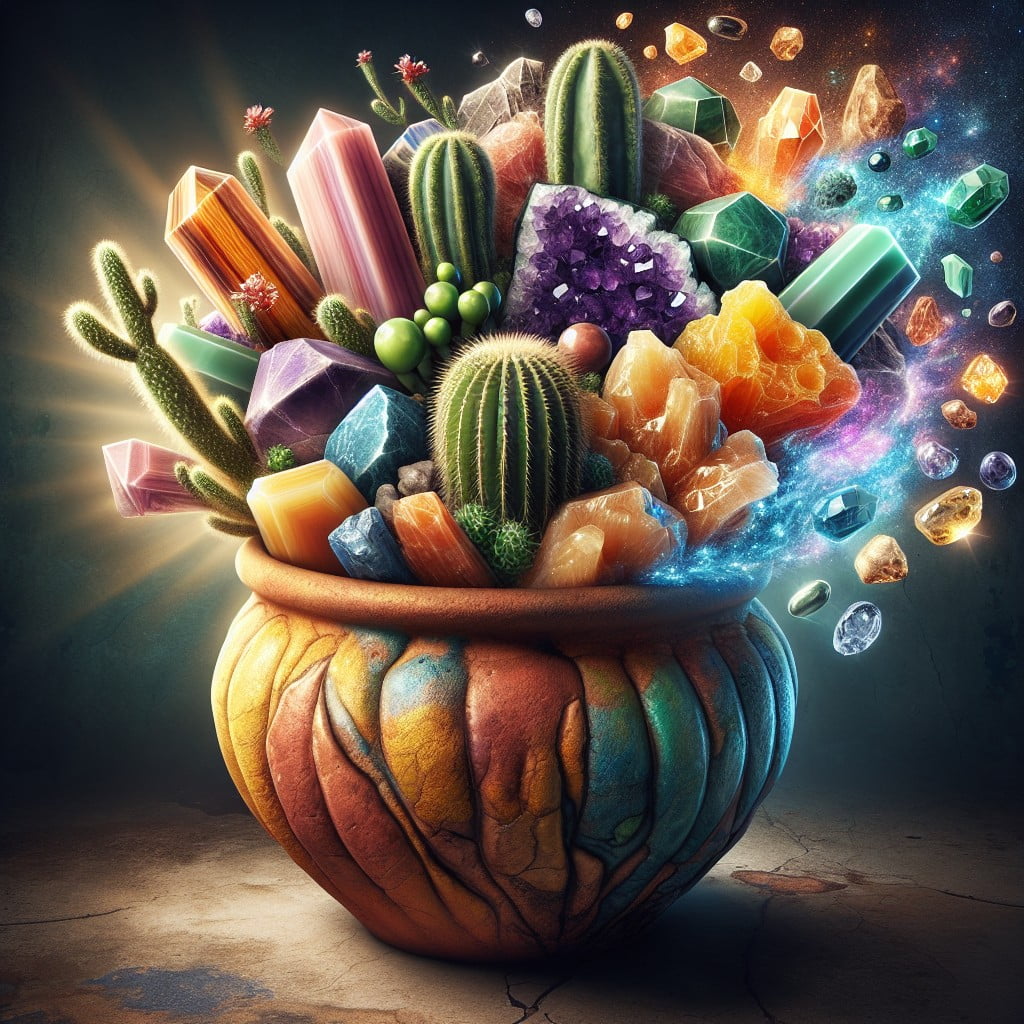
Blending natural elements can create a visually appealing display, and incorporating minerals into a cactus pot achieves just that. The contrast between the spiny, green succulents and the sparkling, colorful rocks provides a delightful mix of textures and hues.
To execute this idea:
- Choose a spacious pot that allows room for both the cactus and minerals to be showcased without overcrowding.
- Opt for minerals with colors that complement or contrast with the cactus. For instance, a deep green cactus pairs well with bright amethyst or warm carnelian.
- Place the minerals carefully around the base of the cactus to ensure they are visible and stable. They should not impede the cactus’s growth.
- If using smaller stones, layer them on top of the soil for a mosaic-like effect.
- Ensure that the display remains practical for plant care; the rocks should not hinder watering or drainage.
- Consider the lighting, as it will affect how the colors and sparkles of the minerals come to life.
This creative approach not only showcases your favorite rocks but also gives your plant displays an extra layer of charm.
Glass Terrarium for Gemstone Display
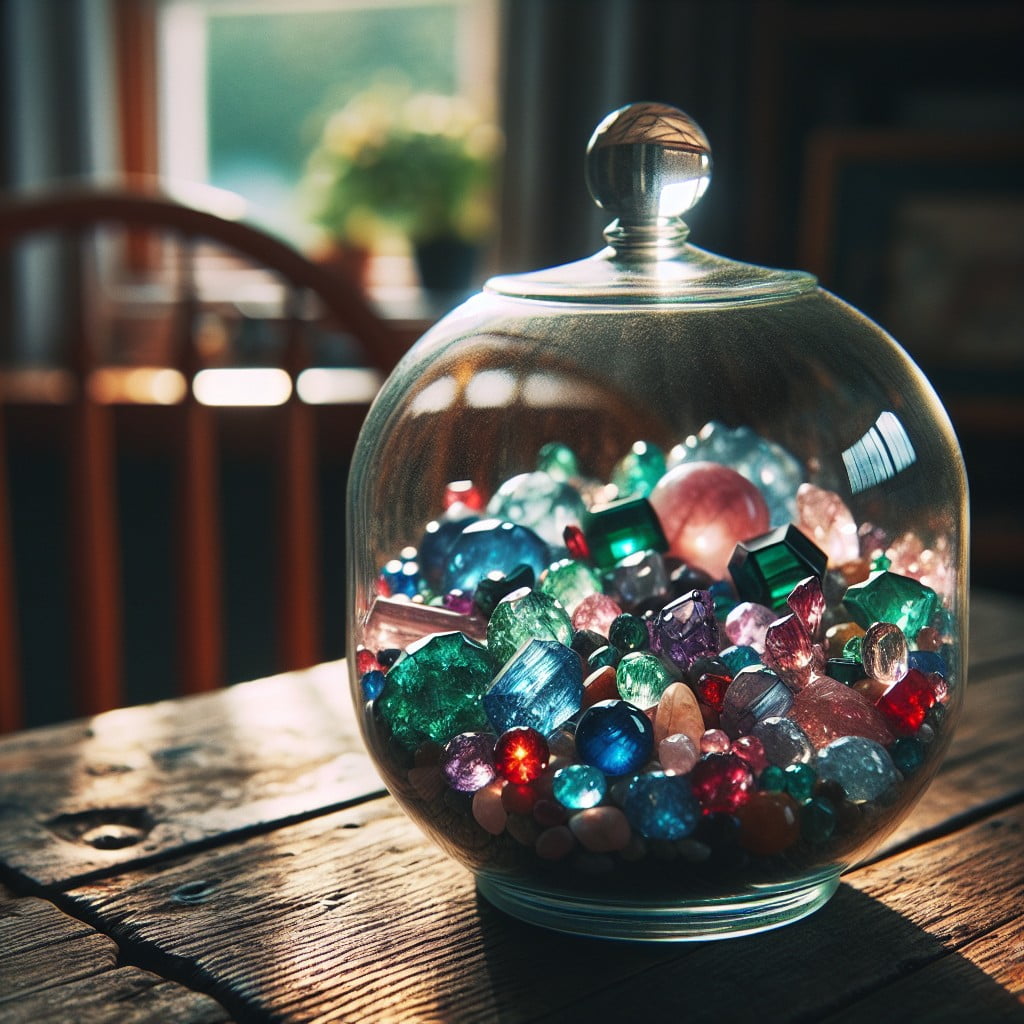
Opting for a glass terrarium offers a unique and modern twist to showcasing gemstones. These transparent enclosures allow light to filter through, enhancing the natural beauty of the rocks within.
Here’s how to make the most out of using a terrarium as a display:
- Choose a terrarium that complements the size of your collection. Small terrariums are perfect for delicate gemstones, while larger ones can house an impressive array of bigger specimens.
- Arrange rocks by color, shape, or type to create a visually appealing display. Consider a natural, asymmetrical arrangement that mimics how gems might be found in their environment.
- Add a layer of sand or fine gravel at the bottom to anchor your stones and prevent them from shifting.
- Consider the terrarium’s placement. A sunny windowsill can cast brilliant reflections, but be cautious with delicate stones that may fade in direct sunlight.
- Utilize the terrarium’s lid to keep dust away from your stones while still providing easy access for rearrangement or cleaning.
By showcasing gemstones in a terrarium, you also provide a conversation piece that doubles as functional decor, perfect for offices, living rooms, or study areas.
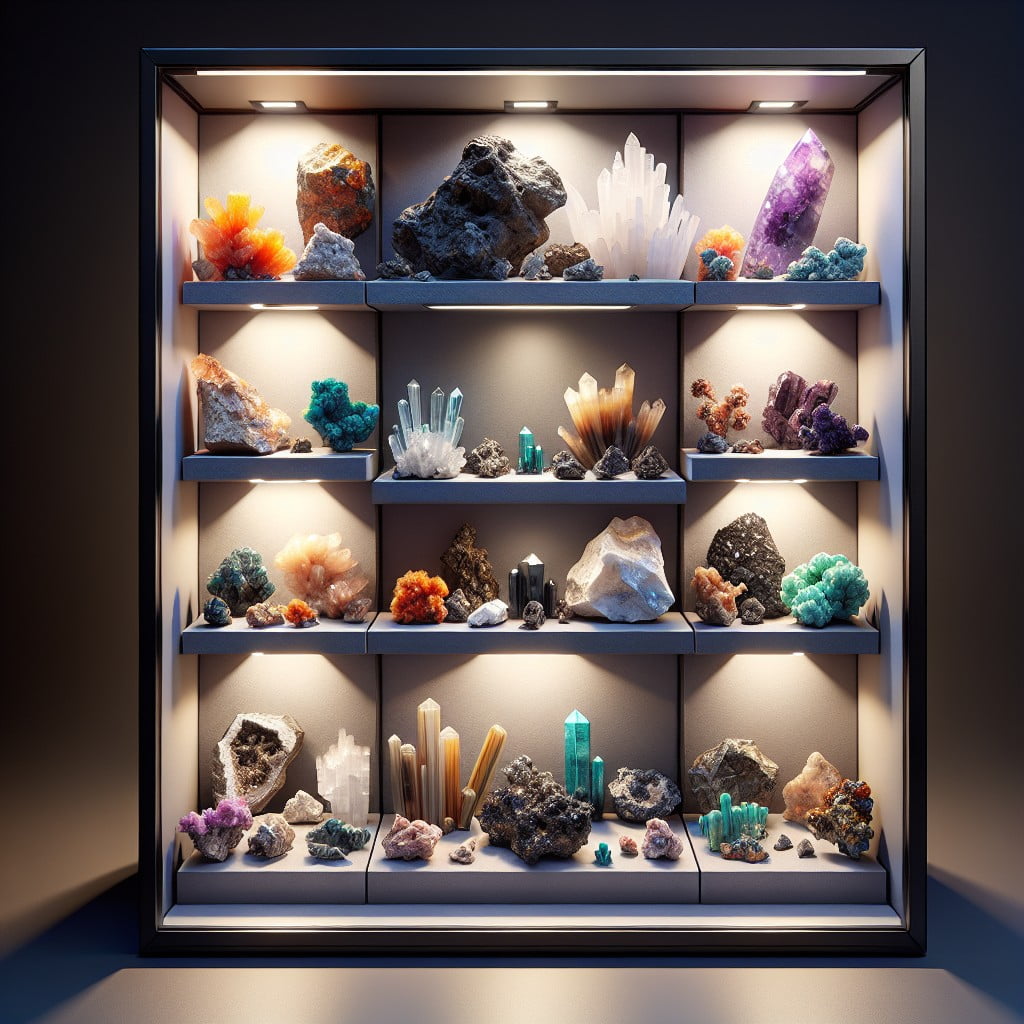
Floating Shelves for Rock and Gem Display
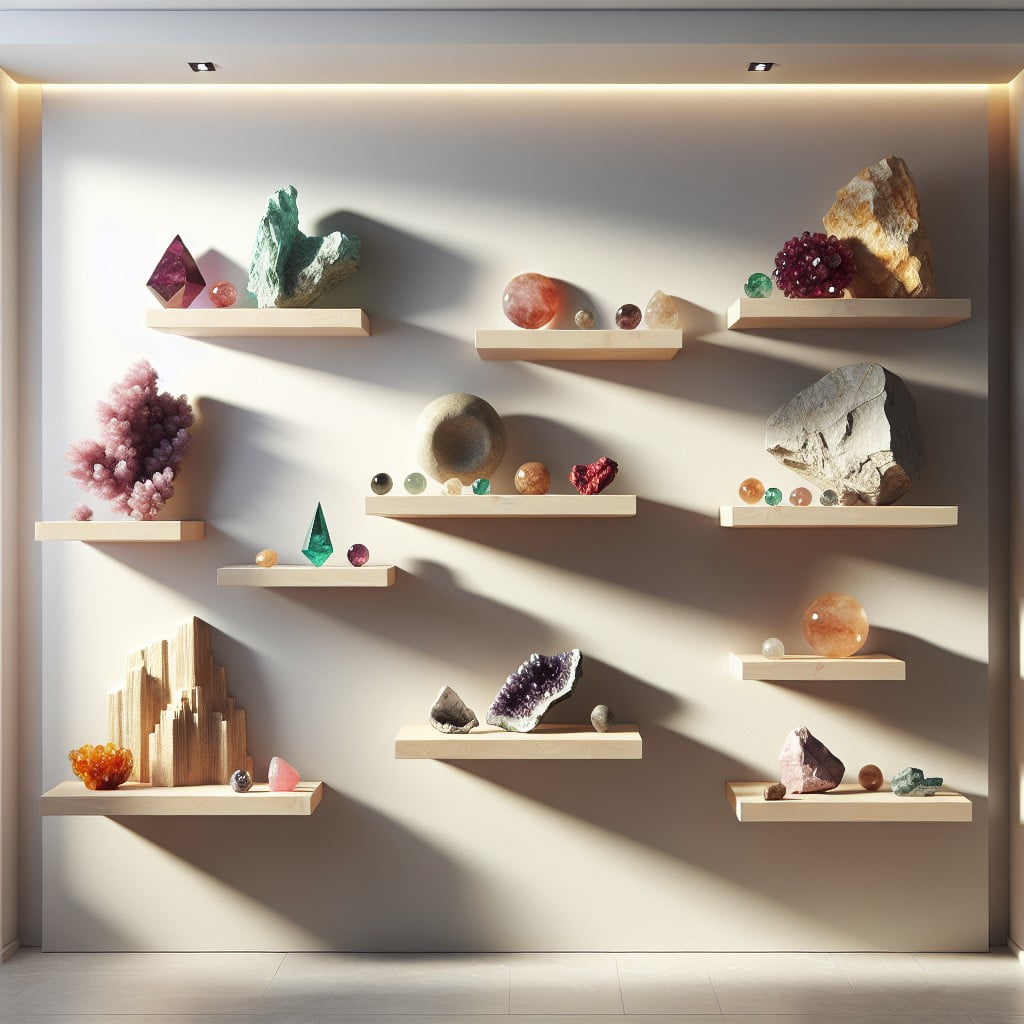
Floating shelves offer a sleek and modern way to showcase your rock collection. They take up minimal space and can be positioned at eye-level, making it easy to admire the intricacies of each specimen.
To ensure stability and prevent damage, consider:
- Selecting shelves with a lip or groove: This design feature helps to keep rocks from rolling off, particularly round or oblong pieces.
- Spacing shelves appropriately: Allow enough room between shelves to accommodate varying heights and allow for unobstructed viewing.
- Considering load capacity: Verify the weight capacity of the shelving to safely hold denser, heavier specimens.
- Using creative arrangements: Group rocks by color, size, or type to create a visually pleasing display. You can also leave space for new additions.
- Choosing the right lighting: With proper lighting, such as spotlights or LED strips, the natural colors and features of the rocks can be enhanced.
- Including labels: Small, discreet labels can provide educational value, noting the name, origin, or other interesting facts about the pieces in your collection.
Tea Tray Display for Small Stones
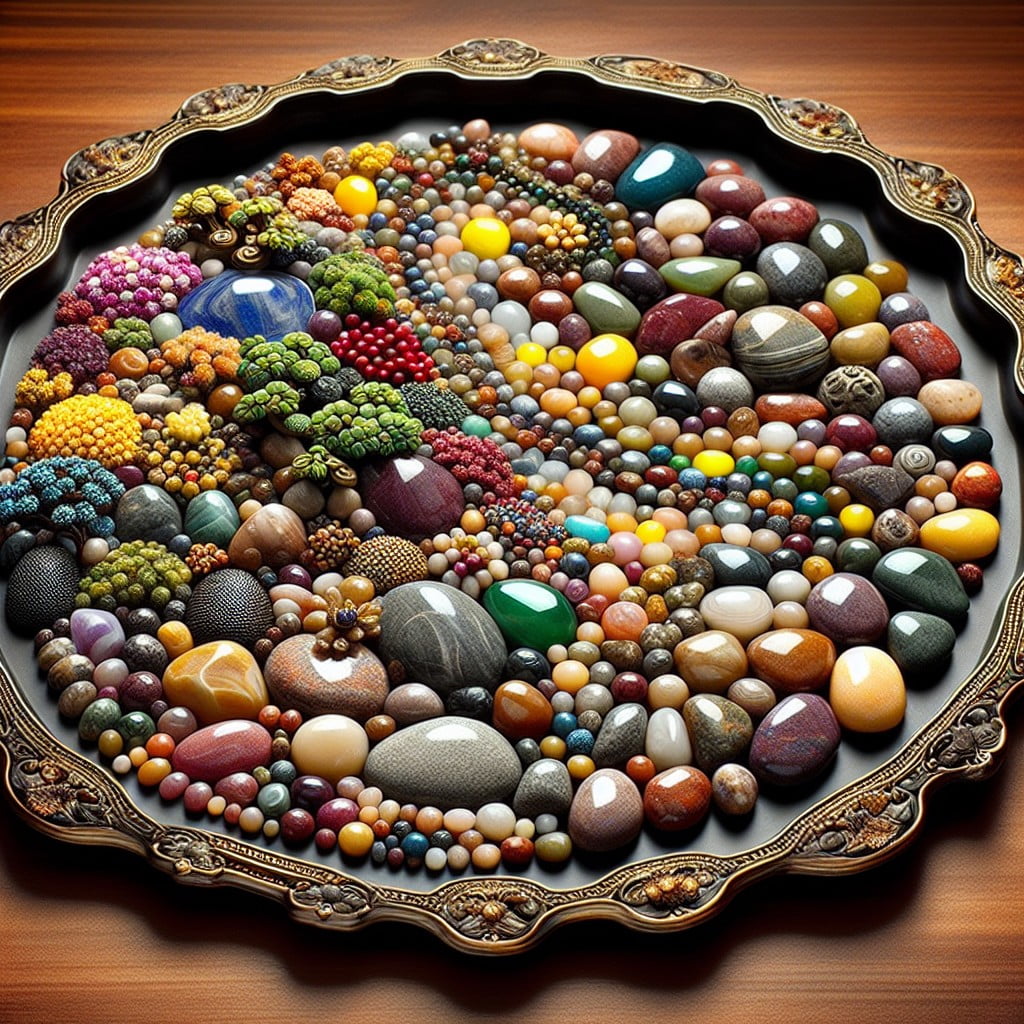
A tea tray offers an unconventional yet charming stage for showcasing small stones, transforming them into a movable exhibit. Opt for a tray with compartments or arrange the stones freely.
- Select a tray with a flat bottom to ensure the stability of stone placement.
- Consider using a tray lined with felt or velvet to accentuate the colors and textures of the stones.
- Group rocks of similar hues or types for a cohesive aesthetic.
- Ensure the tray size complements the scale of the stones; smaller trays for petite collections.
- Employ a minimalist approach, spacing stones to prevent a cluttered look.
This layout creates an interactive experience, encouraging guests to explore and handle the collection. The portability also allows for easy relocation from room to room, making it a versatile choice for rock enthusiasts.
Rock Collection Inside a Lantern

Transform an ordinary lantern into a magical showcase for your cherished stones. Select a lantern with clear glass panels for optimal visibility of your collection. The ideal size will depend on your rock sizes and the number of specimens you wish to display.
Here are some points to consider:
- Use soft, acid-free felt or sand as a base inside the lantern to cushion your rocks and prevent scratches.
- Arrange your rocks in a manner that highlights their unique shapes and colors, layering by size or type if you prefer.
- If the lantern is large enough, incorporate other natural elements like wood, shells, or air plants for a terrarium effect.
- Opt for battery-operated LED lights to illuminate your rocks without the risk of heat damage associated with traditional candles.
- Ensure the lantern has a secure closure to safeguard your collection from dust and accidental spills.
- Regular maintenance, such as gentle dusting with a soft brush, will keep your display looking pristine.
By using a lantern, you can create a portable display that’s easily changeable and can be placed in various settings around your home or office, adding a whimsical touch to your space.
Underlit Display Case for Fluorescent Rocks
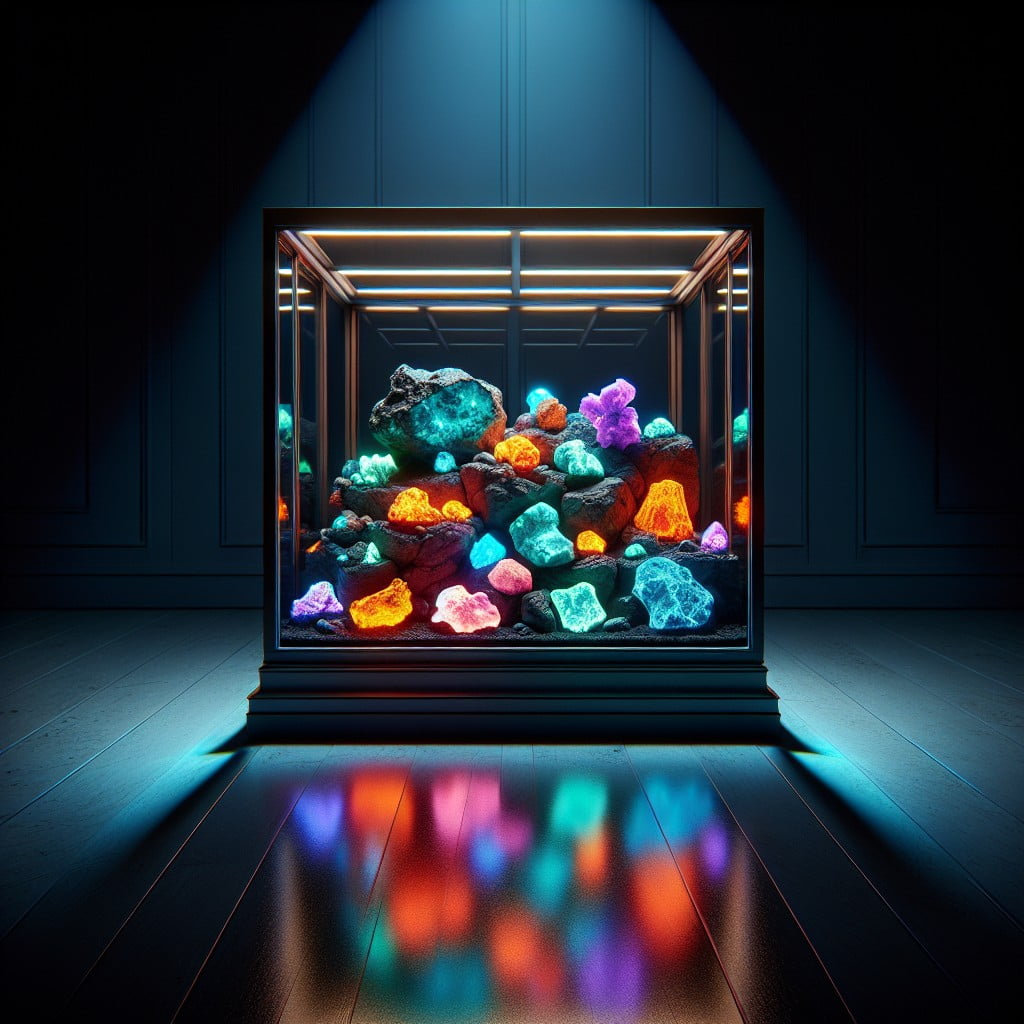
Fluorescent minerals are a sight to behold, transforming under UV light to reveal striking, vivid colors that are otherwise hidden under normal lighting conditions. To showcase these unique properties, an underlit display case is ideal. Here are a few points to consider when setting up such a display:
- Choose the Right Light: UV lights are crucial in this setup. Long-wave UV lights tend to work best for a wide range of fluorescent minerals.
- Safety Concerns: UV light can be harmful. Make sure that your display case either filters out harmful UV rays or is designed in such a way that direct exposure to eyes or skin is minimized.
- Contrast is Key: The darker the display area, the more impressive the fluorescent minerals will appear. Opt for a display case with a dark interior or add a dark backdrop.
- Adjustable Lighting: Variability in light intensity can help to bring out different features in your specimens. Consider a display with adjustable light settings.
- Maximizing Visibility: Opt for a case with a mirrored or reflective bottom to enhance the glow of the rocks from all angles.
- Size and Spacing: Ensure that rocks are spaced out evenly, and the case is large enough to accommodate your collection without overcrowding.
Remember, the objective is to create a display that not only protects your collection but also presents it in the most visually stunning way possible, especially under specific lighting that brings out the natural fluorescence of the rocks.
Garden Design Using Large Rocks
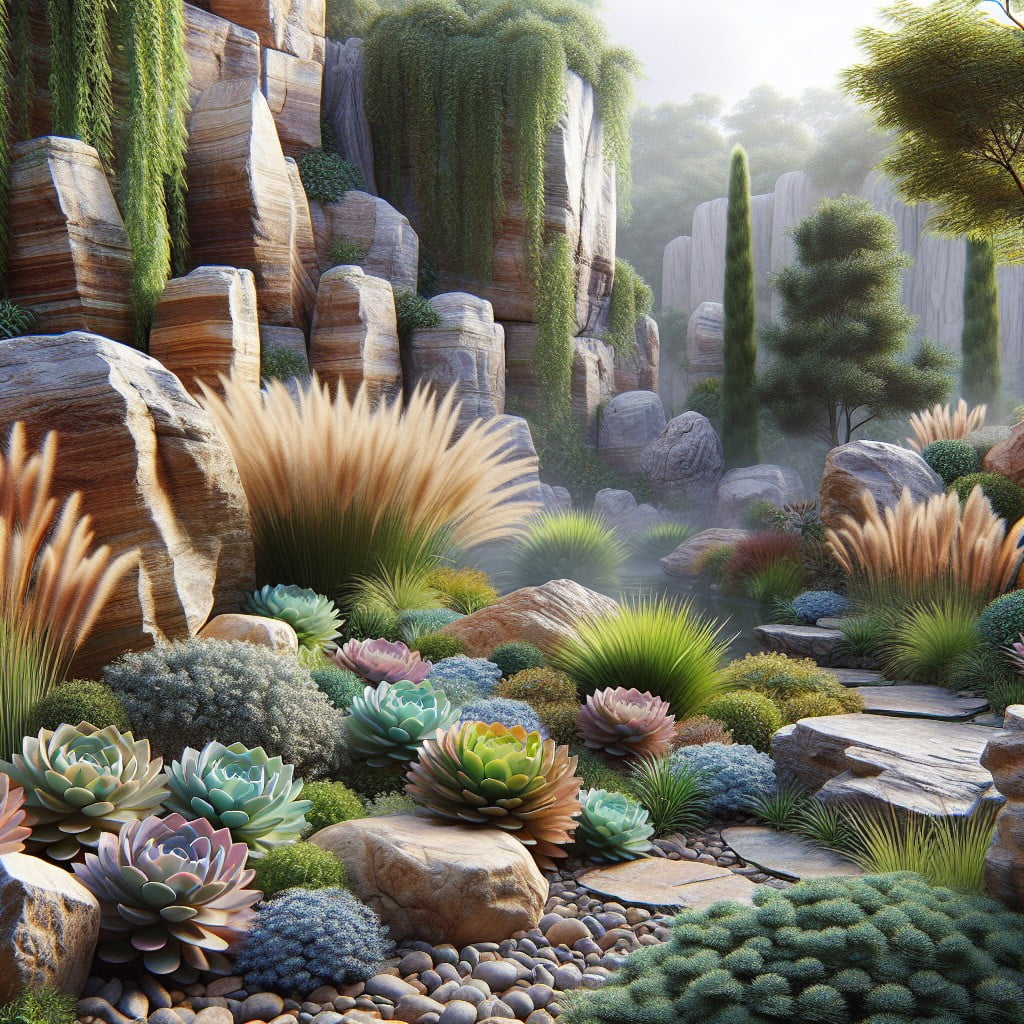
Integrating large rocks into garden landscapes can add natural beauty and textural contrast. Here are some key considerations to effectively use these elements:
- Placement: Think of the rock as a focal point. Situate it where it naturally draws the eye, such as at a curve in a path or beside a water feature.
- Scale and Proportion: Select rocks that are proportional to the size of your garden space. Too small, and they go unnoticed; too large, and they can overwhelm the area.
- Grouping: Rocks often look best in groups, mimicking natural settings. Groups of odd numbers (three or five) are typically more visually appealing than even-numbered clusters.
- Plant Companions: Pair rocks with plants that complement them in color and texture. Ground covers and low-growing alpine plants can soften the base of the rocks.
- Burial Depth: Embed rocks partially into the ground to give the appearance that they’ve always been part of the landscape. This can also provide stability for the rock.
- Orientation: Place the rock with its strata lines running the same direction as the natural lines of your landscape for a harmonious effect.
Follow these tips to seamlessly incorporate large rocks into your garden design, enhancing its overall aesthetic and creating a sense of permanence.
Integrating Rock Display in Furniture Design
Incorporating your rock collection into furniture can turn ordinary pieces into showstopping conversation starters. Think about embedding smaller stones or slices of geodes into tabletops, either resin-coated for a smooth surface or left natural for a more textured feel.
Bookshelf ends or the sides of wooden furniture can be adorned with fossils or minerals, adding a touch of natural history to your living space.
Consider a custom-built coffee table with a glass top and a recessed center; this design allows you to arrange your rocks artfully below the surface, protected from dust and easily viewed from above.
Side tables with hollowed centers offer another dynamic option, where you can fill them with larger specimens, and a glass top keeps them secure.
For a subtler integration, drawer pulls or cabinet knobs can be replaced with polished stones or crystal for functional, yet beautiful, accents.
Reclaimed Wood Shelves With Rocks
Marrying the rustic charm of reclaimed wood with the timeless beauty of rocks creates a striking visual contrast that can enhance any room. These shelves not only serve as a functional space to showcase your collection but also bring a piece of nature’s history into your home.
- Choose sturdy planks with a rich patina to complement the colors and textures of your rocks.
- Consider the weight of your collection and ensure the wood is thick enough to support it.
- To prevent damage, secure the shelves with robust brackets, particularly when displaying heavier specimens.
- Arrange your rocks by size, color, or type, creating a visually appealing display that draws the eye.
- Add small labels underneath each rock to educate viewers about their origins and characteristics.
- Enhance the display by incorporating small plants or other natural elements that resonate with the earthy tones of the wood and stones.
- Apply a clear sealant to the reclaimed wood to preserve its character while protecting it from dust and moisture.
Using reclaimed wood not only brings an eco-friendly element into your passion for collecting but also tells a story of the past, echoing the historical significance of the rocks it presents.
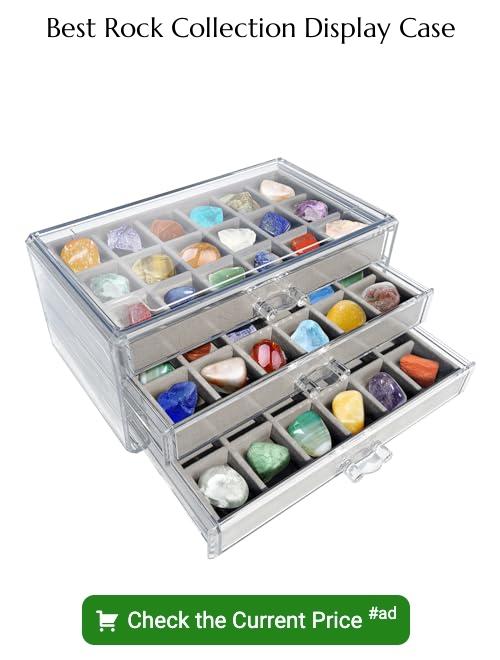
Jewelry Box Displays for Small Precious Stones
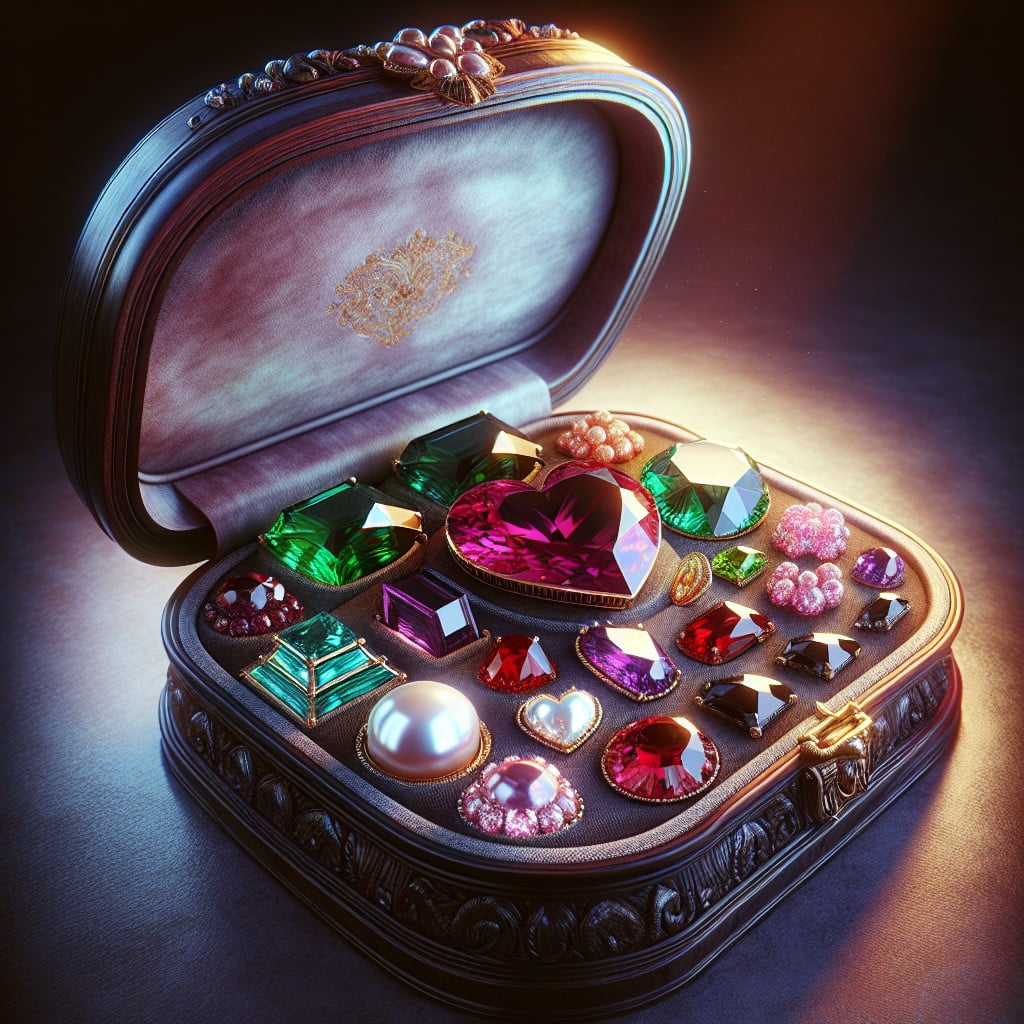
A jewelry box offers an elegant and secure place to showcase small, precious stones. The individual compartments typically lined with soft fabric protect each piece from scratches. For added visibility, select a box with a glass top. This allows light to shine through and enhance the natural beauty of the stones.
Using a jewelry box also means taking advantage of vertical storage space, which keeps the collection concise and organized. If the box doesn’t come with enough compartments, consider adding small, padded inserts to create additional sections.
To create a decorative touch, arrange the stones by color gradient or type. This not only makes the display aesthetically pleasing but also simplifies locating specific items.
If you enjoy sharing your collection with others, a jewelry box is a portable option, making it easy to transport your treasures safely for show-and-tell opportunities.
Finally, the versatility of a jewelry box means that as your collection grows or changes, you can easily swap pieces in and out, keeping the display dynamic and personally curated.
Rock Installation in Aquarium
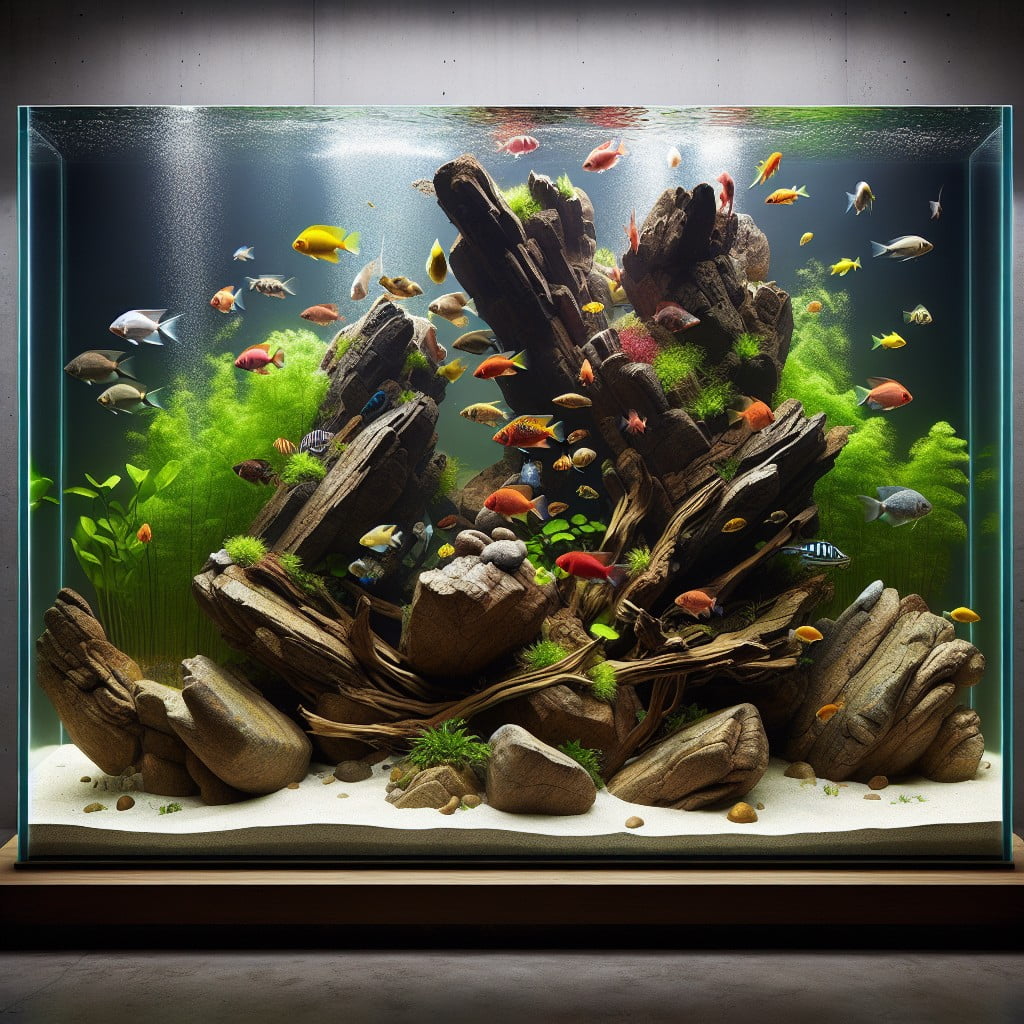
Incorporating mineral specimens into aquariums adds natural beauty and mimics aquatic environments. Consider these points to successfully create an engaging underwater rock scene:
- Choose non-toxic, aquarium-safe rocks to avoid altering water chemistry, with quartz, slate, and granite being ideal choices.
- Arrange larger stones as foundation pieces, contouring the substrate and creating a framework for the display.
- Delicately balance smaller pieces and accent minerals atop or around these base elements, ensuring stability for aquatic inhabitants.
- Pay attention to the visual flow, guiding the viewer’s eye through the aquatic landscape while providing hiding places for fish.
- Consider the lighting to highlight the unique textures and colors of the stones, which can transform under different conditions.
- Conduct thorough research on each rock type to guarantee suitability for the specific freshwater or saltwater setup.
Installing rocks in an aquarium is not only a creative outlet but also greatly contributes to a thriving ecosystem for aquatic life amidst a stunning geological display.
Wine Rack As a Rock Display
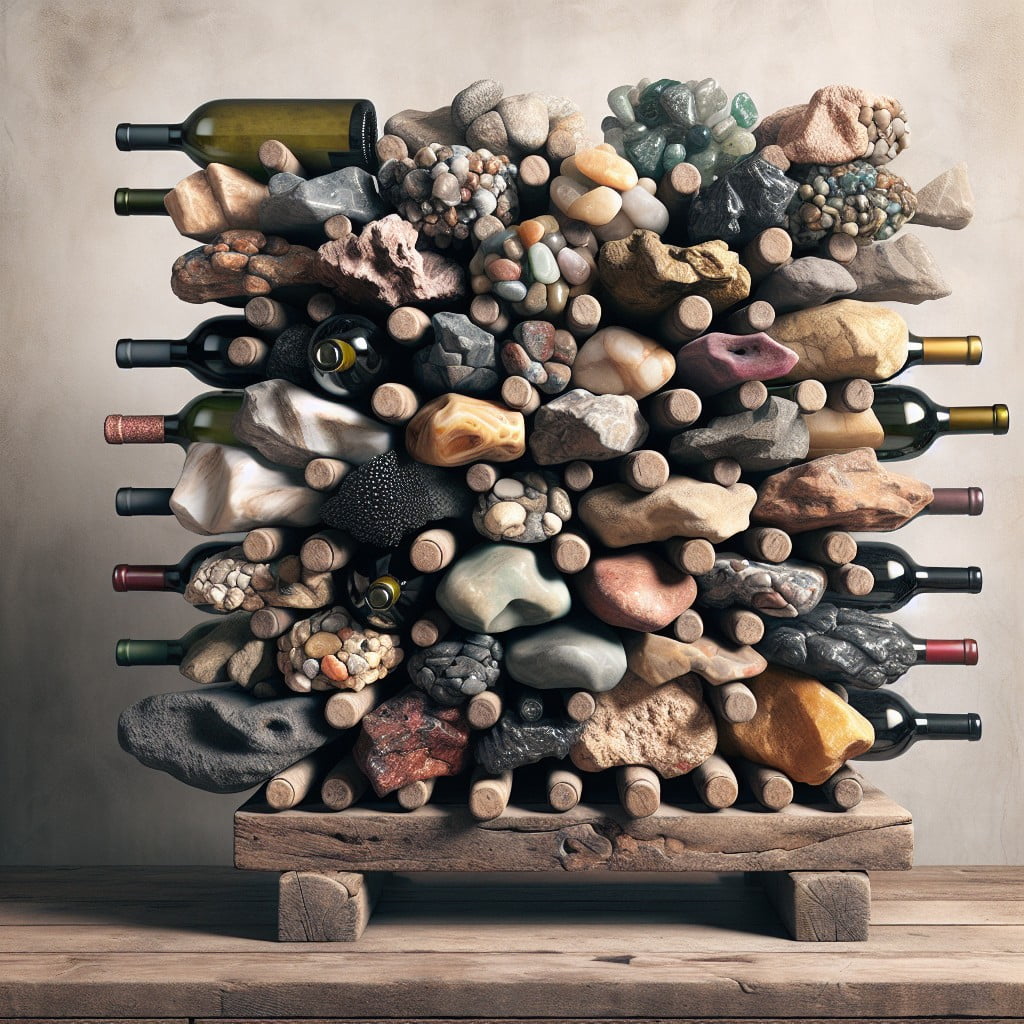
Repurposing a wine rack offers a creative and atmospheric way to exhibit rocks and minerals. This method provides a framework for organizing and showcasing different sizes and types of specimens. The individual compartments, originally designed to cradle bottles, can accommodate rocks and safeguard them from being jostled or knocked over.
Here are key points to effectively utilize a wine rack for your collection:
- Measure the slots to ensure your rocks fit comfortably; you may add cushioning to protect delicate specimens.
- Arrange rocks by color, size, or type to create a visually appealing display.
- Introduce labels to identify and share information about each rock or mineral.
- Consider lighting: a strategically placed lamp above the wine rack can enhance the display’s appeal, playing off the natural luster of the rocks.
- For wire racks, use clear acrylic risers or stands within the compartments to elevate smaller pieces for better visibility.
- Finally, maintain accessibility for easy rotation of the collection, allowing for new additions or reorganization as your collection evolves.
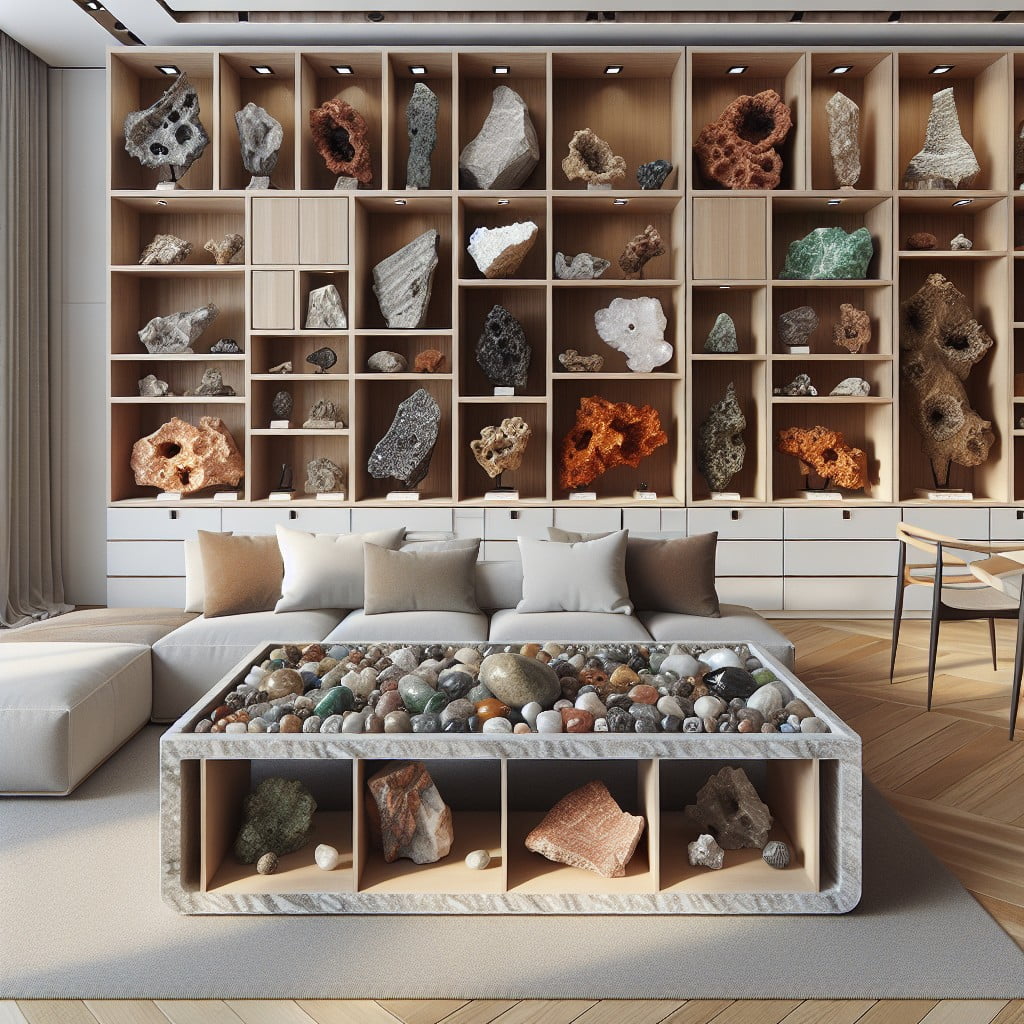
Coffee Table Rock Displays
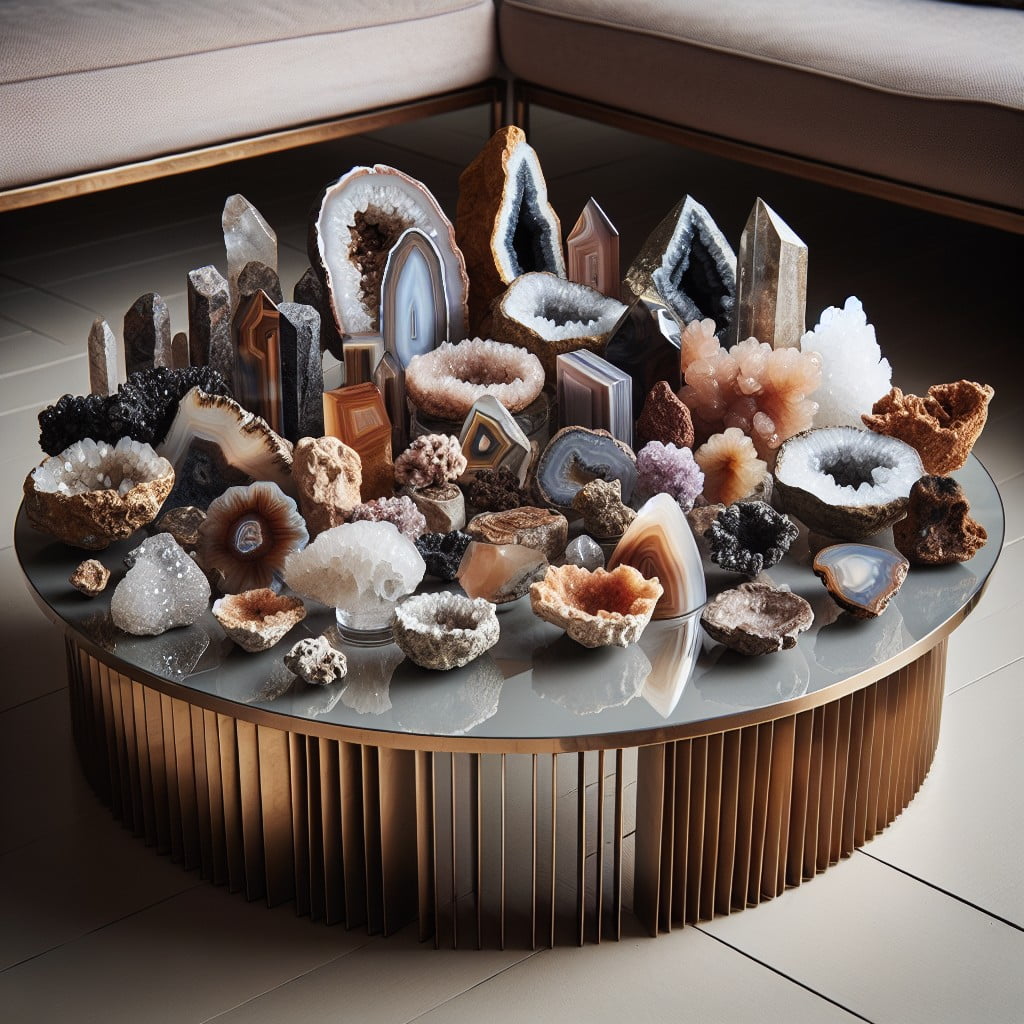
Coffee table displays can turn your rock collection into a centerpiece that sparks conversations. Opt for a table with a glass top and a hollow interior to create a protected showcase that’s both functional and decorative. Ensure the glass is sturdy enough to withstand day-to-day use, and consider the accessibility of the interior for when you wish to add new pieces or rearrange your collection.
For added flair, integrate lighting into the setup. Small LED lights can highlight the unique features of each rock or mineral. If you’re using an existing coffee table, consider a custom-built glass case to sit atop it, ensuring your rocks are the stars of your living space.
Choose a table that complements the theme of your rock collection, whether it’s sleek modern lines for a contemporary assortment or a rustic wood finish for a more naturalistic array. This seamless integration of décor and hobby enhances both the aesthetic appeal of your living area and showcases your personal interests.
Remember to distribute your rocks evenly to balance visual weight and consider grouping them by type, color, or region to tell a story with your display. This approach creates a natural focal point and invites guests to take a moment and engage with your collection up close.
Convertible Rock Display and Play Table for Kids
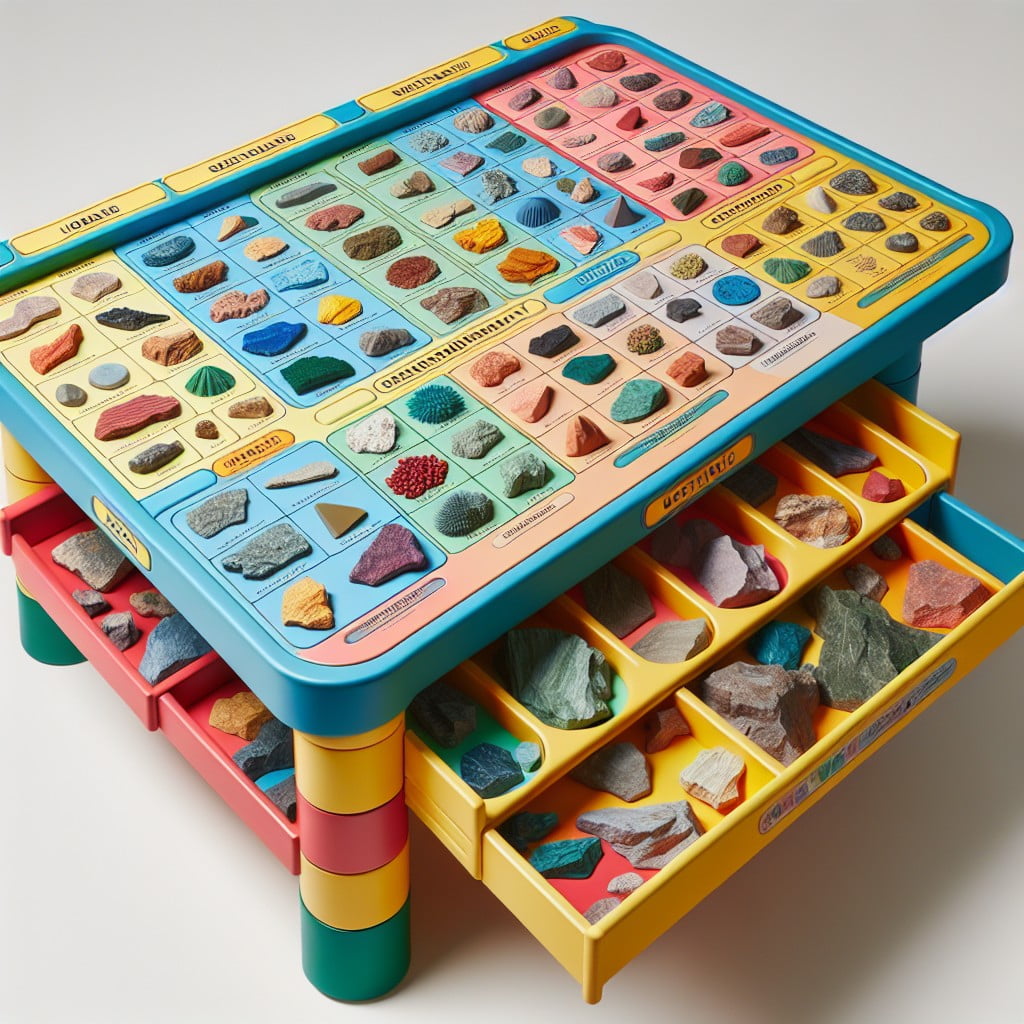
Balancing educational value with play can be effortlessly achieved by using a convertible table designed for both displaying rocks and mineral collections and as a space for children to play. These tables often come with a removable top or a glass panel that secures the specimens underneath while providing an easy visual of the collection.
Here are some points of consideration for creating this dual-purpose setup:
- Opt for a table with a sturdy, locking glass lid so that children can observe the rocks safely without the risk of touching or losing them.
- The compartment below the glass should be segmented, allowing for categorization of different rock types.
- Choose a table height appropriate for kids to ensure comfortable observation and playtime activities.
- Ensure the convertible function is straightforward, enabling the display area to be covered with a solid play surface when needed.
- Utilize durable materials, anticipating the rougher usage by children during playtime.
- Consider integrating educational elements, such as rock names, hardness scale, or geological facts, into the design around the display area.
By serving as both an informative exhibit and an interactive play spot, the table encourages learning through a tangible connection with the natural world while fostering responsible handling and care for a treasured collection.
Ideas Elsewhere
- https://www.reddit.com/r/rockhounds/comments/tkzotf/how_do_you_display_your_rock_collection/
- https://fineartminerals.com/beautiful-gemstones-rock-collection-display-designs-ideas/
- https://rockseeker.com/how-to-display-rocks-in-a-jar/
- https://rockhoundingmaps.com/display-rock-mineral-collection/
- https://rockrembrandt.com/how-to-display-painted-rocks/
Read More Like This
 15 Homecoming Decoration Ideas to Elevate Your Celebration
 15 Christmas Cake Decorating Ideas to Sweeten Your Holidays
 15 Outdoor Party Tent Decorating Ideas for a Magical Celebration
 15 Ideas for Welcome Home Decorations
 15 Cheap Table Decoration Ideas to Elevate Any Gathering
Recap: