Last updated on
Decorating a vase can transform your living space because of its capacity to add a burst of color, texture, and personality.
I am incredibly proud to have handcrafted this guide on 20 Vase Decor Ideas and the unique designs within; I sincerely hope you find it as inspiring and enjoy it as much as I did creating them.
Decorating a vase can transform it from a simple container into a statement piece, adding a touch of elegance and personality to any room.
Whether it’s a glass vase, ceramic, or metal, there are numerous ways to adorn it to match your decor style.
From painting and decoupage to using natural elements like flowers and shells or even incorporating lights, the possibilities are endless.
This article is your comprehensive guide to vase decor ideas, offering detailed steps and tips to help you create a masterpiece that reflects your unique taste and style.
Stay tuned to explore these ideas and learn how to expertly decorate a vase.
Fill With Fairy Lights
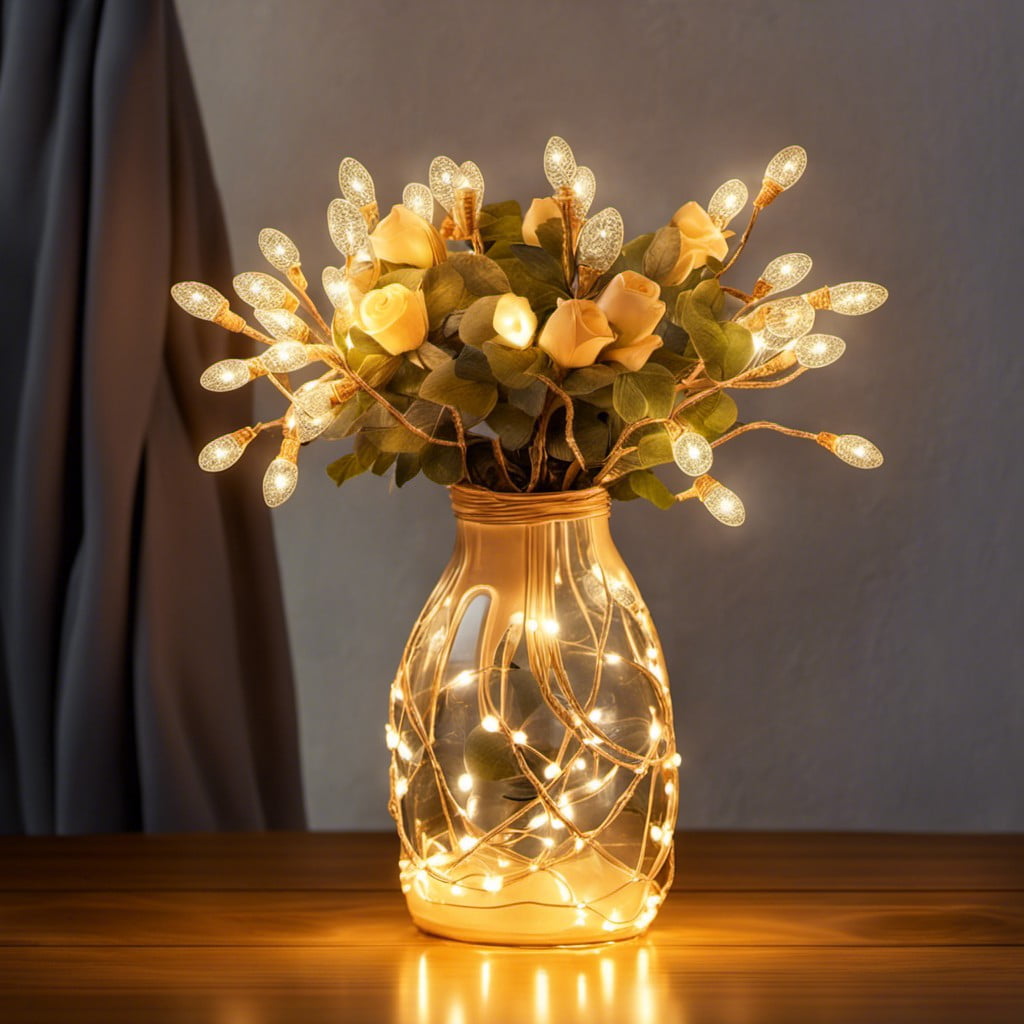
Incorporating fairy lights into your vase offers a dazzling visual feature, especially in the evening. This versatile decor idea adds an enchanting glow to any room.
You can choose lights in a warm hue for a cozy atmosphere or a cool tone for a more modern look. Ensure the string of lights is long enough to fill the vase and leave some coming out the top. The vase should be transparent to optimally display the brilliance of the lights.
Wireless, battery-operated lights are ideal for this as they prevent unsightly cords from showing. The possibilities are endless and up to your vision. This is an excellent option if you’re aiming for a beautiful, radiant, and magical effect.
Use Colored Sand Layers
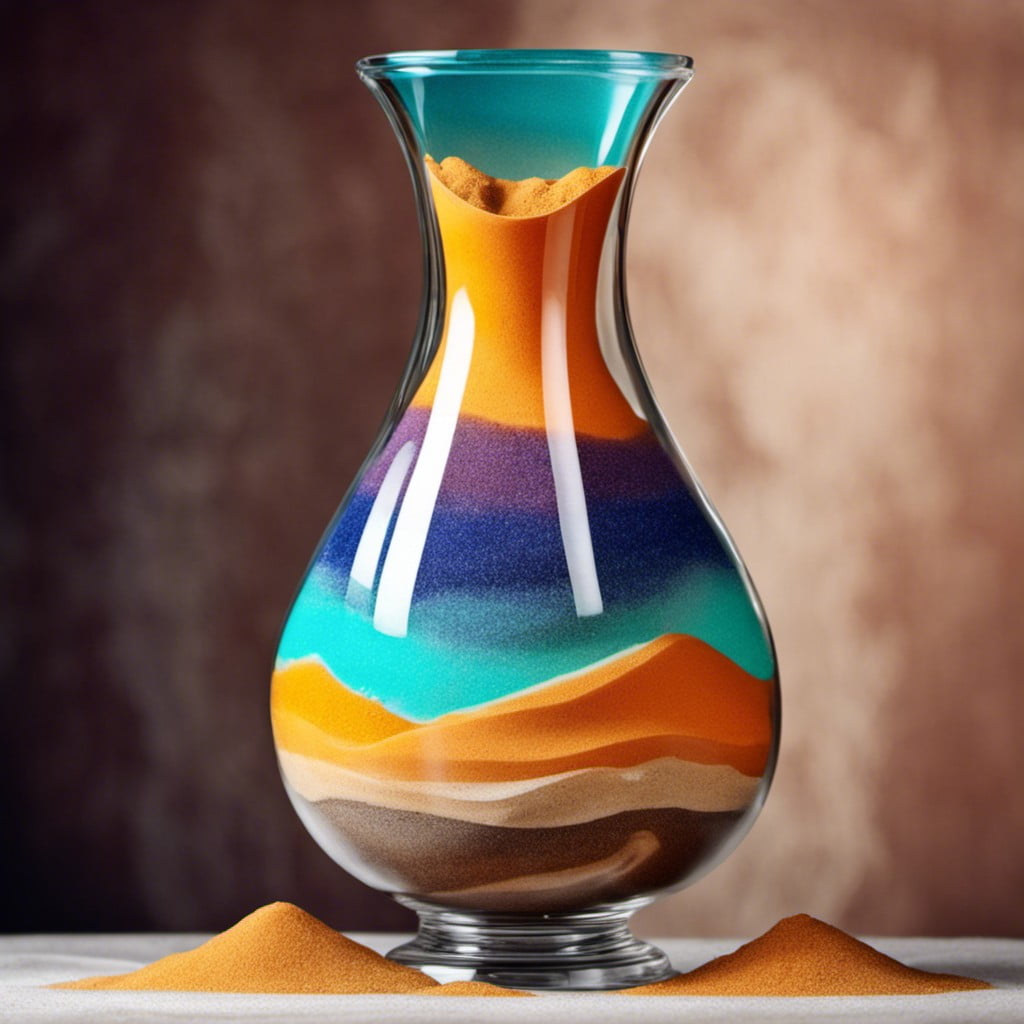
Creating a captivating spectacle using layered colored sand is a cinch! Start by choosing sand in hues to compliment your room’s color scheme or event theme.
A funnel aids in precisely pouring sand into the vase and prevents messy spills. Initially, alternate between vibrant and subtle shades to form a visually pleasing contrast.
Once you’ve filled the vase halfway, leverage a wooden skewer to produce curvy designs within the sand. The outcome can be analogous to mesmerizing layers of sedimentary rock or rippling desert landscapes.
The best part is there’s no right or wrong while personalizing your layers, so creativity is the key.
Finally, remember to leave enough room for the originally intended purpose of the vase – whether it’s for holding flowers or merely adding a unique touch to your décor.
It’s advisable to use a clear glass vase to gain the best view of the captivating colored sand layers.
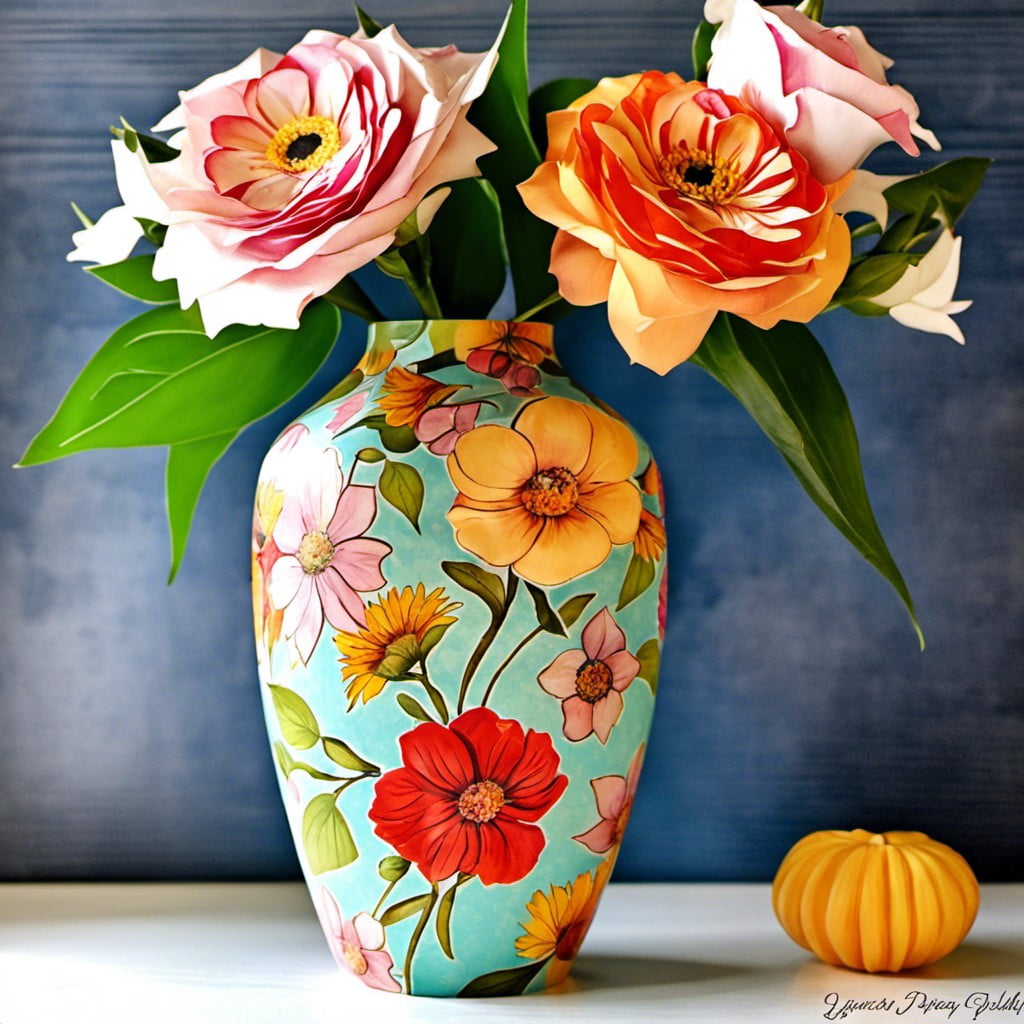
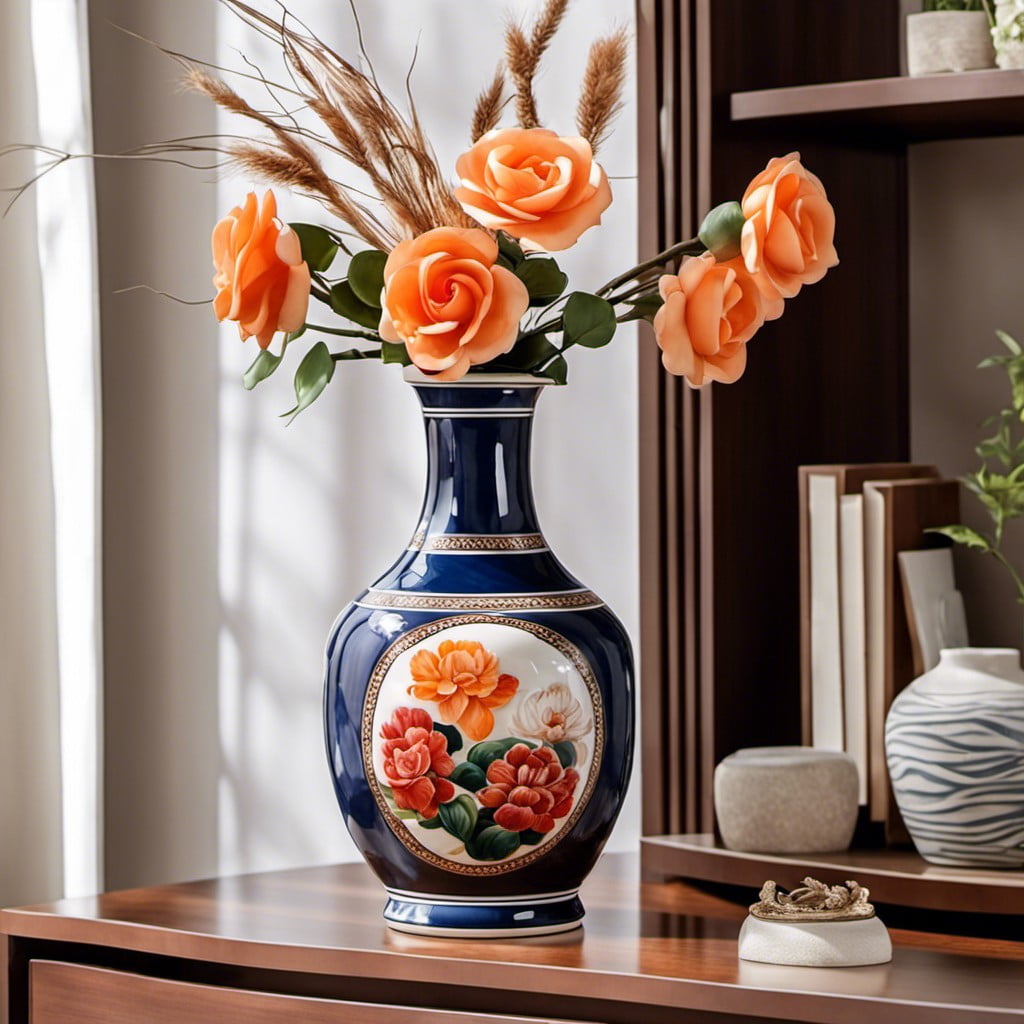
Insert Fresh Flowers
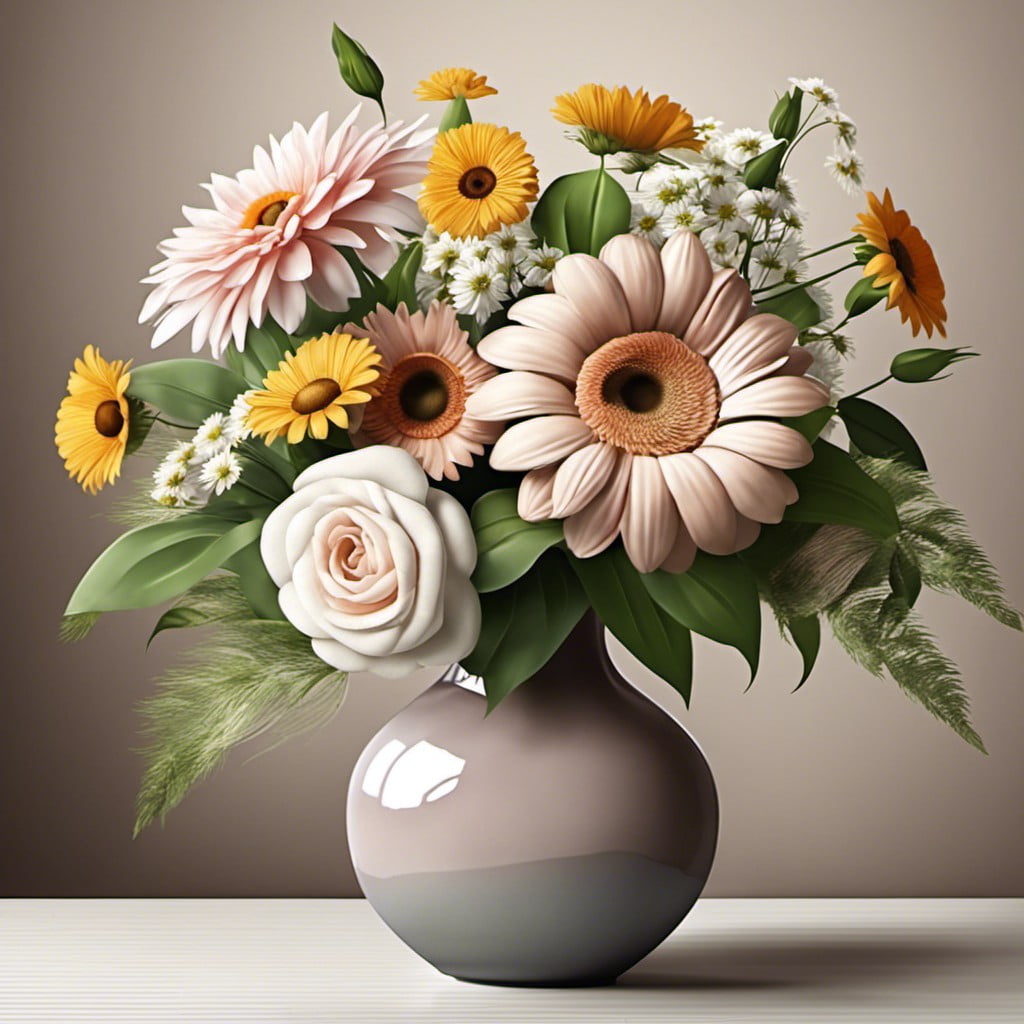
Incorporating fresh flowers into a vase is a go-to option, yet it never loses its charm and appeal. Start by selecting blooms that match your room’s color scheme or act as a bold accent. Choose different heights and widths for visual interest. Either select a single flower type for clean, modern appeal, or combine several kinds for a lush, garden-inspired look.
For longer lifespans, cut stems at an angle for better water absorption. Remove leaves that’ll be submerged to prevent bacterial growth. Refresh water every two-three days, and keep the arrangement away from direct sunlight and heat sources. Experiment with proportions and balance to enhance the overall aesthetic of your vase decor.
Display Decorative Pebbles
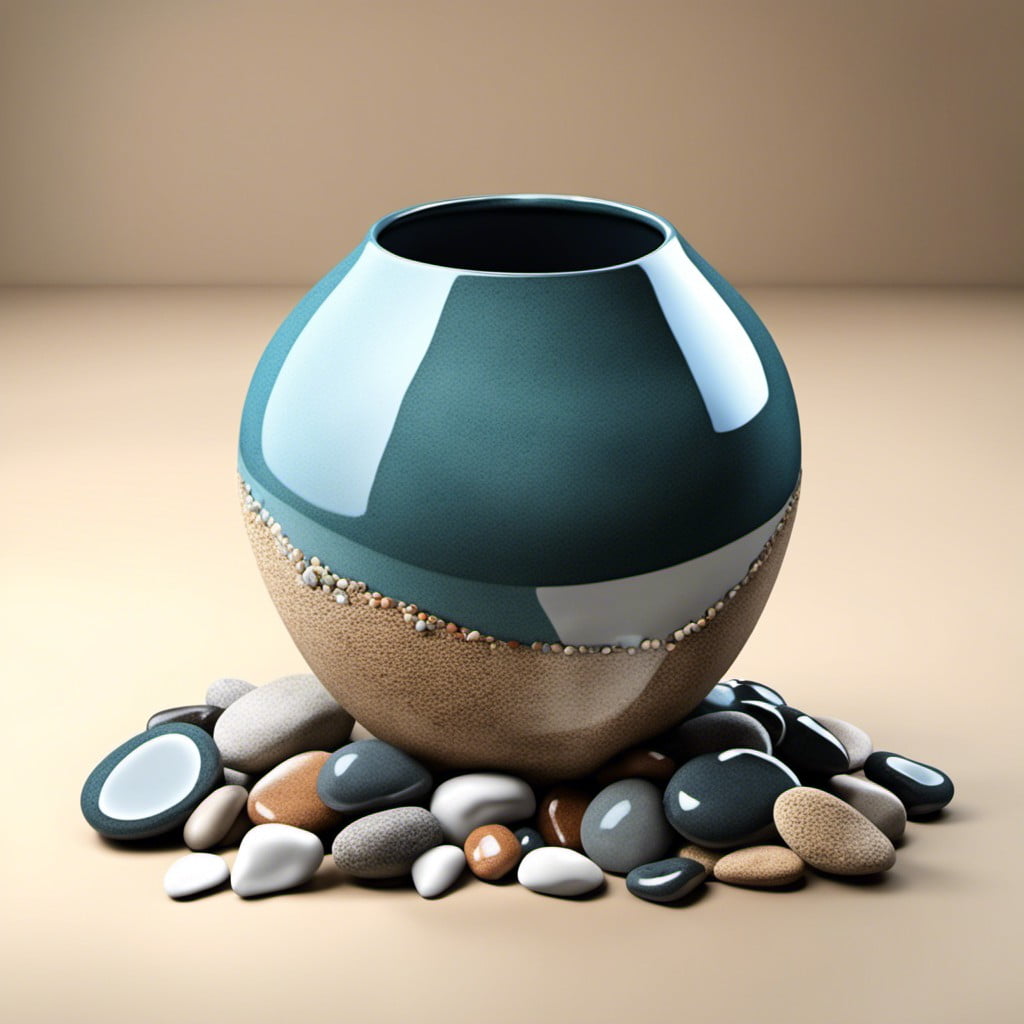
Creating an earthy, organic vibe is just a pebble’s throw away and the process is quite simple. Start by selecting a variety of ornamental stones ranging from small river rocks to sparkling pebbles. The variety in size, shape and color will bring in a unique texture and visual interest.
It’s not just about loosely tossing them in the vase; keen consideration should be given to arrangement. For a casual, naturalistic approach, a random mixture may suffice. However, for a more structured appeal, consider layered arrangements – maybe place a layer of larger stones at the base, followed by medium stones and then the smallest on top. Or go bold by doing color-coded layers.
Lighting can transform a humble pebble-filled vase into a dramatic centrepiece. Introduce a battery-powered tea light at the base or a string of LED lights intertwined amongst the pebbles, and the effect after dusk is simply breathtaking.
Finally, remember to keep the pebbles clean. Regular rinsing under water is typically enough to maintain their shine and brilliance.
Let the zen spirit of stone play up the ambiance of your living spaces!
Arrange Floating Candles
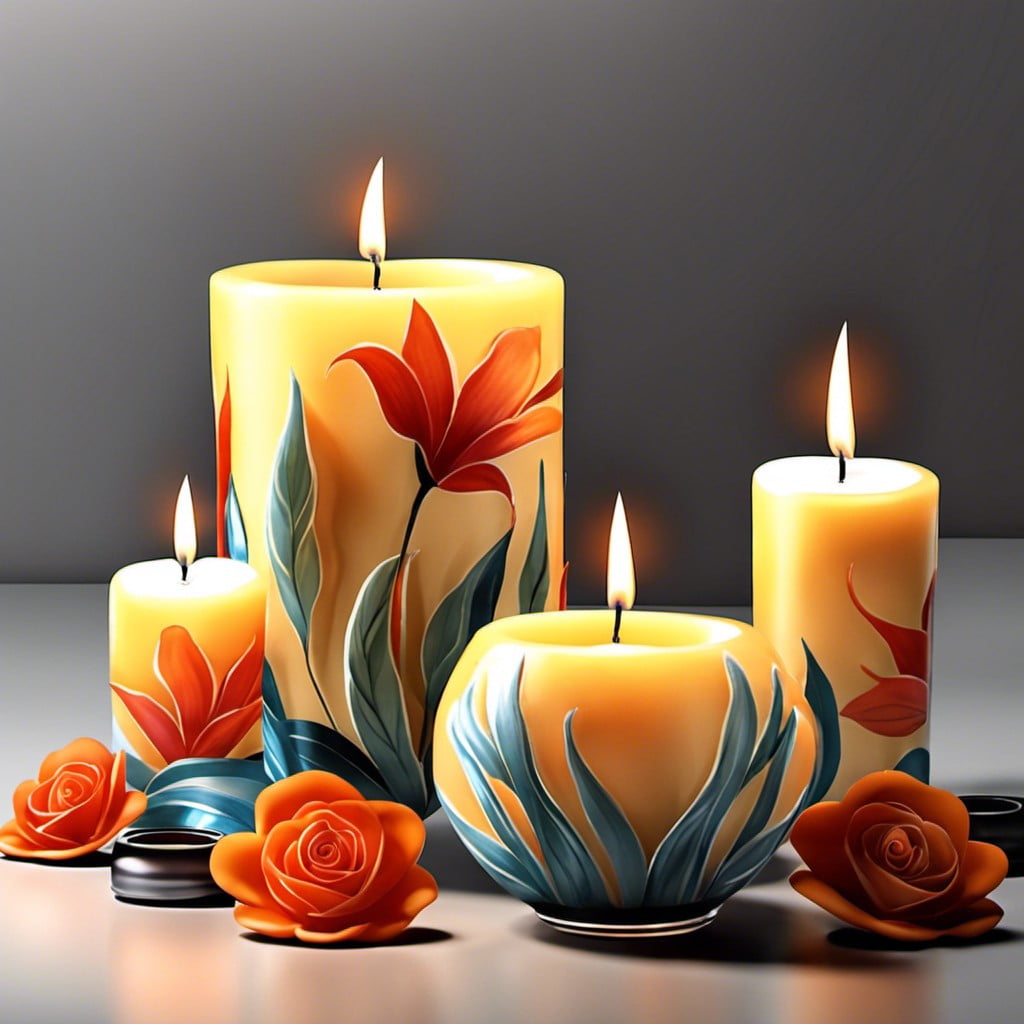
To create a magical ambience using your vase, opt for floating candles. They’re not just beautiful, but also are easy to arrange.
All you need are candles that are specifically made to float, a clear vase, and you’re set! Fill your vase about three quarters full with water.
Place the candles on the water, ensuring they don’t tip over. For an added touch of magic, add a few drops of essential oil, flower petals or small aquatic plants.
Make sure the vase is placed in a safe, flat surface to avoid accidents. Floating candles give off a serene glow, enhancing the ambiance of your room.
Remember to never leave candles unattended and extinguish them before bed or leaving the house.
Add Painted Branches
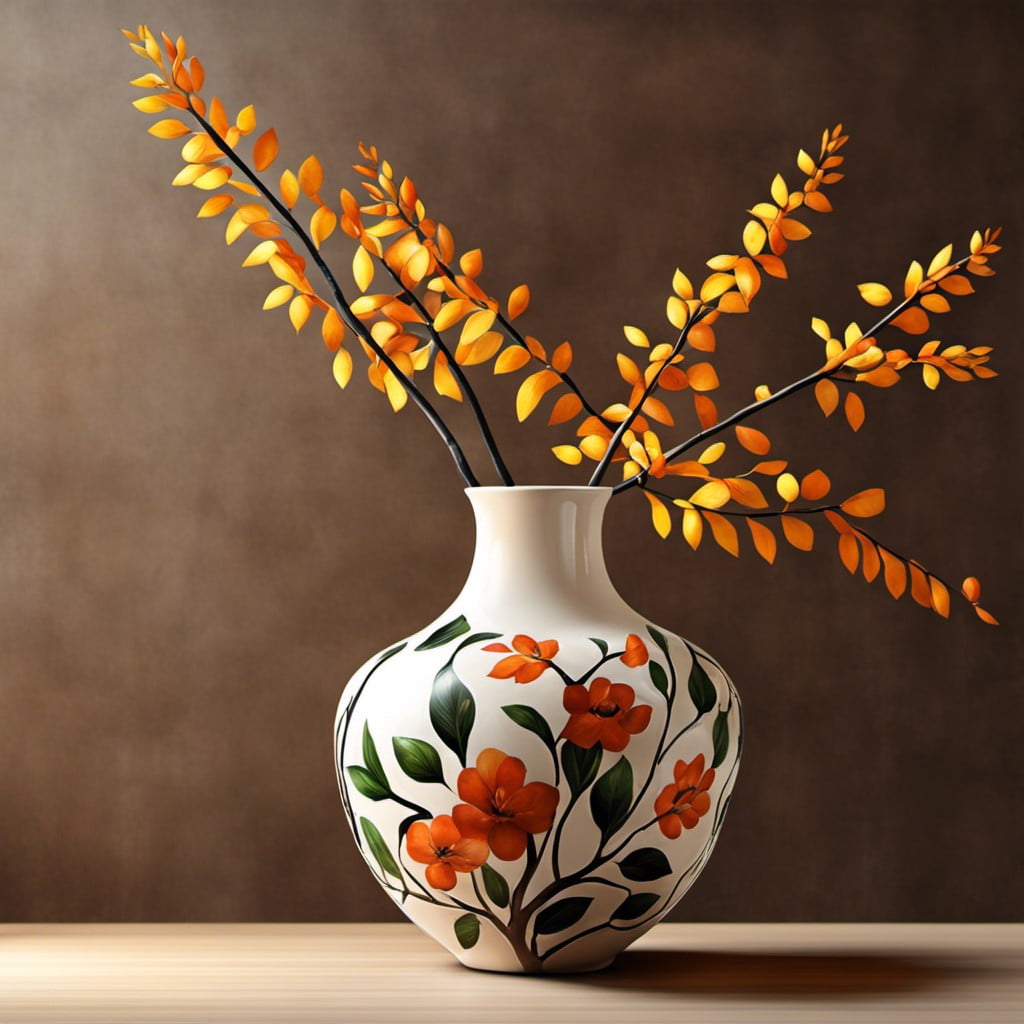
For an artistic yet natural-looking vase, consider integrating branches. Start with branches from your garden – willow, dogwood or birch work well. Remove any tiny twigs or leaves that may be attached, then allow them to dry out thoroughly.
Once dried, select acrylic paint in a color of your choice. Metallic shades work particularly well, injecting a touch of glamour into your decor. However, for a subtler look, pastel colors or whites can be equally beautiful.
Using a paintbrush, gently apply the paint onto your branches, fully covering them. Let them dry fully before moving onto the next step. This could take up to 24 hours depending on your branch’s size and the amount of paint applied.
Upon drying, carefully arrange the painted branches in your vase. Ensure the branching out is upward, almost like a blooming flower. This will create an engaging focal point in your room, its stark structure contrasting beautifully with any backdrop. Orchestrating the painted branches in a clear glass vase will enhance the effect of the color and texture of the branches. This decoration idea is adaptable for all seasons, from vivacious spring pastels to summer brights, autumnal earth tones, or frosty winter whites.
Apply Decoupage Paper
To embark on this creative journey, you’ll need an assortment of decoupage paper, glue suitable for the purpose, a brush, and your imagination.
Step 1: Cut your selected paper into various shapes and sizes. They can be as abstract or as uniform as you like.
Step 2: Apply a layer of glue on the surface of the vase. If you’re working on a specific design, place the glue accordingly.
Step 3: Gently press your decoupage paper onto the glued areas, smoothing out any creases or bubbles as you go.
Step 4: After covering the vase to your satisfaction, seal the design with another layer of glue. Let it dry completely.
The options with decoupage are endless, from floral prints to intricate geometric patterns. It’s all about your sense of aesthetics and creativity. Remember, there’s no right or wrong here. Play around with patterns, experiment, and most importantly, enjoy the process.
Insert Seashells and Beach Sand
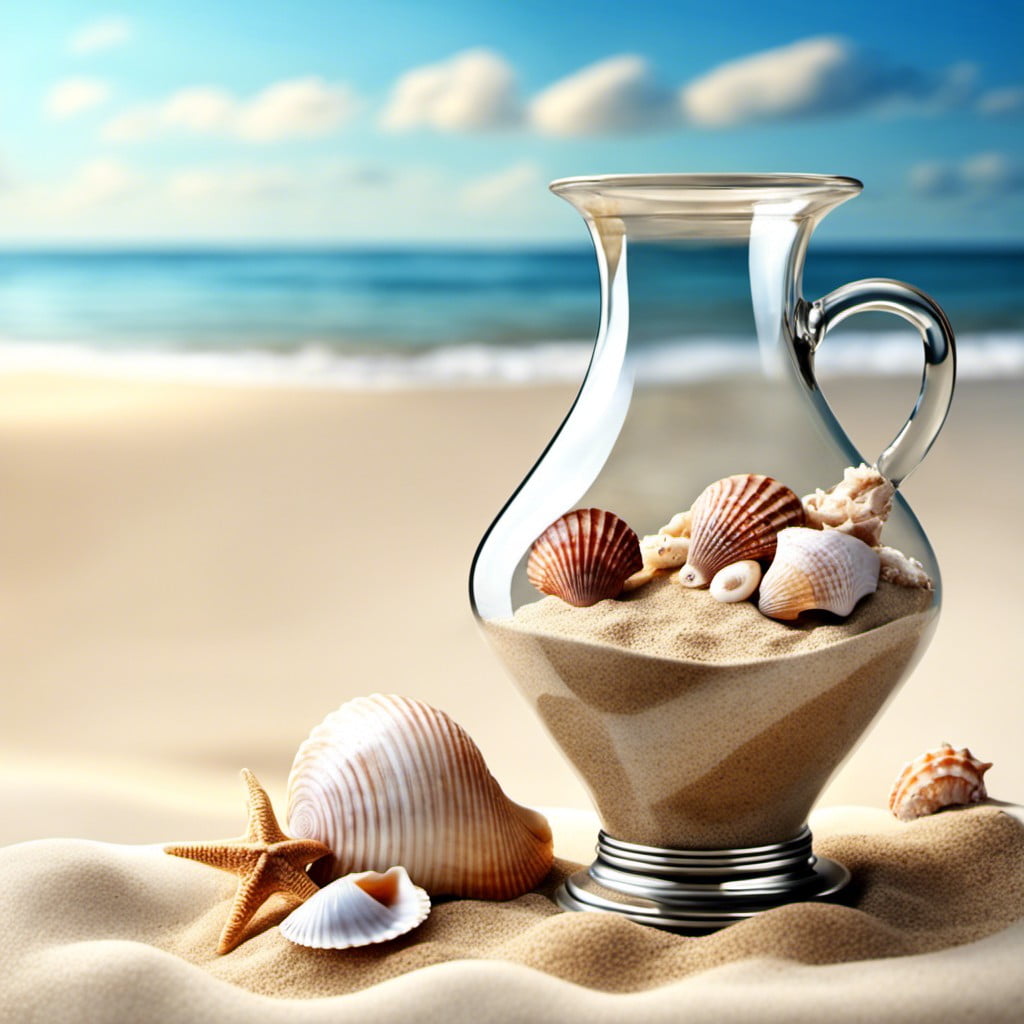
Creating a beach-inspired vase is an exquisite way to bring a piece of the seashore into your living room. Here’s how to go about it.
Begin by gradually pouring beach sand into the base of the vase. Add as much as you deem necessary, but remember to leave room for seashells. Clean sand off the inside of the vase, ensuring it has a neat look.
Next, add your seashells. Big shells should be at the bottom while smaller shells should be at the top. Make sure to arrange them in such a way that they are visible and appealing.
For a more pronounced seaside feel, you might want to include a few tiny replicas of sea creatures or miniature lighthouses. Just ensure these elements harmonize with your overall home decor theme.
Finally, keep your beach-themed vase away from areas with high footfall to prevent spills and maintain its aesthetic appeal. Remember, even minor disruptions could upset the delicate balance you’ve strived to create.
Add Succulent Plants

Succulents make an excellent choice for vase displays due to their variety of shapes, sizes, and colors. Choose a glass or transparent vase to showcase the interesting layers of pebbles, soil, and roots.
Start by placing a layer of small stones at the vase bottom for drainage. Cover the pebbles with cactus mix, adding enough soil so that the succulent’s base will rest just below the rim of the vase. Make a hole in the soil, insert the succulent, then gently cover the roots with additional soil.
Position your succulents in the vase, experimenting with different arrangements until you find one that’s appealing. Remember, these plants require minimal water and plenty of sunlight.
A succulent vase is not only easy to create but also requires low maintenance, offering a stylish and long-lasting addition to your home decor.
Use It for Fruit Display
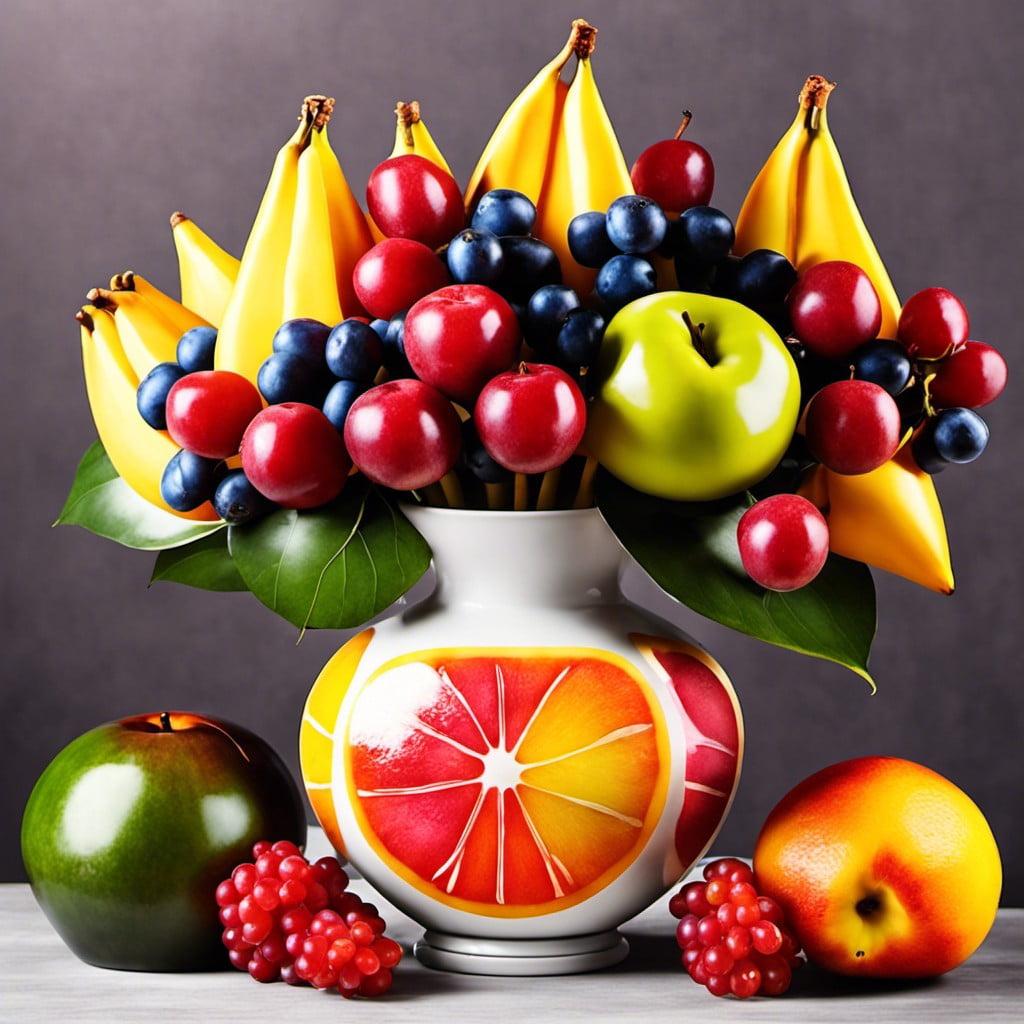
Displaying vibrant fruits serves both as a visual feast and a practical snack station. Choose a transparent vase to exhibit the natural beauty of the fruits. Mix different types together to create an eye-catching arrangement, making sure to select long-lasting fruits for longevity.
Apples and citrus fruits are particularly fitting, with their wide array of colors and substantial shelf-life. Not only will this add a pop of color to any room, but it’s also a great reminder to grab a healthy bite.
Rotate the fruits regularly to keep your “centerpiece” looking fresh and inviting.
Try Terrarium Style Design

Creating a Terrarium style design ends up transforming your vase into a self-sustaining, mini ecosystem. This unique decor idea provides both a visual treat and an educational experience. Here are some steps to guide you in preparing your terrarium.
1. Choose a clear, glass vase for better visibility of the enclosed plants.
2. Put a layer of stones or pebbles at the bottom for drainage.
3. Add a thin layer of activated charcoal to facilitate air purification within the enclosed space.
4. Layer on some potting soil and ’plant’ your chosen small, humidity-loving plants.
5. Consider incorporating miniature figures or small decorative items for theme-based terrariums.
Remember, terrariums require limited but regular maintenance. Regular sunlight exposure and water are necessary for the plants’ survival. You should also monitor the humidity and mould growth inside and take action accordingly.
Hang Pendants From the Rim

Selecting unique pendants that align with your decor theme enhances the beauty of a simple vase.
Consider pendants of varying lengths to create depth and dynamism.
Nature-themed ornaments, crystal drops or vintage charms, can complement a wide array of decor styles.
Secure every pendant to the rim using a sturdy string.
Adjust the positioning until achieving perfect balance.
Light sources placed near these bedecked vases can ignite splendid reflections, adding a sparking visual impact.
Most importantly, choose durable, easy-to-clean pendants to prolong the vase decor’s life.
Wrap It With Jute Twine

A rustic touch can often add a unique charm to any decor and jute twine certainly fits the bill. Here is an easy way to use it to enhance your vase:
1. Select suitable jute twine: Consider your vase size. Thicker twine for large vases can create impact, while finer twine can add a delicate touch to smaller vases.
2. Prepare the vase: Clean your vase thoroughly to ensure the twine adheres well. Start from the bottom and work up to keep it neat.
3. Apply adhesive: Use a high-strength craft glue to stick the twine to the vase. Apply the adhesive in manageable sections to prevent premature drying.
4. Wrapping technique: Carefully wrap the twine around the vase, ensuring the rows sit tightly together. Keep it straight for a streamlined look, or experiment with spirals or zigzags for a more artistic effect.
5. Leave to dry: Allow sufficient time for the adhesive to dry fully once you’ve wrapped enough twine.
Remember, the key is to manifest your creativity. With a simple spool of jute twine, you’re just steps away from transforming a plain vase into a beautiful, rustic centerpiece.
Consider Seasonal Themes Like Christmas or Easter
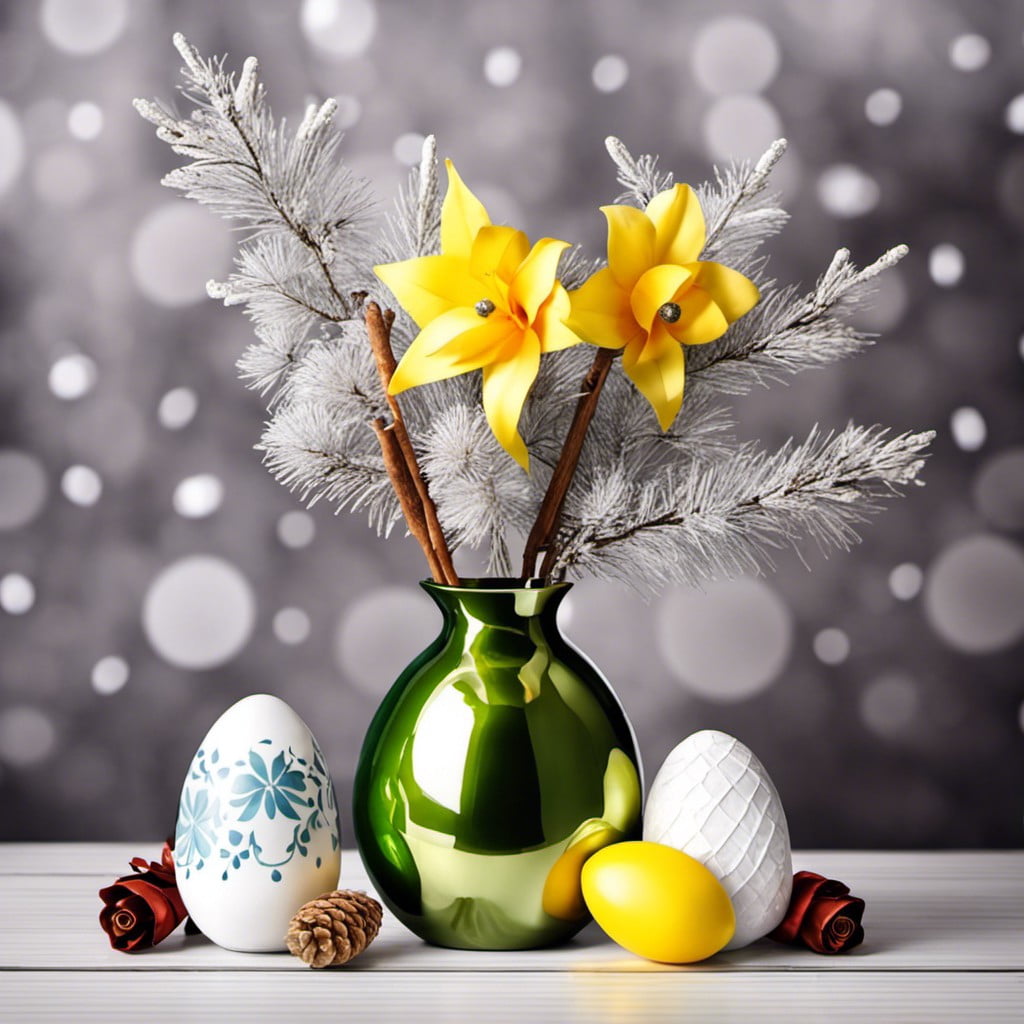
Transitioning between holiday celebrations offers ample opportunities to reimagine your vase’s aesthetic. During the Christmas season, sprigs of holly, red berries, or miniature fir trees provide an effortless and festive statement. Placing delicate baubles or tinsel inside the vase is also a visually captivating way to invoke Christmas cheer.
When Easter rolls around, your vase can play host to pastel-colored eggs, vibrant artificial grass, or even bunny figurines. Remember to incorporate Easter lilies or daffodils for an even more traditional touch.
Switching up your decor with each season keeps the home feeling refreshed and festive, turning your vase into a timeless centerpiece.
Display Potpourri for Aesthetic and Fragrance
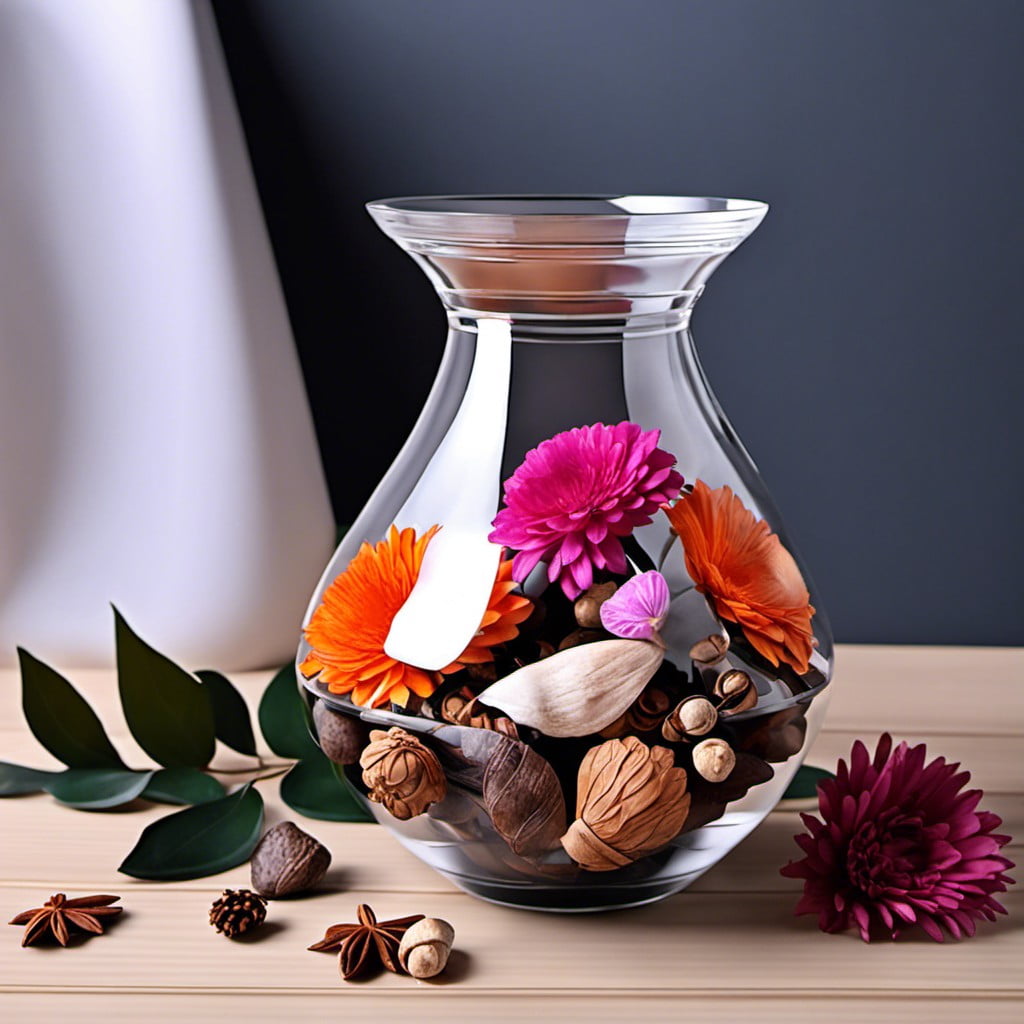
Start by choosing a potpourri mix that matches the colors of your room for a beautiful visual appearance. Light or dark wood elements or neutral-toned rooms pair well with spicy or citrus-scented potpourri while floral aromas complement brightly colored spaces. Remember, a tall vase works best as the potpourri’s fragrance ascends and fills up the room.
Try mixing dried flowers, leaves, and spices for a personal touch. Star anise, cinnamon sticks, dried rose petals, or dried lavender are all excellent choices. They add a natural, homely touch to any vase.
If you’d like to change the fragrance, essential oils are great. Simply apply a few drops to your dried ingredients. Citrus is uplifting, lavender is calming, and peppermint can help with focus. There are infinite combinations to try, swap and change to keep things fresh.
Ensure you rotate or shake the potpourri every few weeks to keep the scent active. Over time, you might need to add more essential oil. So, it’s always good to keep some handy.
Potpourri offers a double attraction: a visual pop and a room-filling aroma. Try it and see just how transformative it can be for your vase decor. Keep safety in mind though, keep vases on high shelves if you have pets or little ones around.
Fill It With Pinecones
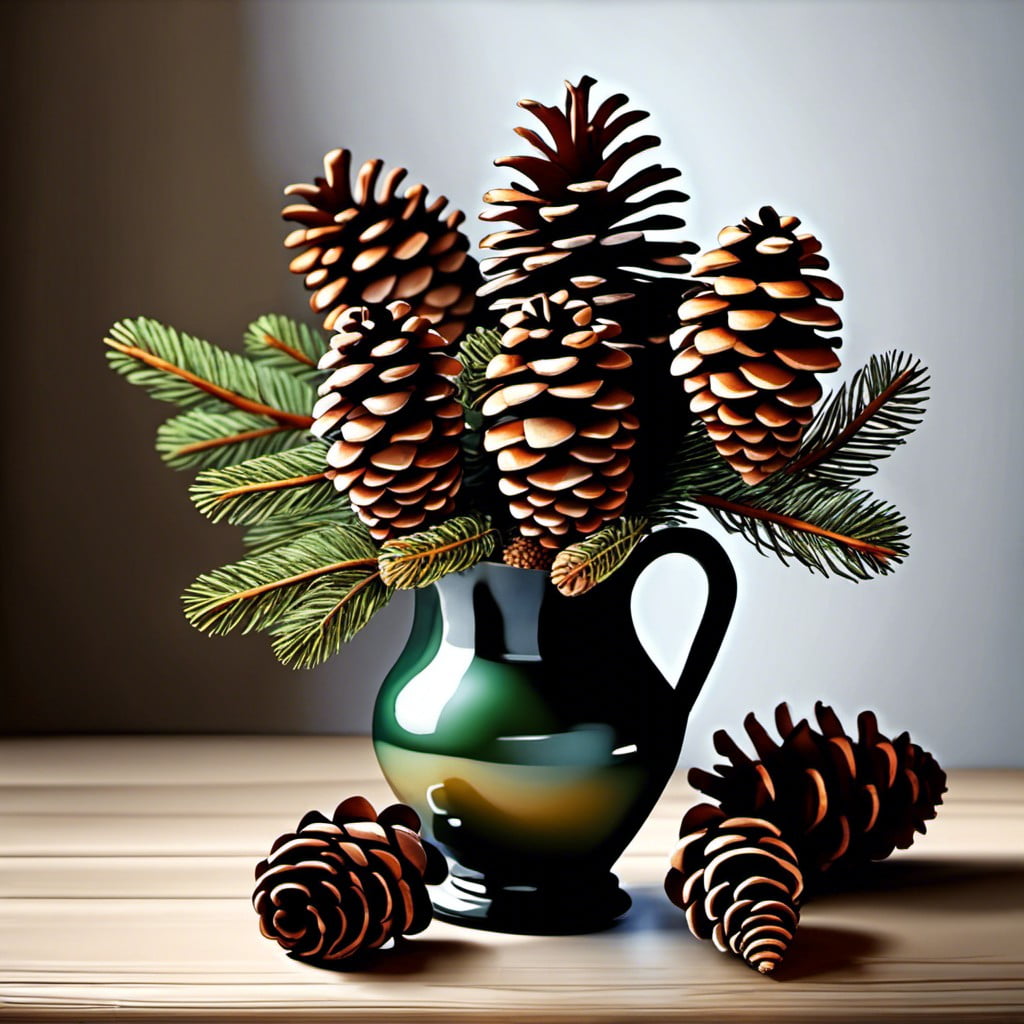
Begin by lining the vase’s bottom with small-sized pinecones, ensuring stability. Gradually add larger ones, paying attention to positioning. The goal is to reduce empty spaces, creating a compact and visually engaging display. Remember, pinecones come in various shades of brown – make use of this color variation for a more dynamic look.
Pinecones’ rustic feel can act as a natural highlight in a neutral-toned space, or contrast well in a vibrant setup. One could also lightly dust them with white paint for a “frosted” effect, especially during the winter season.
Although this method is simple, it delivers a strong visual impact. Pinecones’ distinct shapes and textures add depth and warmth instantly, making them a quick and cost-effective vase decor idea. Just remember, you don’t have to fill it to the brim; sometimes, less is more.
Stick Glass Beads On the Exterior
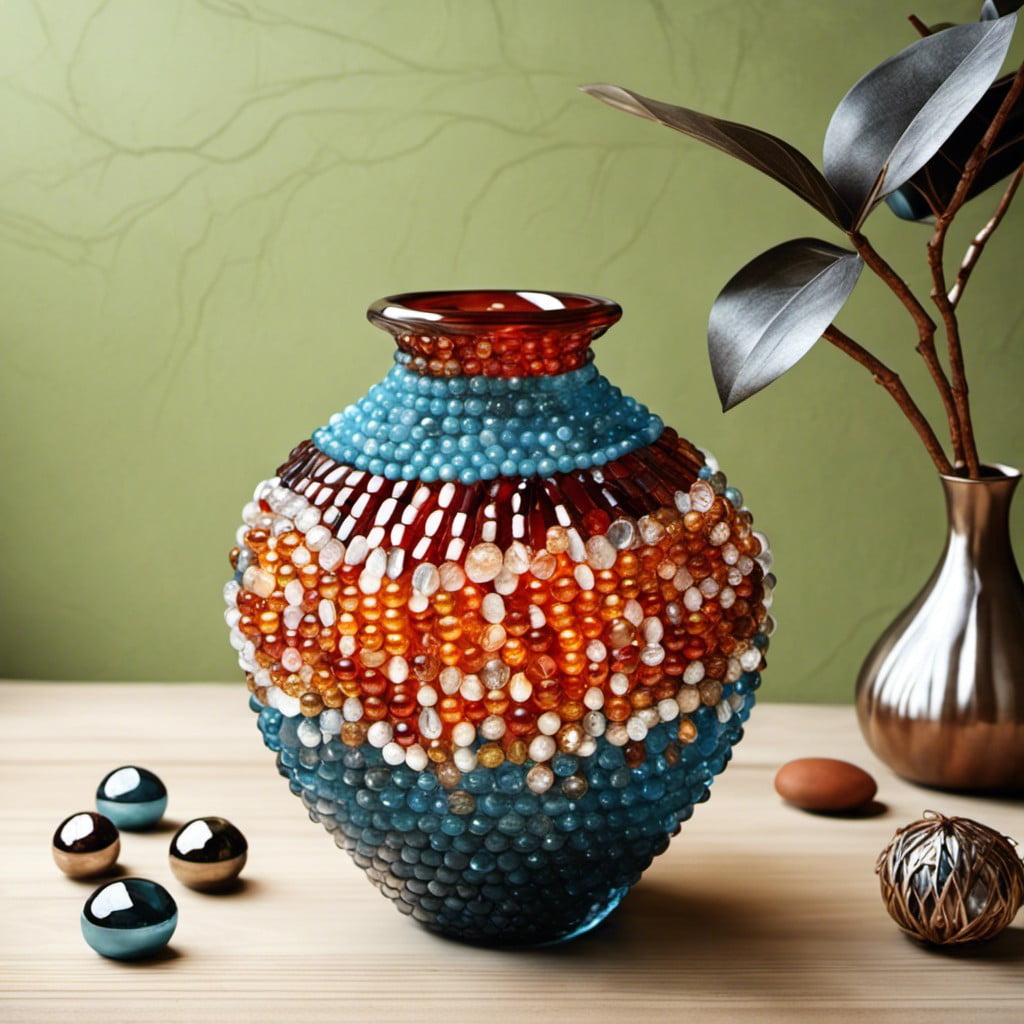
Selecting the right adhesive is the first step in achieving a sparkling exterior. Craft glue or hot melt adhesives are both excellent choices, the former offering a strong bond while the latter grants a quick drying time.
When selecting beads, consider glass beads for their sparkling and lustrous qualities. They come in a variety of sizes, colors, and finishes, from translucent to iridescent, that allow freedom in design.
Ensure to apply the adhesive in small sections to prevent it from drying before the beads are embedded. Work in a well-lit area to accurately position the beads for your chosen design, whether it’s a spiraling pattern, a random scatter, or an intricate motif. This method not only adds an artistic touch to your vase but also provides tactile interest.
Keep in mind that while the aesthetics are amplified, the vase can no longer be used for holding water or heavy objects. Its function becomes purely ornamental, making it the perfect centerpiece or conversation starter.
Remember to handle the decorated vase carefully to avoid damaging the delicate beadwork. A soft brush can be used for cleaning to maintain the shimmering charm of the glass beads.
String Fairy Pearls Inside
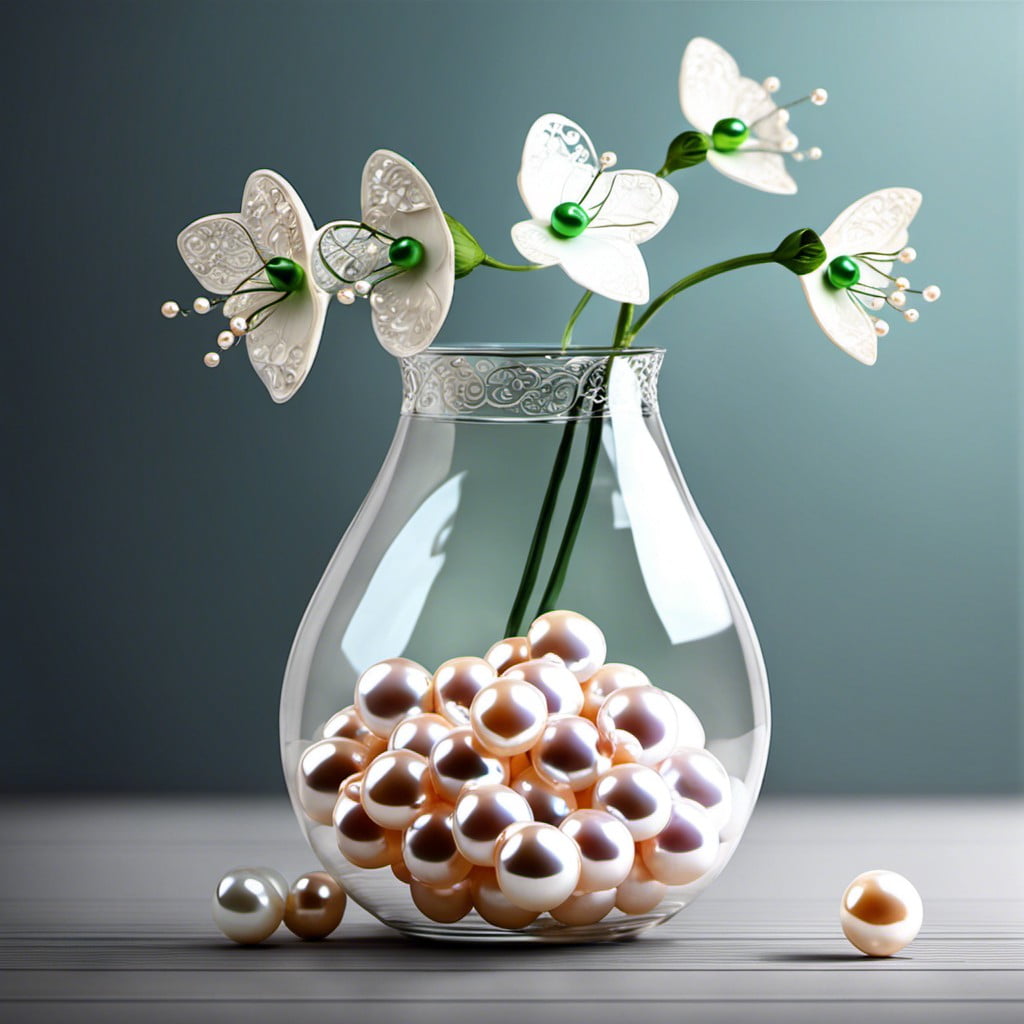
Adopting this decorative style is like infusing a trace of magic and whimsy into your vase. Fairy pearls, also known as water beads, increase in size when soaked in water and emit an ethereal glow in the presence of light.
Start by soaking the pearls in water until they expand. Next, get hold of a string of LED lights. Subtly intertwine the illuminated string around the expanded pearls, ensuring an even spread. Transfer this glowing ensemble into your vase carefully.
The result will be nothing short of elegant – a mesmerizing luminary effect that adds sophistication and enchantment to any space.
Apply Painted Ceramic Decals
Applying ceramic decals is a fun and innovative way to give your old vases a face lift. Here’s how to do it:
1. Choose Decals: Pick designs that resonate with your décor or personal style and order ceramic decals accordingly. They come in a variety of patterns to match every taste.
2. Prepare Surface: Clean the vase well to ensure there’s no dust or grease which could interfere with adhesion. Use warm water and soap, then dry thoroughly.
3. Apply Decals: Cut out your decals and soak them in warm water. Once flexible, place them onto the vase and smooth out any bubbles with a clean cloth.
4. Heat: Follow the supplied instructions to heat the decals so they adhere firmly to the vase. Some may need an oven, while others may simply require a hairdryer.
5. Seal: Use a clear sealant to protect the decals from any damage. This will ensure long-lasting results.
This little DIY project not only upgrades your vase but also opens up a world of personalization options. Make sure to take your time for the best results.
Use It to Display Decorative Balls

When curating an attractive array of decorative balls, consider the size of your vase, as this will dictate the size and amount of spheres. Glass or ceramic balls bring a sleek, modern edge, while woven or foam options can imbue warmth and texture. Remember, repetition can be your friend – a collection of similar items creates a striking visual.
To assemble this look, begin by selecting balls with various sizes and textures for interest. It’s ideal to stick to a consistent color scheme that complements the vase and the surrounding space. Layer the spheres, starting with the largest at the bottom for stability. Smaller pieces can sit at the top or fill gaps, ensuring a polished presentation.
Don’t forget to routinely dust your decorative balls to maintain their aesthetic appeal. Additionally, you can swap out these decorations with the changing seasons for a fresh update, simply store them in a clean, safe place.
Read More Like This
 15 Classroom Grinch Christmas Door Decorations Ideas
 15 Creative Ribbon Decoration Ideas You’ll Love
 15 Ingenious Pool Noodle Decoration Ideas
 15 Creative Ideas for Wedding Car Decoration
 15 Simple Balloon Decoration Ideas
Recap: