Last updated on
Discover the art of chalkboard writing because it can transform your mundane messages into captivating communication pieces.

Chalkboard writing is one of my favorite crafts to make. It’s easy and creative! You can do so many great things if you master it. So here are my tips from years of experience.
Mastering the art of chalkboard writing can transform simple communications into eye-catching pieces. This article offers a wealth of tips and tricks, from selecting the perfect chalk markers and prepping your chalkboard to mastering different types of lettering and implementing creative layouts.
Whether you are a cafe owner wanting to create delicious displays of your daily menu or a satisfied suburban parent with an intent to keep the family organized, these tips will help in bringing your vision to life.
Here’s what you can do!
Key takeaways:
- Use the right tools: chalk markers, chalk sticks, chalk holder, ruler, graphite transfer paper, microfiber cloth, eraser, sponges.
- Plan your design: sketch on paper, choose font style, arrange words logically, practice layout on paper, use guideline for straight lines.
- Transfer design: trace outlines onto chalkboard, use light source, follow guide to fill in design.
- Add depth and shading: alternate light and dark shades, blend with fingers, consider light source.
- Maintain and clean chalkboard: use microfiber cloth or cleaner, cover when not in use, store chalk in dry place.
Supplies Needed to Write Perfect Letters On a Chalkboard
Grabbing the right tools is key for precision and ease. At top of the list are quality chalk markers or traditional chalk sticks based on preference. For sharper, cleaner lines and bolder colors, consider chalk markers.
A chalk holder prevents smudging and offers better control. However, chalk holders work only with standard size chalk which is thicker and bulkier.
To create stencils or laid out designs beforehand, it’s helpful to have a ruler, graphite transfer paper, or tracing paper. In addition, a microfiber cloth, felt eraser or sponges are an essential part of the setup, perfect for erasing errors or cleaning up the chalkboard.
Finally, if you’re creating changeable or permanent art, you may also want to invest in chalkboard surface cleaner and sealants respectively to maintain your work over time.
Remember, while procuring quality supplies is crucial for better chalkboard writing, a lot also comes down to skill and practice. Update supplies as your writing grows.
Design the Text to Transfer to Chalkboard
Firstly, sketch your text or design on a piece of paper, so you have a clear reference before starting on the chalkboard. Choose a font style that complements your message and is easy to read. Consider the size of your text, ensuring it fits well on your chalkboard.
Try adding features to your text for visual interest. Maybe some words would look better in cursive, bold, or underlined. Experiment with variations until you are satisfied.
Next, arrange your words artistically but also logically. If it’s a menu, ensure items are grouped together appropriately. For a quote, format it in a way that emphasizes key words or points.
Remember, balance is key in design. Too much in one area can be overwhelming. Leave some areas light to rest the eyes. It’s also advisable to practice your layout on paper so you’ll have a clear guide when transferring it to the chalkboard.
Lastly, always have a guideline to keep your lines straight. You can use a ruler and faintly draw lines using a chalk line tool. This can be erased later after the final design is drawn. Your design should be clear, legible, and aesthetically pleasing.
How to Transfer the Design to the Chalkboard
To begin the transition, gather tracing or graphite paper, a pen, and the chalk of your choice. Place your tracing paper under your chosen text or design. Then, trace the outline of your letters or design with a ballpoint pen. The pressure will transfer a faint outline onto the chalkboard for you to trace.
When tracing, apply gentle pressure to avoid damaging the chalkboard. Ensure each stroke is even. Don’t worry if your lines aren’t perfect—this adds to the chalkboard’s natural, hand-drawn effect.
Take note: an indirect light source can reduce shadows and help you see the guidelines better. Also, for smaller details, consider using chalk markers or fine-tip chalk.
With your guide in place, it’s time to take your chalk and follow the outline. Defining and filling the letters can be done at once or separately depending on your comfort level. Don’t forget, chalk is forgivable; mistakes can be erased and written over!
Remember, practice will improve your technique and precision when transferring designs to the chalkboard. This stage allows your creativity to shine, don’t rush it, enjoy the process.
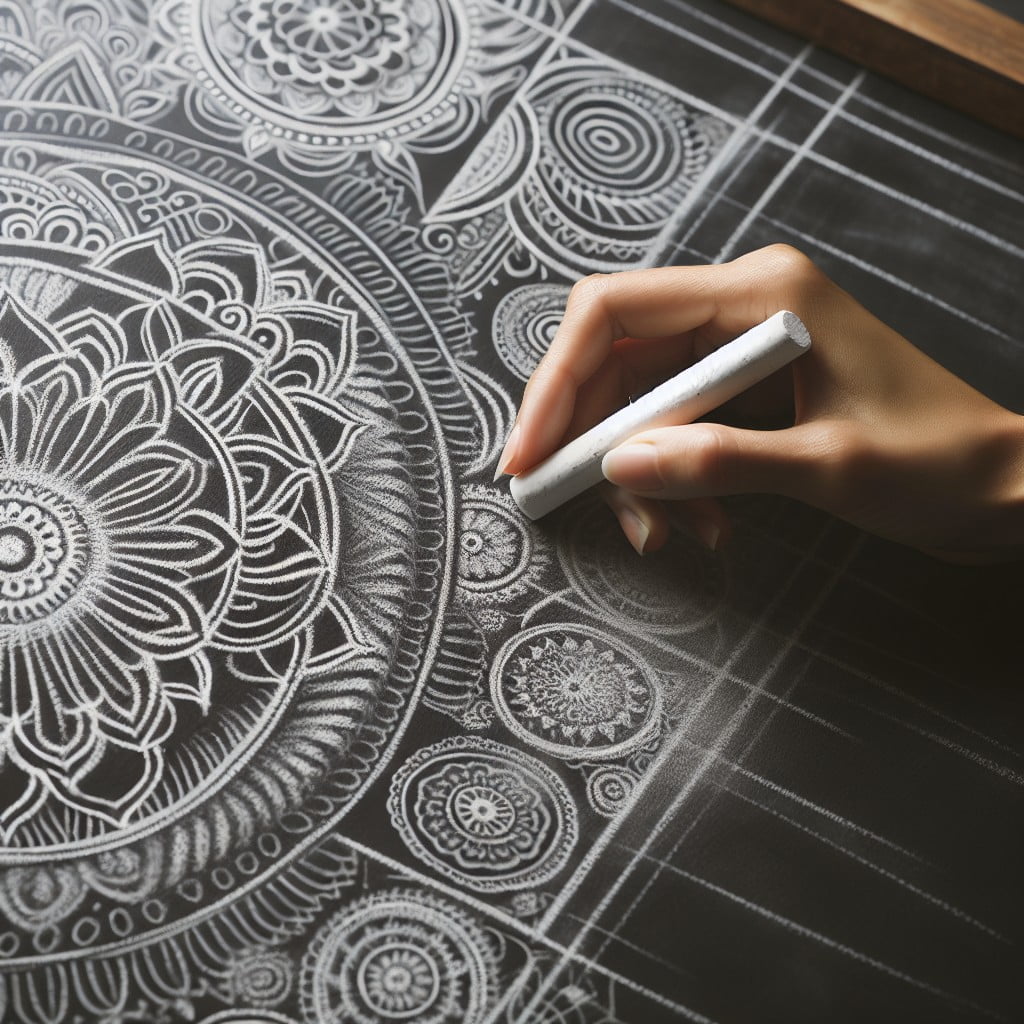
Chalkboard Art Drawing Tips and Tricks
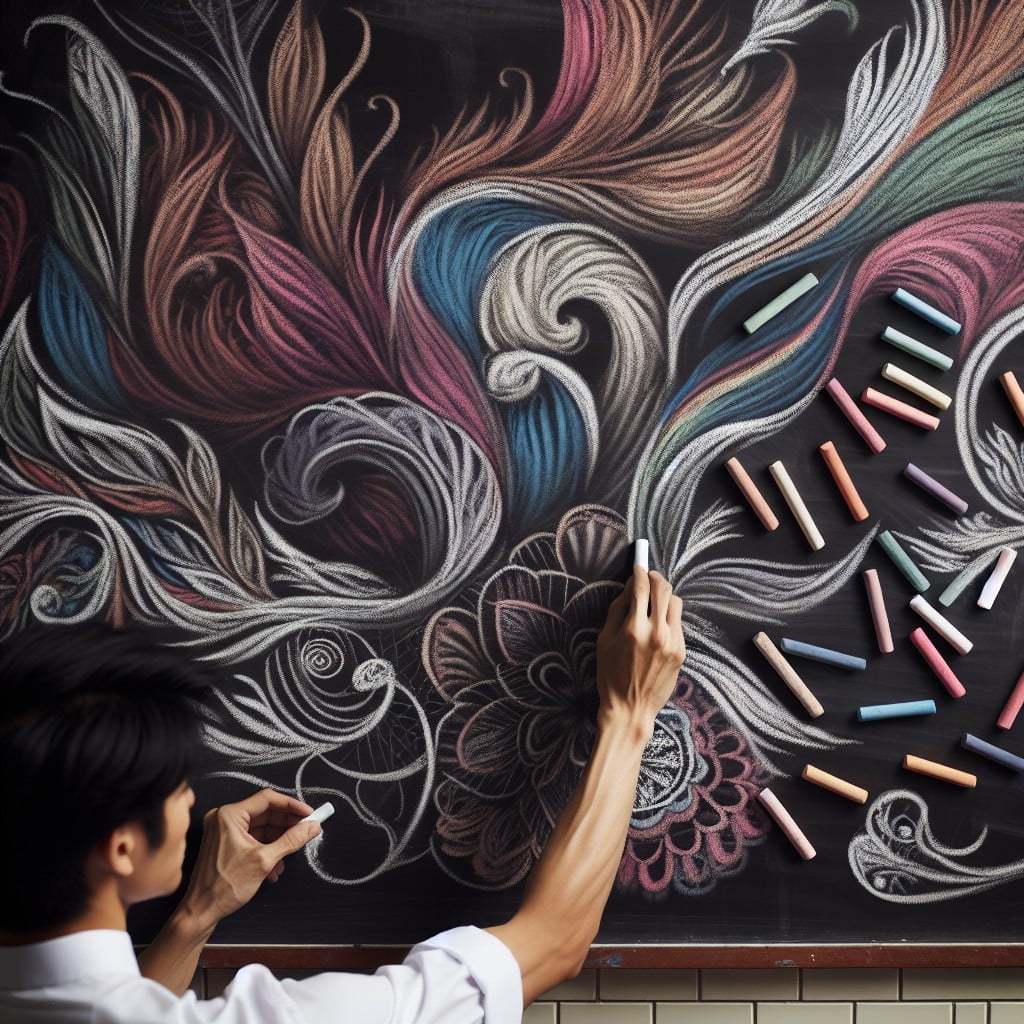
When creating chalkboard art, precision is key.
Start by lightly sketching your artwork using a piece of chalk held on its side. Be sure to keep a damp cloth nearby to easily erase any mistakes. Remember, even professional artists make adjustments as they work.
To achieve clean and sharp lines, sharpen your chalk by carefully scraping it against a crafting knife. A sharper edge allows for meticulous detail-work. Additionally, consider chalk pencils which are available in a range of colors and can be sharpened like regular pencils.
Take advantage of shading techniques. By varying the pressure you put on the chalk, you can create different tones and add depth to your drawings.
To produce a 3D illusion in your chalkboard art, use white chalk to highlight the tops and sides of your drawings. A technique known as back-lighting can help you create a glowing effect. By outlining your subjects in white and smudging it slightly, a glowing illusion is created.
Lastly, blend your colors with a dry paintbrush to add a soft gradient effect. This technique works well for large color fields or creating a ‘sky’ or gradient background. Be patient with blending; the results are worth it.
Remember, creativity flourishes through practice, so let your chalkboard be a playground for your artistic instincts.
Making a Template for Chalkboard Writing
To begin creating your template, identify the words or phrases to be included in the design. Then, sketch them out on paper, or for an even more accurate representation, use a digital design tool. The size of your design should correspond to the size of your chalkboard. Taking note of spacing and alignment is essential to ensure your text will not appear crowded.
Once satisfied with the design, trace over it with chalk on the reverse side. Then, place the chalk-covered side onto the chalkboard, align accordingly, and trace over the design once more. As a result, you will have a perfect chalk outline directly on the chalkboard that will serve as your template.
Remember, the chalk outline is there to guide you, not constrain you. Don’t hesitate to make spontaneous changes as you fill in the outline. After all, chalkboard art is all about creating something that is distinctively yours.
Filling in The Design On Chalkboard
Once the design or text is successfully transferred onto the chalkboard, it’s time for the filling process, which helps transform faint lines into clear, well-defined letters or images.
Here are some helpful pointers to guide you:
- Use a good quality chalk: It is important to use high-quality chalk to ensure vibrant color and consistency. Cheaper chalk may not adhere as well or provide an even fill.
Follow one direction: Always aim to stick to one direction while filling in the design. This leads to a cleaner look and prevents unwanted smudging.
Layering: If you want a bolder, more prominent design, try doing multiple layers. Just be sure to let each layer dry before starting the next one to prevent smudging.
Fine details: For intricate smaller details, consider using a chalkboard pen or a sharpened piece of chalk. This will give you more control.
Taking breaks: Do not rush. Take regular breaks as this process requires patience and precision.
Always remember: mistakes can be easily corrected on a chalkboard with a damp cloth, so don’t stress and have fun with the process. Happy Chalking!
Avoiding Retracing Letters While Writing
In the world of chalkboard art, one critical strategy is to sidestep the habitual re-tracing of letters. The reasons are two-fold. Firstly, retracing can lead to chalk buildup, affecting the clarity of your letters. Secondly, it generally results in uneven lines which can disrupt the harmony of your design.
Here’s what you can do to prevent this:
- Practice Single Stroke: When creating letters or shapes, strive for a single, confident stroke. It might be daunting initially, but practice makes perfect!
- Use Templates: A template can guide your hand and keep your strokes in check. Follow the layout for precision and refrain from retracing.
- Modify Letter Thickness: If your design calls for thicker lines, do not retrace the same path. Instead, add weight to the original stroke by drawing directly alongside it.
- Be Patient: Let each stroke dry before proceeding. This prevents smudging and unintentional doubling back.
- Use Correct Tools: A high-quality chalk holder will help you achieve clean lines without any need for retracing.
Remember, in chalkboard drawing, less is more. The lesser you retrace, the cleaner your design will be.
Letting the Chalkboard Dry
After applying your design, a crucial step is providing sufficient drying time. During this period, resist the urge to touch the surface – it could inadvertently distort your work. Depending on the type, chalk can take one to two hours to reasonably set.
When in doubt, err on the side of caution and wait a bit extra – this isn’t a race, after all. In cases of intricate designs, it’s even advisable to pause overnight. But remember, patience is the key here. And once dry, the finished piece will be worth the wait, showcasing crisp, vibrant lines.
Lasty, erase any visible chalk guidelines for a clean look. Now, you are ready to move to the next step of your creative process.
Adjusting the Width and Spacing of Letters
Having your design in place, you’ll now want to ensure all the letters are consistent. It’s essential to pay attention to the width of each letter to keep the overall look balanced. This is where templates can be a lifesaver! They ensure each letter maintains its proper width.
Spacing between letters, known as kerning, is equally vital. Too much or too little can make text difficult to read. Again, a template helps. However, don’t hesitate to manually adjust as necessary – sometimes, the eye is the best judge.
Remember, consistency is key but don’t strive for perfect symmetry. After all, the charm of chalkboard writing lies in its hand-drawn appeal. Also, consider the overall harmony of your chalkboard, adjust the spacing between words to avoid empty areas or crowding. Now, let’s dive into the next step, filling in your design.
Chalkboard Cleanup and Maintenance
Keeping your chalkboard in peak condition requires regular upkeep. Start by using a microfiber cloth to remove traces of dust and chalk residue. For a more thorough cleaning, lightly dampen the cloth with water before wiping. A gentle chalkboard cleaner can also be effective for stubborn marks. Avoid using abrasive materials that can scratch the surface.
Weekly maintenance is often enough, but in high usage scenarios, consider cleaning more frequently. If the chalkboard becomes hard to write on or chalk dust starts to build up, it might be a sign it needs a clean.
Don’t forget about your chalk tools. For them to draw smoothly, they should be free from oil or grease and stored in a dry area. Occasionally rolling chalk sticks on a clean, dry cloth can keep them in good condition.
Lastly, when not in use, consider covering your chalkboard. This can prevent unintentional smudges or dust accumulation. It’s also a good way to protect the board from scratches and retain its smooth writing surface.
Sealing Chalkboard Art to Preserve
To ensure your beautiful chalk art lasts, applying a sealant is crucial. It prevents dust, grime, or unintentional smudges from ruining your creation.
Several options can serve this purpose, such as hairspray, matte medium, or a sealant specifically made for chalkboards.
Spray evenly from about 12 inches away and let it dry. Remember to work in a well-ventilated area when dealing with aerosols.
A word of caution: once the artwork is sealed, it can’t be easily changed or erased. Thus, make sure the design is exactly as you want it before applying the sealant.
For drawings you want to change frequently, sealing might not be the best option.
Using Various Chalk Colors Effectively
When choosing chalk colors, it’s key to consider the impact on readability and aesthetics. Here’s a quick rundown on making the most of your chalk palette:
1. Contrast is Key: Always aim for high contrast between the chalk color and the board. This ensures your text or artwork pops and can be read from a distance. Light colors work well on darker boards and vice versa.
2. Utilize Color Theory: Complementary colors can bring your artwork to life. Pairing opposites on the color wheel such as blue and orange or purple and yellow creates a vibrant effect.
3. Gradation for Depth: Use varying shades of the same color for a graded, 3D effect. This works well for borders, shadows, or more complex illustrations.
4. Less Is More: While a multitude of colors can add visual appeal, avoid overusing them as it can make the design look too busy and harder to read.
5. Test Colors: Remember, chalk colors can look different on the board than they do in their package. Always test them on a small corner before starting your project.
6. Transitioning Colors: For a seamless transition between colors, blend the edges where they meet while the chalk is still wet. This creates a beautiful gradient effect.
Remember, practice makes perfect, and mastering color use will give your chalkboard designs a professional touch.
Understanding and Choosing Chalk Textures
The texture of chalk contributes significantly to the look and feel of your final art. Let’s dive a bit deeper into this aspect:
1. Traditional Chalk: Softer and less abrasive, this type provides a classic, soft appearance to your writing or art. Perfect for when you want the authentic chalkboard look.
2. Chalk Pens: Available in various colours and thicknesses, chalk pens are smooth and precise. They dry quickly and do not smudge making them a good choice for detailed designs.
3. Chalk Pencils: These precise tools are ideal for adding small details or embellishments to your work. Moreover, they’re erasable, perfect for mistakes or last-minute changes.
4. Chalk Markers: These markers give a bold, bright look. They work well on dark backgrounds and are a great choice for modern, crisp designs.
5. Liquid Chalk: Liquid chalk gives the cleanest lines and the boldest colours, however it’s not always the best for those textured, traditional chalkboard effects.
Remember, no single type is superior to others; it all depends on the look you’re going for. Use a mix of different textures to create interesting and complex designs. Experiment with different types to discover which suits your style the most.
Maintaining Chalkboard and Chalk Quality
To ensure the longevity of your chalkboards and the chalk you are using, diligent care is vital.
Firstly, for the chalkboard, avoid using oily or abrasive cleaners. A damp cloth or a specialized chalkboard cleaner will suffice. It helps retain the texture of the surface, leading to easier writing and cleaner erasing. Regular cleaning also prevents “ghosting”, where the residual chalk dust builds up over time and leaves a permanent stain on the chalkboard.
As far as chalk is concerned, proper storage is key. Keep chalk in a dry, cool place. Humidity or dampness can cause it to soften and crumble. When the chalk length becomes too short to hold, use a chalk holder instead of discarding to maximize usage.
Remember, high quality chalk creates less dust and thus leads to a cleaner board and clearer writing. Low dust or dustless options are highly recommended. The right care and maintenance ensure your tools are in prime condition, ready to create beautiful art whenever inspiration strikes.
Chalkboard Lighting for Optimal Visibility
Taking the time to properly light your chalkboard can significantly enhance visibility and readability. Here are a few key considerations:
1. Directional Lighting: To avoid shadows, position lights on the sides or from above.
2. Soft Illumination: Opt for soft, diffused lighting to minimize glare and ensure even illumination across the chalkboard.
3. Color Temperature: Use warm lighting to create an inviting ambiance. However, if you feature brightly colored chalk, cooler light may better highlight these hues.
4. Adjustable Options: Choose flexible fixtures – such as track lighting or adjustable lamps – to control the direction and intensity of light.
5. Safety Measures: If installing new fixtures, make sure to maintain a safe distance from the chalkboard to avoid dust or chalk accumulation on the lights.
Remember, effective lighting not only enhances your artwork but also makes the chalkboard a focal point in your space.
Protecting Designs From Smudging
To guard your artwork from unintentional smudging, consider these key points:
1. Dry Hands: Ensure your hands are dry while working on your chalkboard art. Sweaty or damp hands can cause unintended smears.
2. Work Direction: If you’re right-handed, work from left to right, and vice versa if you’re left-handed. This approach lessens the chance of your hand rubbing against completed work.
3. Chalk Placement: Never rest your hand on the chalkboard. Instead, hold your chalk at an angle, maintaining a little distance from the surface you are working on. This posture minimally disturbs the design underneath.
4. Chalkboard Rest: Avoid leaning directly on the chalkboard. If needed, use a piece of parchment paper or clear plastic under your hand as a protective barrier.
5. Sealing: After completion, consider using a chalkboard sealer. This forms a protective layer on the art, preventing damage from touch and airborne particles.
Creating Borders and Frames On Chalkboards
Starting with a good-quality thick chalk, draw an outline of your border or frame. Choose from a range of styles: scalloped edges, wavy lines or simple straight lines. It’s your art, and the border should enhance the main content.
If you’re aiming for precision, use a ruler or a template. It’s a handy trick particularly for more geometric frames. For a more casual and rustic look, freehand drawing serves perfectly well.
Don’t shy from diversifying the frame thickness. Thicker borders have a dramatic flair and draw more attention, while thin ones provide a subtle emphasis.
Incorporating elements like vines, swirls or miniature doodles can make the frame interesting. These additions create a playful vibe around your content.
Remember, you can always modify your design with a damp cloth or Q-tip. Small modifications and improvements are a part of the process.
Lastly, consider color. A brightly colored frame can be exceptionally effective to contrast a monochrome design. Be observant and playful in your color choices.
In short, let your creativity flow while being mindful of your overall composition.
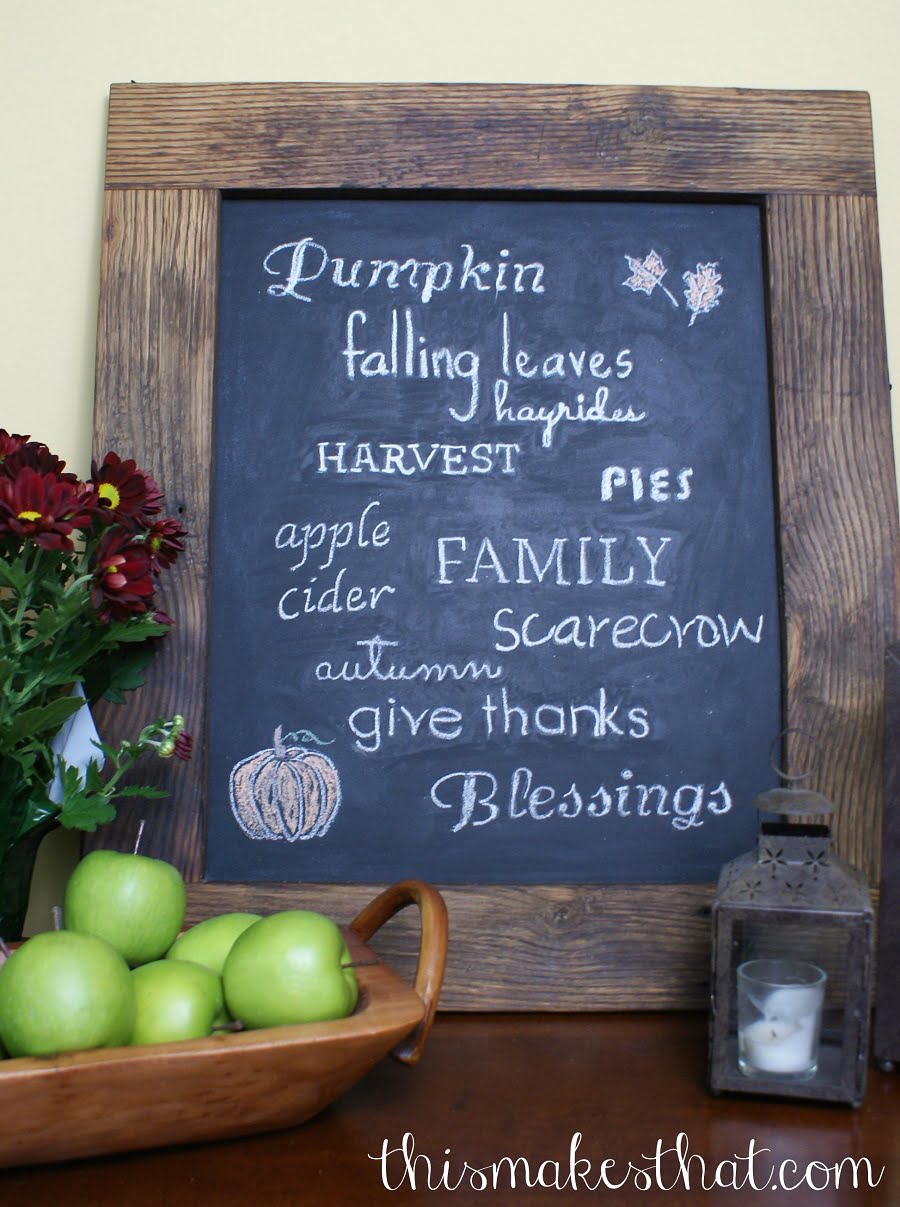
Incorporating Art and Icons Into Chalkboard Designs
It’s a smart move to invite more visual interest and more understanding in your chalkboard design by incorporating small drawings, symbols, or icons. These elements lend an added layer of visual clarity, especially useful if your design features lists or instructions.
Here are some useful steps:
- Identify Suitable Icons: Pinpoint the icons or images that relate to your text. Is it a menu board? You might like to draw tiny images of dishes next to their descriptions, like a steaming coffee mug by a coffee list.
- Add Balance: Be careful not to overload with symbols. Moderation keeps the text legible and the design appealing.
- Size Matters: Keep the symbols smaller than your text. Your icons are there to enhance your words, not to overshadow them.
- Draw First: Carve the icon in first, then surround it with text. This planning prevents your design from becoming cramped.
- Keep it Simple: Simplified, easy-to-recognize icons are perfect. Precision doesn’t matter. The recognition of the icon at first glance is the key.
- Utilize Borders: Utilize the borders or margins for these doodles if there isn’t enough space to incorporate.
With these points considered, your stylish chalkboard design can engage your audience better, enhancing your message with visual appeal.
Organizing Content On Your Chalkboard
Start by establishing the purpose of your chalkboard content. Whether it’s a flowchart, crucial reminders, or your grandmother’s secret cake recipe, defining the function will influence organization. Start with larger important points and work down to the details.
Balance is fundamental. Visualize the chalkboard as divided into thirds; place key points in each section to evenly distribute the information. Use arrows or symbols to guide the reader’s eye seamlessly through the content.
Leave some space – a crowded layout can be overwhelming, so make sure there’s enough room around the words. An appealing design requires a good balance between text and white space.
Take advantage of hierarchy. Make main points or headlines larger, and sub-points smaller. This not only makes content more digestible but also makes your chalkboard aesthetically pleasing.
Lastly, make sure your content is legible from the distance it will be viewed from and ensure that colors contrast well with the chalkboard’s background for standout readability. Try rehearsing your layout with light pencil marks before getting into the actual chalk work.
Remember, practice and experimentation will lead to mastering the art of chalkboard organization. Don’t be afraid to erase and start again. Your chalkboard is a blank canvas awaiting your creative touch!
Creating Depth and Shadows for Chalk Art
To breathe life into your chalk drawings, mastering depth and shadows is key. Here are practical tips to guide you in this aspect.
1. Use Dark and Light Chalk: Alternate between darker and lighter shades of the same color to establish depth. The lighter shades represent the light falling on an object while the darker tones indicate parts in shadow.
2. Shading Execution: Gentle and consistent strokes lead to better results. Do not rush. Take your time to blend the chalk properly for a gradient effect.
3. Utilize Your Finger: Your best blending tool can be your finger. For softer shadows, rub the chalk lightly to spread and blend it across the surface.
4. Pay Attention to the Light Source: Consistency is critical. If sunlight is your source, remember it comes from above. Shadows will naturally fall below objects then.
5. Play with Sharp and Soft Shadows: Sharp shadows suit solid and close objects. Soft shadows are great for distant objects or to create a hazy effect.
6. Layer Colors: Multiple layers of color can increase the depth of your art. Start with a base layer, then add the rest building up towards the darker tones.
Remember, practice makes perfect. Experiment with different techniques until you find what best suits your style.
Practicing Lettering and Design Techniques
Consistent practice is vital; it helps achieve fluidity and better control over the chalk. Start by mastering basic shapes – circles, lines and curves. They are the basis for most letters. Practice these until you can draw them evenly without much thought.
Next, tackle individual letters. It’s helpful to have an alphabet example to reference. Look at how the lines and shapes you practiced form each character. Pay attention to spacing and try to maintain consistency. Do not rush yourself; precision is more important than speed.
Additionally, doodle doodle. It’s a low-stress way to develop control and guide your hand to create complex designs. Sketch out vines, flowers, arrows, or any design that appeals to you. This will also build your visual library, which you can refer back to when creating future chalkboard designs.
Remember, mastering these skills takes time. Don’t be hard on yourself if the results aren’t perfect immediately. Enjoy the process, and through repetition, your muscle memory will improve, and before you know it, your letters and designs will become more fluid and confident.
Developing Your Unique Chalkboard Style
Experimentation is key. Try combining different techniques, such as script, block letters, and unique doodles. Your style will become more defined as you venture beyond your comfort zone.
Take inspiration from everywhere but refrain from copying. Remember, the joy is in adding personal touches that make your work distinctively yours.
Invest in a variety of chalks. Use thin, regular, or jumbo sized chalks to play with line thickness. You might find that one size brings out your style better than the others.
Don’t disregard errors. A slight mistake in angle or a smudge can add character to your work, making it unique and appealing.
Consistency matters. Keeping a uniform slant, even while switching between styles, leaves an impression of a cohesive design, enhancing its overall appeal.
Remember, there’s no rush. Let your style develop gradually and organically. With diligent practice, a unique and captivating chalkboard style will eventually emerge.
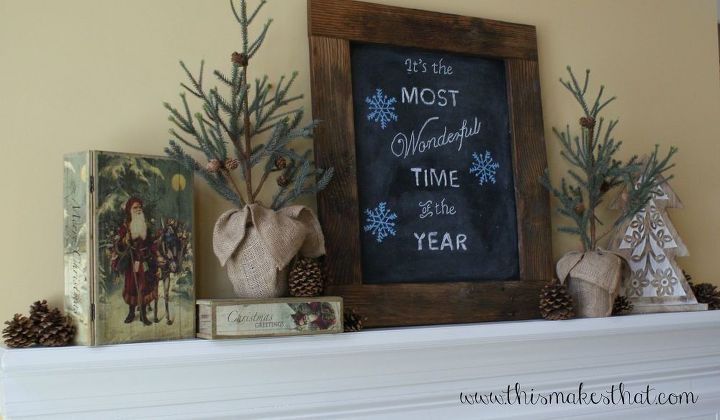
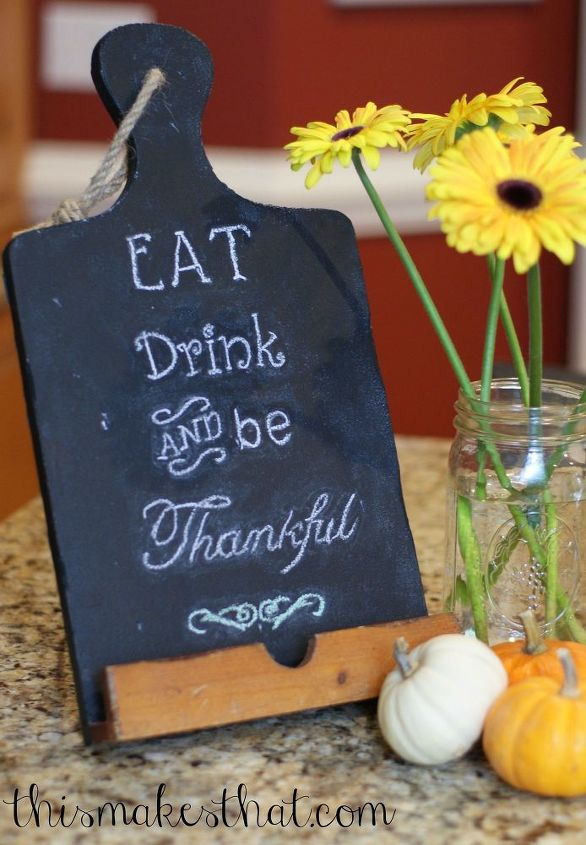
Innovating With Chalkboard Signs and Menus
Chalkboard signs and menus undoubtedly contribute an artistic flair to businesses and events, but they also offer flexibility and creativity. For an eatery, using chalkboards to exhibit daily specials allows for continuous updates without the typical hassle. Plus, it exhibits freshness and variety to clientele.
For events like a wedding, chalkboard signs can deliver personalized messages or directions to attendees, enhancing the personal and intimate nature of the occasion. A beautifully scripted quote or a tiny, humorous nugget on the sign can bring an element of surprise and charm.
Chalk art is not just confined to letters and words, either. Create simple but attractive images that correspond with the text. In a cafe, draw an appetizing coffee cup next to the espresso options. At an event, basic icons can guide attendees towards the restroom or the banquet.
While consistency in lettering and design is important, don’t shy away from playing with various fonts and sizes for different sections to create emphasis and interest. An elegant script might work well for the main heading, while block letters list the details clearly.
Remember, a chalkboard sign or menu is not only for informational purposes, but it can also be a design feature that showcases creativity and thoughtfulness.
Optimizing Space On Your Chalkboard
To maximize your chalkboard surface effectively, a careful planning stage is necessary. Start by drafting your design on a piece of paper in proportion to your chalkboard. This will give you a clear picture of how your content will fit.
Prioritize your information. Place the most important details at eye level or the center where they will be most noticeable. Less vital elements can occupy the corners or edges.
Incorporate different sizes of text and illustrations to utilize space and create visual interest. Larger fonts draw attention, while smaller sizes allow you to fit more content.
Make use of narrow and wide chalk to alternate between thick and thin lines. This can help divide space and differentiate between different sections or segments of your design.
Remember not to overcrowd your chalkboard. Leave some blank spaces to allow the elements to breathe and create a balanced design. Too much clutter can detract from your main message and make the board difficult to read.
Lines and borders can also be useful for dividing up your chalkboard. You can use them to compartmentalize different pieces of information, creating neat sections that will make your design more organized and easily readable.
FAQ
How do you trace letters on a chalkboard?
To trace letters on a chalkboard, first imprint the design from a printed template to the chalkboard using chalk or transfer paper, then trace over the imprinted design directly on the chalkboard with chalk markers or paint.
What are the best materials to use for chalkboard lettering?
The best materials to use for chalkboard lettering are high-quality, dustless chalk or water-based chalk markers.
How can one erase mistakes on a chalkboard while doing lettering?
To erase mistakes on a chalkboard during lettering, simply use a damp cloth or a chalkboard eraser.
Are there any chalkboard writing techniques to enhance readability?
Yes, utilizing block letters, maintaining consistent line spacing, and adopting color-coded chalk for different content sections can enhance the readability of chalkboard writing.
Read More Like This
 15 Funny Graduation Cap Ideas to Make Your Big Day Unforgettable
 15 Unique DIY Christmas Decorations Ideas for a Festive Home
 15 Creative Science Fair Board Ideas to Amaze Your Audience
 15 Handmade Envelope Decoration Ideas for Creative Gifting
 10 DIY Gifts for the Whiskey Lover in Your Life
Recap: