Last updated on
Uncover the secrets of safely painting over lead paint because ensuring your health and home’s safety need not be a confusing process.
Key takeaways:
- Lead paint poses serious health risks, especially to children and pregnant women.
- Legal requirements and safety standards must be followed when dealing with lead paint.
- Different methods can be used to identify the presence of lead paint in your home.
- Safety measures, such as wearing protective gear and proper containment, are essential when handling lead paint.
- Proper cleaning and disposal methods should be followed after painting over lead paint.
Understanding Lead Paint and Its Risks

Lead paint, commonly used before its ban in 1978, poses serious health concerns due to the toxic nature of lead. Exposure to lead can occur through inhalation or ingestion of lead dust, which can be particularly hazardous to children and pregnant women.
The risks associated with lead exposure include developmental disorders, neurological damage, and various other chronic health issues. It’s essential to identify and properly manage this type of paint to reduce the potential for harm, especially during renovation projects where the risk of lead dust becomes elevated.
Regular maintenance and monitoring of painted surfaces for deterioration can help minimize exposure, as intact lead-based paint typically does not pose a direct health threat. However, when the paint begins to chip or peel, immediate attention is necessary to address the safety of the living environment.
Legal Requirements and Safety Standards for Lead Paint
The U.S. Environmental Protection Agency (EPA) enforces strict regulations when dealing with lead paint due to its health hazards, especially to children and pregnant women. Before any work on pre-1978 homes, the EPA’s Renovation, Repair and Painting (RRP) Rule requires that contractors be RRP-certified to ensure safe practices.
Key points to consider regarding legal requirements and safety standards:
- Disclosure: Sellers must disclose known lead paint and hazards before real estate transactions.
- Certification: Contractors must complete an EPA-approved training program to become RRP-certified.
- Safety Protocols: Proper containment, minimization of dust, and specific cleanup procedures are mandatory.
- Warning Signs: Posting signs to inform about the presence of lead paint and associated work is compulsory.
- Verification: Following a project, a lead-safe certification or clearance test by a licensed inspector is often needed.
Staying informed and compliant with these guidelines is crucial for the safety of occupants and workers alike.
Identifying the Presence of Lead Paint in Your Home
Homes constructed before 1978 have a higher likelihood of containing lead-based paint. To confirm if your home has lead paint, consider these evaluation methods:
- Home Test Kits: Available at hardware stores, these kits can detect lead on painted surfaces. However, for accurate results, follow the instructions carefully.
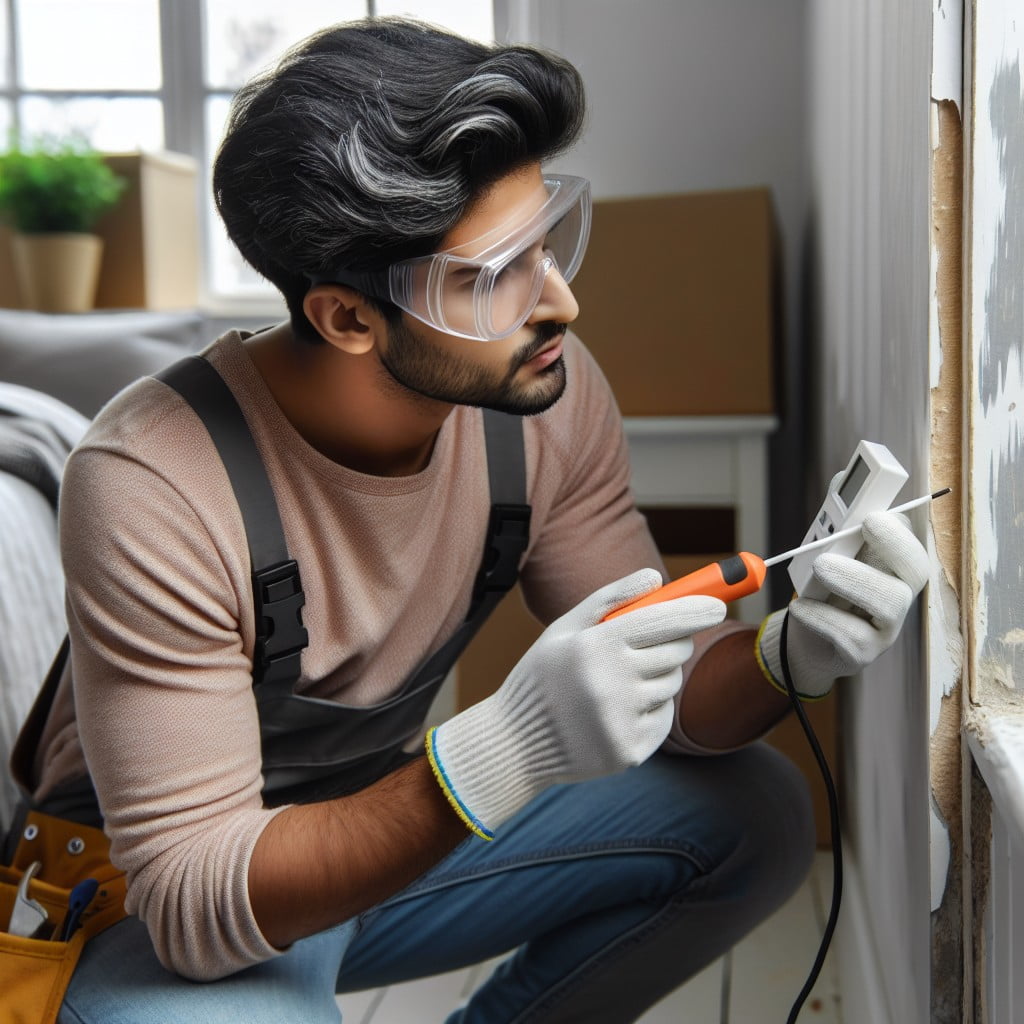
- Professional Testing: A more reliable approach involves hiring a certified lead inspector or risk assessor. They use advanced methods such as X-ray fluorescence (XRF) analyzers or lab tests on paint samples.
- Historical Clues: If your home’s paint is very old and has a chalky or cracking texture, it could indicate the presence of lead. This observation should be followed up with proper testing.
- Visual Inspection: Look for areas of deteriorating paint, such as peeling or chipping, often found on windows, doors, and railings. These regions might pose a greater lead exposure risk and should be prioritized for testing.
Safety Measures When Handling Lead Paint
Before embarking on any project involving lead paint, prioritizing your safety and the safety of those around you is imperative. Lead dust and chips can pose serious health risks if inhaled or ingested.
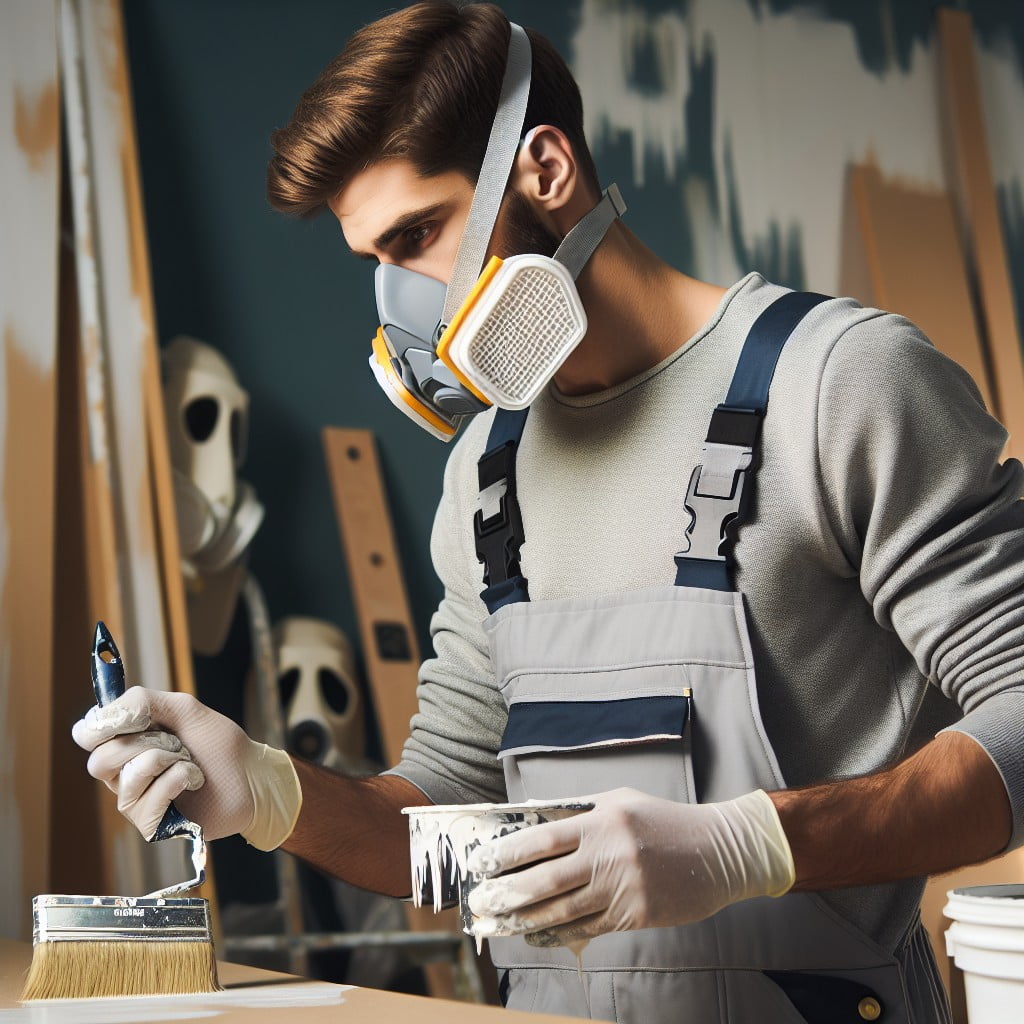
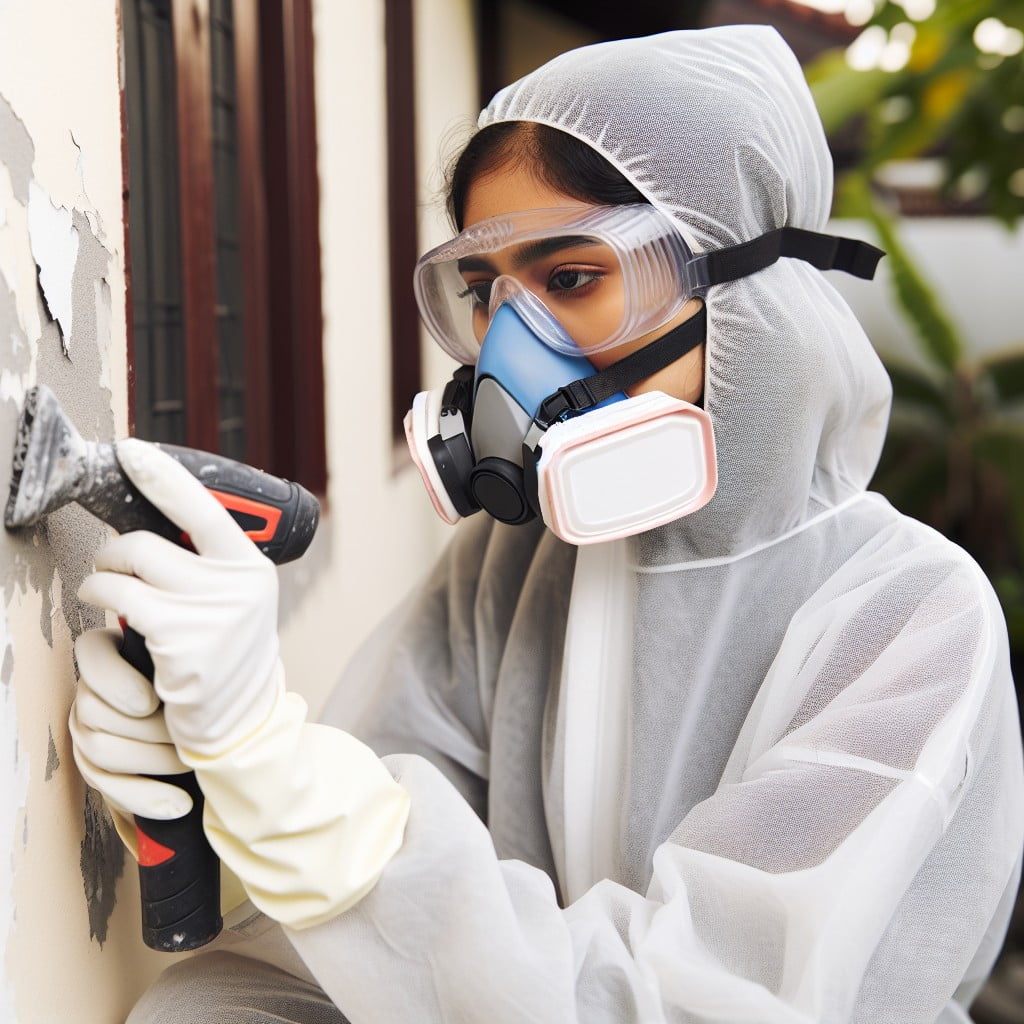
Always wear personal protective equipment (PPE), including a properly fitted respirator with a HEPA filter, gloves, goggles, and disposable coveralls. This will minimize your exposure to lead.
Ensure the work area is well-ventilated, but don’t use high-speed fans as they can spread lead dust. Use plastic sheeting to seal off the work area and cover furniture and floors to prevent contamination.
Mist surfaces with water before sanding or scraping to keep dust from becoming airborne. Never use open-flame burning or a high-temperature heat gun, as these methods can release lead fumes.
Clean up meticulously using a HEPA-filter vacuum or wet mopping instead of dry sweeping. Dispose of the protective gear and clean effectively to remove any lead-containing waste.
By adhering to these safety measures, you can substantially reduce the risk of lead exposure.
Preparing the Area for Painting Over Lead Paint
Before applying a new coat of paint, it’s paramount to properly prep the site to ensure safe and effective coverage. Start by clearing the room of furniture and belongings to create a spacious working environment. Lay down plastic sheeting over floors and fixtures to guard against dust and paint drippings. Using painter’s tape, seal off the sheeting’s edges and cover any trim or areas not to be painted.
Ensure sufficient ventilation by opening windows and employing fans to circulate air; this protects against fume buildup from paints or primers. Personal protective gear is crucial; don a high-quality respiratory mask, safety goggles, and gloves to shield against lead dust and fumes. By attentively adhering to these steps, the space will be primed for a safer encapsulation process of the lead-based paint beneath.
Choosing the Right Type of Encapsulant or Barrier Paint
Selecting an appropriate encapsulant is crucial for safely covering lead paint. Key considerations include:
- Performance: Look for encapsulants specifically designed to seal in lead paint. These products typically have undergone rigorous testing to ensure they effectively prevent lead particles from escaping.
- Permeability: Choose a product that resists moisture since water can damage the encapsulant layer and potentially expose the lead paint underneath.
- Adhesion: Your encapsulant must adhere well to the existing surface. If it doesn’t, it could peel or crack, undermining its effectiveness.
- Flexibility: A good encapsulant will flex with the movements of your house, especially in temperature changes, without cracking or losing its seal.
Consult with specialists at hardware stores or reach out to professional painters who have experience with lead-safe practices. They can help guide you toward the most reliable products and ensure that your choice matches the specific needs of your painting project.
Step-by-Step Guide to Encapsulating Lead Paint
Begin by cleaning the surface; remove dust and debris without sanding to avoid dispersing lead particles. Use a HEPA-filtered vacuum cleaner for optimal safety.
Patch any holes or cracks in the walls with a suitable filler to create a smooth surface that the encapsulant can adhere to evenly.
Wait for the filler to dry thoroughly before proceeding to the next step. Drying times may vary based on the product used and environmental conditions.
Select an encapsulant that’s specifically designed for lead paint; these products are typically thicker than regular paint and create a long-lasting barrier.
Apply the encapsulant according to the manufacturer’s instructions. Start with a brush around the edges and corners, then use a roller for larger surfaces to ensure even coverage.
Allow the first coat to dry fully. The duration will depend on the brand and environmental factors such as humidity and temperature.
Apply a second coat to ensure that the paint is properly encapsulated. Two coats are often recommended for optimal safety.
Inspect the area for any missed spots or thin layers, and touch up as needed to maintain the integrity of the encapsulation barrier.
Maintain a well-ventilated area throughout the process to safeguard against inhaling any potential lead dust or fumes.
Cleaning and Disposal After Painting Over Lead Paint
Once the new layer of paint is securely in place, attention must shift to proper cleaning and disposal methods to ensure lead particles are not dispersed. Here are some key points:
- Use a HEPA vacuum: Clean the work area with a HEPA vacuum to capture any fine lead particles. Regular vacuums may not contain them effectively.
- Wet cleaning methods: Follow up vacuuming with wet mopping or wiping surfaces with a damp cloth to pick up any remaining dust. This prevents particles from becoming airborne.
- Disposal of waste: Place all used cloths, protective sheeting, and other waste into a heavy-duty plastic bag. Seal it tightly before disposing of it as per local hazardous waste guidelines.
- No power washing: Avoid power washing exteriors, as it can spread lead-contaminated water and cause broader environmental contamination.
- Wash work clothes separately: Launder clothes worn during the painting project separately from other household laundry to avoid cross-contamination.
- Repeated cleaning: Clean the area multiple times to ensure all lead dust is removed, especially if the space is regularly occupied by children or pregnant women.
Implementing these cleaning and disposal tactics minimizes the risk that lead paint poses during and after the painting process.
Recognizing When Professional Lead Paint Abatement Is Necessary
There are certain situations where the risks associated with lead paint are too high to handle as a DIY project. Professional lead paint abatement should be considered if:
- The painted area is damaged or deteriorating, as this can increase the risk of lead dust exposure.
- Any form of demolition or major structural work is planned, which can disturb lead-based paint and create hazardous dust.
- Children or pregnant women are in the home, as they are especially vulnerable to the dangers of lead exposure.
- You lack the appropriate equipment, such as HEPA filters or proper personal protective gear, to ensure safety during the encapsulation process.
Remember that certified professionals have the training and resources to safely remove or stabilize lead paint, minimizing the risk of contamination to you and your family. It’s crucial to prioritize health and safety when dealing with this potentially toxic material.
Resources for Hiring Certified Lead-Safe Contractors
Selecting a qualified professional for lead-safe work is crucial for both safety and compliance with local regulations. The United States Environmental Protection Agency (EPA) provides a searchable database of certified contractors who have undergone the necessary training to handle lead paint safely. Another useful resource is your state’s department of health website, which often lists certified professionals and provides guidelines specific to your location.
Before hiring a contractor, ensure they possess valid certification for lead-safe practices, ask for references, and check reviews to gauge their reputation and level of service. It’s also important to verify that they carry insurance specifically for lead paint abatement. This not only protects your property but also ensures that any workers are covered in case of an accident.
By choosing the right resources and asking the right questions, you can find a reliable contractor who will safely and effectively manage the lead paint in your home.
FAQ
Do you have to remove lead paint before painting?
Yes, if the lead paint on ceilings and walls is well-maintained, it may not be necessary to remove it before applying a fresh coat of paint or wallpaper.
What paint will stick to lead?
For interior lead surfaces, Zinsser Perma-White Interior Matt/Satin/Semi-Gloss, available in over 4,000+ RAL, NCS and BS colours, adheres effectively when applied in two coats with a minimum of two hours drying time between applications, per the manufacturer’s instructions.
Is it OK to live in a house with lead paint?
While it is technically possible to reside in a house with lead paint, it is not recommended due to the severe health risks, such as damage to the brain and nervous system, particularly for children and unborn babies.
How do you neutralize lead paint?
Lead paint can be effectively neutralized through various approaches including wire brushing, wet hand scraping with liquid paint removers, or wet sanding the surfaces using an electric sander equipped with a high-efficiency particulate air (HEPA) filtered vacuum.
How can one safely cover up lead paint?
To safely cover up lead paint, one must thoroughly clean and sand the area, apply a specially-designed lead blocking primer, and finish off with regular latex paint.
What precautions should be taken while repainting a surface coated with lead paint?
When repainting a surface coated with lead paint, essential precautions include using protective wear such as gloves and masks, ventilating the room adequately, and ensuring that any leftover paint or dust is disposed of safely.
What is the potential health risk associated with painting over lead paint?
Painting over lead paint poses a potential health risk as it can result in the release of lead dust during the painting process, which is harmful if inhaled or ingested, especially for children and pregnant women.
Read More Like This
 15 Unique DIY Christmas Decorations Ideas for a Festive Home
 15 Creative Science Fair Board Ideas to Amaze Your Audience
 15 Handmade Envelope Decoration Ideas for Creative Gifting
 10 DIY Gifts for the Whiskey Lover in Your Life
 15 Creative Ideas for DIY Outdoor Birthday Party Decorations
Recap: