Last updated on
Because creativity triumphs cost, you can turn a humble deck into an enchanting retreat without breaking the bank.
I’m proud to present this article and accompanying designs on 20 affordable deck decorating ideas I’ve created, and I sincerely hope you find it as inspiring and enjoyable to read as it was fun for me to create.
Decorating a deck on a budget is not only possible but can also be a fun and rewarding experience. This article will provide you with a plethora of affordable and creative ideas to transform your deck into a beautiful and comfortable outdoor living space.
From DIY furniture and lighting options to cost-effective accessories and plants, we’ve got you covered. As you delve deeper into this article, you’ll discover how easy it is to give your deck a stylish makeover without breaking the bank.
Let’s get started on your deck transformation journey, where every detail matters!
String Lights

Bringing in magical soft glows at sunset, string lights radiate an invitingly warm ambiance. Let’s explore ways to use them effectively.
Firstly, they are excellent for defining space; running them along the deck’s edges or around your central seating area does wonders.
Secondly, consider draping them from posts or railings to create a stunning curtain effect or wrap them around tree branches for a whimsical touch.
Pro-tip: Opt for solar or LED lights to save on energy costs.
Painted Rug
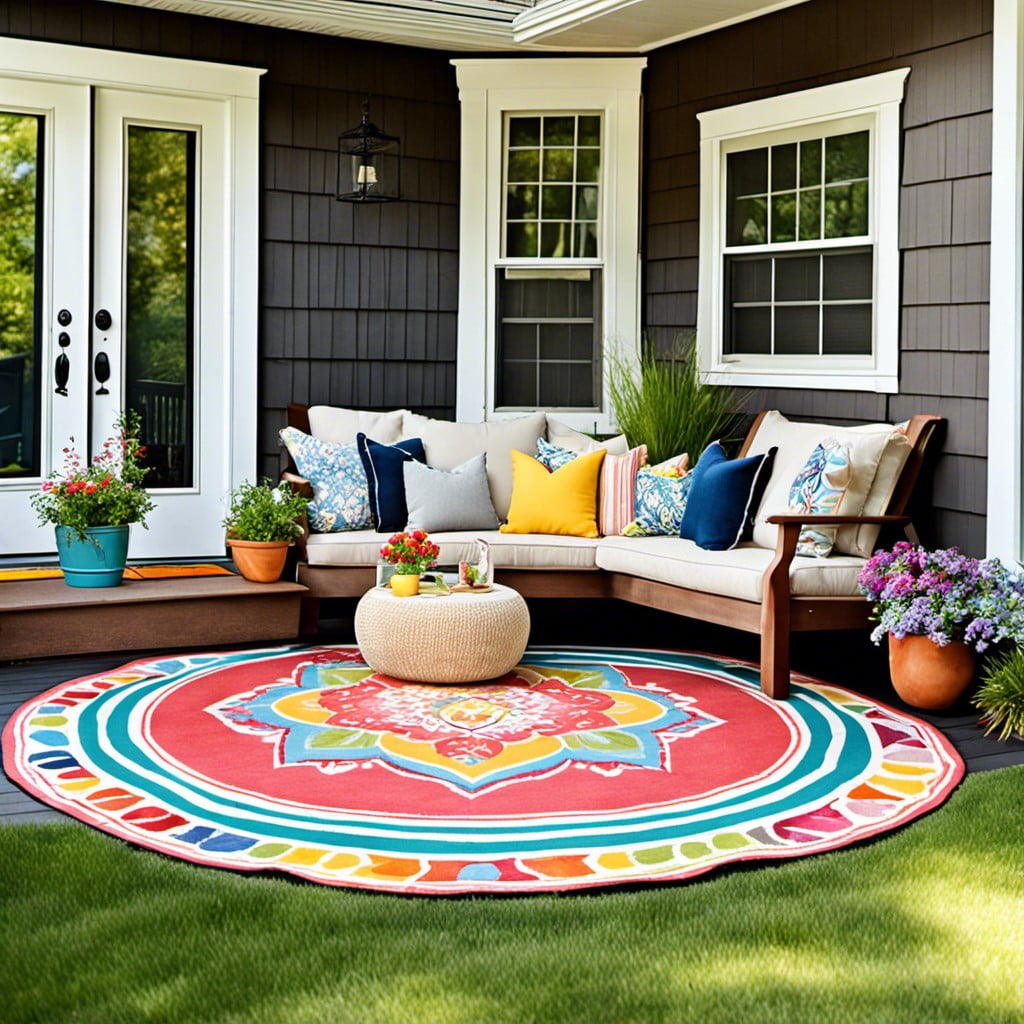
Adding a pop of color to your deck doesn’t have to be expensive, nor does it require investing in actual outdoor rugs. You can easily create your vibrant ‘rug’ with nothing more than paint and a bit of creativity.
First, thoroughly clean the deck to ensure the paint adheres well. Choose an all-weather, water-resistant outdoor paint in your preferred color. You could stick to a single color, or opt for a variety of hues for a more vibrant masterpiece.
After deciding on a pattern, sketch it on your deck using a chalk. Keep it simple or go for complex geometric designs – the choice is yours! Use masking tape to section off areas you don’t want painted, ensuring neat lines and accurate designs. Once your design is laid out, it’s time to bring it to life with paint.
After you’ve finished painting, allow the paint to dry completely before removing the tape. Your brand-new painted rug, custom-made to your taste, is ready to impress! This idiosyncratic and budget-friendly idea not only enhances the aesthetic of your deck but also adds a personal touch to your outdoor space.
DIY Seating
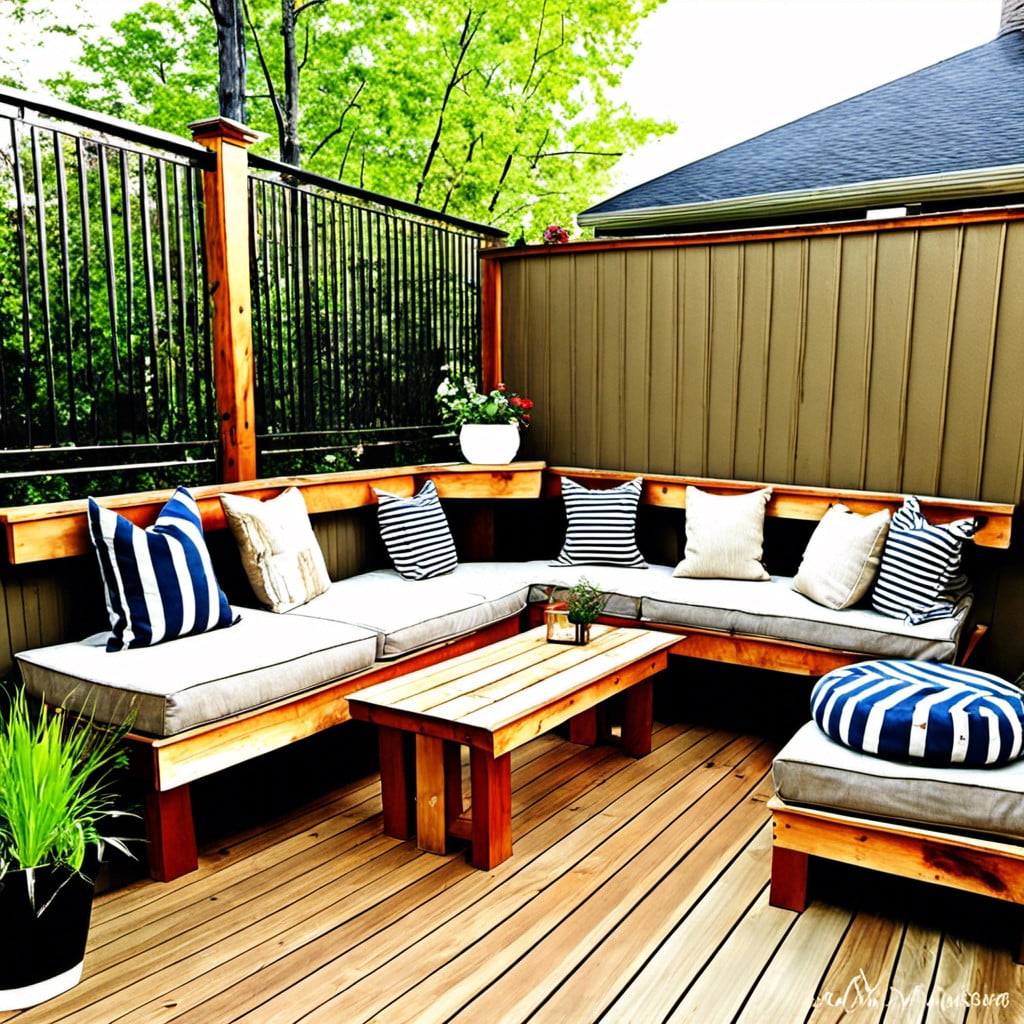
Creativity truly comes alive when devising economical outdoor seating plans. Working on them can become an exciting and rewarding experience.
Experiment with different materials like wooden pallets or unused cinder blocks, both cheap and readily available options. Their robust nature allows them to withstand harsh weather conditions, and they can be cushioned for added comfort.
Another idea to consider is the use of tree stumps. Not only are they sturdy, but they also add an appealing natural touch to the outdoor space.
Alternatively, look at re-purposing old furniture. A lick of weatherproof paint can give a new lease of life to a tired interior chair or sofa, turning it into a centerpiece of your deck.
Remember, comfort is key, so invest in some colorful outdoor cushions and throws to make the space inviting for both yourself and any guests you might be entertaining.
Hammock Chair
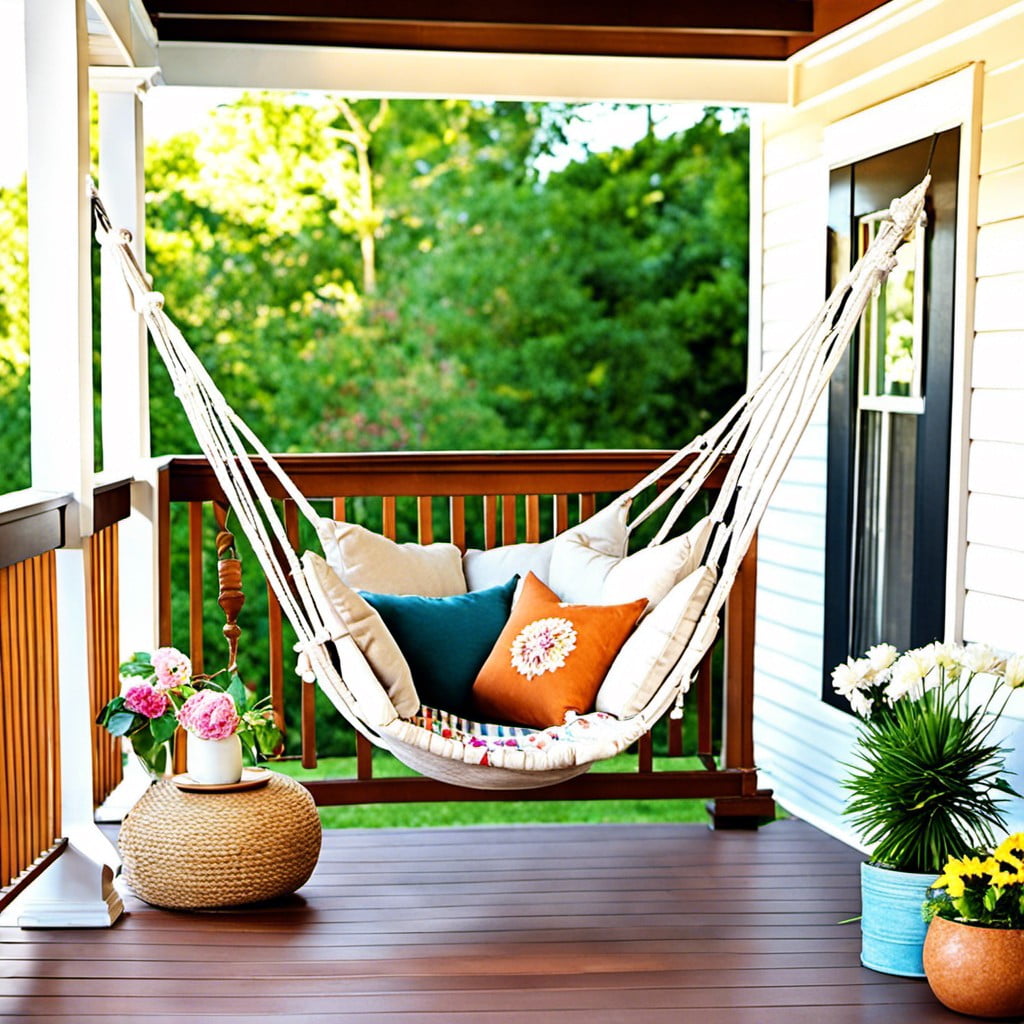
Relaxing outdoors has never been more stylish or budget-friendly. A hammock chair brings not only a fun, unique element to your deck but also doubles as a comfortable lounging spot. The best part? There’s no need for specialized outdoor furniture.
Firstly, pick a sturdy branch or beam on your deck and secure your hammock chair using strong, weather-resistant ropes. For a personalized touch, choose a hammock chair in a bold color or a design that complements the rest of your deck. This also makes it a focal point of your space.
Secondly, add some soft, weather-resistant cushions for extra comfort.
Remember, safety is paramount. Always ensure that the hardware used to hang the chair can support the weight of anyone likely to use it. And there you have it, your fancy lounging spot ready to rock—literally!
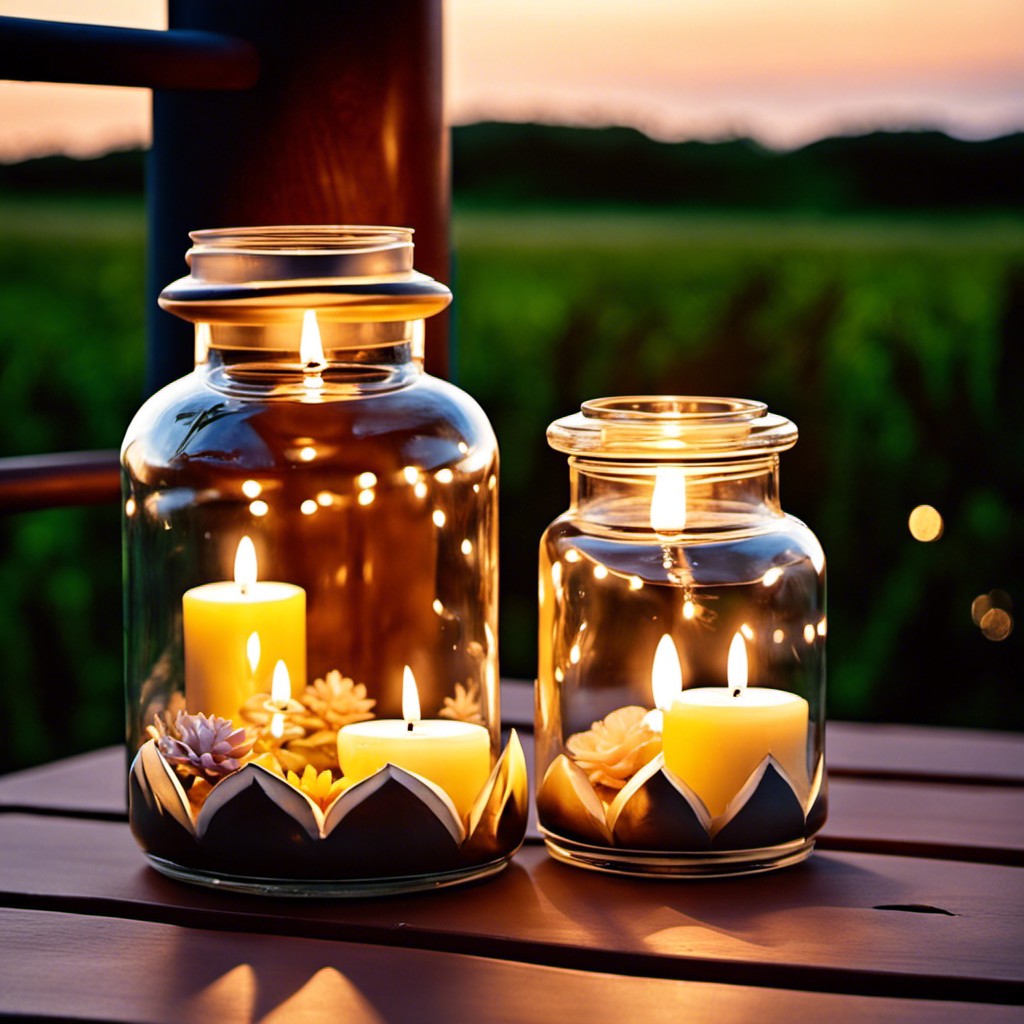
Jar Lanterns
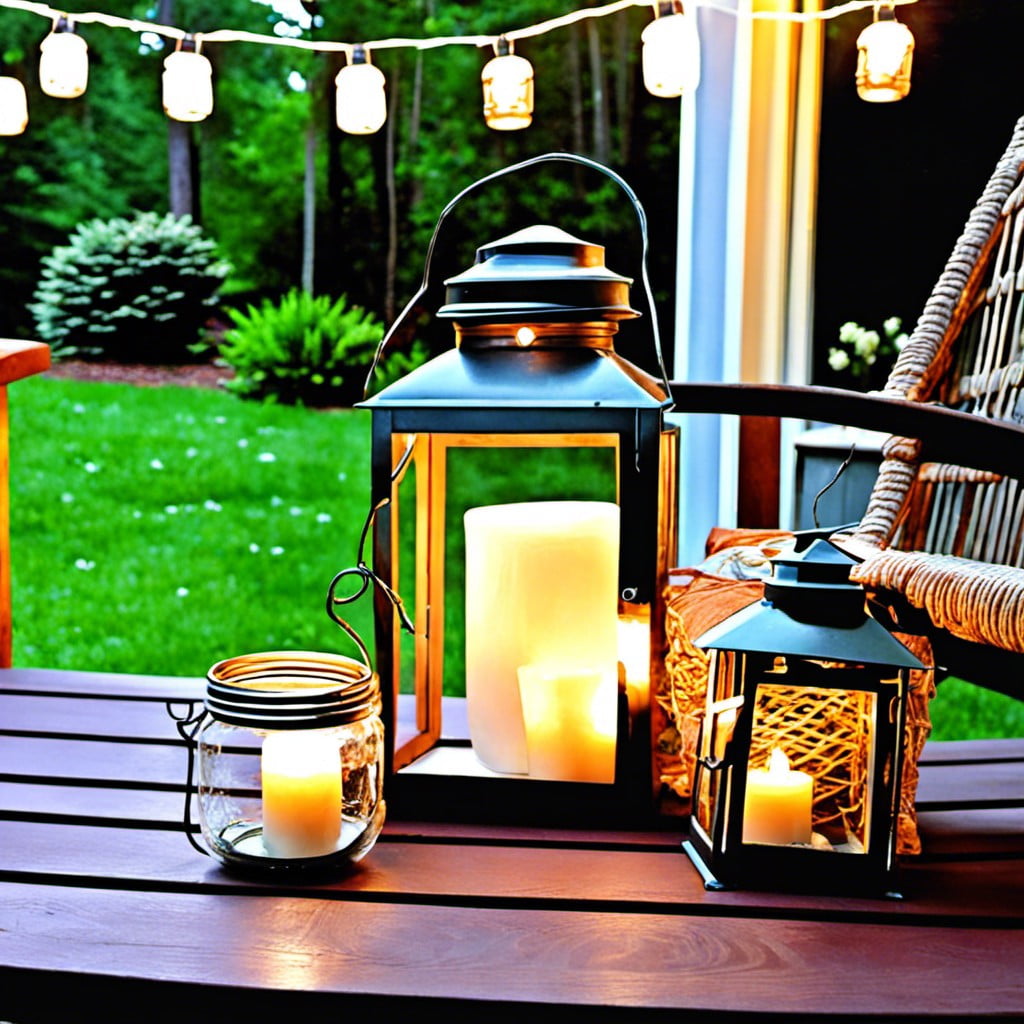
Crafted from recycled or store-bought mason jars, lanterns bring a charming glow to any deck. They are inexpensive, and the best part is you can make them yourself! Gather your jars, some LED lights or tealight candles, and wire for hanging. Sandpaper can help you give the jars an antiqued look, for a magical vibe.
Fill each jar with lights or a candle, then secure the wire around the neck of the jar and hang from your deck’s roof, railings or even from tree branches. The twinkling light from these lanterns will create a romantic ambiance that enchants and welcomes.
For a twist, consider adding in some colored glass stones or pebbles at the base of the jar. Or perhaps use citronella candles to ward off any pesky mosquitoes and add some lovely scents to the outdoor air. With jar lanterns, the possibilities are wide open!
Pallet Furniture
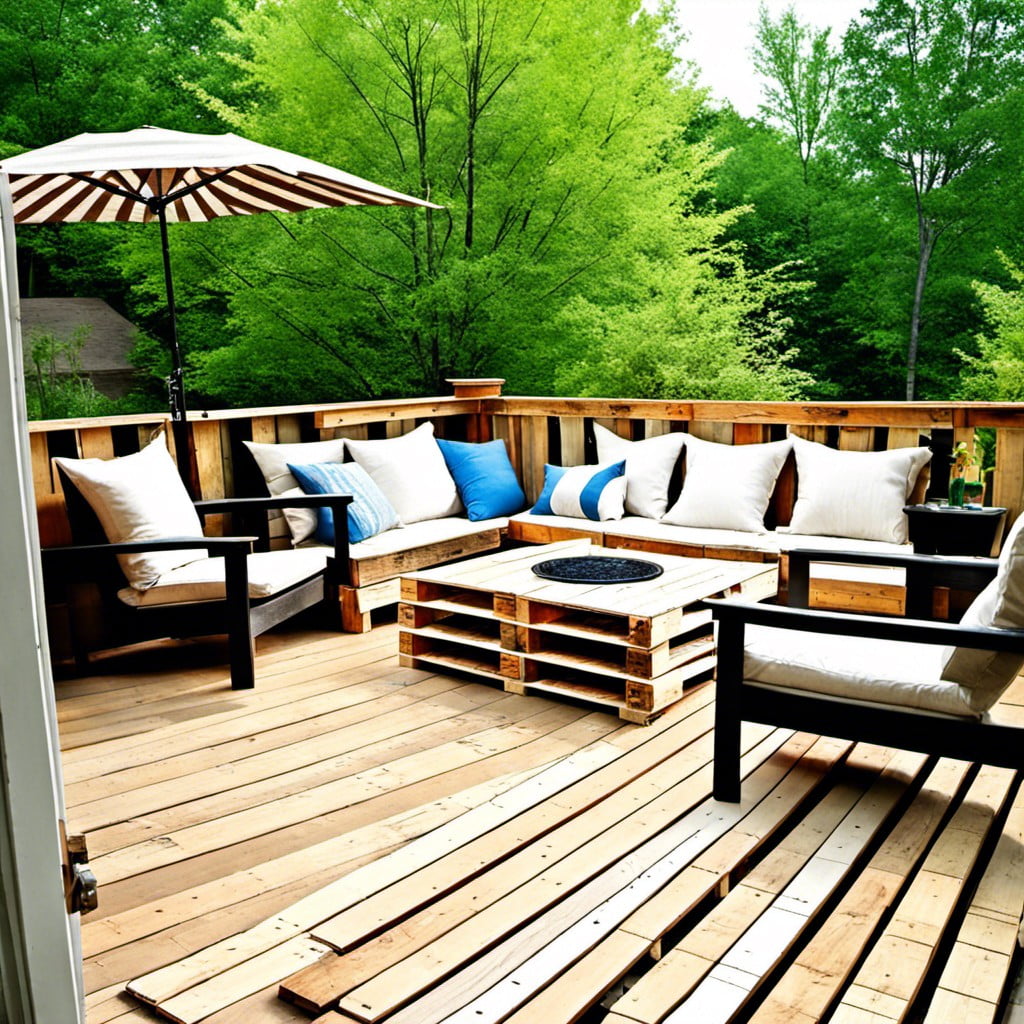
Harnessing the rustic allure and versatility of pallets can transform a deck without straining your wallet.
Discarded or relatively inexpensive to buy, these wooden platforms can inspire a multitude of furniture ideas.
Well-sanded and stained, they can become inviting daybeds or cozy love seats with the addition of comfortable cushions and throw pillows.
Attach wheels for portable coffee tables or stack them for a bar-style serving area.
Safety is paramount, so ensure they’re sturdy, free of splinters, and treated to withstand weather conditions.
This affordable, eco-friendly option breathes new life into a space while reducing waste.
Upcycled Planters
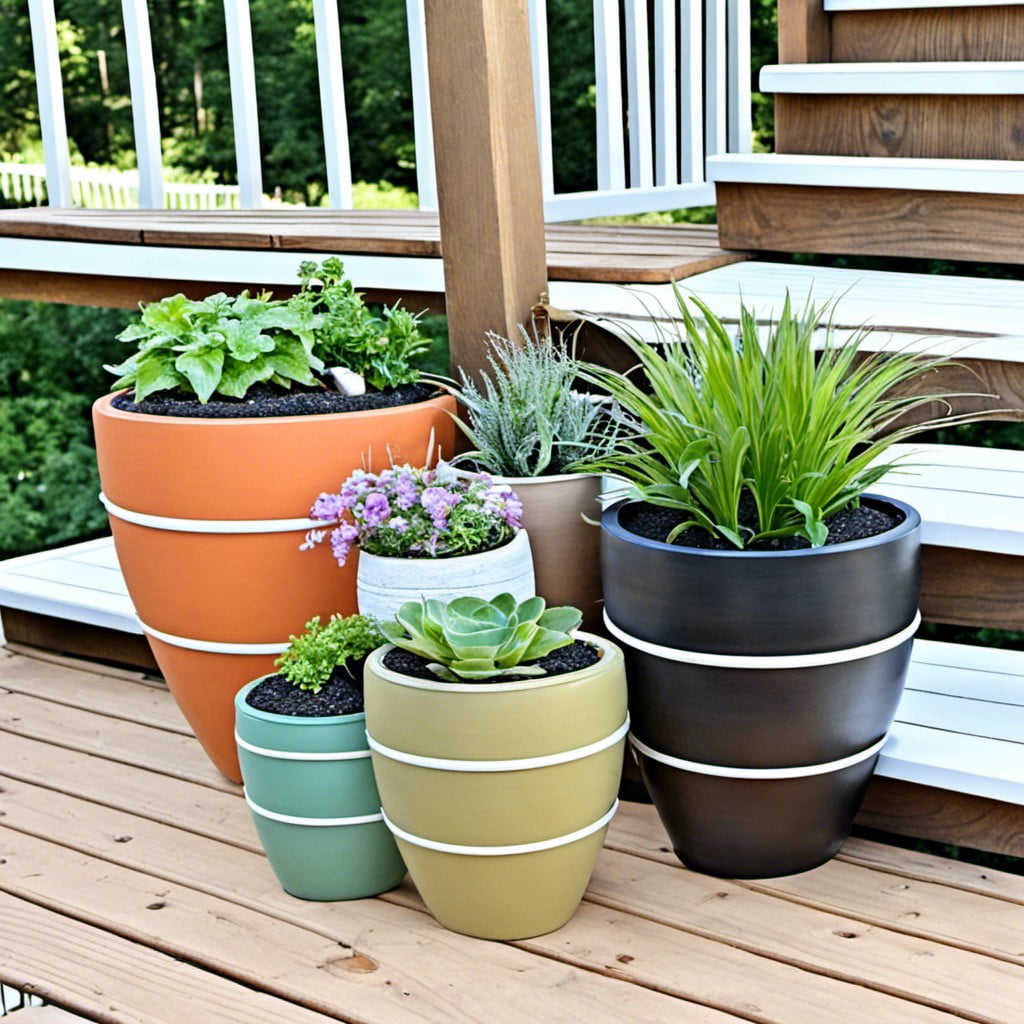
Upcycling offers a clever and eco-friendly solution for decorating your deck on a budget. Make use of old boots, tires, or tin cans by repurposing them into unique planters. Not only will this save money, but it also adds a unique personal touch to your deck.
1. Preparation: First, ensure the items are clean and suitable for outdoor use.
2. Drill Drainage Holes: Essential to prevent waterlogging and promote plant health. Always consider safety when using power tools.
3. Paint & Decorate: Add further charm by painting the items with a weather-resistant paint, or why not try a mosaic design?
4. Plant: Choose plants that will thrive in the planter’s size. Consider herbs for tin cans or flowers for larger items such as tires.
5. Position: Arrange your upcycled planters to create an appealing visual display on your deck.
Remember, the only limit to upcycling is your imagination, so get creative and bring some life to your deck while reusing and reducing waste.
Wall Garden
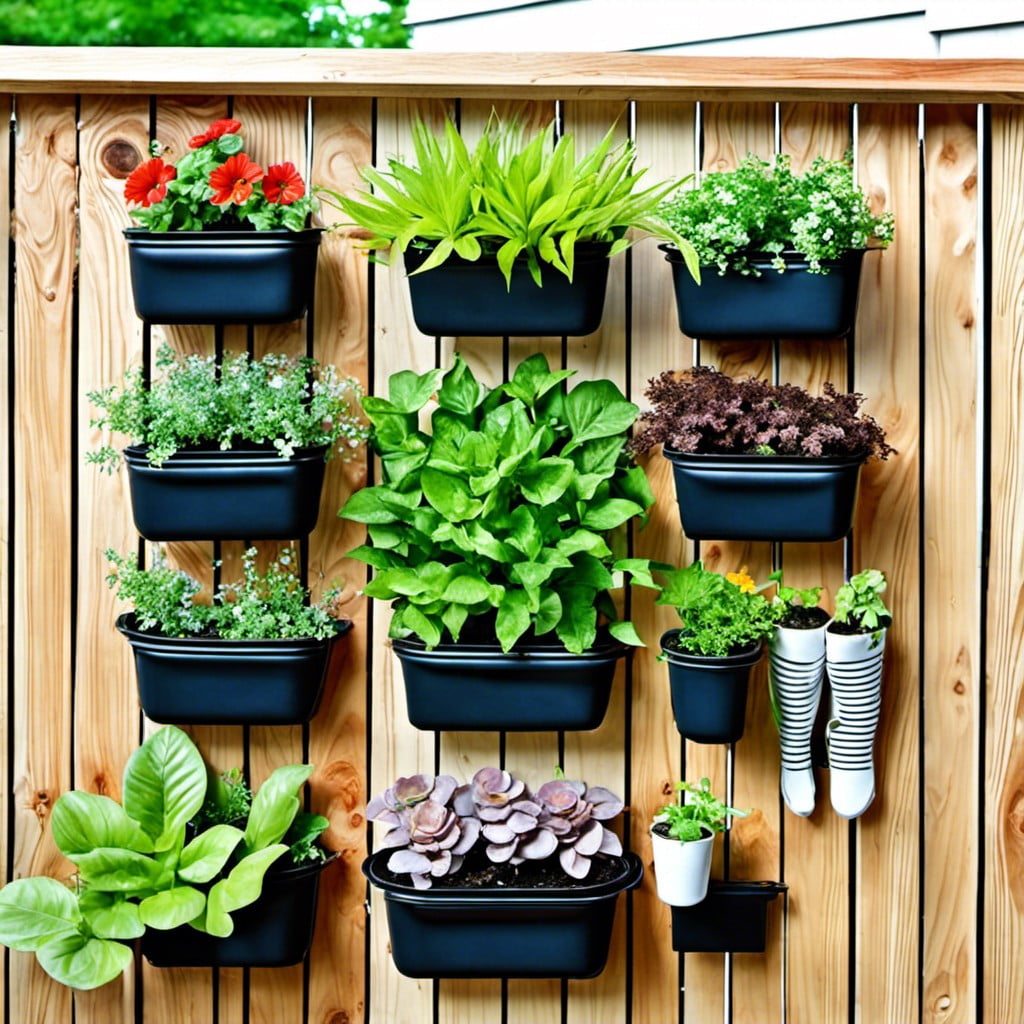
Introducing some verdant freshness to your deck doesn’t have to drain your wallet. Think vertically! You can fashion a lush wall garden, using pallets or trellises as your foundation.
Filled with low maintenance succulents, herbs or seasonal flowers, they can be both decorative and functional – especially if you plant herbs. You may even decide to create a chic geometric pattern or go for a more whimsical design to fit your personal style.
Ensure the plant varieties chosen are suitable for the local climate and deck’s sunlight exposure level. Save even more by propagating your own plants, turning one purchase into an endless supply. With a wall garden, your deck transforms into a green haven without sacrificing valuable floor space.
Thrifted Decor
Harnessing the potential of second-hand items can lead to truly unique results:
- Visit local thrift stores, flea markets, and yard sales for budget-friendly finds. The key lies in seeing beyond an item’s original purpose, looking for potential.
- Vintage furniture pieces offer charm and oftentimes more solid construction than their modern counterparts. A simple re-paint or reupholstering project could transform these treasures into stunning pieces.
- Old dishware, vases, and frames can be repurposed into quirky planters or candle holders, adding character to your deck.
- An array of varied, patterned throws and cushions sourced from thriftstores bring a bohemian feel, all while providing comfort.
- Don’t forget to check for old garden equipment or tools that could serve as rustic decorations.
Remember, sometimes the best decorations don’t cost much; they just require a little creativity and a keen eye for potential.
Candles in Bottles
Repurposing wine bottles into candle holders provide a brilliant option. Remove any labels and clean thoroughly.
Use tapered candles for a more elegant effect, you can either go for colors that complement your overall decor or stick with classic white.
Be sure to place these on a safe, stable surface to avoid any unfortunate accidents.
With their warm, soft glow, these homemade lights cast a lovely ambience, perfect for any deck.
For added safety, consider using LED taper candles. They offer a similar effect without the fire-hazard risk.
This dual application of a decorative and functional piece can create an immediate, low-cost impact on your deck’s aesthetic.
Fabric Canopy
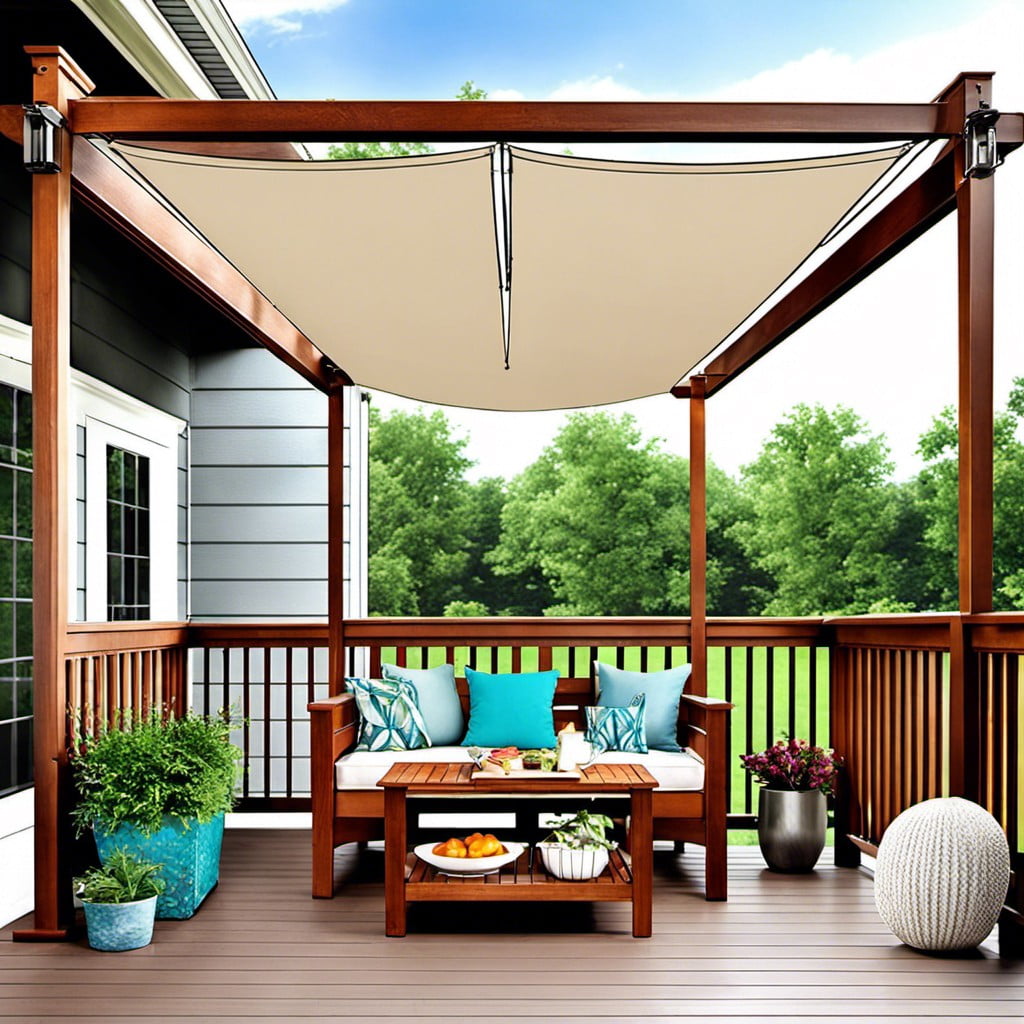
Stepping under a fabric canopy creates an instant shift in ambiance, transforming your deck into a chic, cozy oasis. While being relatively inexpensive, this budget-friendly decor idea boosts your outdoor aesthetic tremendously. Using weather-resistant fabric ensures longevity and minimal wear and tear.
Here are handy tips to keep in mind:
- Ensure proper drainage – Install the canopy with a slight slant to avoid collecting rainwater.
- Secure corners well – Reinforce attachment points for a sturdy canopy that stands against wind.
- Use neutral colors – Neutral colored fabrics will blend well with any existing deck decor.
- Combine with lights – Hanging string lights under your canopy adds extra appeal for night-time use.
Remember to always take safety precautions when setting up your canopy. A well-maintained fabric canopy doubles as a stylish accessory and functional shade, making it a worthwhile addition to your deck.
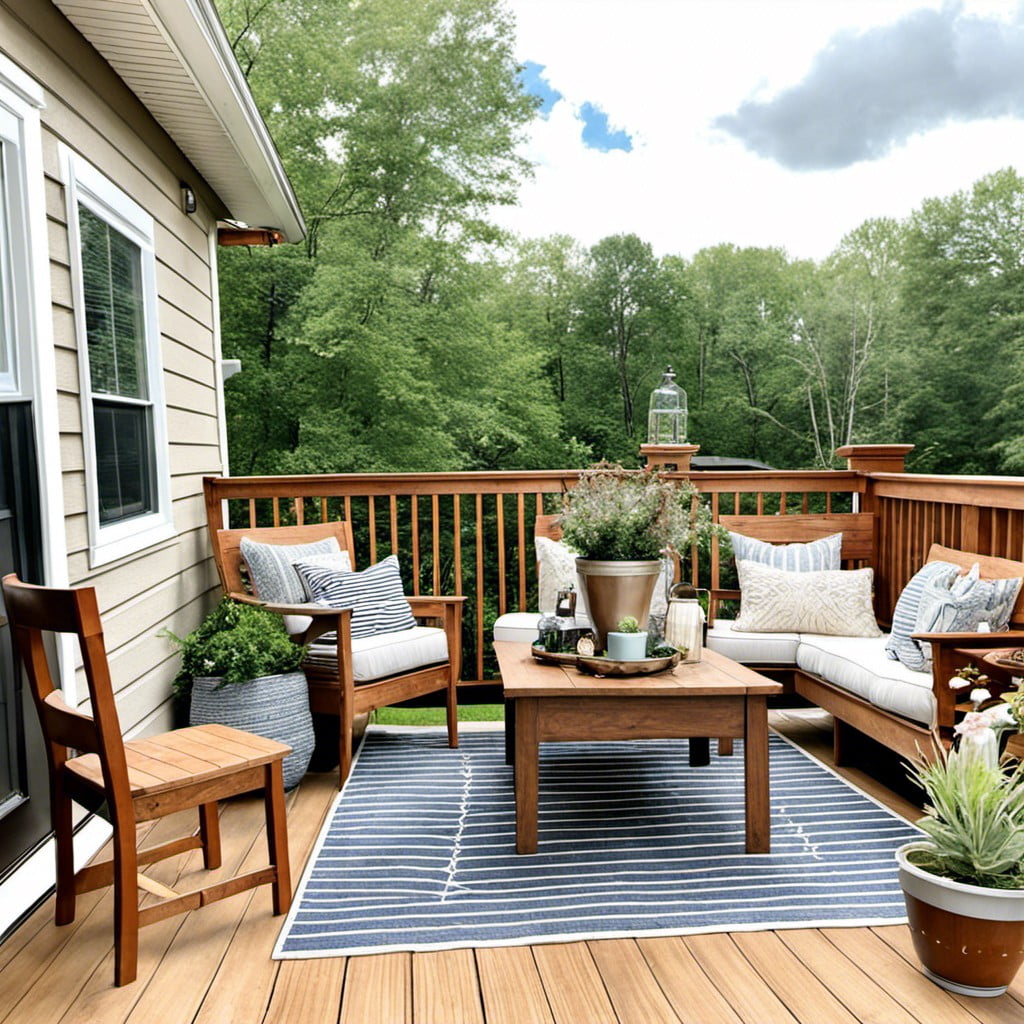
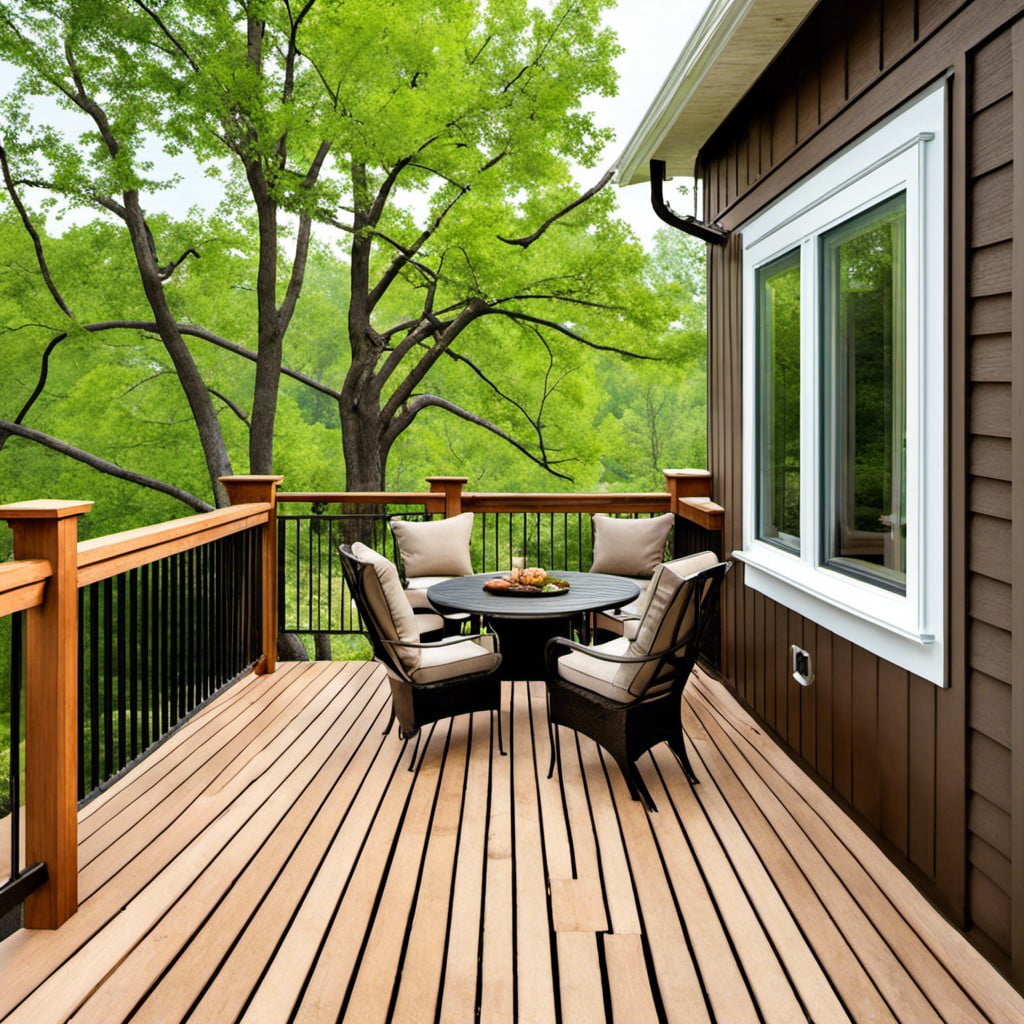
Outdoor Rug
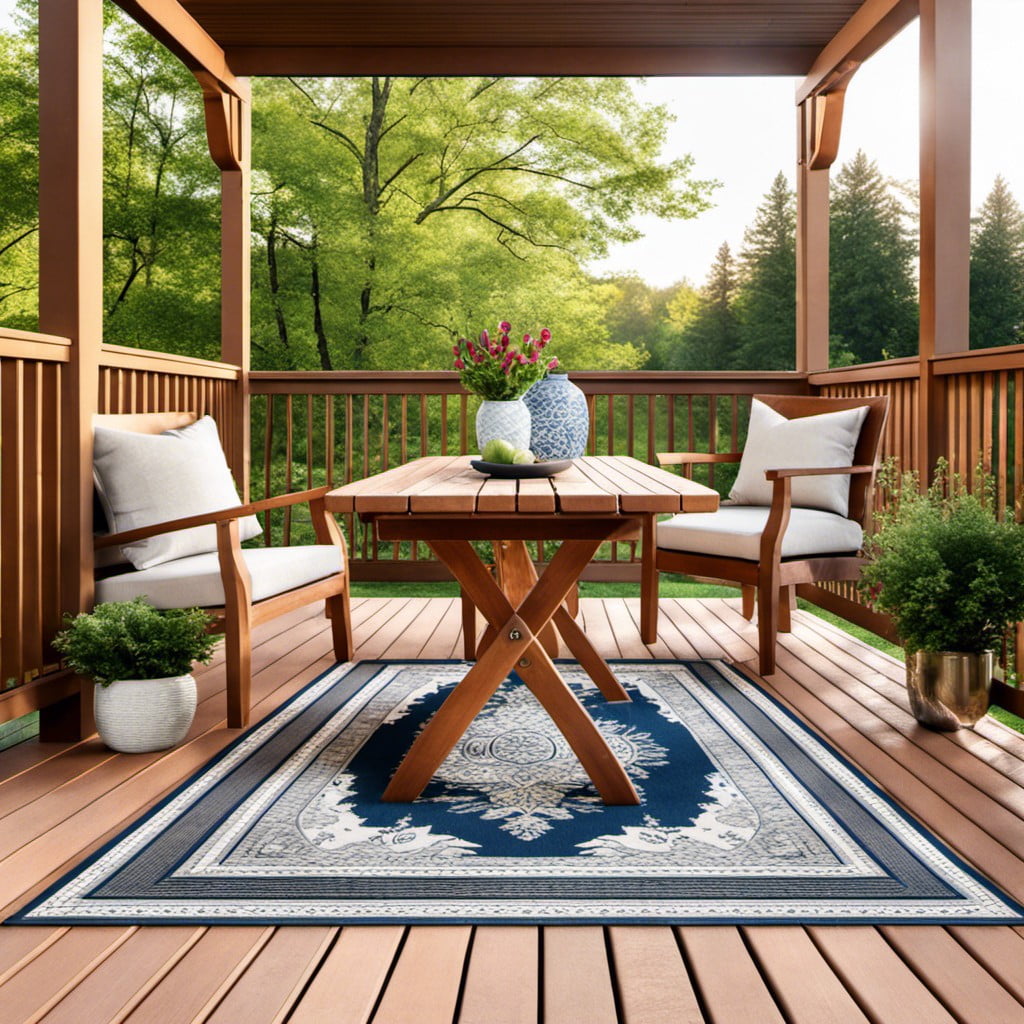
An outdoor rug can instantly transform the feel of your deck by adding a pop of color and texture. These rugs are made from durable materials built to withstand elements, making them a practical and affordable solution. A variety of styles and sizes are available to suit different deck sizes and design themes, whether you prefer Moroccan patterns or nautical stripes.
When deciding on the positioning, you’ll typically want to have some furnishings on the rug to anchor your space better. If you’re planning to place it underneath a dining set, for instance, you’d want the rug to be large enough to fully accommodate the chairs, even when they’re pulled out. However, if your rug is merely to delineate a lounging area, a smaller size would suffice.
Maintenance is key to prolong their lifespan. Most rugs are easily cleaned with warm soapy water and a brush. Air drying is usually recommended, and rotating rugs periodically will help even out any potential wear and tear.
The next step is choosing rug pads to prevent slipping and sliding. There are eco-friendly, non-toxic options made out of natural rubber or felt. Always check for the manufacturer’s guidelines for outdoor rug use.
Lastly, remember that the rug is not only practical but also a visual treat, choose what you personally find appealing and that matches your deck’s aesthetic. Balance between functionality and style is the key.
Old Wooden Ladder Decor
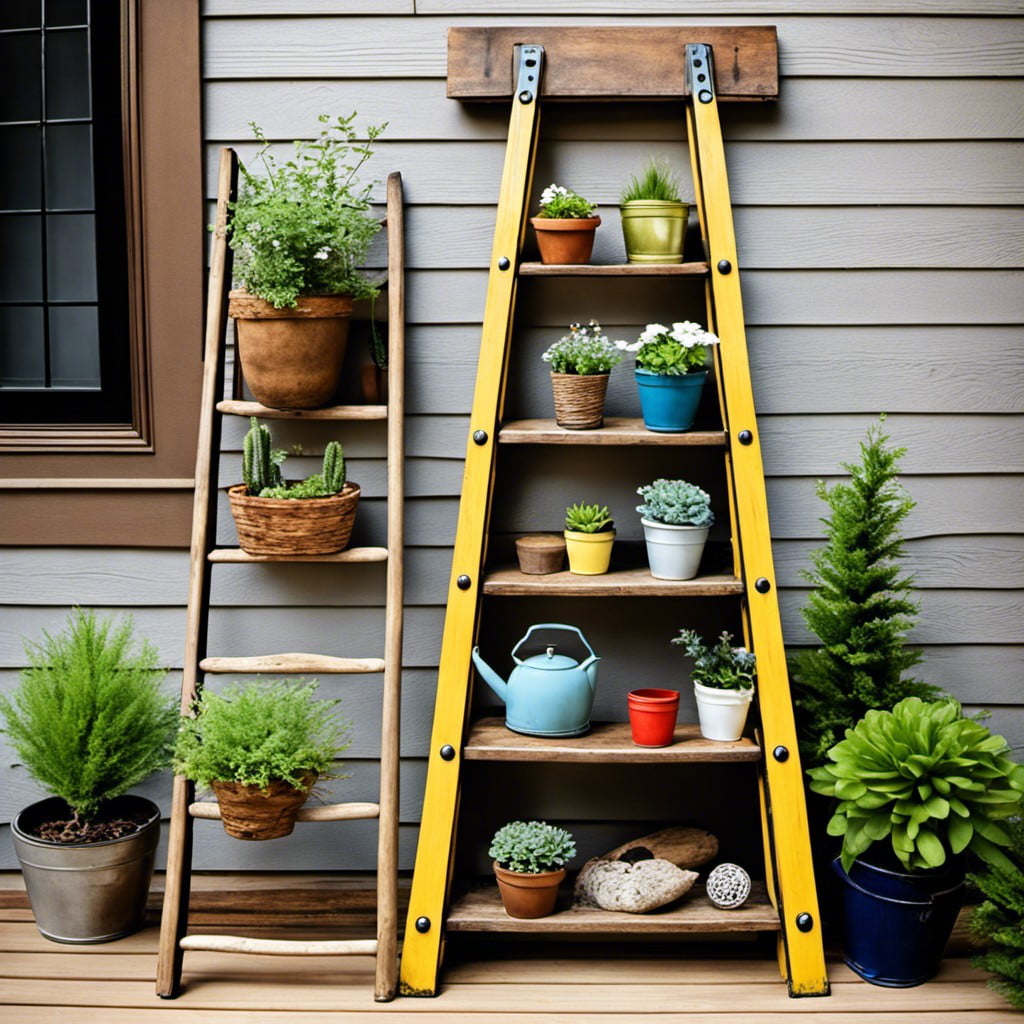
One advantage of using an old wooden ladder is its versatility. You can stand it up tall against a wall and use it as a vertical plant stand, or you can lay it on its side for a more horizontal approach. It’s a great way not only to showcase potted plants but also to store outdoor accessories or beautiful decor like fairy lights and vintage collectibles. An added bonus: no need for extensive DIY skills. Even worn-out or slightly damaged ladders can contribute to a rustic, charming aesthetic. Give new life to an old ladder and turn it into an attractive, functional piece of outdoor decor.
Floor Cushions
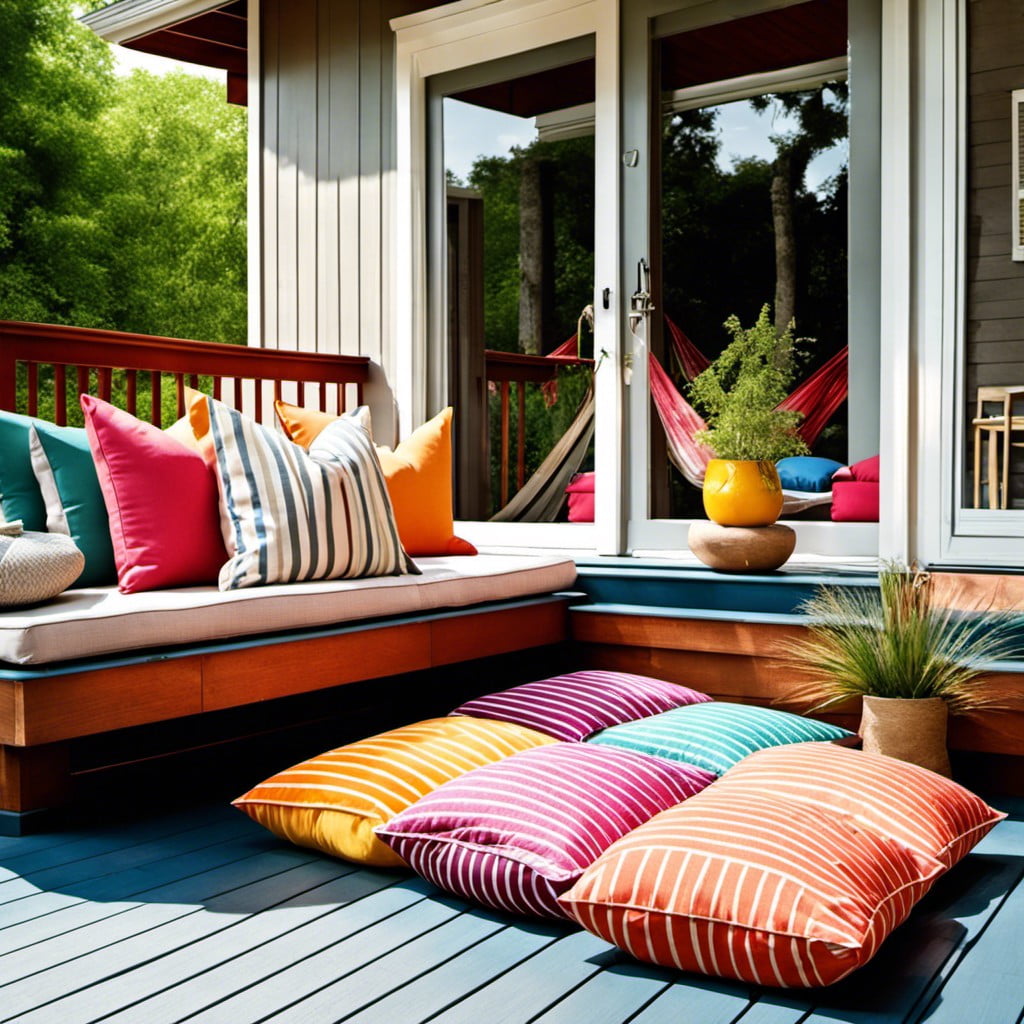
Floor cushions are not only comfortable but also innately versatile. They create a welcoming, laid-back ambiance and can be moved around to accommodate various seating arrangements. If you prefer a Bohemian aesthetic, opt for rich, bold colors and patterns. For a minimalist look, choose simple, monochromatic designs.
Keep in mind that outdoor cushions should be water-resistant and easy to clean. Look for materials like olefin, vinyl, or polyester, which can withstand a little sunshine and rain. Don’t forget to store them inside if the weather forecast looks grim. Your budget will appreciate you looking after them!
Making your own floor cushions can also be an exciting project for those handy with a sewing machine. Collect different fabrics to make unique, customized designs. Additionally, this allows you to control the size and shape of your cushions, ensuring they fit perfectly with your deck’s layout.
Mosaic Table
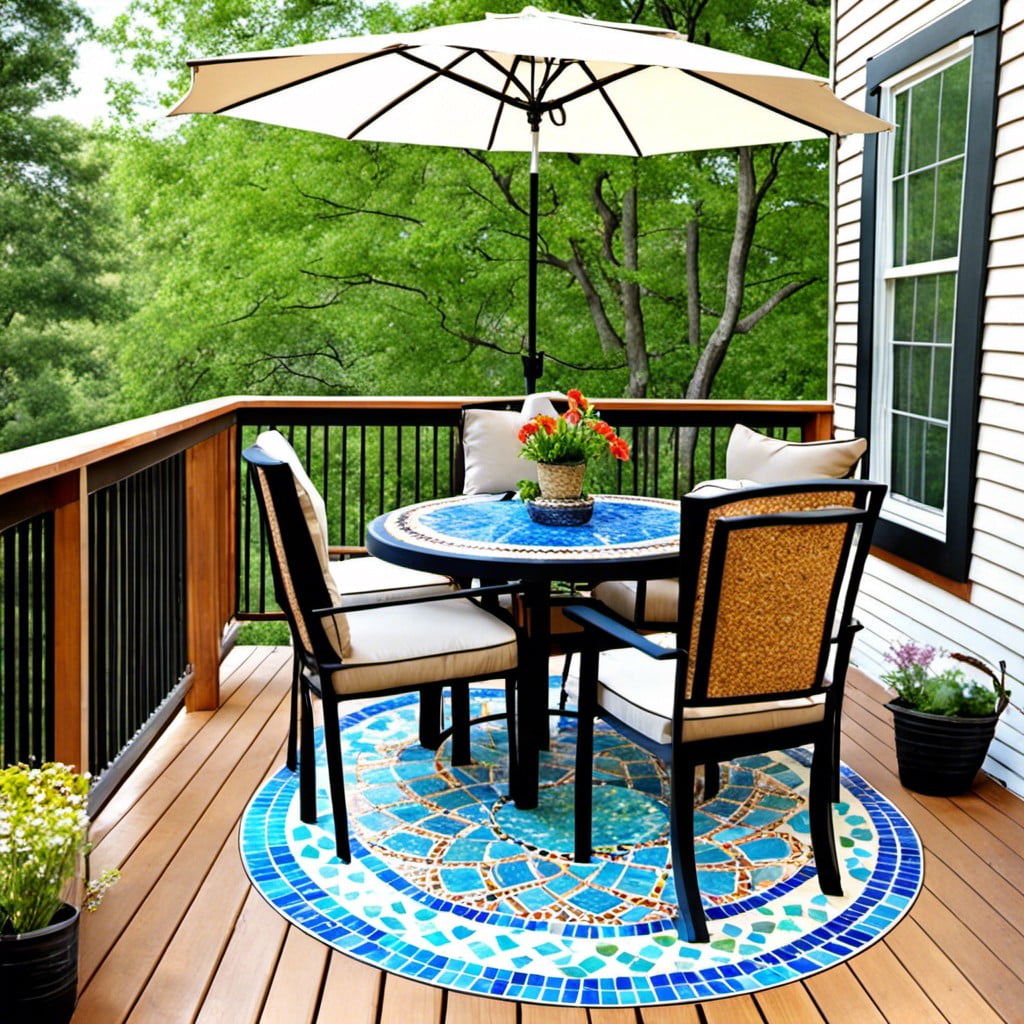
Incorporating a mosaic table into your deck design offers an exquisite touch that’s both functional and visually impressive. To embark on this DIY project, you’ll first need a solid-base table, which can be an old one you have around, or purchased from a thrift store to save on cost.
Next, gather pieces of tiles or broken ceramics, even sea glass, and start laying out your design directly on the table. A simple pattern or random arrangement both work splendidly, depending on your preference. Don’t forget to fill in the gaps with grout once your pieces are laid out.
Remember to seal the surface after the grout has dried, ensuring your table withstands the elements. This outdoor-friendly feature not only aligns with your budget considerations, but it also adds color and life to your deck area. This piece is guaranteed to catch the eye and spark conversations during social gatherings.
Tree Branch Railings
While decking a house, feasibility and aesthetics can harmoniously work together. This is quite true when it comes to utilizing tree branches for railings. Sourcing from your backyard makes this creative endeavor not just eco-friendly but budget-friendly too.
Begin by choosing sturdy branches with visually intriguing shapes and forms, remember to keep safety as a priority. Remove any bark to prevent rot, and treat the wood for durability against the elements. These branches, once fashioned into railings, bring a raw, rustic appeal and blend the constructed deck seamlessly into the natural surrounds. Installing them requires basic carpentry skills and essential tools: a drill, screws, and brackets.
For a sleek finish, pair these railings with a neat wooden floor or contrast them against a vividly colored wall. They can create a picturesque frame for looming trees or a serene lake view. Personalize by adding hanging lanterns, windchimes or crawling vines. Functional yet fashionable, tree branch railings are truly transformative.
Vintage Crates As Tables
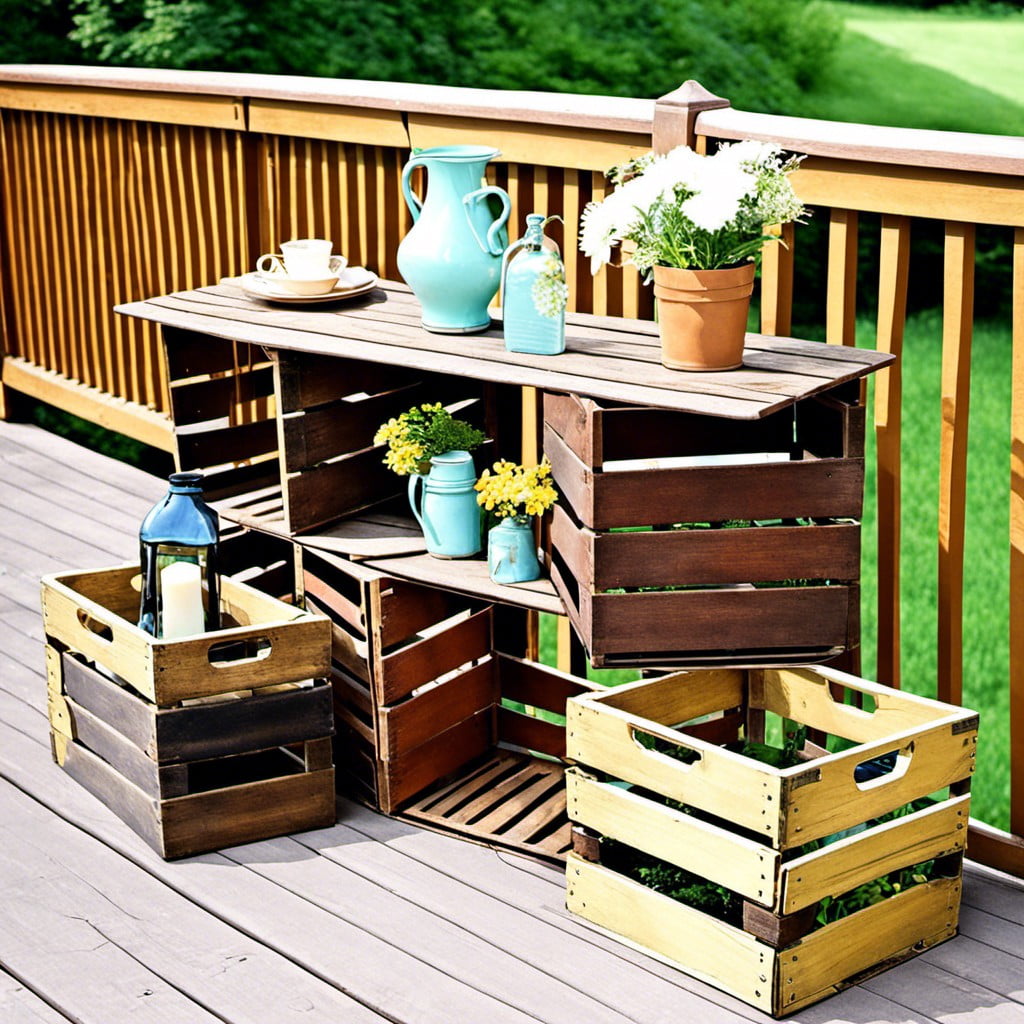
Leveraging vintage crates for outdoor furniture presents a unique opportunity for adding both functionality and character to your deck. These charming elements can offer storage, serve as a coffee table or even work as plant stands.
Here are some useful tips to make the most out of vintage crates:
- Stacking Strategy: Stack a few crates together for a multi-level table, providing space for drinks, books, and flowers.
- Painting and Staining: Add some personality by painting or staining your crate. This gives a chance to match the color with the overall theme of your deck.
- Cushion Top: Add a cushion on top of a crate to create extra seating.
- Casters: Attach wheels for mobility, especially handy when rearranging for different occasions.
- Protective Coating: Considering they may be exposed to weather, it is wise to protect them with a suitable outdoor sealant. This ensures longevity by resisting moisture and sun damage.
Remember, these crates are eco-friendly, affordable, and carry a rustic charm, so don’t be afraid to experiment!
Homemade Wind Chimes
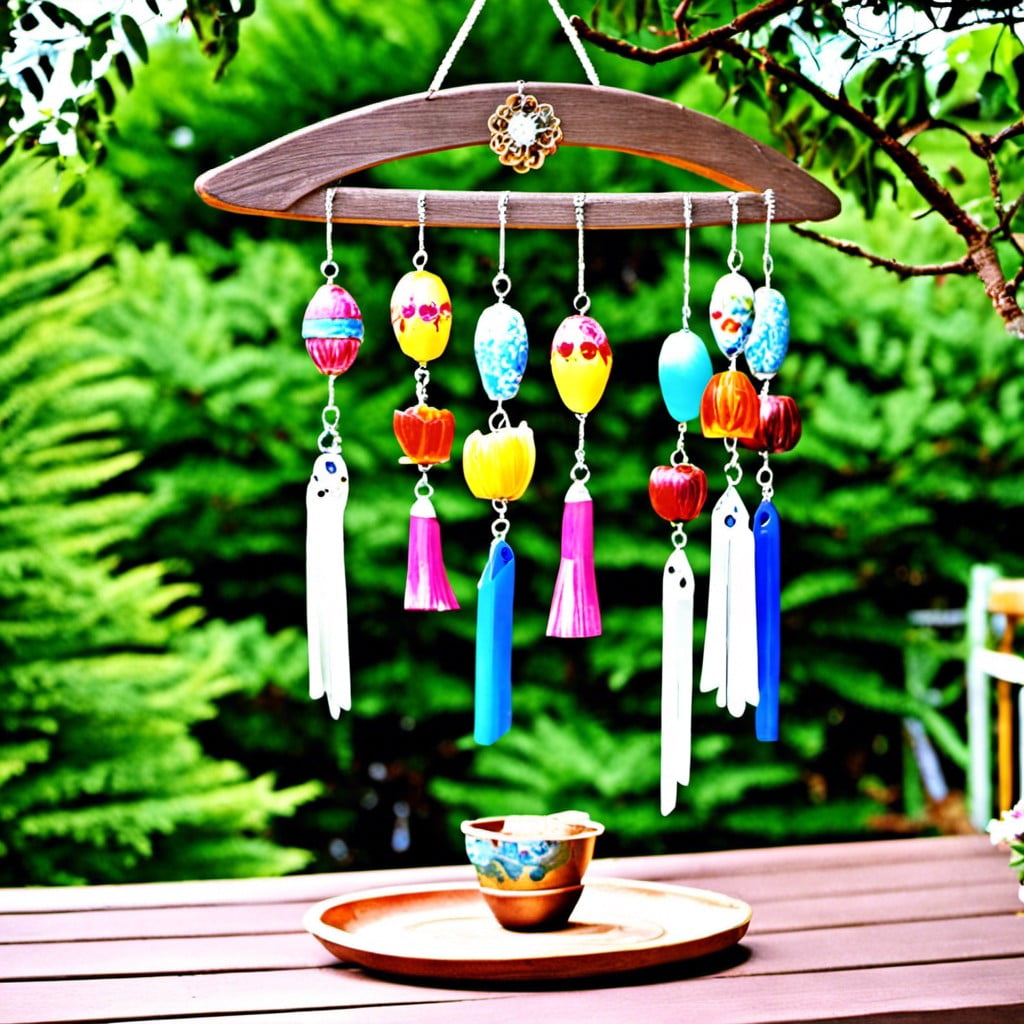
Harnessing the sounds of nature while adding visual charm, these melodic ornaments need not pull on your purse strings. Firstly, gather materials such as discarded keys, old silverware, or seashells which can be upcycled into clappers and wind catchers.
Second, utilize a circular item like a lid or embroidery hoop as the top from which you’ll hang your components. String or fishing line work well for suspending these elements and aid in their movement with the breeze.
For a truly personalized touch, consider painting your pieces or elaborating with beads and ornaments. Remember to secure everything tightly to withstand outdoor weather.
Finally, hang your creation in a breezy spot to revel in the unique tunes from your DIY wind chime.
Hanging Flower Pots
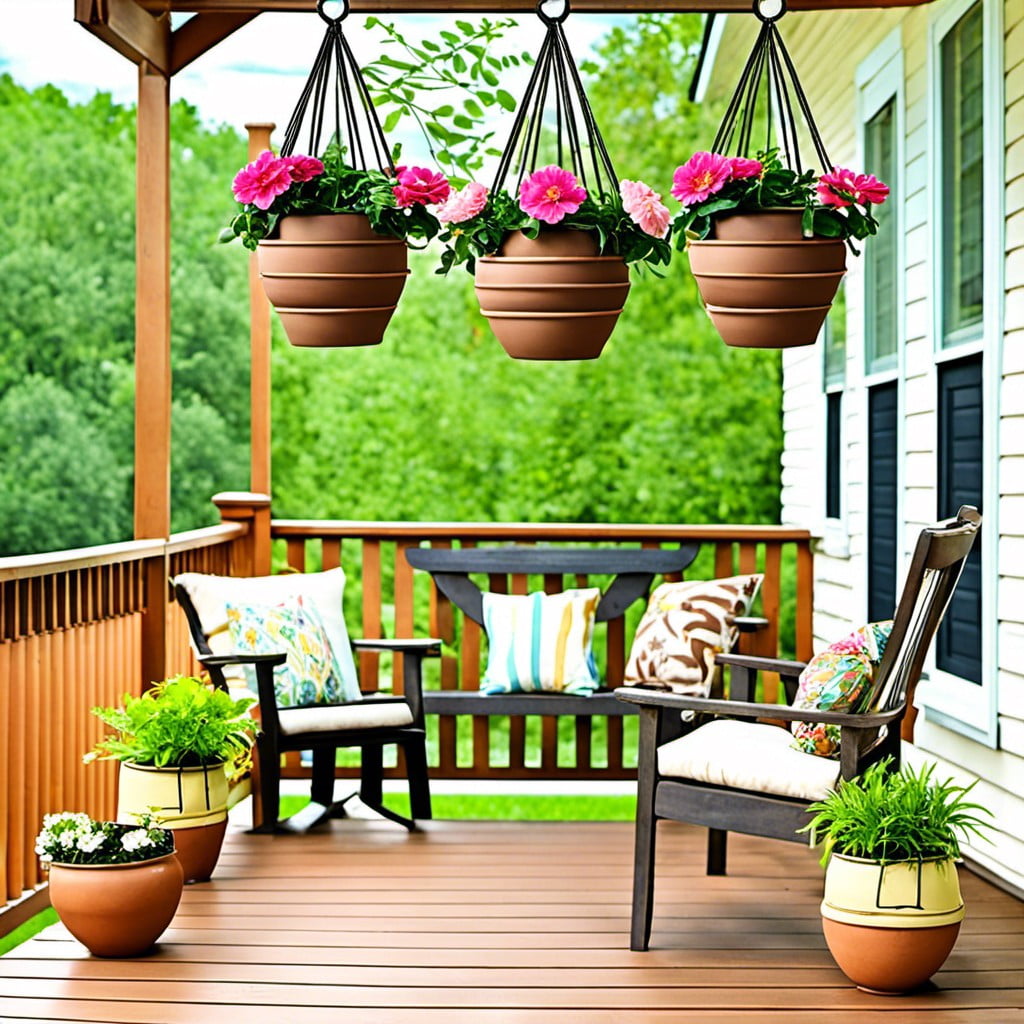
To create a dynamic and visually appealing space, think vertically as well as horizontally. The strategic positioning of hanging flower pots not only adds a splash of color and fresh aroma but it also maximizes spaces typically overlooked.
Here are some tips to take note of:
- Choose pots of different sizes to create a layered look.
- Opt for plants of varying heights and blooms to add visual interest.
- Consider trailing plants for a cascading effect.
- Remember to provide proper drainage for each pot to ensure the plants remain healthy.
- Pots can be hung from deck rafters, railings, or on the wall for a stunning green backdrop.
- Select pot colors and designs that complement your overall decor theme.
Remember, hanging flower pots are a vibrant and economical touch that elevates the ambience of any deck.
DIY Bird Feeders
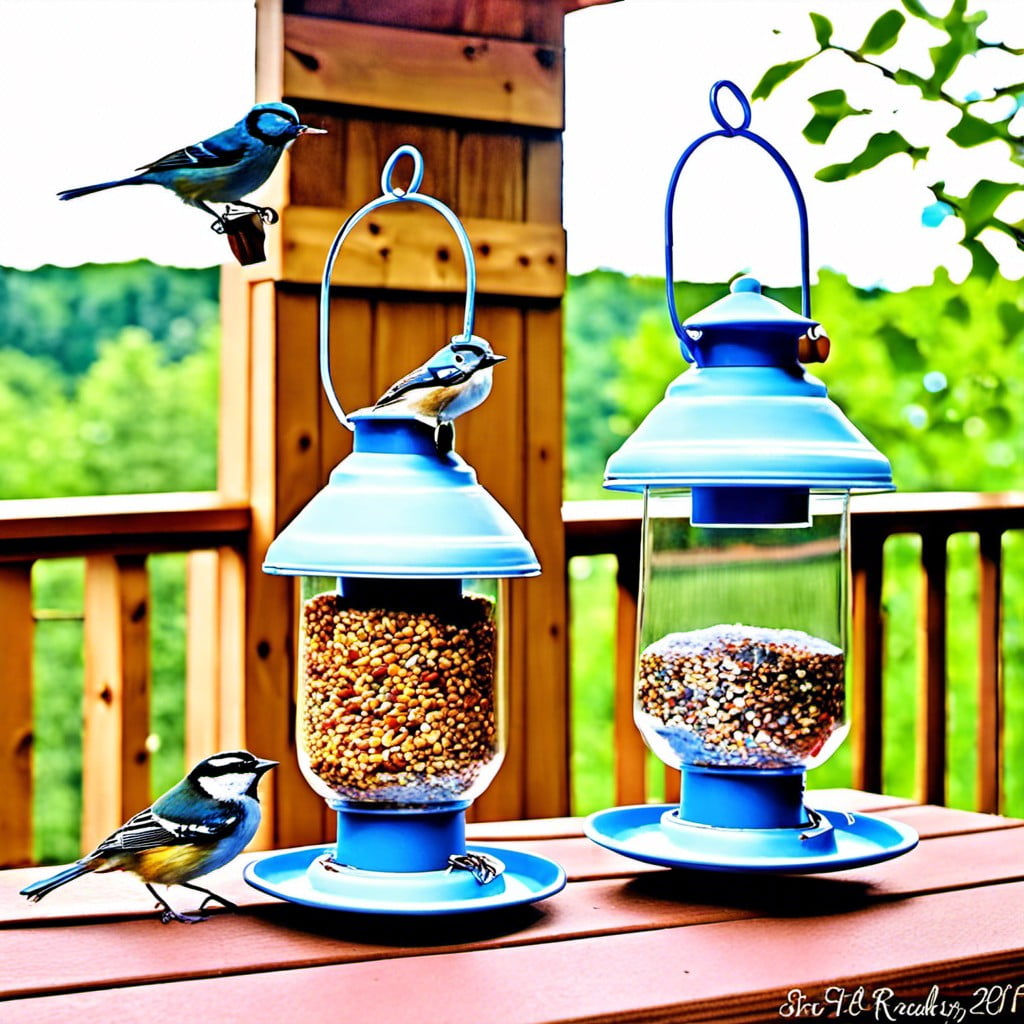
Creating your own bird feeder serves as a delightful decorative element and a functional piece that attracts a colorful array of birds to your deck.
To get started, you’ll need a few simple materials, such as a clean, empty tin can, twine, birdseed, and peanut butter.
- 1. Generously coat the outside of your can with peanut butter.
- 2. Roll the sticky surface in birdseed until fully covered.
- 3. Create a handle by threading twine through the can and knotting on either side.
- 4. Find a suitable spot on your deck to hang your DIY bird feeder, ideally where you can comfortably observe your feathered visitors.
Recycling materials that you already have at home not only makes this project cost-effective, but it also promotes sustainability.
Experimenting with designs and varying the type of birdseed used can attract different species, making your deck a hub for birdwatching.
Read More Like This
 15 Homecoming Decoration Ideas to Elevate Your Celebration
 15 Christmas Cake Decorating Ideas to Sweeten Your Holidays
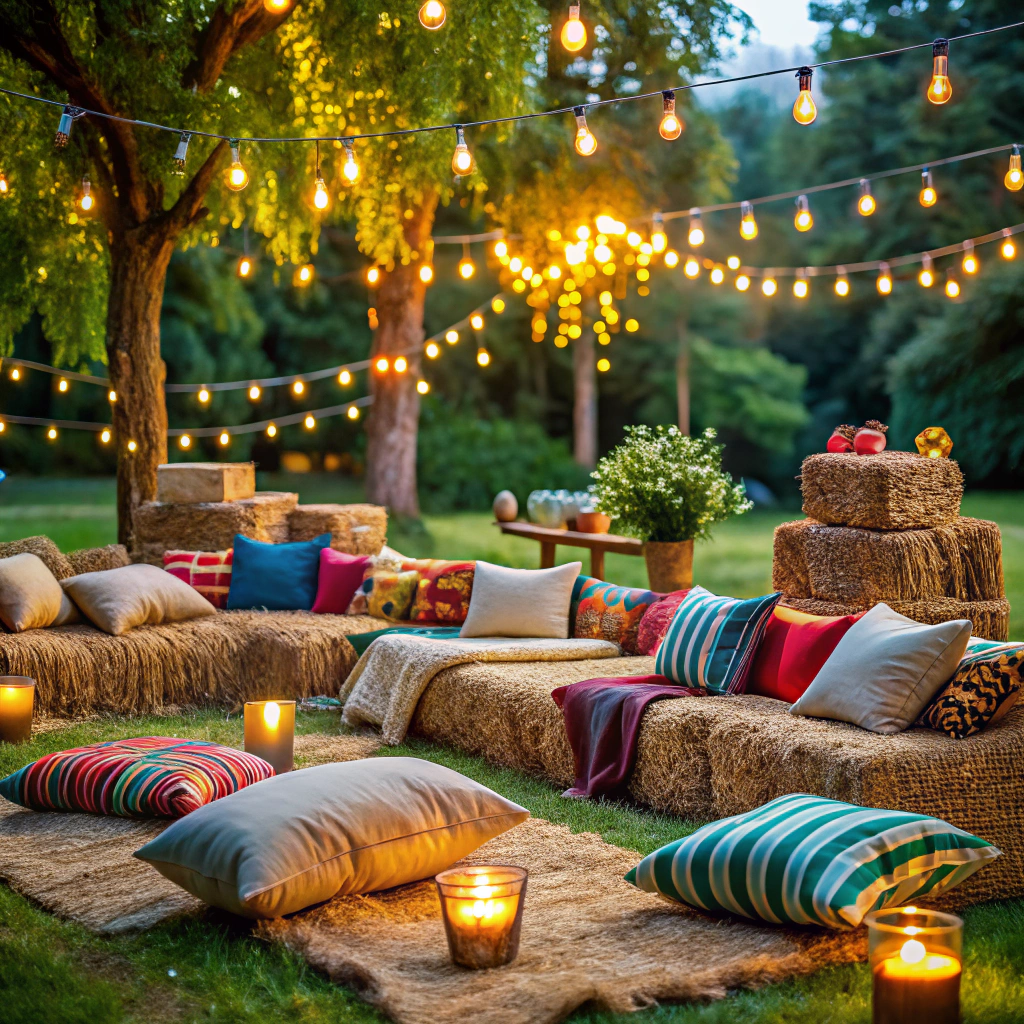 15 Outdoor Party Tent Decorating Ideas for a Magical Celebration
 15 Ideas for Welcome Home Decorations
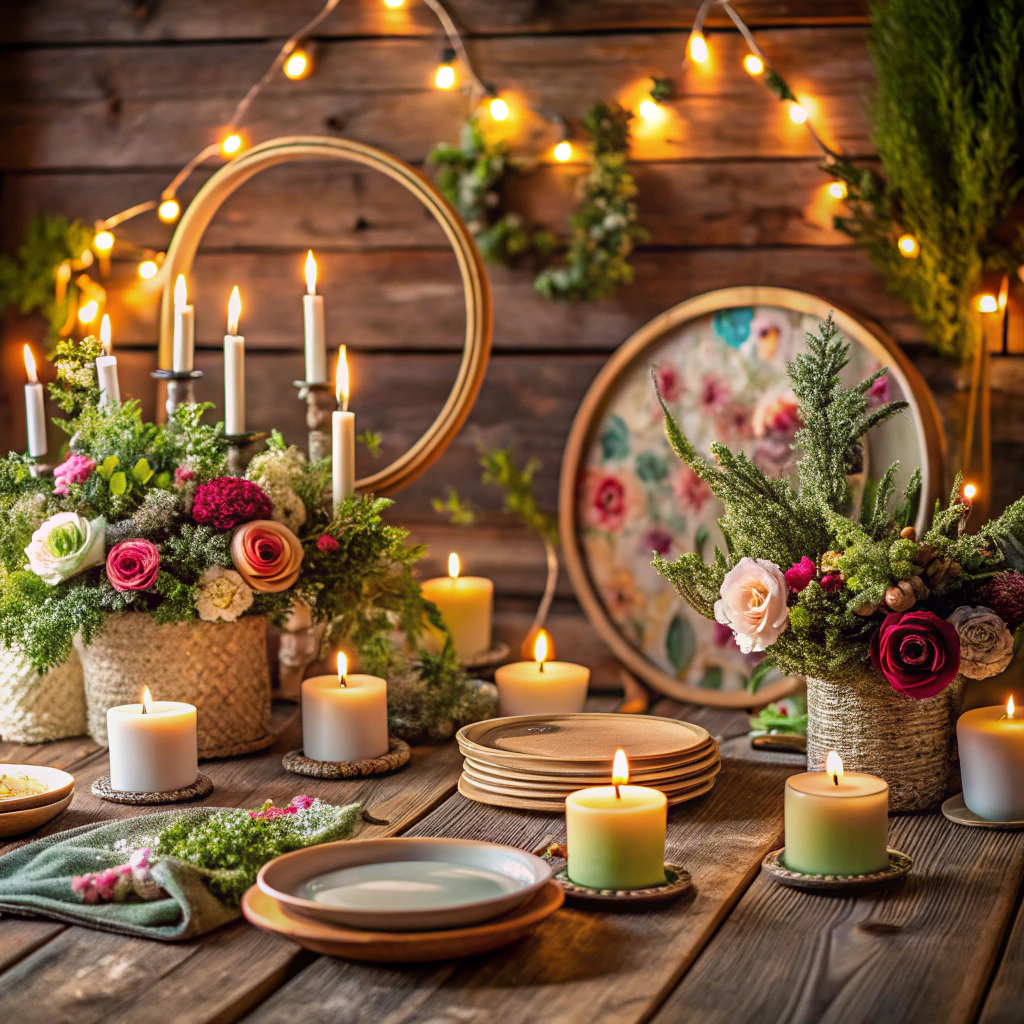 15 Cheap Table Decoration Ideas to Elevate Any Gathering
Recap: