Last updated on
Discover building a pantry in a closet because it magically transforms underutilized space into a functional, organized storage solution for your groceries.
Key takeaways:
- Take precise measurements and assess the condition of the space.
- Design the pantry based on the items you plan to store.
- Gather essential tools and materials for the project.
- Clear out and clean the closet before starting construction.
- Construct the shelving framework and install the shelves.
- Note: To maintain an organized pantry, group items by category, practice the “first in, first out” rotation method, periodically declutter, and maximize vertical space. Ensure safety by securing shelves, using non-toxic materials, and maintaining good lighting.
Assessing Your Space
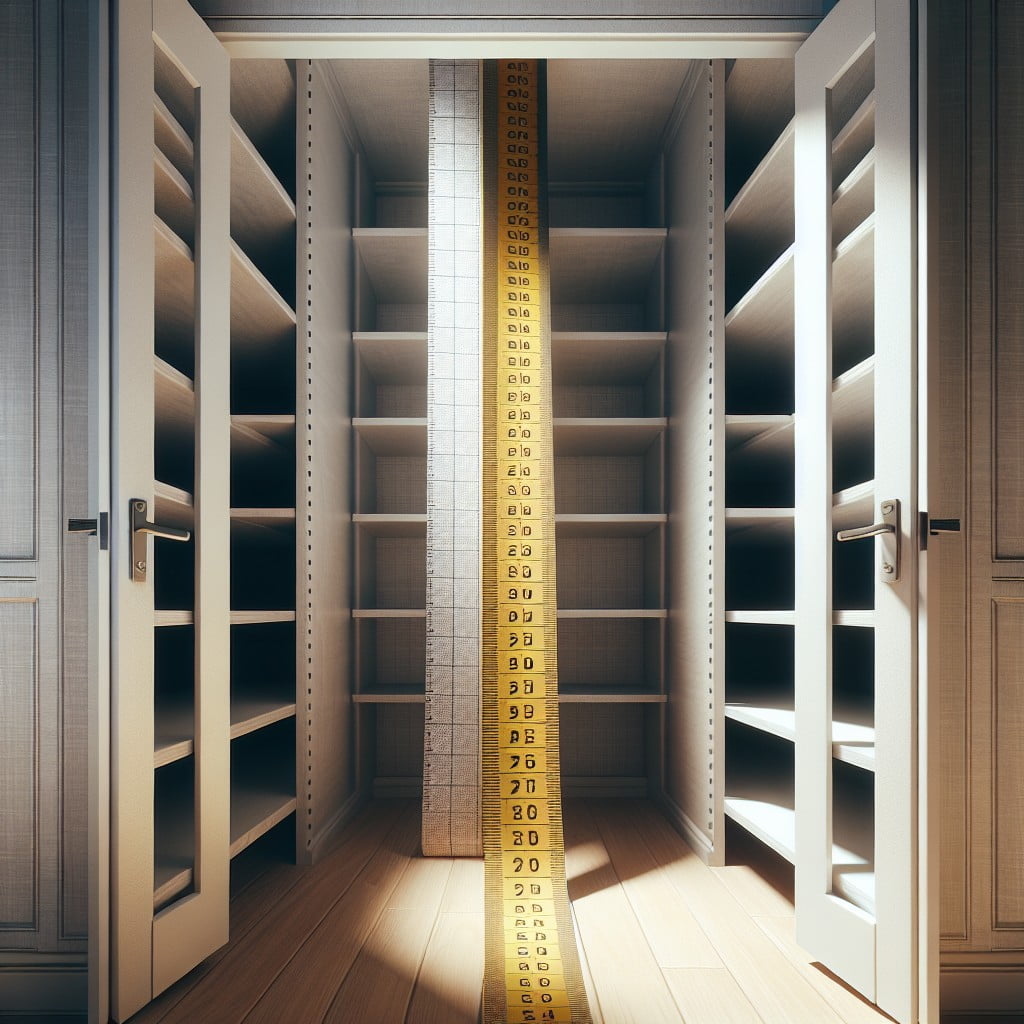
Before embarking on converting your closet into a pantry, take precise measurements to determine the size of your space. Consider not only the width and depth but also the height to maximize storage potential.
Examine the condition of the walls and flooring to ensure they can support the weight of pantry shelving and contents. Also, take note of available lighting and whether additional fixtures are necessary.
Evaluate accessibility, ensuring there’s enough room for the door to open fully and that the location is convenient for your kitchen workflow.
Lastly, take inventory of your pantry items to estimate the type and quantity of storage solutions you’ll need. This preparatory step is crucial for a functional and well-organized pantry.
Designing the Pantry
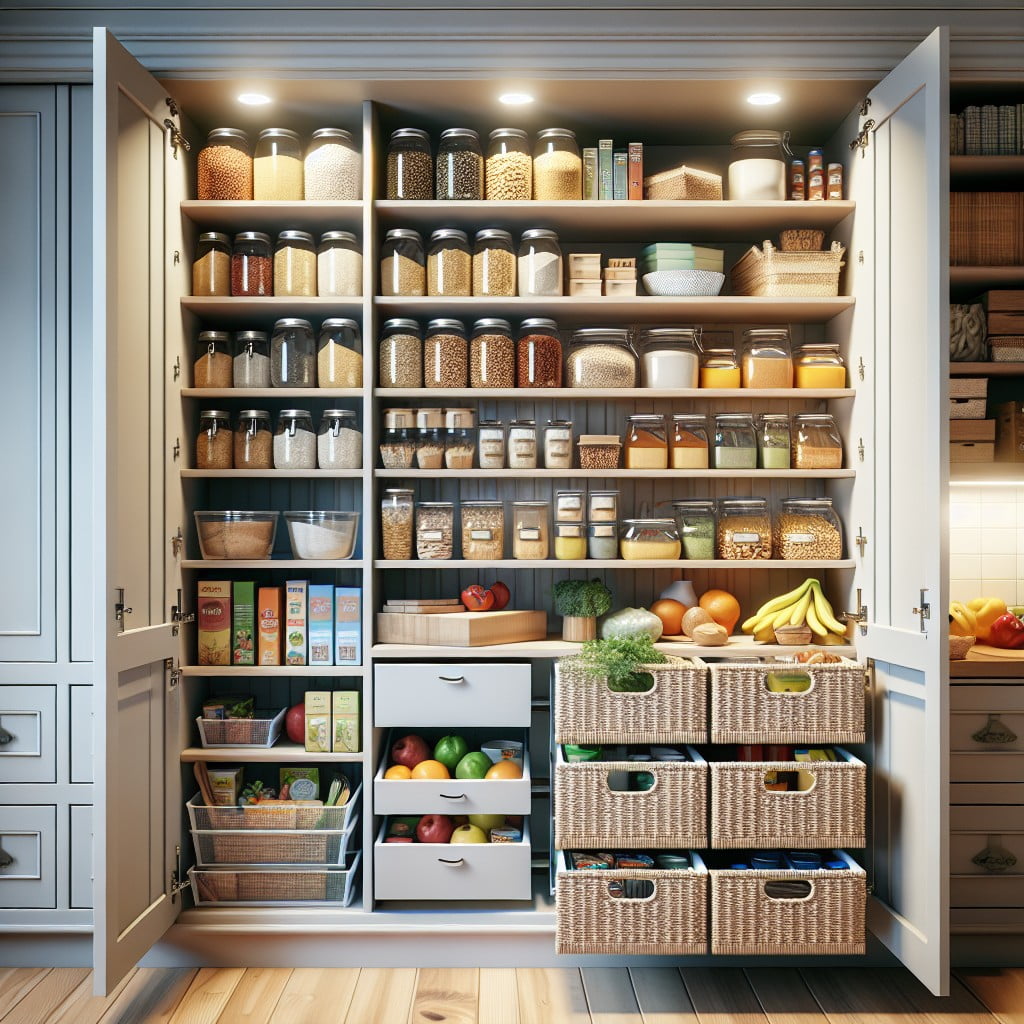
To ensure your pantry fits your specific needs, start by evaluating what you intend to store. Categorize items into groups such as canned goods, baking ingredients, snacks, and bulk purchases. Each category should influence the size and spacing of shelves and organizers.
Take precise measurements of the closet space to determine the maximum shelf depth and height. Consider adjustable shelving to accommodate varying item sizes. For smaller items, shallow shelves prevent items from being hidden in the back. Deeper shelves at the bottom can hold bulkier items.
Think about accessibility and convenience. Frequent-use items should be within easy reach, while lesser-used items can be stored higher or lower in the pantry. Also, consider a combination of open shelves for easy visual scanning and closed cabinets or bins for less visually appealing or bulk items.
Lighting is a crucial aspect of design. If natural light is inadequate, install battery-powered LED lights under shelves to illuminate the contents.
Lastly, factor in the aesthetic appeal. Choose materials and colors that complement the interior of your home, making the space both functional and pleasing to the eye.
Tools and Materials You Will Need
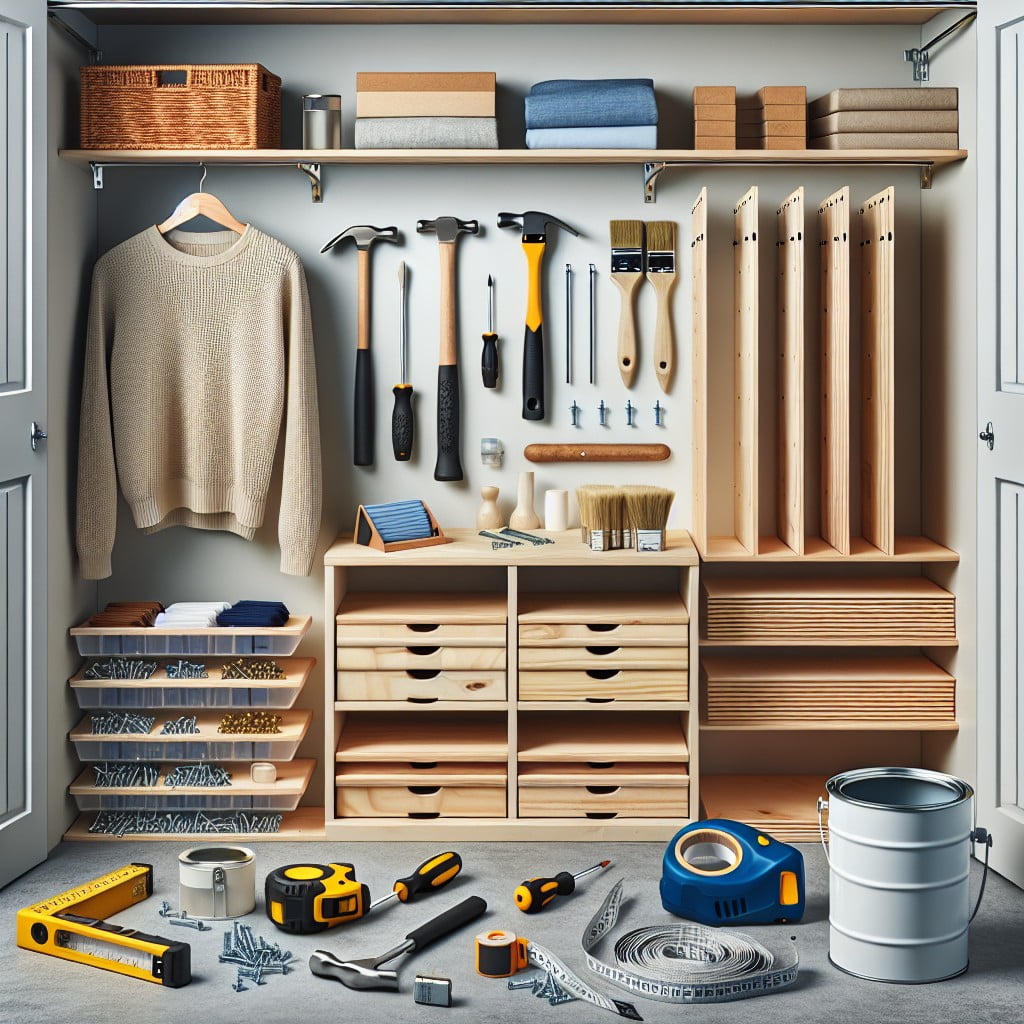
To ensure a smooth transition from closet to pantry, having the right tools and materials at hand is crucial. Prepare for the task by gathering:
- Measuring tape: This is essential for precise measurements to maximize your space.
- Level: Essential for ensuring your shelves are perfectly horizontal.
- Stud finder: This will aid in securely anchoring your shelves to the wall.
- Drill with bits: For pre-drilling holes, driving screws, and installing hardware.
- Saw (hand saw or power saw): Necessary for cutting shelving material to the right dimensions.
- Screws and anchors: Select the appropriate size and type for your wall material and shelf weight.
- Wood or melamine boards: These will serve as the basis for your shelving.
- Paint or wood finish: To protect and enhance the appearance of your wooden structures.
- Sandpaper: For smoothing shelf edges and surfaces before painting or finishing.
- Pencil and notepad: To jot down measurements and plan your layout.
While this list is not exhaustive, securing these items will provide a firm foundation from which to start crafting your pantry. Remember, the aim is a sturdy and practical space, so invest in quality materials that will bear the weight of your pantry essentials and withstand the test of time.
Preparing the Closet Space
Begin by emptying the closet completely, creating a blank canvas for your pantry transformation. Remove any existing rods, hooks, or shelves that won’t be part of the new design.
Clean the area thoroughly, wiping down walls and sweeping or vacuuming the floor to ensure a tidy workspace. Address any repairs that might be necessary, such as filling holes or repainting, to provide a fresh and clean backdrop for your pantry shelves.
Finally, measure the dimensions of your closet carefully, noting the height, width, and depth to aid in designing a pantry that will fit perfectly within the available space.
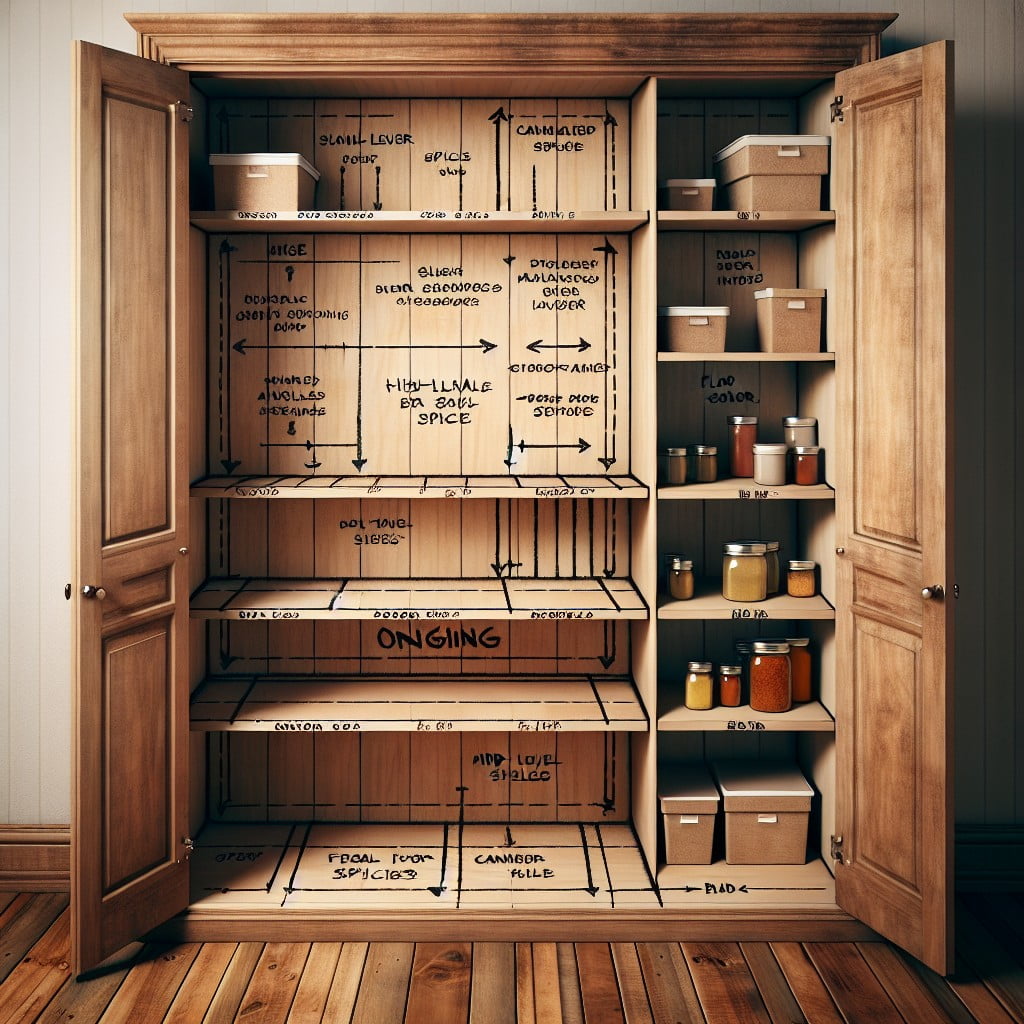
Constructing the Shelving Framework
Begin by measuring the back wall of your closet to determine the width for your shelves. Once you have your measurements, cut your vertical support beams to fit from floor to ceiling. These will act as the backbone of your shelving structure. Secure the vertical supports to the studs in the wall, ensuring they’re level and evenly spaced according to the width of your planned shelves.
For horizontal support, cut corresponding shelving brackets or cleats from your chosen material—these will hold up the shelves. Attach the horizontal supports to the vertical beams, making sure they are perfectly level. This creates a strong framework that will bear the weight of your pantry items.
Stagger the height of the shelves based on the sizes of items you plan to store; typically, heavier items belong on lower shelves while lighter ones can reside up top. Keep flexibility in mind—adjustable shelf brackets or mountable standards and clips allow for easy reconfiguration should your storage needs change over time.
Ensure all components are securely fastened before moving on to the next step—attaching the shelf boards themselves. Use a stud finder, level, and proper anchors if necessary, to guarantee stability. Remember, a well-constructed framework is the cornerstone of a durable and functional pantry.
Cutting and Installing Shelves
Measure the interior dimensions of your closet to determine the size of the shelves you’ll need, factoring in thickness of the wood and any hardware that may add extra width. Choose a sturdy material like plywood or medium-density fiberboard (MDF) for durability and support.
Utilize a circular saw or hand saw with a guide to ensure straight cuts. If you’re uncomfortable with power tools, most hardware stores offer cutting services—consider bringing your measurements and having them make the cuts for you.
Sand the edges of your cut shelves to avoid splinters and give a clean, smooth finish. This also prepares the surface for any paint or sealant if you choose to add a protective layer for easier cleaning and maintenance.
Install shelf brackets or standards and clips, aligning them with the studs in your closet wall for stability. Use a level to guarantee your shelves will be even—uneven shelves can lead to sliding items and inefficient space usage.
Place the shelves on the brackets, securing them with screws if necessary. This prevents the shelves from shifting when the pantry is in use.
Finally, ensure the spacing between shelves is practical for the items you plan to store, adjusting the height to accommodate everything from small spice jars to bulky cereal boxes, maximizing the functionality of your new pantry.
Incorporating Stackable Canned Goods Organizer
Maximize your space by choosing stackable organizers specifically designed for canned goods.
This clever storage solution helps you see all available cans at a glance without having to move things around.
Opt for adjustable options to fit different can sizes, ensuring versatility for future needs.
Align these on the shelves to maintain an open pathway for easy access.
When positioning, keep frequently used items at eye level and lesser-used ones higher up or below.
Remember to label and date your cans to track expiration and maintain a first-in, first-out rotation system.
This orderly approach not only saves you time when searching for ingredients but also prevents waste by avoiding expired goods getting lost in the back.
Installing Under-Shelf Storage
Maximizing space in your pantry is all about utilizing every inch of available area. Under-shelf storage can be a game-changer, offering a neat solution without the need for extra floor space or more shelves. This method involves baskets or bins that securely hang from a shelf, essentially creating a drawer or cubby underneath.
For installation, simply slide the arms of the storage basket onto a shelf until it feels stable. These removable options require no tools, making them a versatile choice for renters. They’re perfect for housing items that don’t stack well, like bags of chips or bread. Remember to measure the height of the items you plan to store to ensure they’ll fit beneath the shelf, and consider the weight capacity to avoid overburdening the shelf above.
Attaching the Door Organizer
Maximize storage capacity by attaching a door organizer. This clever addition utilizes otherwise unused space, providing extra shelving or pockets for items such as spices, condiments, and snack packs.
Ensure the door can support the added weight; reinforce hinges if necessary. Use over-the-door hooks or secure the organizer with screws for a permanent solution.
Adjust pocket or shelf height to accommodate various-sized products, keeping frequently used items at eye level. Choose a clear pocket design for quick content identification or opt for a solid, sturdier material for heavier goods.
Keep balance and accessibility in mind; do not overload the door to the point it impedes smooth opening and closing.
Organizing Pantry Items Efficiently
Grouping items by category ensures you’ll always know where to find what you need. Place baking ingredients together, keep pastas and grains within reach, and allocate a section for canned goods. Opt for clear, labeled bins or baskets to simplify the identification of contents.
Using a first in, first out rotation method prevents goods from expiring unnoticed. As new groceries are added, move older items to the front, keeping track of best-before dates.
For items used daily, such as snacks or breakfast foods, assign a specific, accessible shelf at eye level. This reduces time spent searching and keeps your most-used items within easy reach.
Incorporate lazy Susans for corners and hard-to-reach spaces, perfect for condiments and spices. Their rotating function brings items from the back to the front, reducing wasted space and minimizing clutter.
If space allows, dedicate a shelf for bulk purchases, situated at the bottom or on higher shelves. This designated area keeps large items, like paper goods or surplus stock, out of the way yet conveniently stored for when needed.
Remember, the key to efficiency lies in adaptability. Periodically re-evaluate your pantry’s organization to ensure it continues to meet your changing needs.
Maximizing Vertical Space
When working with limited square footage, height becomes your best friend. To make the most of the vertical space, use stackable clear bins or baskets which allow you to see contents at a glance.
Over-the-door racks can be a boon for storing spices and smaller items, keeping them accessible yet out of the way. For bulkier items, consider adjustable shelving so you can customize the space between shelves to fit your storage needs.
Hanging organizers or hooks are perfect for tools such as measuring cups or kitchen towels. Finally, if you have high ceilings, a sturdy step stool will ensure you safely reach those top shelf items with ease. Remember, the goal is to create a functional storage solution that best utilizes every inch of your closet-turned-pantry.
Tips for Maintaining an Organized Pantry
Keep items visible and accessible by placing the most frequently used products at eye level, with less frequently used items on higher or lower shelves. Utilize clear storage bins or labeled baskets to group similar items, such as baking ingredients or snack packets, making it easy to pull out what you need without disturbing the rest of the inventory.
Rotate your stock by practicing the “first in, first out” principle; when you add new groceries, move the older items to the front so they get used first. This helps to prevent food from expiring unnoticed.
Periodically declutter by removing items that are past their expiration dates or that you no longer use. An annual or seasonal review is a good practice to keep your pantry from becoming overcrowded.
Invest in a whiteboard, chalkboard, or notepad to keep an inventory or to jot down goods as they run low. This will help streamline your shopping trips and ensure that you only replenish what is necessary.
Finally, assign a specific area for each food category, such as canned goods, spices, grains, and baking supplies. Consistency in where items are stored will make it easier for everyone in the household to find and return items, maintaining order in your pantry.
Safety Considerations
Ensure your pantry layout keeps heavy items at waist level to prevent strain when lifting. Fasten shelving units securely to wall studs, particularly if there are children in the home or in prone-to-earthquake areas, to avoid tipping.
When choosing materials, opt for non-toxic, formaldehyde-free plywood to avoid chemical off-gassing. Always use a sturdy ladder or step stool for reaching high places rather than improvising with chairs.
Keep a fire extinguisher nearby if storing any flammable materials, and make sure to have good lighting to prevent accidents caused by poor visibility. Regularly check expiration dates to prevent the mishandling of spoiled goods, and keep a well-organized space to ensure emergency supplies are easily accessible.
FAQ
How to design a pantry closet?
Designing a pantry closet involves inventorying what you plan to store, taking measurements of these items, estimating the quantity needed to be stored at once, and diligently crafting a design that optimally utilizes available space.
How do you make a hidden pantry?
To create a hidden pantry, consider installing a jib door, a flat door type blending seamlessly into the wall, either within your kitchen or elsewhere hiding it in plain sight.
What materials are required to construct a closet pantry?
To construct a closet pantry, one requires materials including plywood or MDF boards, screws, a drill, a level, brackets, shelves, rods, a saw, and paint or stain.
How to maximize space in a pantry closet for efficient storage?
Maximizing space in a pantry closet for efficient storage can be achieved by using clear bins for organization, installing additional shelves or tiered storage solutions, utilizing the back of the door for hooks or shallow shelves, and regularly decluttering and reorganizing.
How to maintain and organize a newly converted pantry closet?
Maintaining and organizing a newly converted pantry closet involves implementing systematic categorization approaches, employing efficient storage solutions, adhering to cleanliness, and undertaking regular checks and updates of the stocked items.
Read More Like This
 15 Funny Graduation Cap Ideas to Make Your Big Day Unforgettable
 15 Unique DIY Christmas Decorations Ideas for a Festive Home
 15 Creative Science Fair Board Ideas to Amaze Your Audience
 15 Handmade Envelope Decoration Ideas for Creative Gifting
 10 DIY Gifts for the Whiskey Lover in Your Life
Recap: