Last updated on
Discover the simple steps to effortlessly add another pendant light to your space, illuminating and transforming it with style and functionality.
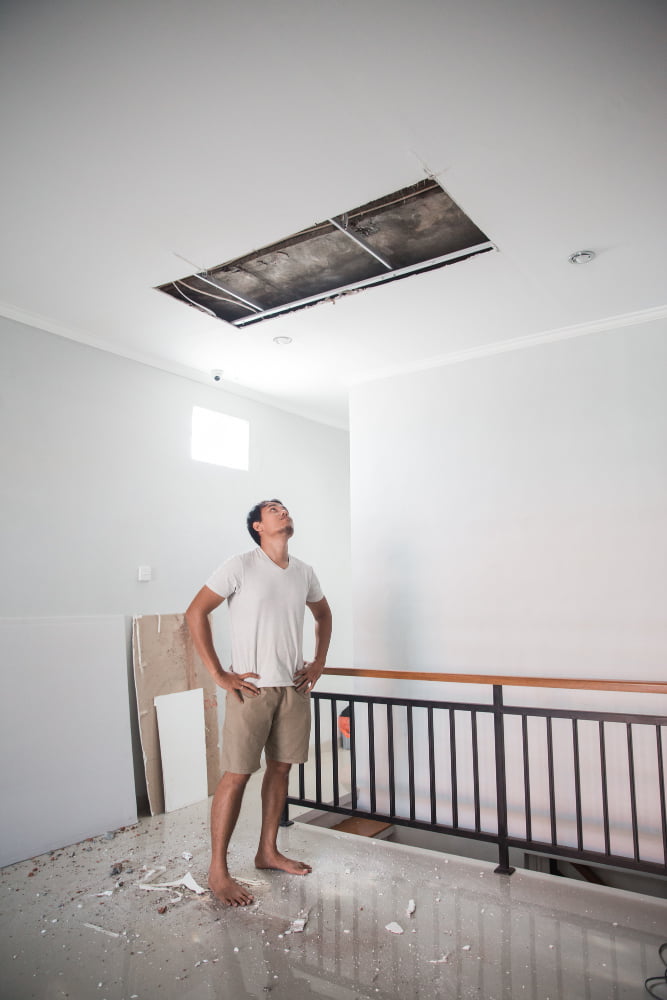
Are you tired of your current lighting setup and looking to add some extra pizzazz to your home decor? Adding another pendant light can be an easy and affordable way to brighten up any room. Not only does it provide additional illumination, but it can also serve as a stylish statement piece.
In this article, we’ll go over the steps on how to add another pendant light and give you some tips on choosing the perfect one for your space. So let’s get started!
Key takeaways:
- Choose the right pendant light: Consider style, size, and functionality.
- Determine the ideal location: Take into account where you need additional lighting and the height at which the pendant light should be hung.
- Calculate the necessary drop length: Measure and cut the chain links to ensure the pendant light hangs at the desired height.
- Select compatible components: Ensure the canopy, mounting hardware, and wiring are designed to work together and support the weight of the pendant light.
- Gather required tools and materials: Make sure you have the necessary tools, such as wire strippers and screwdrivers, along with the pendant light kit and mounting bracket.
Choose the Right Pendant Light
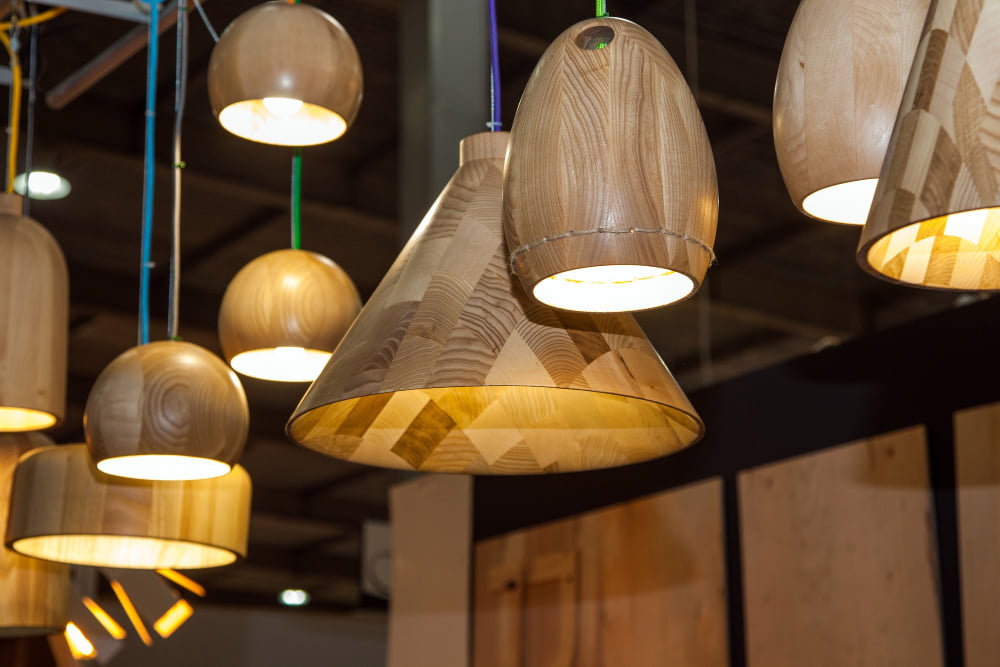
First and foremost, you want to make sure that the style of your new pendant light complements your existing decor. Whether you’re going for a modern or traditional look, there are plenty of options available on the market.
Another important factor is size. You don’t want your new pendant light to be too small or too large for the space it’s intended for.
Consider both height and width when selecting a fixture.
Lastly, think about functionality – do you need bright task lighting or soft ambient lighting? This will help determine what type of bulb and wattage is best suited for your needs.
Determine the Ideal Location
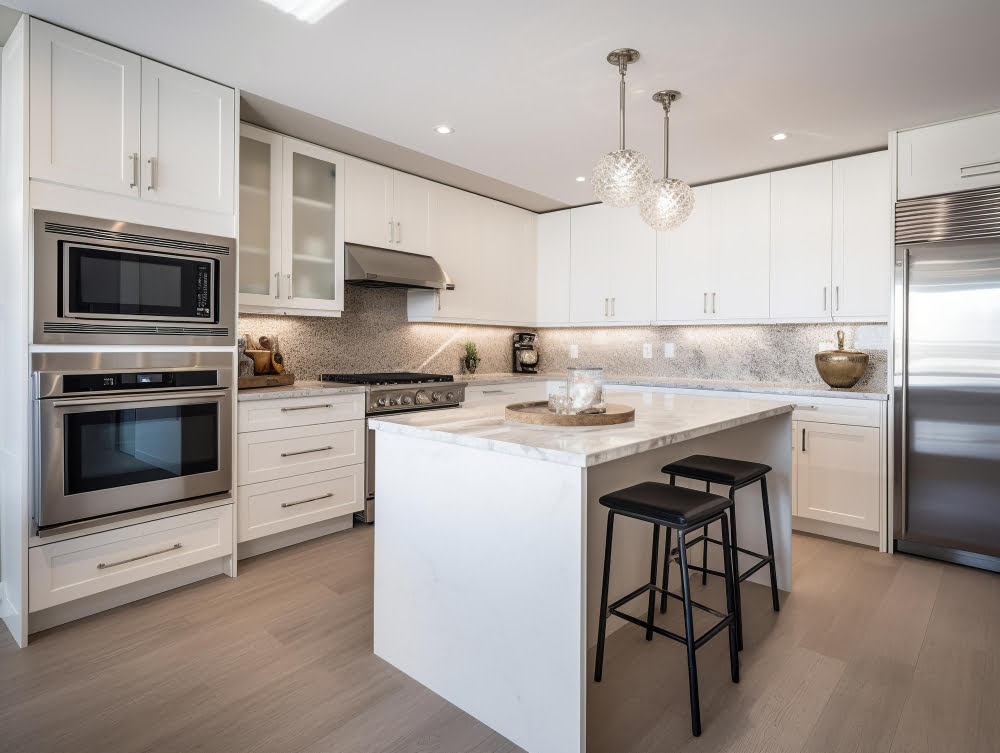
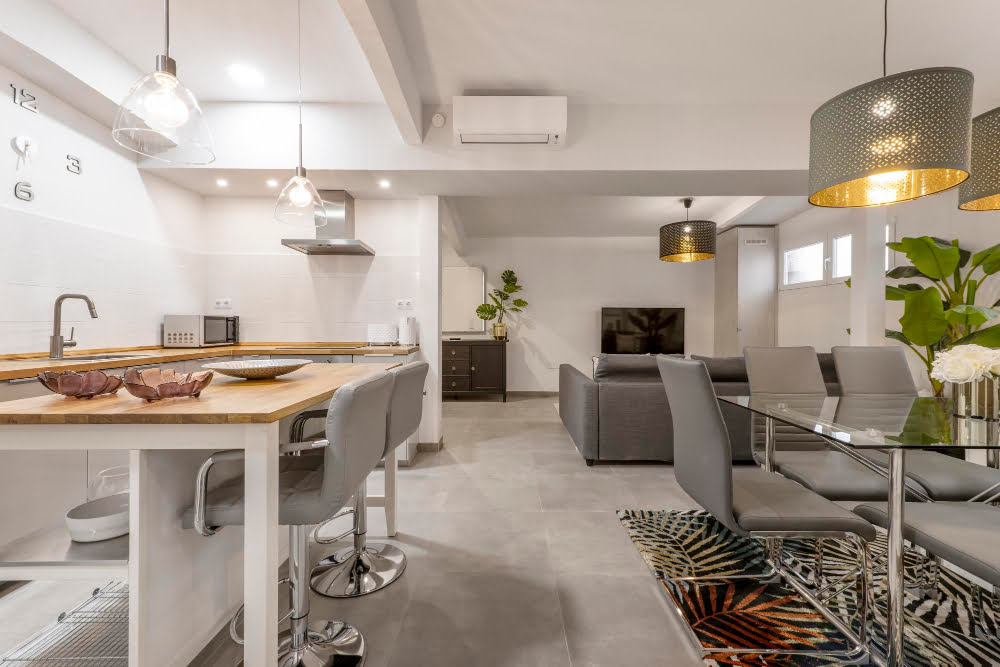
Consider where you need additional lighting and what areas of your room could benefit from a stylish statement piece. Pendant lights work well in many different spaces, including above kitchen islands or dining tables, in living rooms or bedrooms as accent lighting, and even in bathrooms.
When deciding on placement, keep in mind that pendant lights should be hung at a height that allows people to walk underneath them without hitting their heads. A general rule of thumb is to hang the fixture 30-36 inches above surfaces like countertops or tables.
Consider how many pendants you want to install and whether they will be grouped together or spaced out throughout the room. This can affect both functionality and aesthetics.
Calculate the Necessary Drop Length

This is important because it ensures that your new fixture will hang at just the right height and provide optimal lighting. To calculate this measurement, start by measuring from where you want the bottom of your pendant light to be located down to where it will attach to its mounting bracket or base plate on the ceiling.
Next, subtract this distance from both the total height of your room and any obstructions such as furniture or cabinets that may interfere with hanging a pendant light in that location. The resulting number is how long each chain link should be cut so that when assembled together they reach exactly where you want them.
It’s essential not only for aesthetic purposes but also safety reasons since a too-long drop length can cause accidents if someone bumps into them accidentally while walking underneath.
Select Compatible Components
This includes the canopy, mounting hardware, and wiring. Make sure that these parts are designed to work together and can support the weight of your new pendant light.
When selecting a canopy or ceiling plate for your pendant light, make sure it is large enough to cover any holes or marks left by previous fixtures. Check if there is enough clearance between the ceiling and fixture so that wires can be properly connected without being cramped.
The mounting hardware should also be compatible with both the fixture itself as well as your ceiling type (e.g., drywall vs plaster). If necessary consult an electrician before purchasing any components.
Lastly, double-check that all wiring connections match up correctly between each component before installation begins.
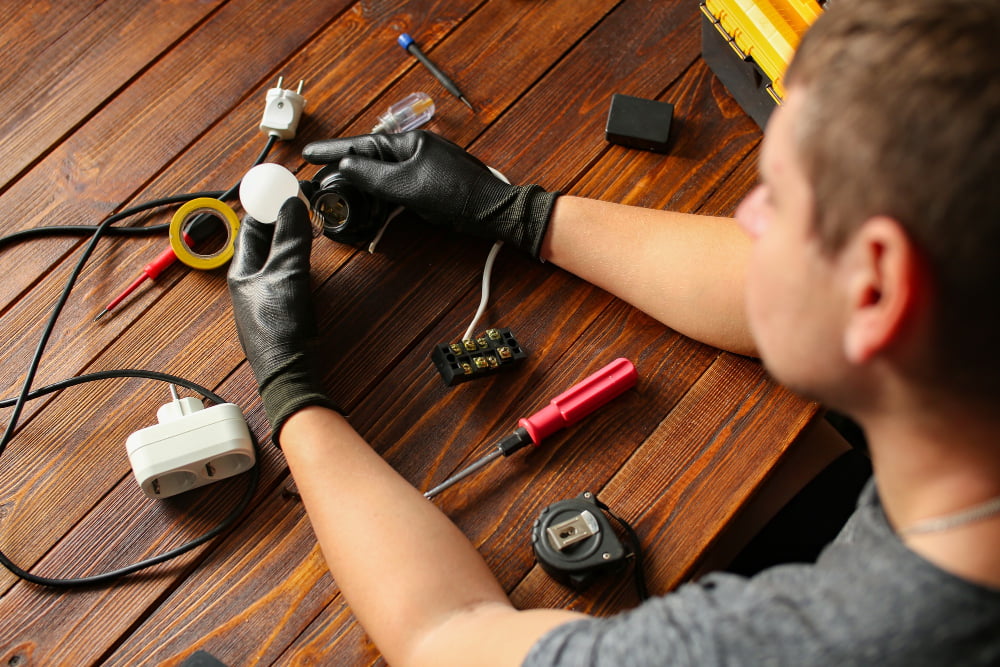
Gather Required Tools and Materials

Before starting any electrical work, make sure you have turned off the power supply to avoid any accidents.
Here are some of the essential tools and materials you will need:.
- Wire strippers
- Screwdrivers (flathead and Phillips)
- Pliers
- Voltage tester
- Electrical tape
- Wire connectors
- Ceiling fixture mounting bracket
- Pendant light kit with canopy or base plate
Make sure that all your tools are in good condition before beginning installation as faulty equipment can lead to poor results or even injury.
Safety Precautions

First and foremost, turn off the power supply to the area where you’ll be working. This can typically be done by flipping a switch on your circuit breaker or fuse box.
It’s also recommended that you use a voltage tester to ensure that there is no electrical current running through any wires before proceeding with installation.
Make sure that all tools and materials are within reach so as not to create any tripping hazards while working at heights or on ladders. If possible, have someone assist you during installation for added safety measures.
Turn Off the Power Supply
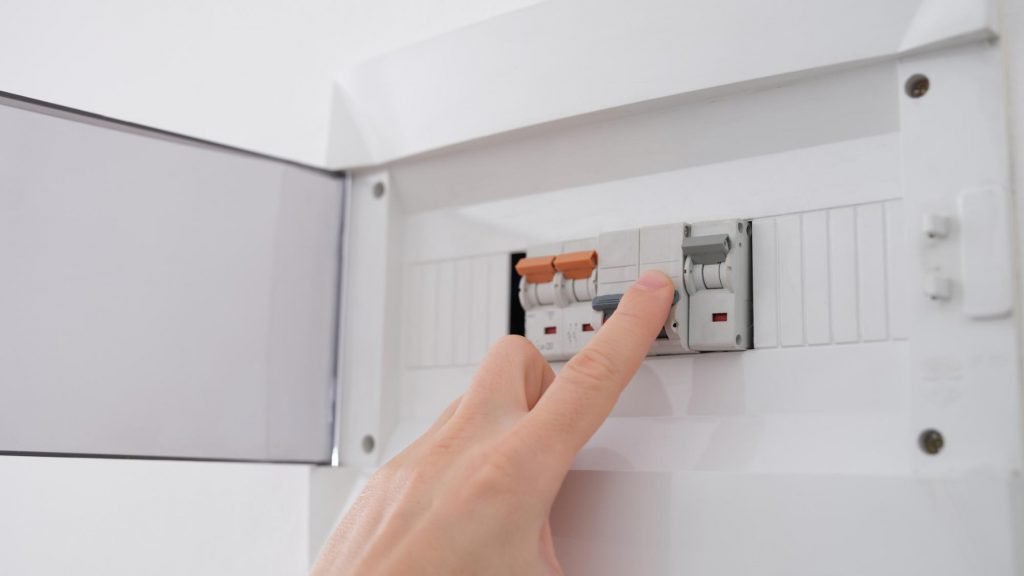
This step is essential for your safety and prevents damage to your home’s electrical system. Locate the circuit breaker that controls the area where you’ll be installing your pendant light and switch it off.
If you’re unsure which breaker controls that specific area, turn off all of them until you find the right one.
Once turned off, use a voltage tester or multimeter to double-check if there is still electricity flowing through any wires in proximity before proceeding with installation.
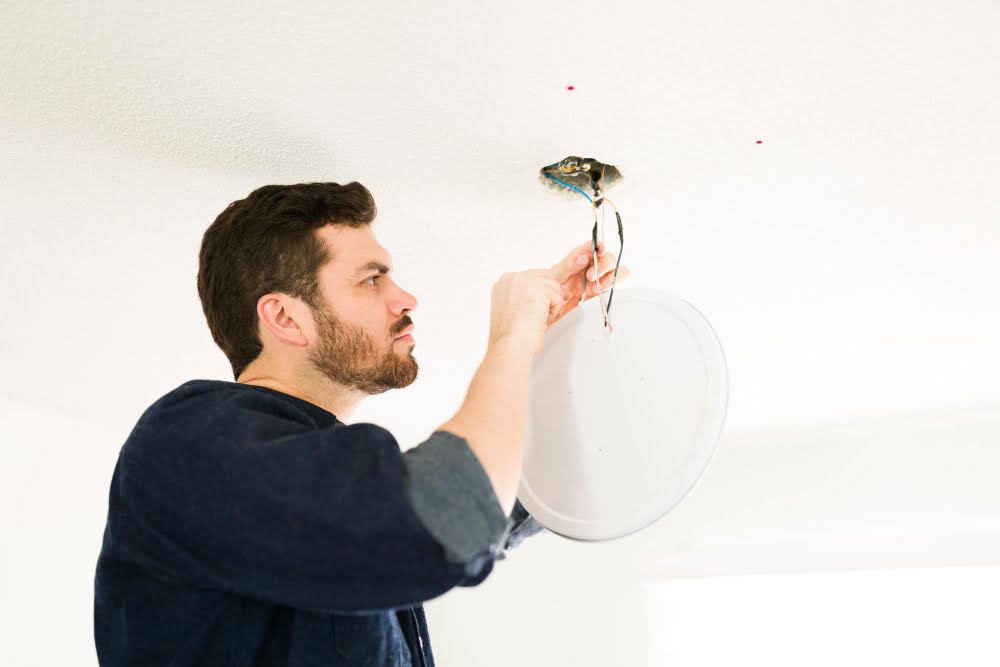
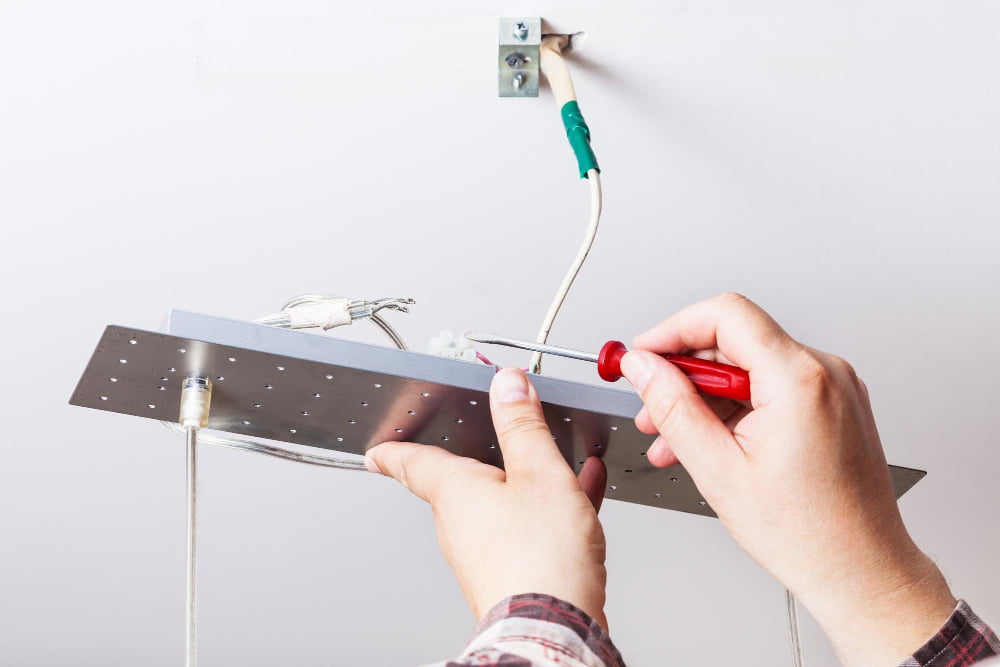
Install the Ceiling Fixture
Before starting, make sure that you have turned off the power supply to avoid any electrical hazards.
To begin installation, remove the existing ceiling fixture and inspect its wiring and mounting bracket. If necessary, replace or adjust them accordingly before proceeding with installing your new pendant light.
Next, attach a mounting bracket onto your ceiling junction box using screws provided in your kit or ones that fit securely into place. Ensure that it is levelled properly by using a spirit level tool.
After attaching the mounting bracket securely on top of junction box now comes hanging up of Pendant Light Fixture which can be done either by screwing directly into threaded rod protruding from center hole in crossbar or through chain links attached to crossbar depending upon type of mountings available with Pendant Light Fixture.
Identify Your Circuit Type
This will help ensure that the installation process goes smoothly and safely.
There are two main types of circuits: a single-pole circuit and a three-way circuit. A single-pole circuit is the most common type found in homes, where there is only one switch controlling power to the light fixture.
On the other hand, a three-way circuit has two switches that control power to one light fixture from different locations.
To determine which type of wiring you have, turn off power at your electrical panel before removing any existing fixtures or wires. Then use an electrical tester or multimeter tool to test each wire for voltage and continuity.
Wire the Pendant Light
Begin by stripping about 1/2 inch of insulation from each wire end using a wire stripper or scissors. Next, connect the black (hot) wires together with a twist-on connector or electrical tape.
Repeat this process for the white (neutral) wires and green/bare copper (ground) wires if applicable.
If your pendant light has multiple sockets, make sure to connect all hot wires together as well as all neutral wires together before connecting them to their respective circuit wiring in order to avoid overloading any one socket.
It is important that you follow proper wiring procedures when installing any electrical fixture in order to ensure safety and functionality. If you are unsure about how to properly wire your pendant light, consult an electrician or refer back to manufacturer instructions for guidance.
Attach the Pendant Light to the Fixture
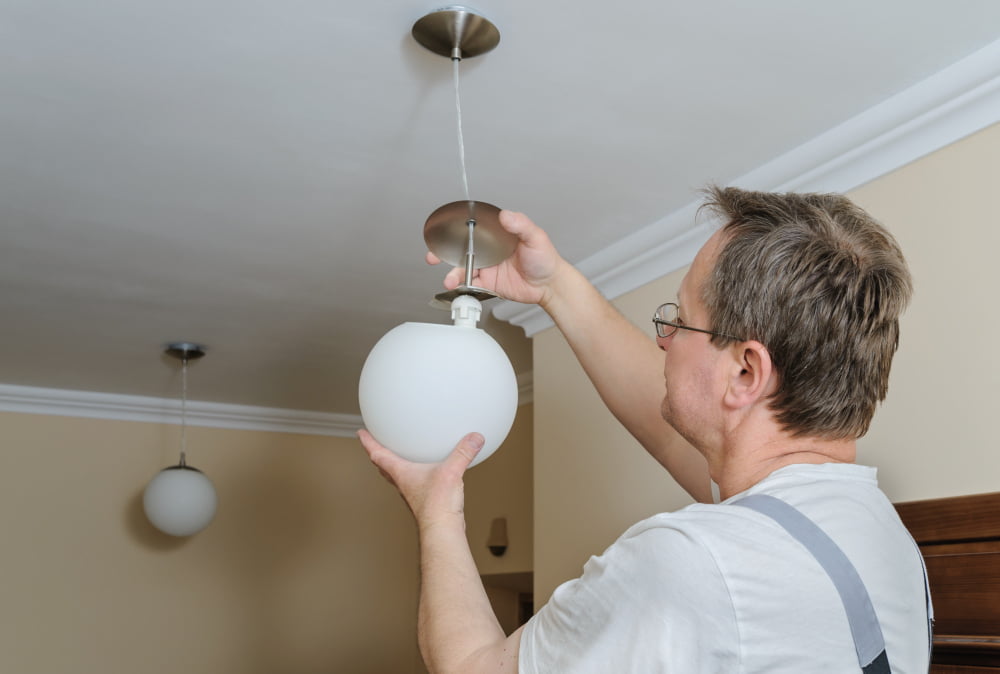
First, carefully thread the wires through the base of your new pendant light and connect them with wire connectors or screws according to manufacturer instructions. Next, align any screw holes on your new fixture with those on your mounting bracket and secure them together using screws or bolts.
It’s important that you don’t overtighten these fasteners as this can damage both components. Once attached securely, gently tug on each wire connection point to ensure they are firmly in place before proceeding.
If necessary for aesthetic purposes or safety reasons (such as if there is a risk of someone bumping into a low-hanging pendant), adjust its hanging length by adjusting any chain links between ceiling canopy and fixture itself until desired height is achieved.
Adjust the Hanging Length
The ideal height for a pendant light depends on several factors such as room size, ceiling height, and personal preference. Generally speaking, pendant lights should hang 12-20 inches below an 8-foot ceiling or at least 30 inches above any furniture or tabletops.
To adjust the hanging length of your new pendant light fixture:.
- Loosen any set screws that hold the cord in place.
- Slide up or down along with adjusting cable ties until you reach your desired height.
- Tighten all screws back into place once you’ve found your perfect spot.
Remember that if you’re installing multiple pendants over a table or island benchtop they should be hung at equal distances apart from each other for symmetry purposes.
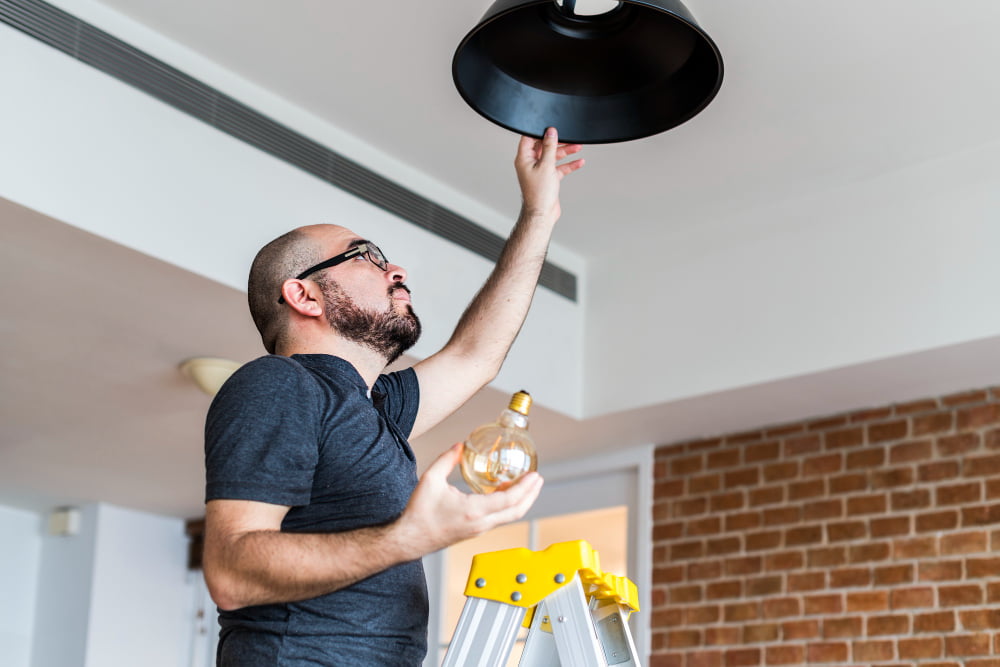
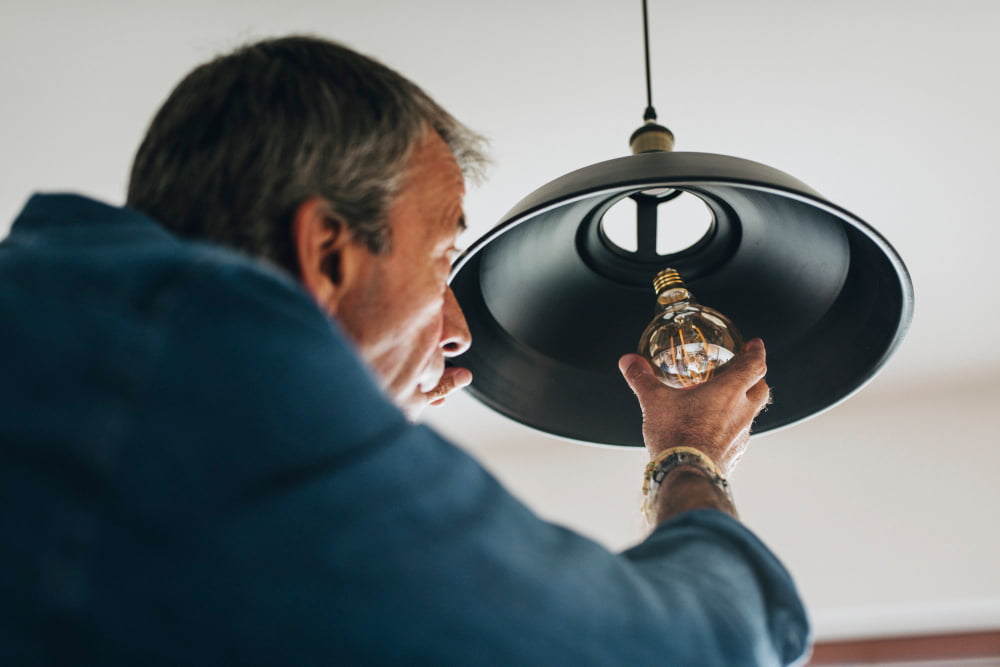
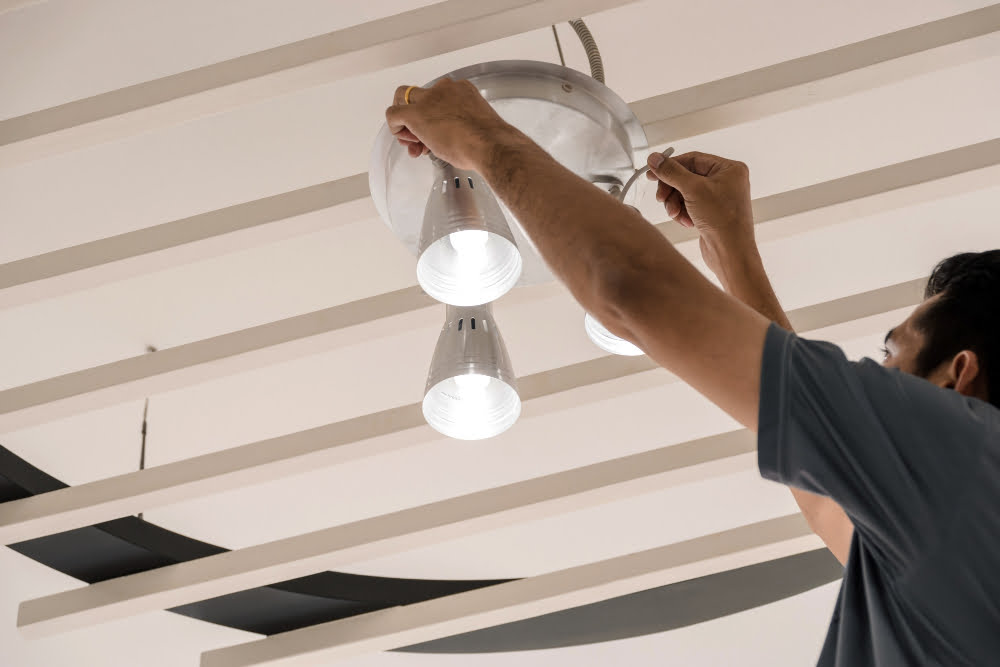
Screw in Light Bulbs

Before doing so, make sure that you have turned off the power supply and let any previously used bulbs cool down. Then, carefully insert each bulb into its socket and gently twist until it is securely in place.
It’s important to choose a bulb with appropriate wattage for your pendant light fixture. Check your manufacturer instructions or consult an electrician if unsure about what wattage is safe for your specific setup.
Consider using energy-efficient LED or CFL bulbs instead of traditional incandescent ones as they last longer and consume less electricity over time.
Don’t forget to add any necessary covers or shades before turning on the power supply again.
Finish With Light Covers or Shades
Light covers or shades not only protect the bulbs but also enhance the overall look of your fixture. There are a variety of options available, from glass and metal shades to fabric covers and decorative globes.
When selecting a cover or shade for your pendant light, consider both form and function. Choose one that complements the style of your room while providing adequate lighting coverage.
To attach a cover or shade, simply screw it onto the base of your pendant light fixture using small screws provided with most models. Be sure to follow any manufacturer instructions carefully when installing these components.
Restore Power and Test Functionality
Before turning on the power supply, make sure that all wires are properly connected and secured in place. Double-check if there are any exposed wires or loose connections that may cause electrical hazards.
After ensuring everything is safe, turn on the circuit breaker or flip the switch back to its original position. If your new pendant light has a dimmer switch feature, adjust it accordingly to your desired brightness level.
Troubleshoot Common Issues
One of the most common problems is flickering or dimming lights. This could be due to a loose connection in the wiring or an issue with the bulb itself.
Check all connections and make sure they are secure, and try replacing the bulb with a new one.
Another issue you may face is uneven lighting or shadows being cast on certain areas of your room. This could mean that your pendant light isn’t level, so adjust it accordingly until it’s straightened out.
If none of these solutions work for you, there might be an underlying electrical problem causing issues with your newly installed fixture. In this case, it’s best to consult a licensed electrician who can diagnose and fix any electrical problems safely.
Understanding Switch Wiring and Functionality
Before you begin, make sure you have a basic understanding of how your switches work and the different types of wiring that may be present in your home.
There are two main types of switches: single-pole and three-way. A single-pole switch controls one fixture from one location, while a three-way switch allows for control from two or more locations.
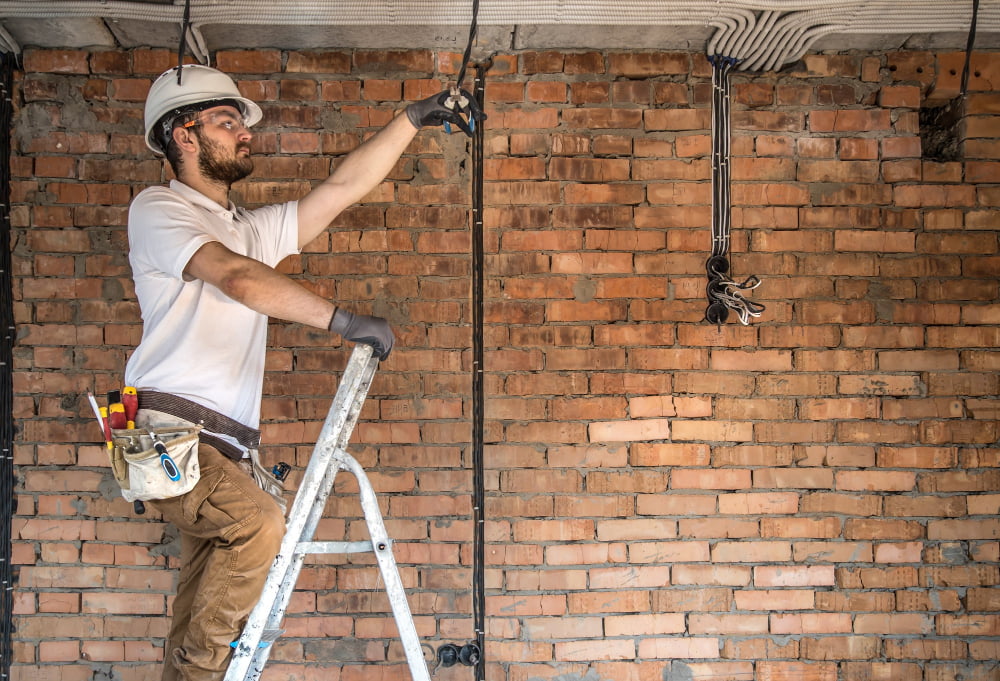
When it comes to wiring, there are also different options depending on the age of your home. Older homes may have knob-and-tube or cloth-covered wire systems, while newer homes typically use non-metallic sheathed cable (NM) or armored cable (AC).
It’s important to identify which type of system you have before beginning any electrical work. If you’re unsure about anything related to electrical systems in your home, consult with an electrician before proceeding with installation.
Pendant Light Maintenance Tips

Here are some maintenance tips that will help keep your pendant light shining bright:.
1. Dust regularly: Use a soft cloth or feather duster to remove any dust buildup on the surface of the fixture.
2. Clean with care: If you need to clean your pendant light, make sure you turn off the power supply first and use a gentle cleaning solution such as warm water and mild soap.
3. Replace bulbs when necessary: Keep an eye on how often bulbs burn out in order not only for optimal lighting but also safety reasons.
4. Check wiring periodically: Inspect wires for any signs of wear or damage that could cause electrical issues over time.
Light Switch Wiring Diagram

This will help ensure that you connect the wires correctly and avoid any potential hazards. A typical light switch has two terminals: one for incoming power and another for outgoing power to the fixture.
The hot wire (usually black or red) is connected to the incoming terminal, while the neutral wire (usually white) is connected directly to a metal box or grounded conductor.
It’s also essential to know which type of circuit you have in order not only install but also troubleshoot any issues that may arise later on. There are two types of circuits: single-pole and three-way circuits.
In a single-pole circuit, there is only one switch controlling one fixture from a single location; this means that there are only two wires involved – hot and neutral – with no traveler wires needed.
On the other hand, in a three-way circuit setup, multiple switches control one fixture from different locations; this requires an additional traveler wire between switches besides hot and neutral ones. Understanding these basic concepts can make all difference when it comes time for installation!
FAQ
Can I add a second light to an existing switch?
Yes, you can add a second light to an existing switch, but ensure not to overload the circuit by considering the number of lighting outlets already powered.
Is it difficult to add pendant lights?
Adding pendant lights is not difficult, especially when replacing an existing fixture with a junction box, as it only takes about half an hour and four steps to complete the process.
How do you add an extra light to a circuit?
To add an extra light to a circuit, you can either run a spur from the last ceiling rose in a loop-in circuit, from an existing or new junction box, or use a fused spur from a socket outlet.
What are the initial steps for installing an additional pendant light in a room?
First, turn off the power supply, gather necessary tools and materials, and decide on the location for the new pendant light installation.
What essential tools and materials are needed for adding a second pendant light?
Essential tools and materials for adding a second pendant light include a pendant light fixture, wire stripper, screwdriver, wire nuts, voltage tester, and electrical tape.
Are there any safety precautions to consider when connecting multiple pendant lights to a single switch?
Ensure that the combined wattage of the pendant lights does not exceed the switch’s capacity, and follow electrical codes and guidelines for safe installation.
Read More Like This
 15 Unique DIY Christmas Decorations Ideas for a Festive Home
 15 Creative Science Fair Board Ideas to Amaze Your Audience
 15 Handmade Envelope Decoration Ideas for Creative Gifting
 10 DIY Gifts for the Whiskey Lover in Your Life
 15 Creative Ideas for DIY Outdoor Birthday Party Decorations
Recap: